
Built in Bookshelves with Bench + Download
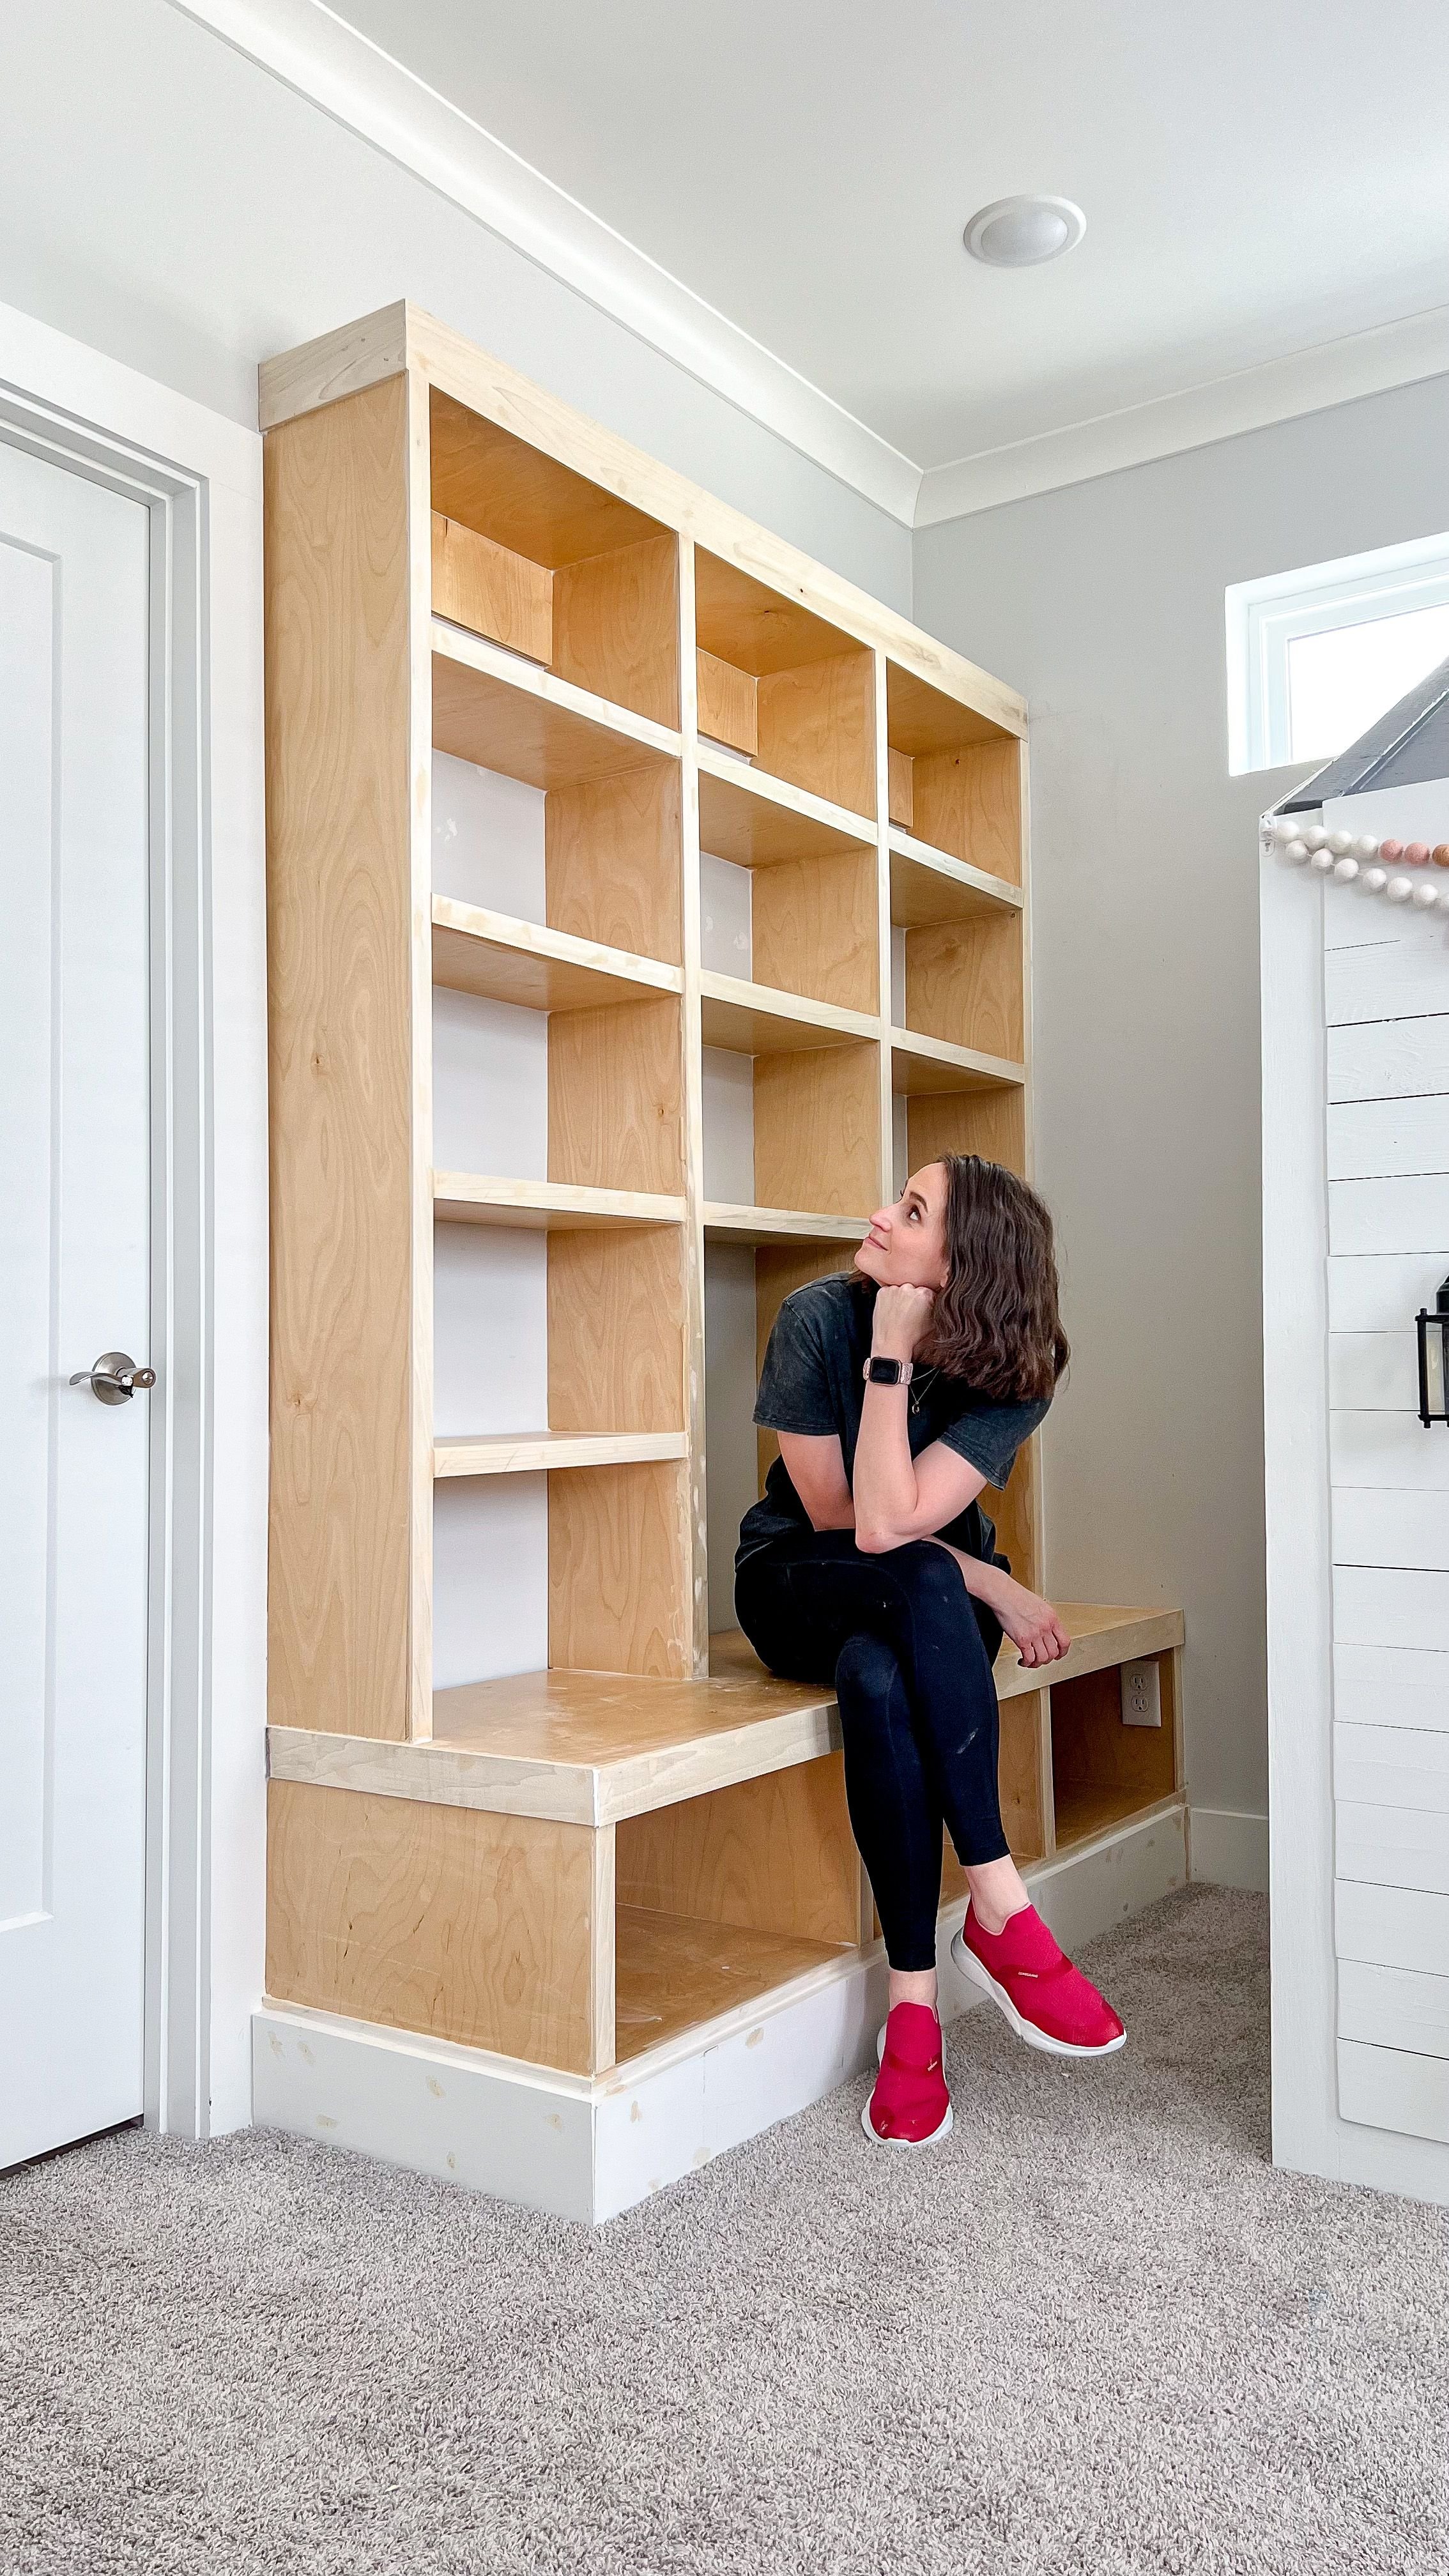
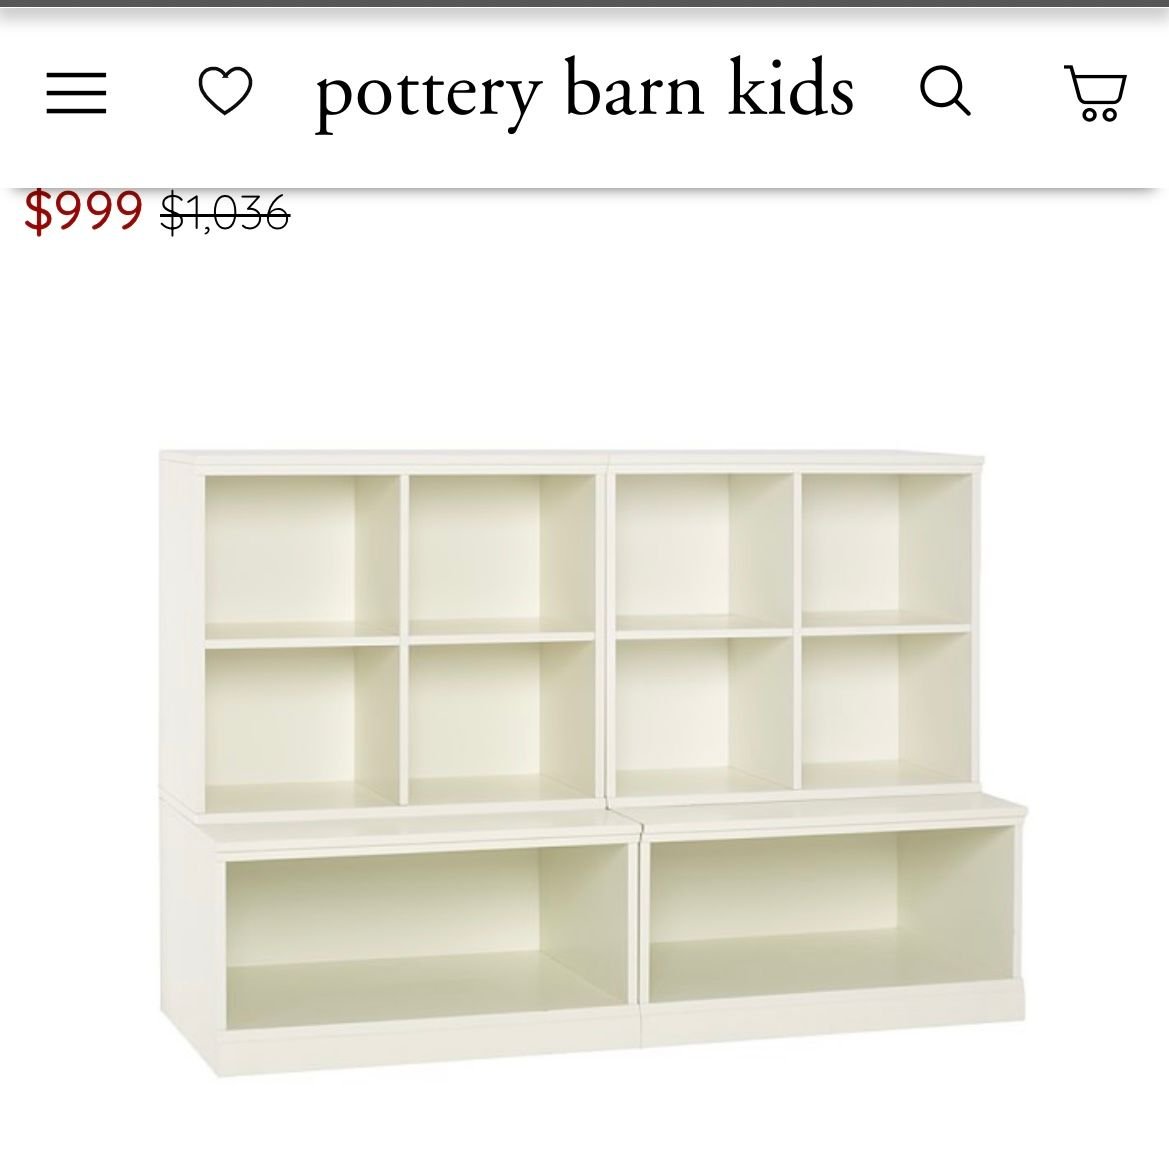
The bookshelf we had in Jackie’s bedroom just was not cutting it. It was overflowing, it wasn’t secured to the wall and there was too much extra stuff we wanted to put on it that we just didn’t have room for. I went to Pinterest to look for something that might work for the space. I ended up finding a Pottery Barn shelf with a ledge on it that I absolutely loved. I did not, however, love the price. I came up with my own much taller design of that shelf, got all the measurements I needed and got to work.

Built in Bookshelves with Bench + Download | Materials List
4’x8.75” Plywood
2x4s
1x3s
4” Trim
2” Trim
2” Wood Screws
Wood Glue
Large Clamps
2” Pocket Hole Screws
3” Wood Screws
1.5” Brad Nails
220 Grit Sandpaper
Primer
Paint
Triple Coat Polyurethane
Trim/Moulding Remover
Built in Bookshelves with Bench + Download | Getting Started
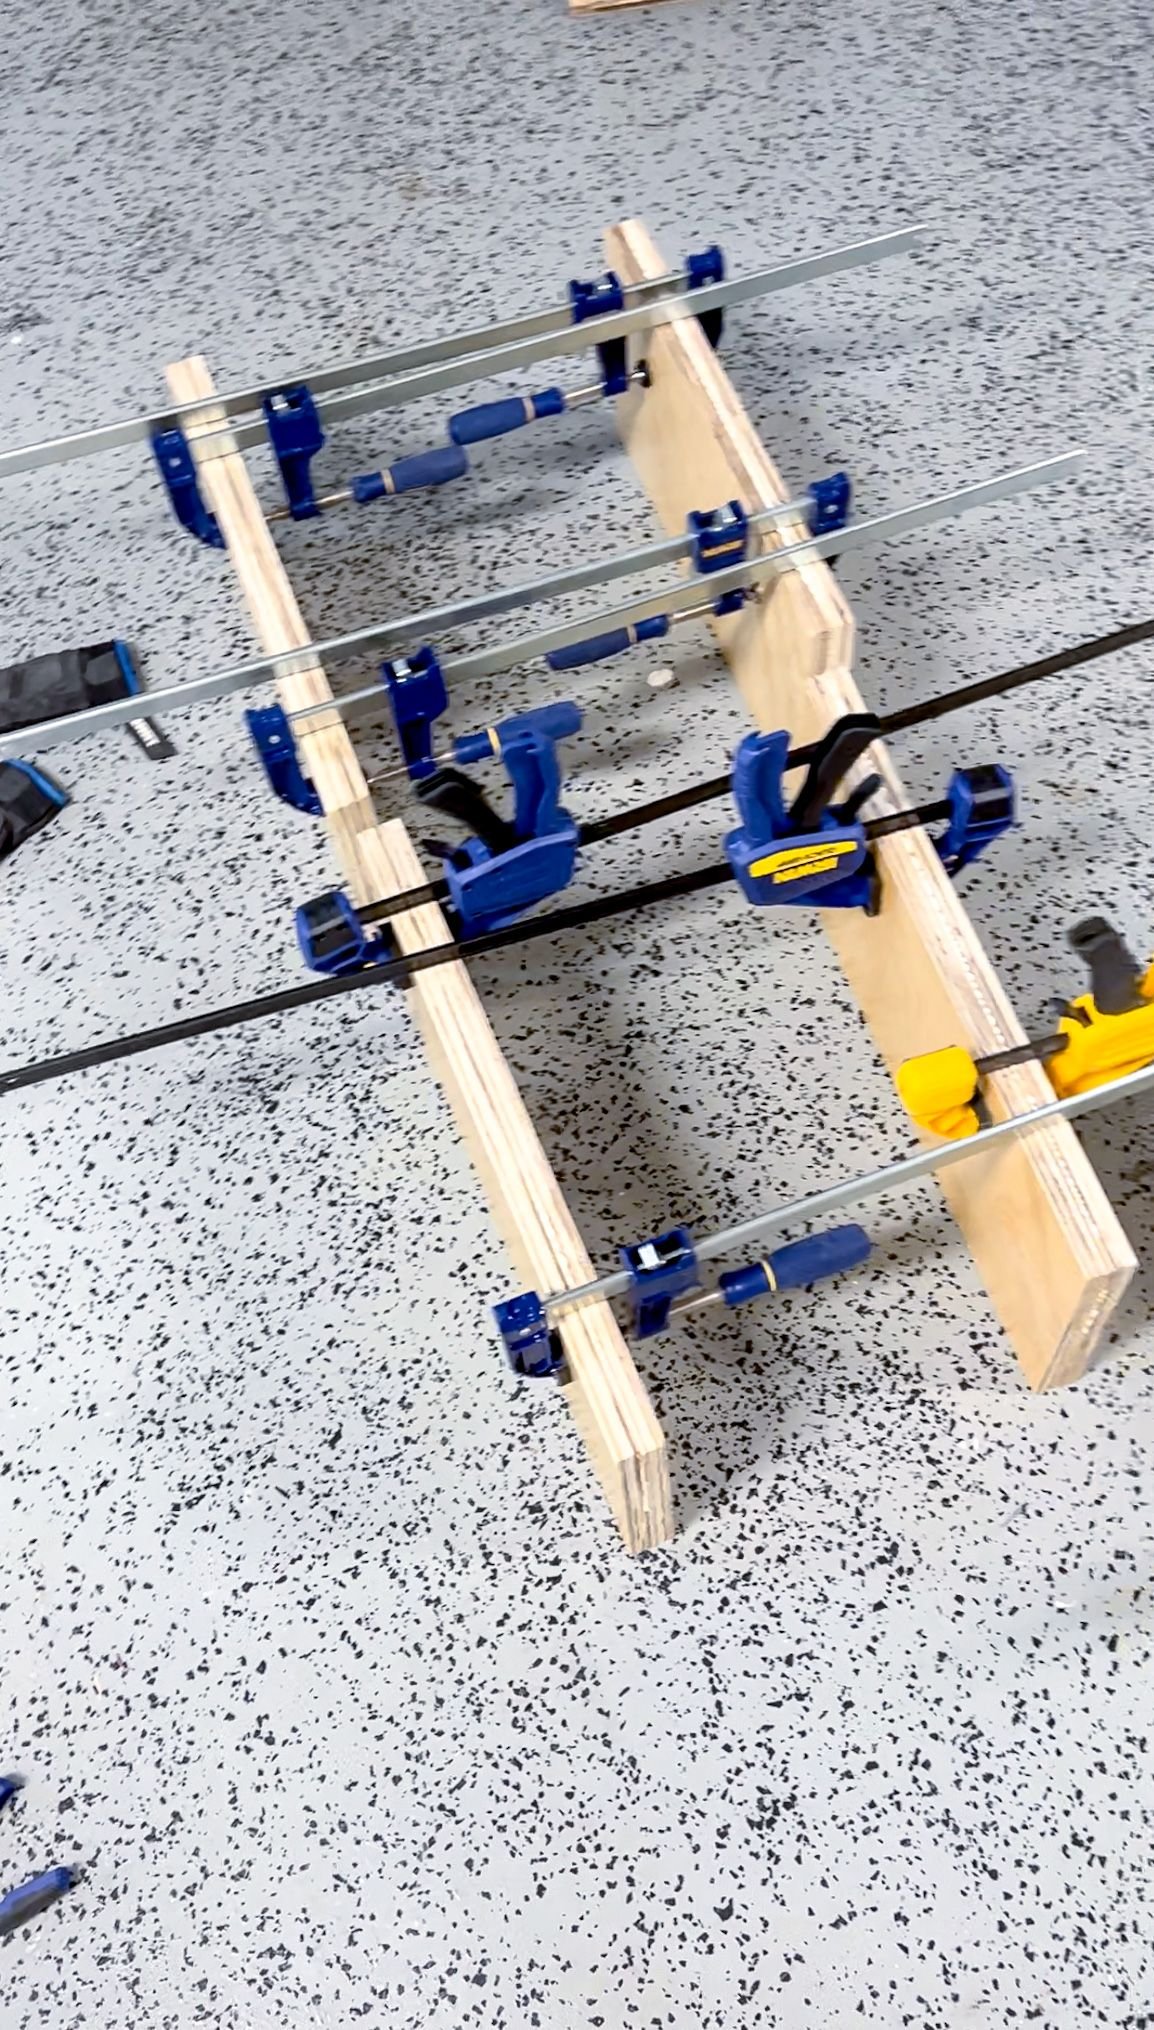
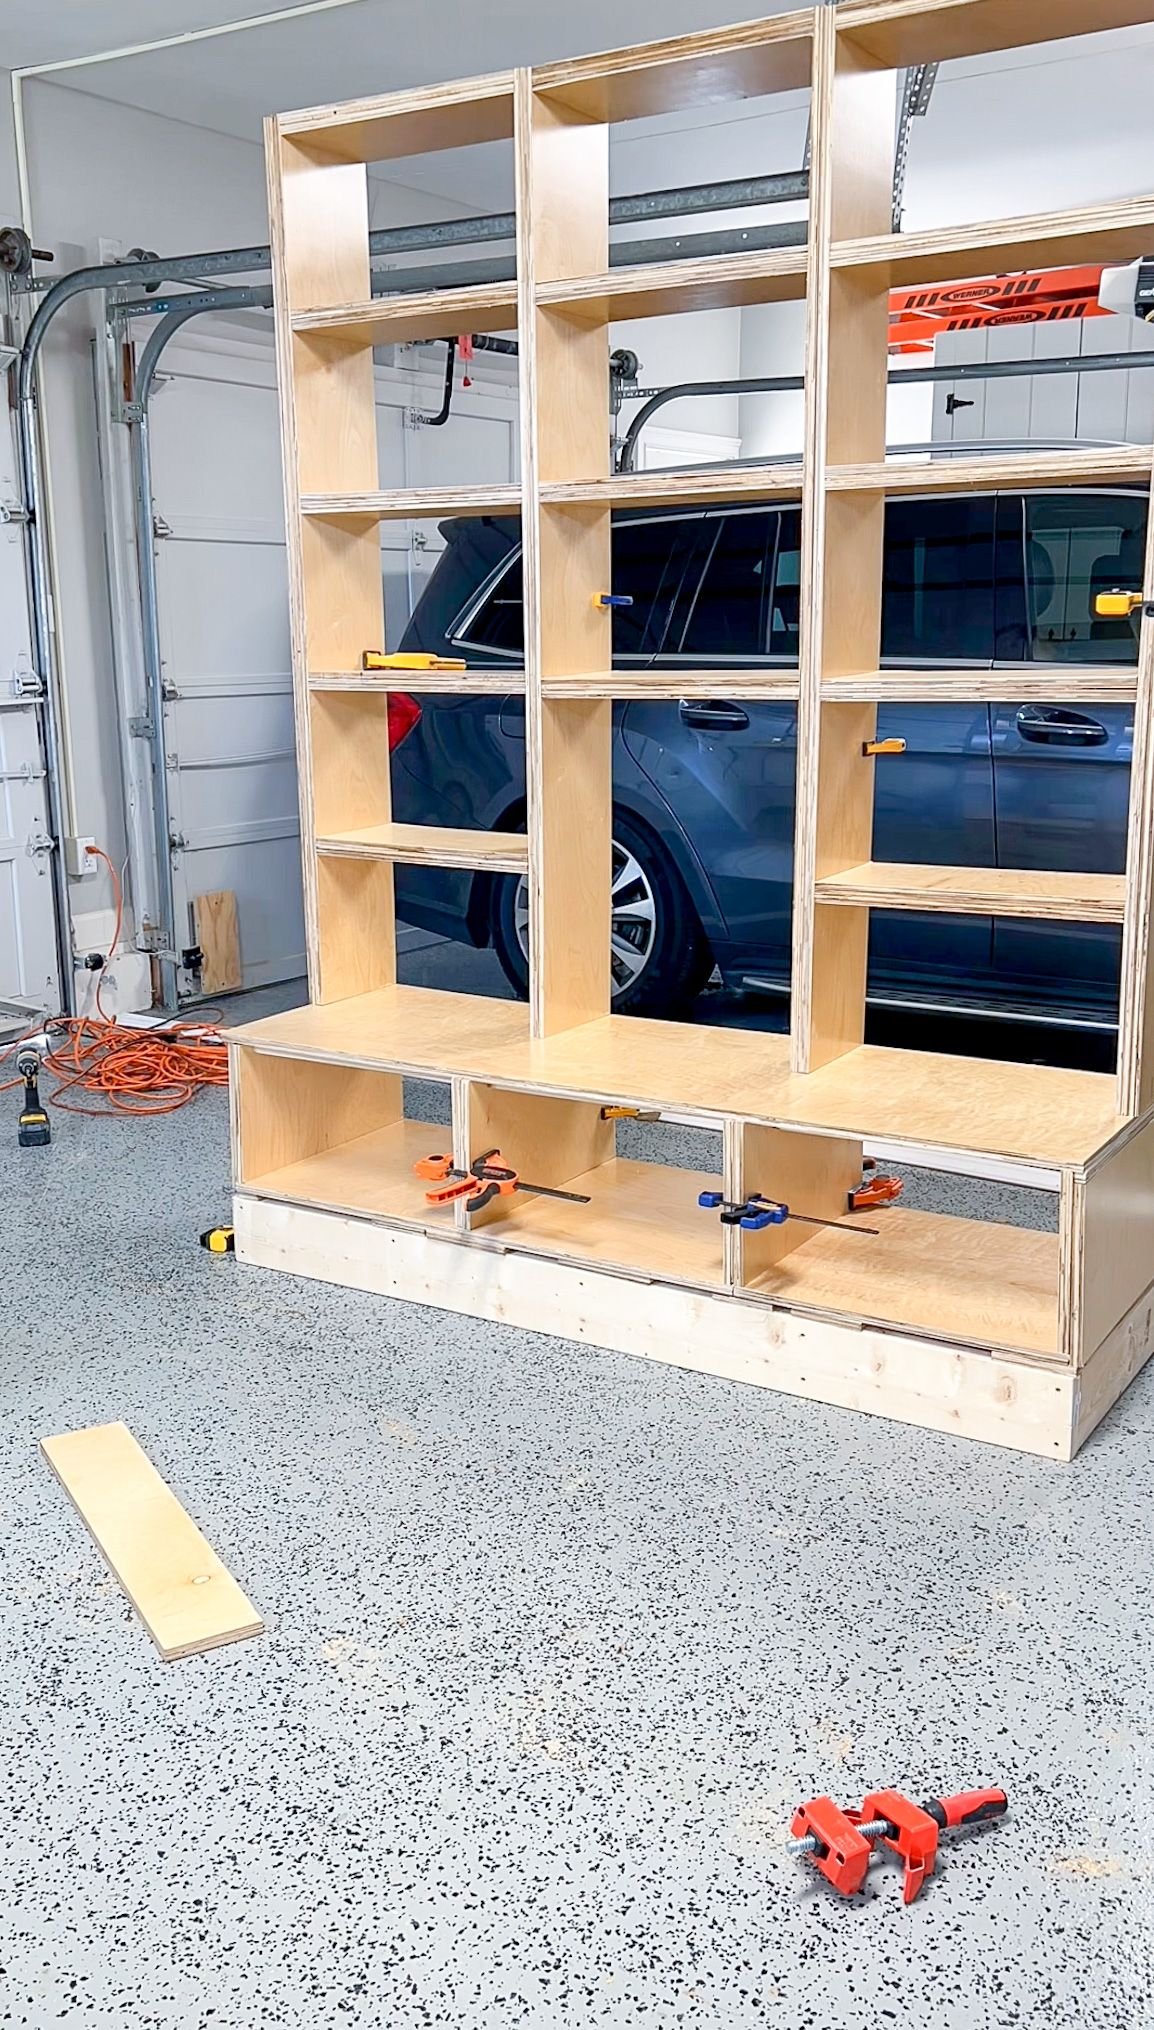
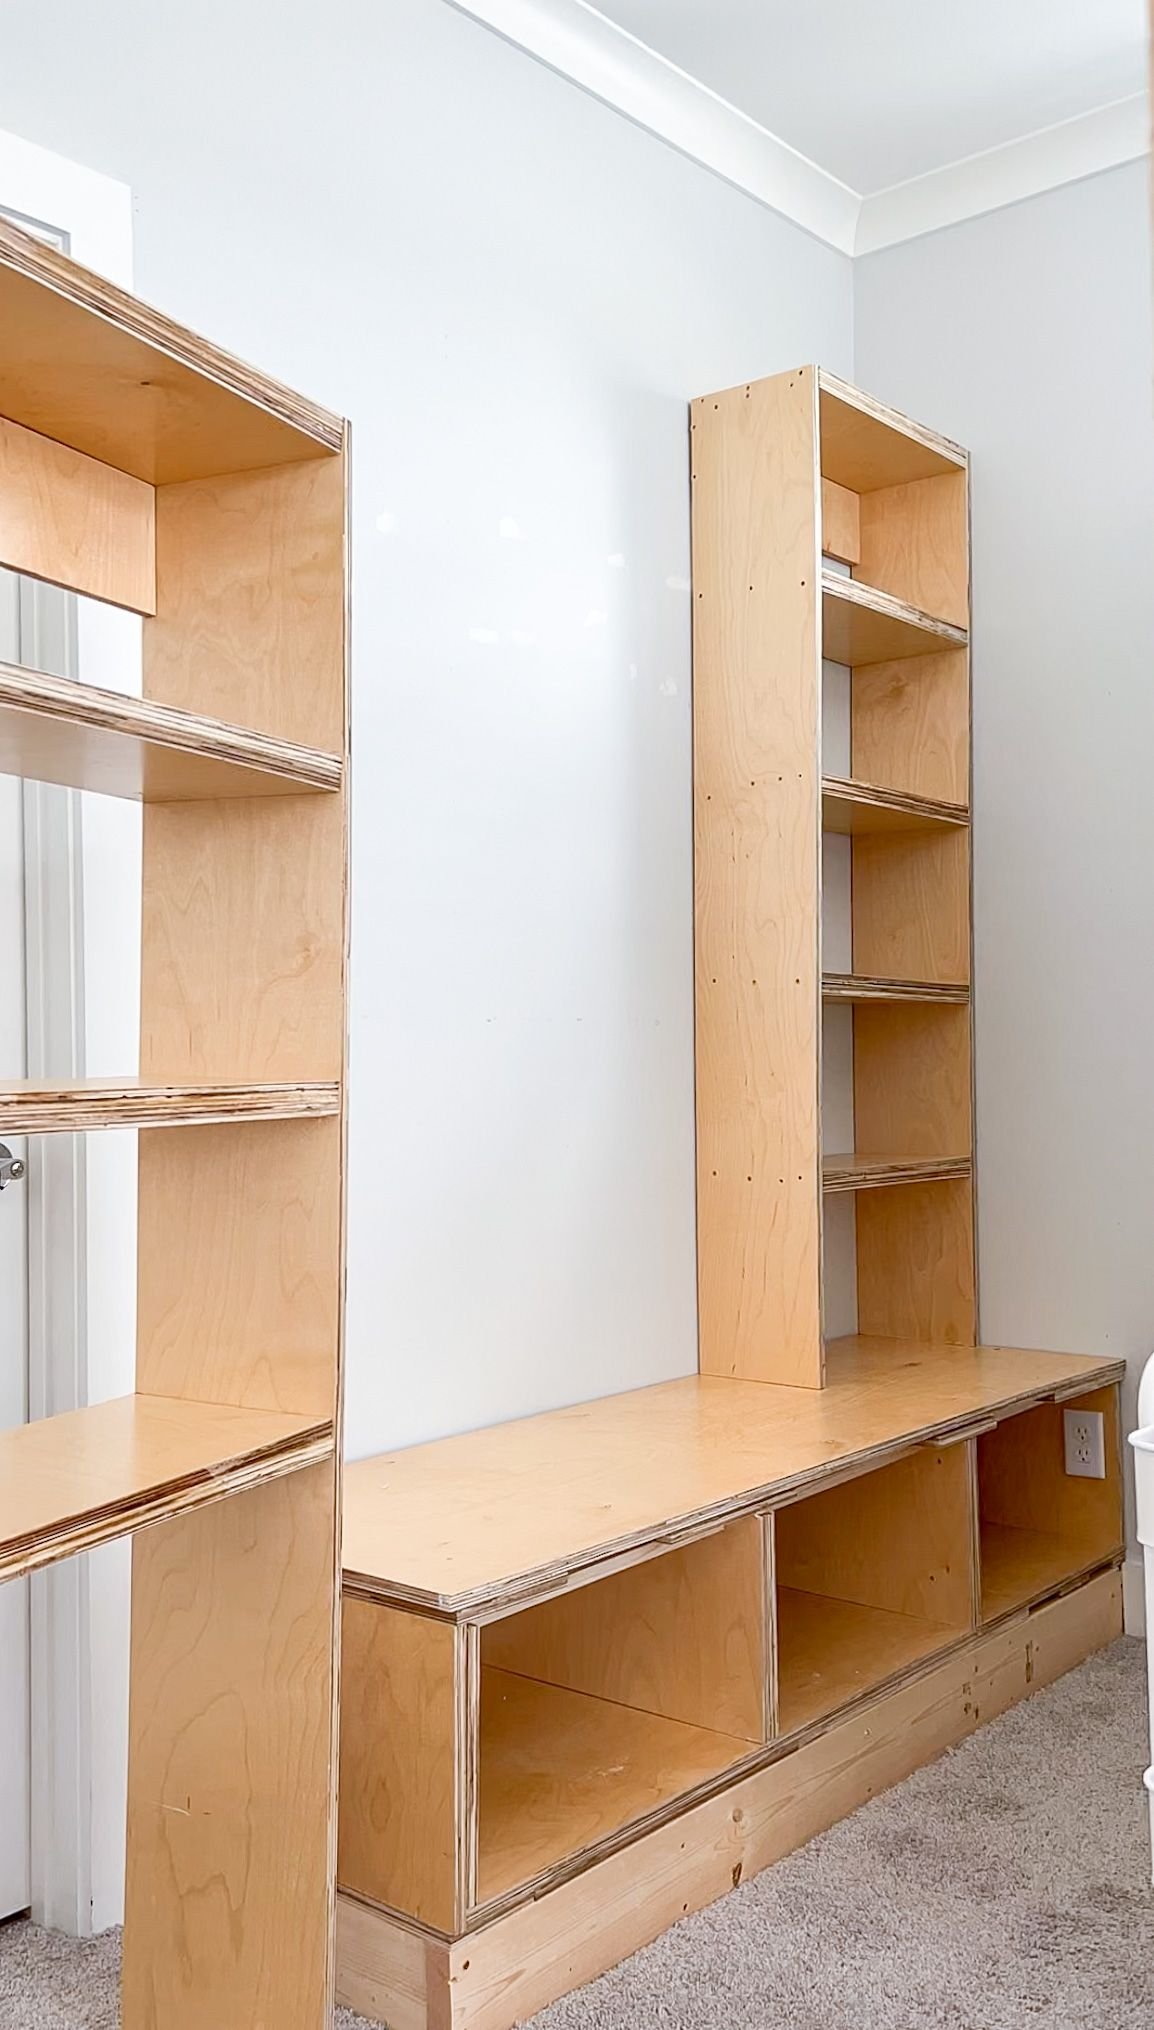
I used the scrap wood leftover from when I built my grandparents closet in 2021. I cut all of the pieces I needed and went on to the most time intensive part: gluing the shelves. I decided to double up the shelves, so they were nice and thick. We want this bookshelf to be as sturdy as possible. I glued two pieces together that were the same size, and then clamped them together to dry. I made 15 of these.

Built in Bookshelves with Bench + Download | Building the Shelves
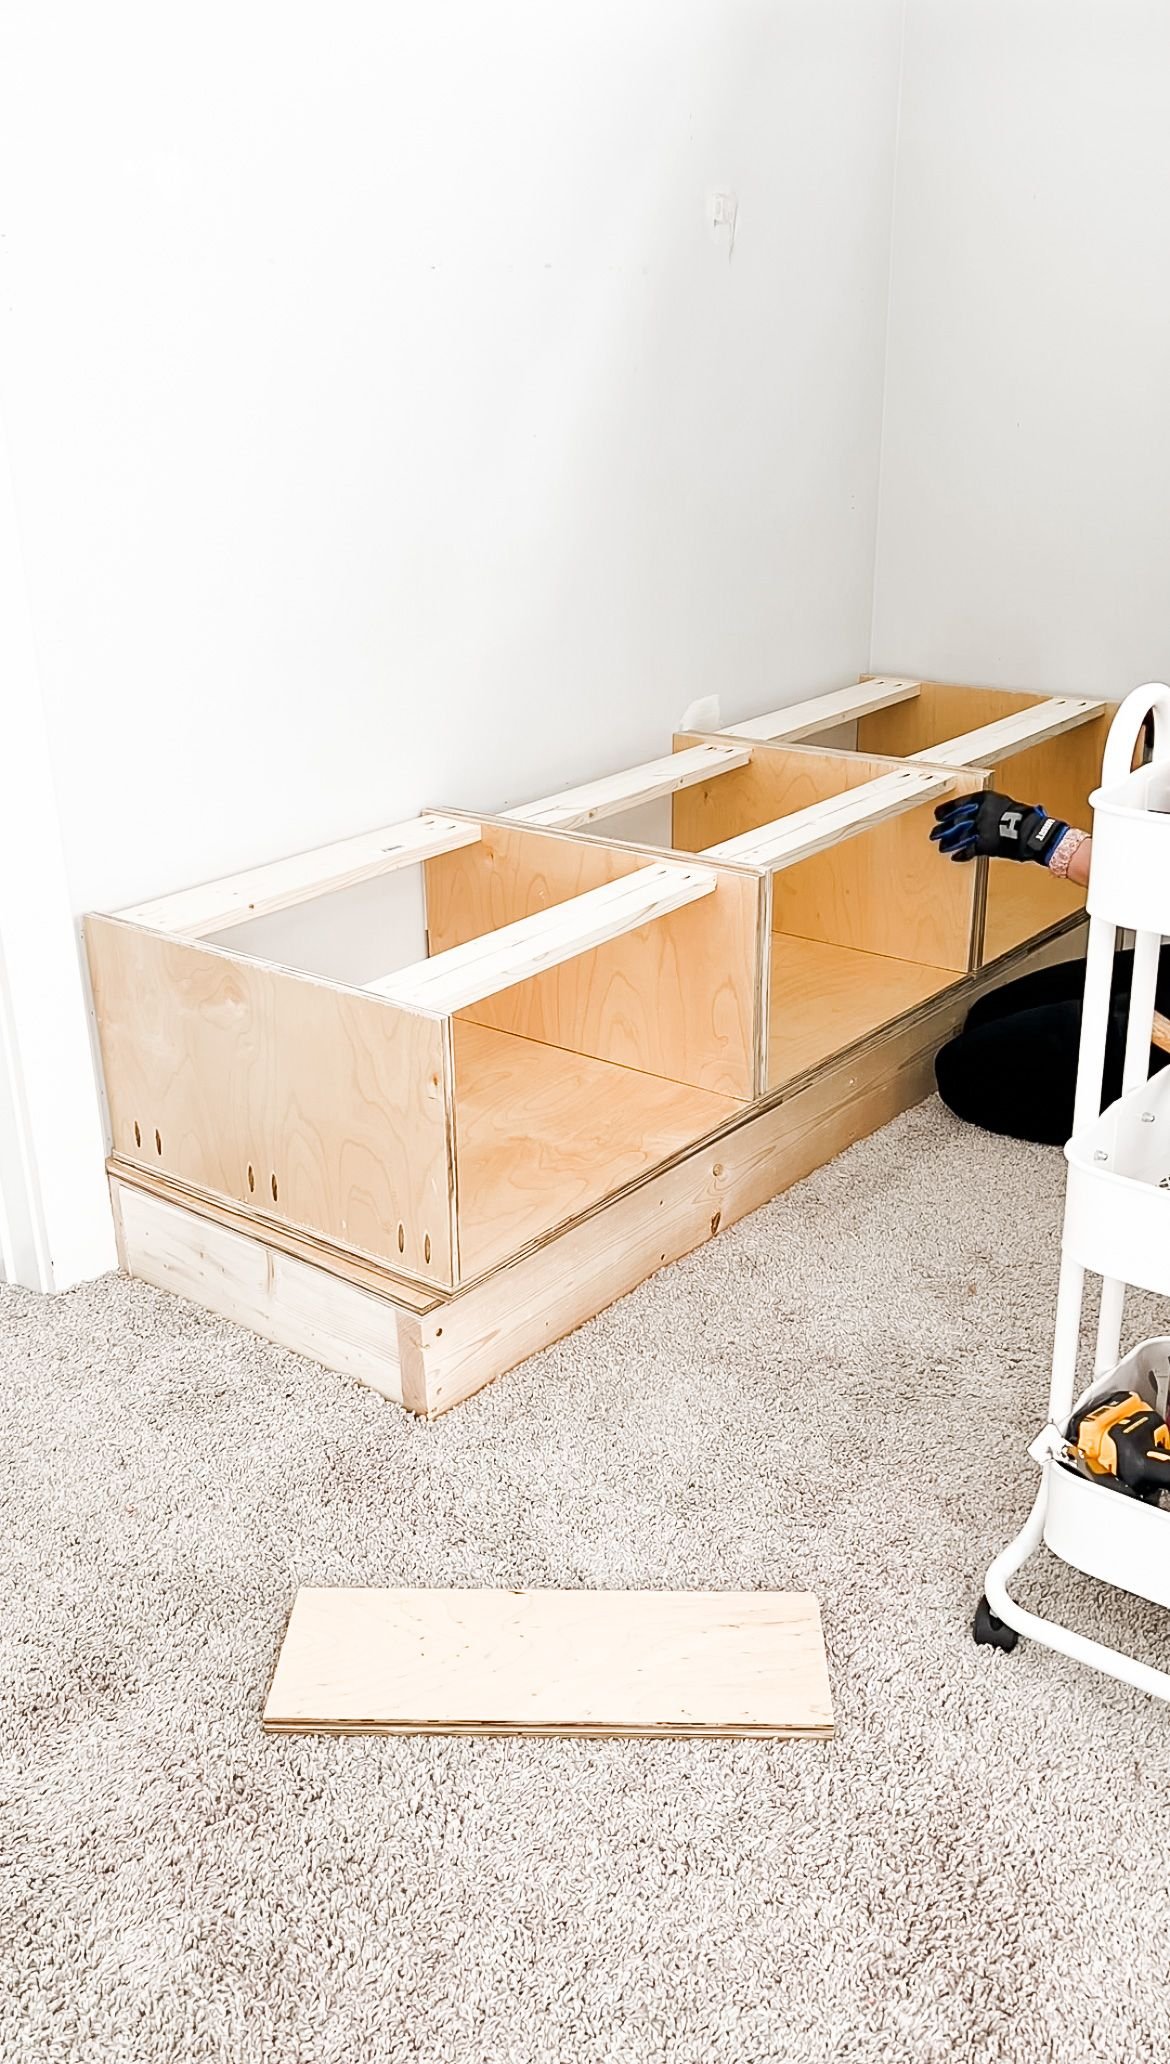
Then I started building the boxes that would make up the bench for the shelf, including some cubbies that could be used for drawers on the bottom. I used pocket holes and wood glue to secure these, making sure the pocket holes were on the OUTSIDE of the boxes. I also used 1x3s across the tops of each box as additional support. I made three of these. I went on to build the base for the shelves that was going to go on the very bottom. This is where everything would rest so adding this section adds more stability while also raising everything up. This way, I could put trim around it so it looks like a built-in. Next, I started building the actual shelves.
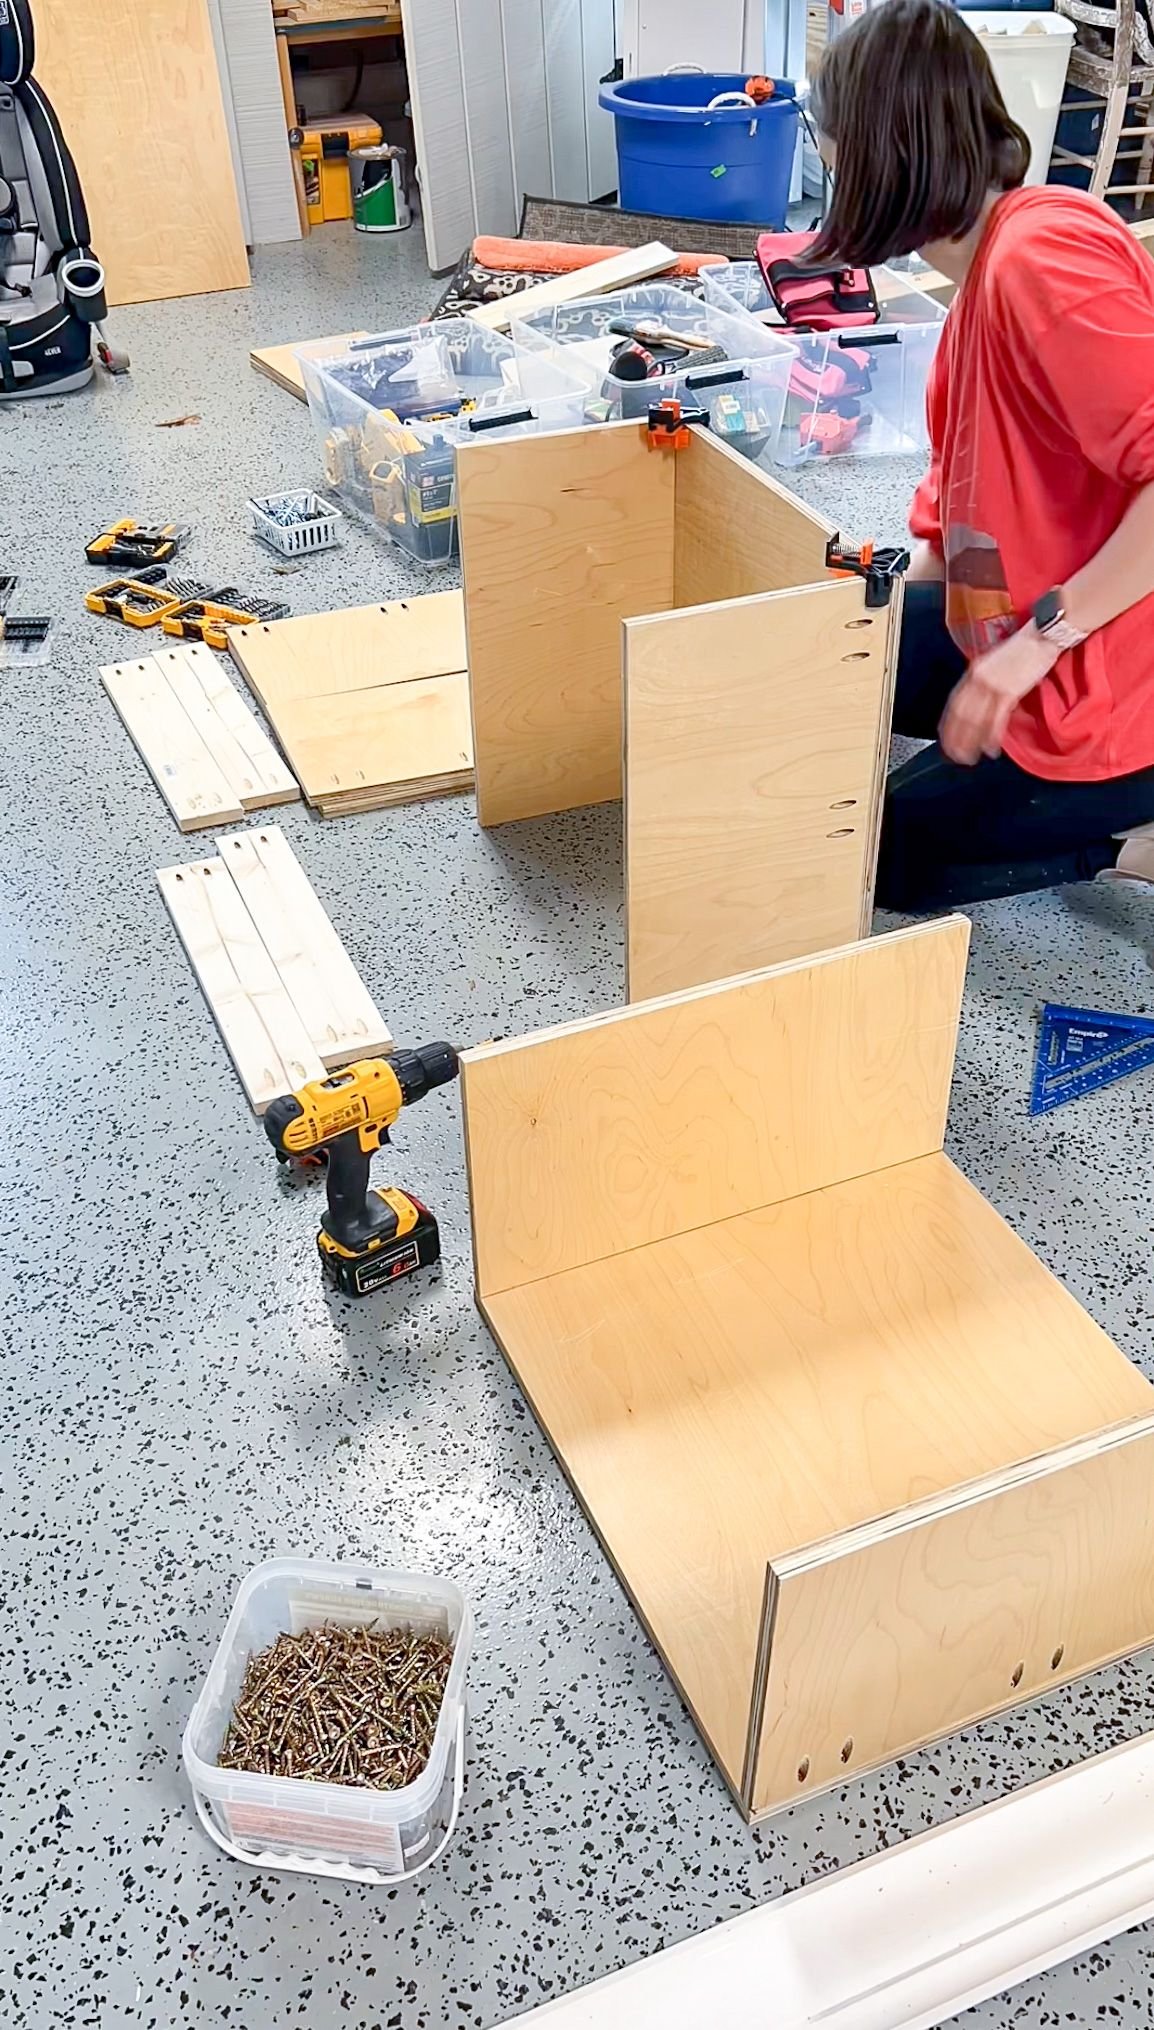
I used two longer boards for the outsides, one of the doubled up shelf pieces for the top and added four additional shelves. I secured these with wood screws from the outside because all of them would get covered up in the end. I didn’t add a shelf at the bottom because these are going to rest right on top of the bench, and therefore didn’t need a bottom to them.


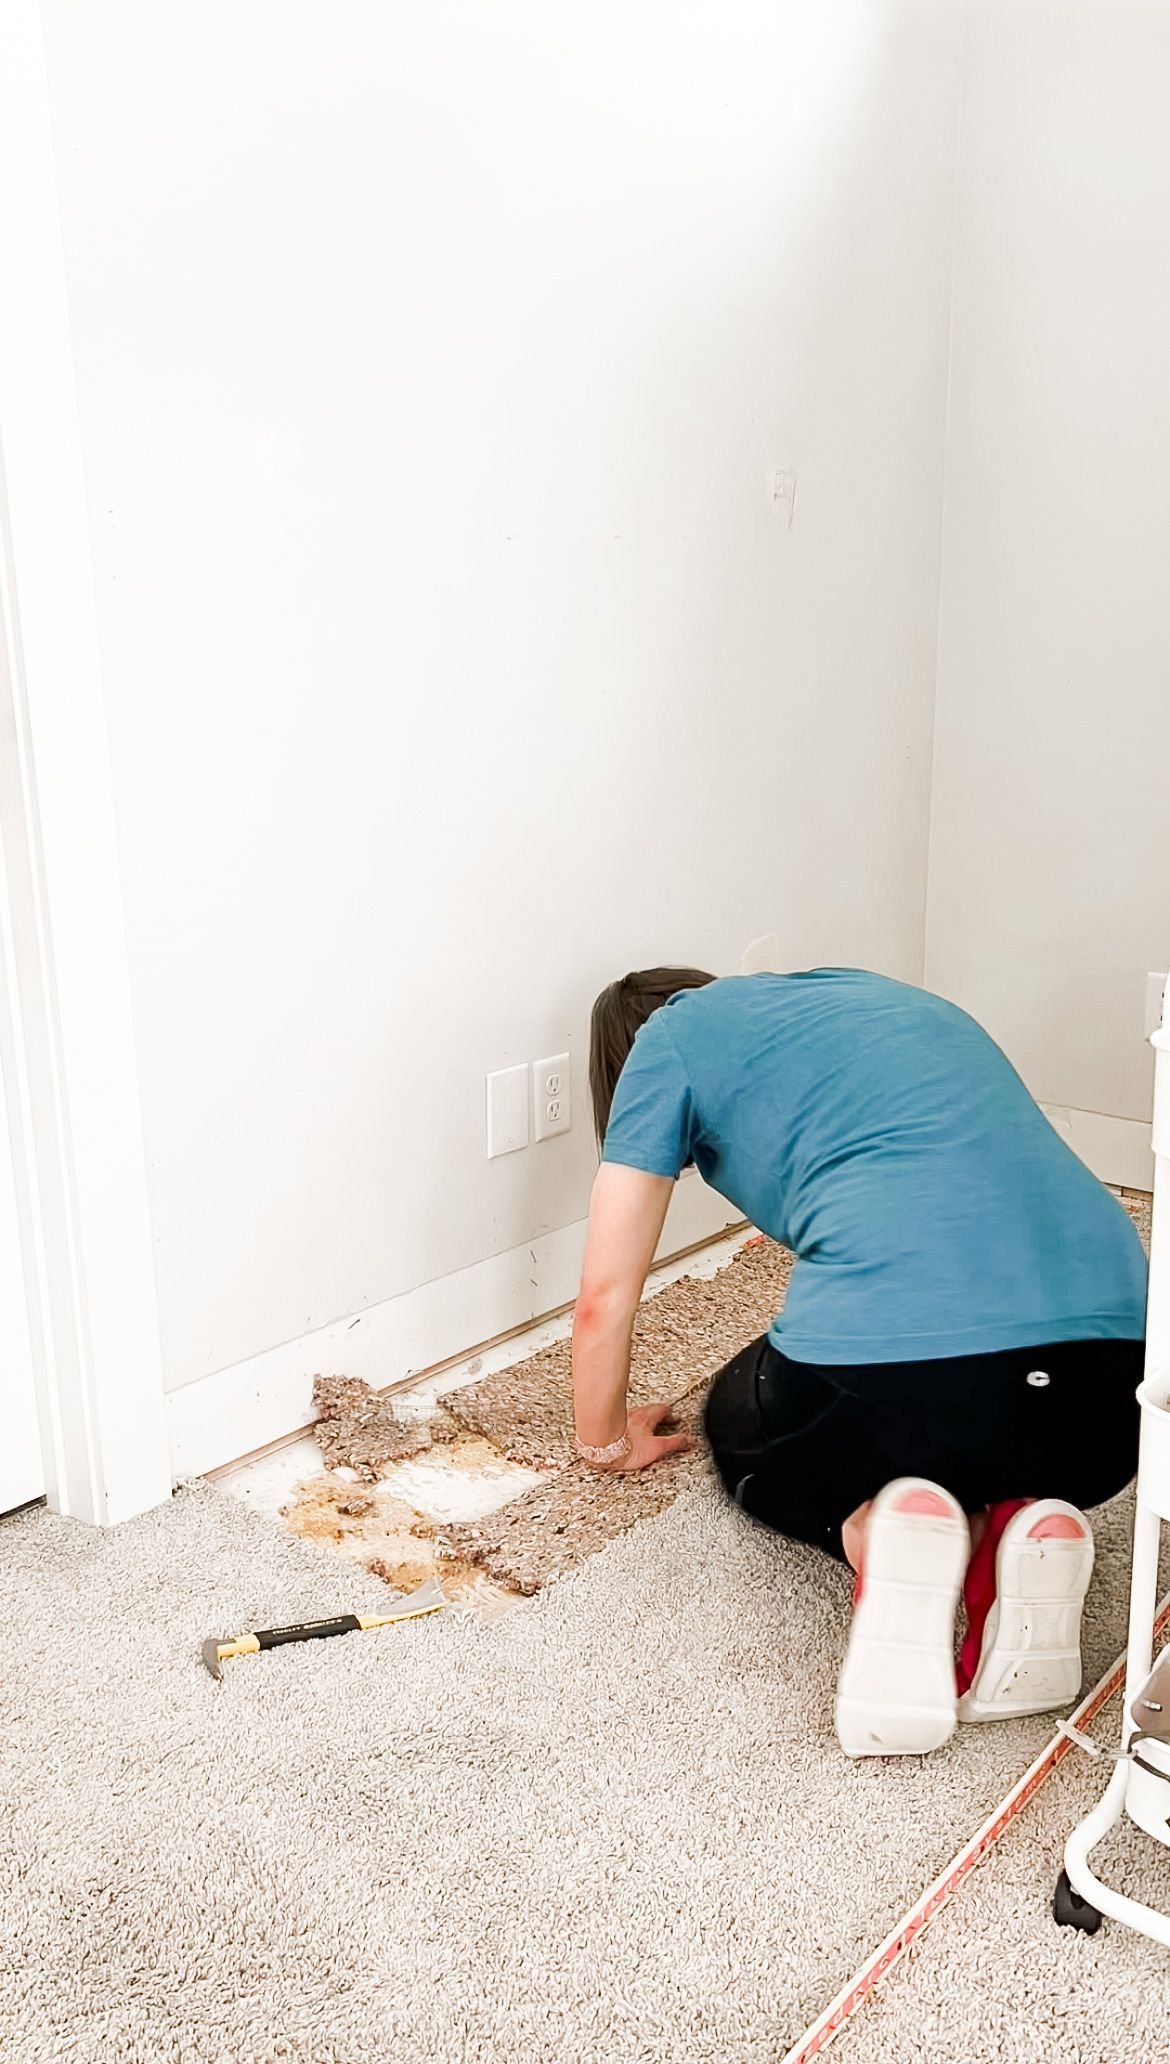
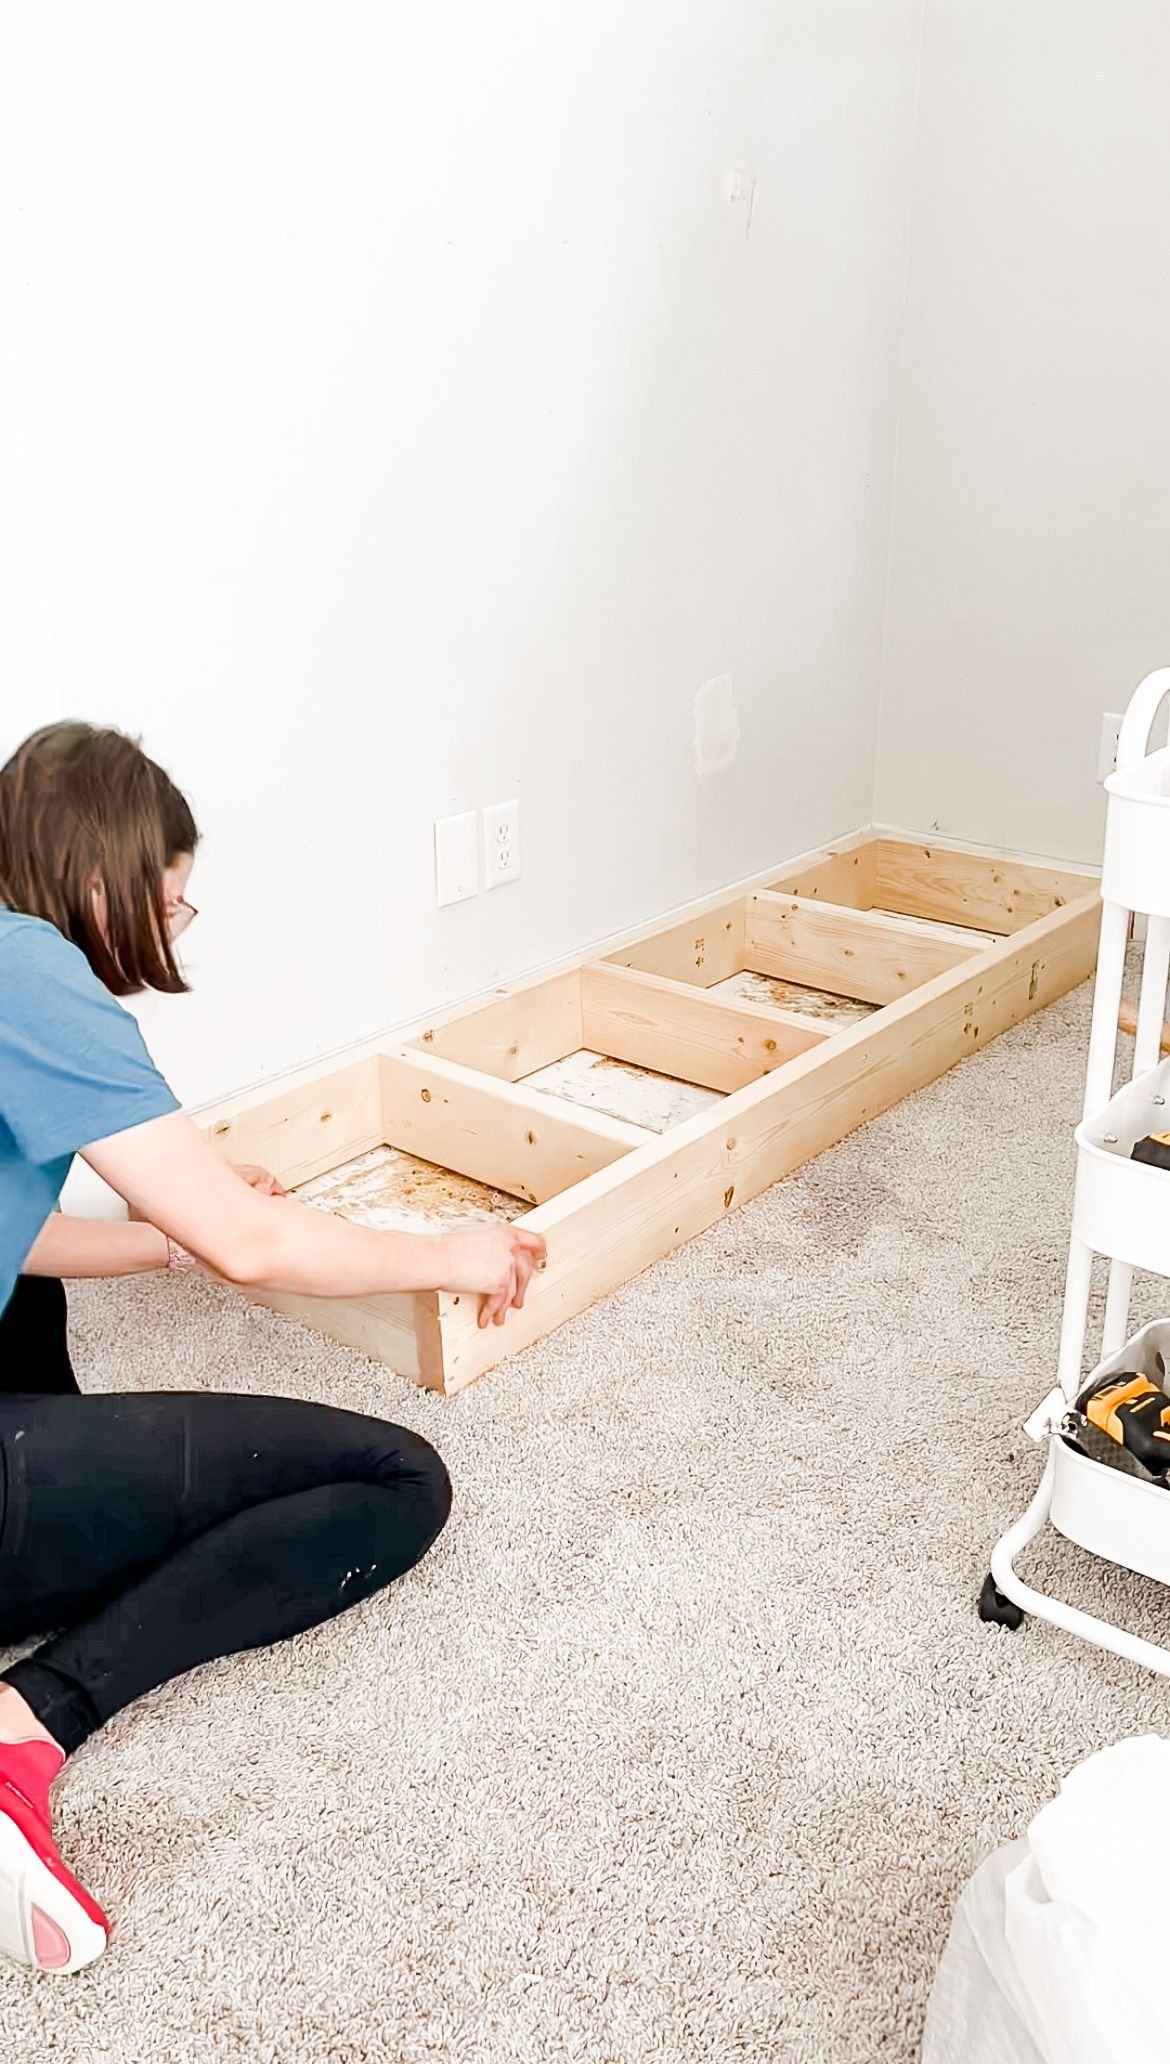
I removed the baseboard from where the shelf was going to go in her room because I needed everything to sit flush against the wall. I also removed the carpet from underneath. This is not a necessary step, it’s just something I wanted to do to make it even more flush. I then took the base, found the studs in the wall, and secured it to the studs so it wasn't going anywhere. I added some pieces on top of the base so the trim would line up perfectly with it and wouldn't overlap on the boxes that I was putting on next. For the far right box, first cut out a hole for the outlet. Once I did that, everything lined up perfectly. I then added the top piece, which was the bench. I did add some shims underneath it, so everything was level. I secured it from underneath through the 1x3 supports and then I placed the shelves.
Built in Bookshelves with Bench + Download | Finishing Work
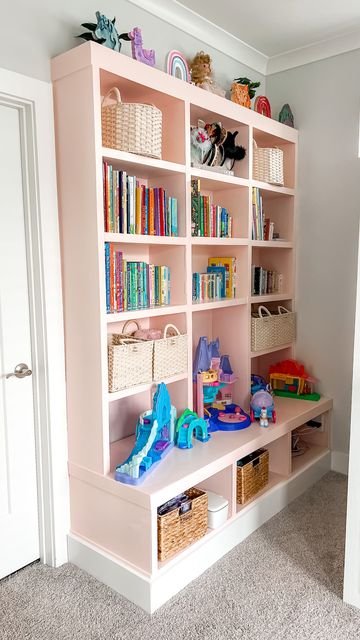
When I built the shelves, I added a support piece across the back of each one of them, which allowed me to then secure the shelf to the studs in the wall. I added an additional piece of plywood to the last shelf so that it covered up all of the screw holes from securing the shelves. Not only does this look nicer because I don't have to fill in a bunch of screw holes, but it continues the cohesiveness of the double width that I have going everywhere else. I then added all the trim, added the baseboard back on, did the finish work of wood filling and caulking. I sanded everything down, and then it was time to paint.
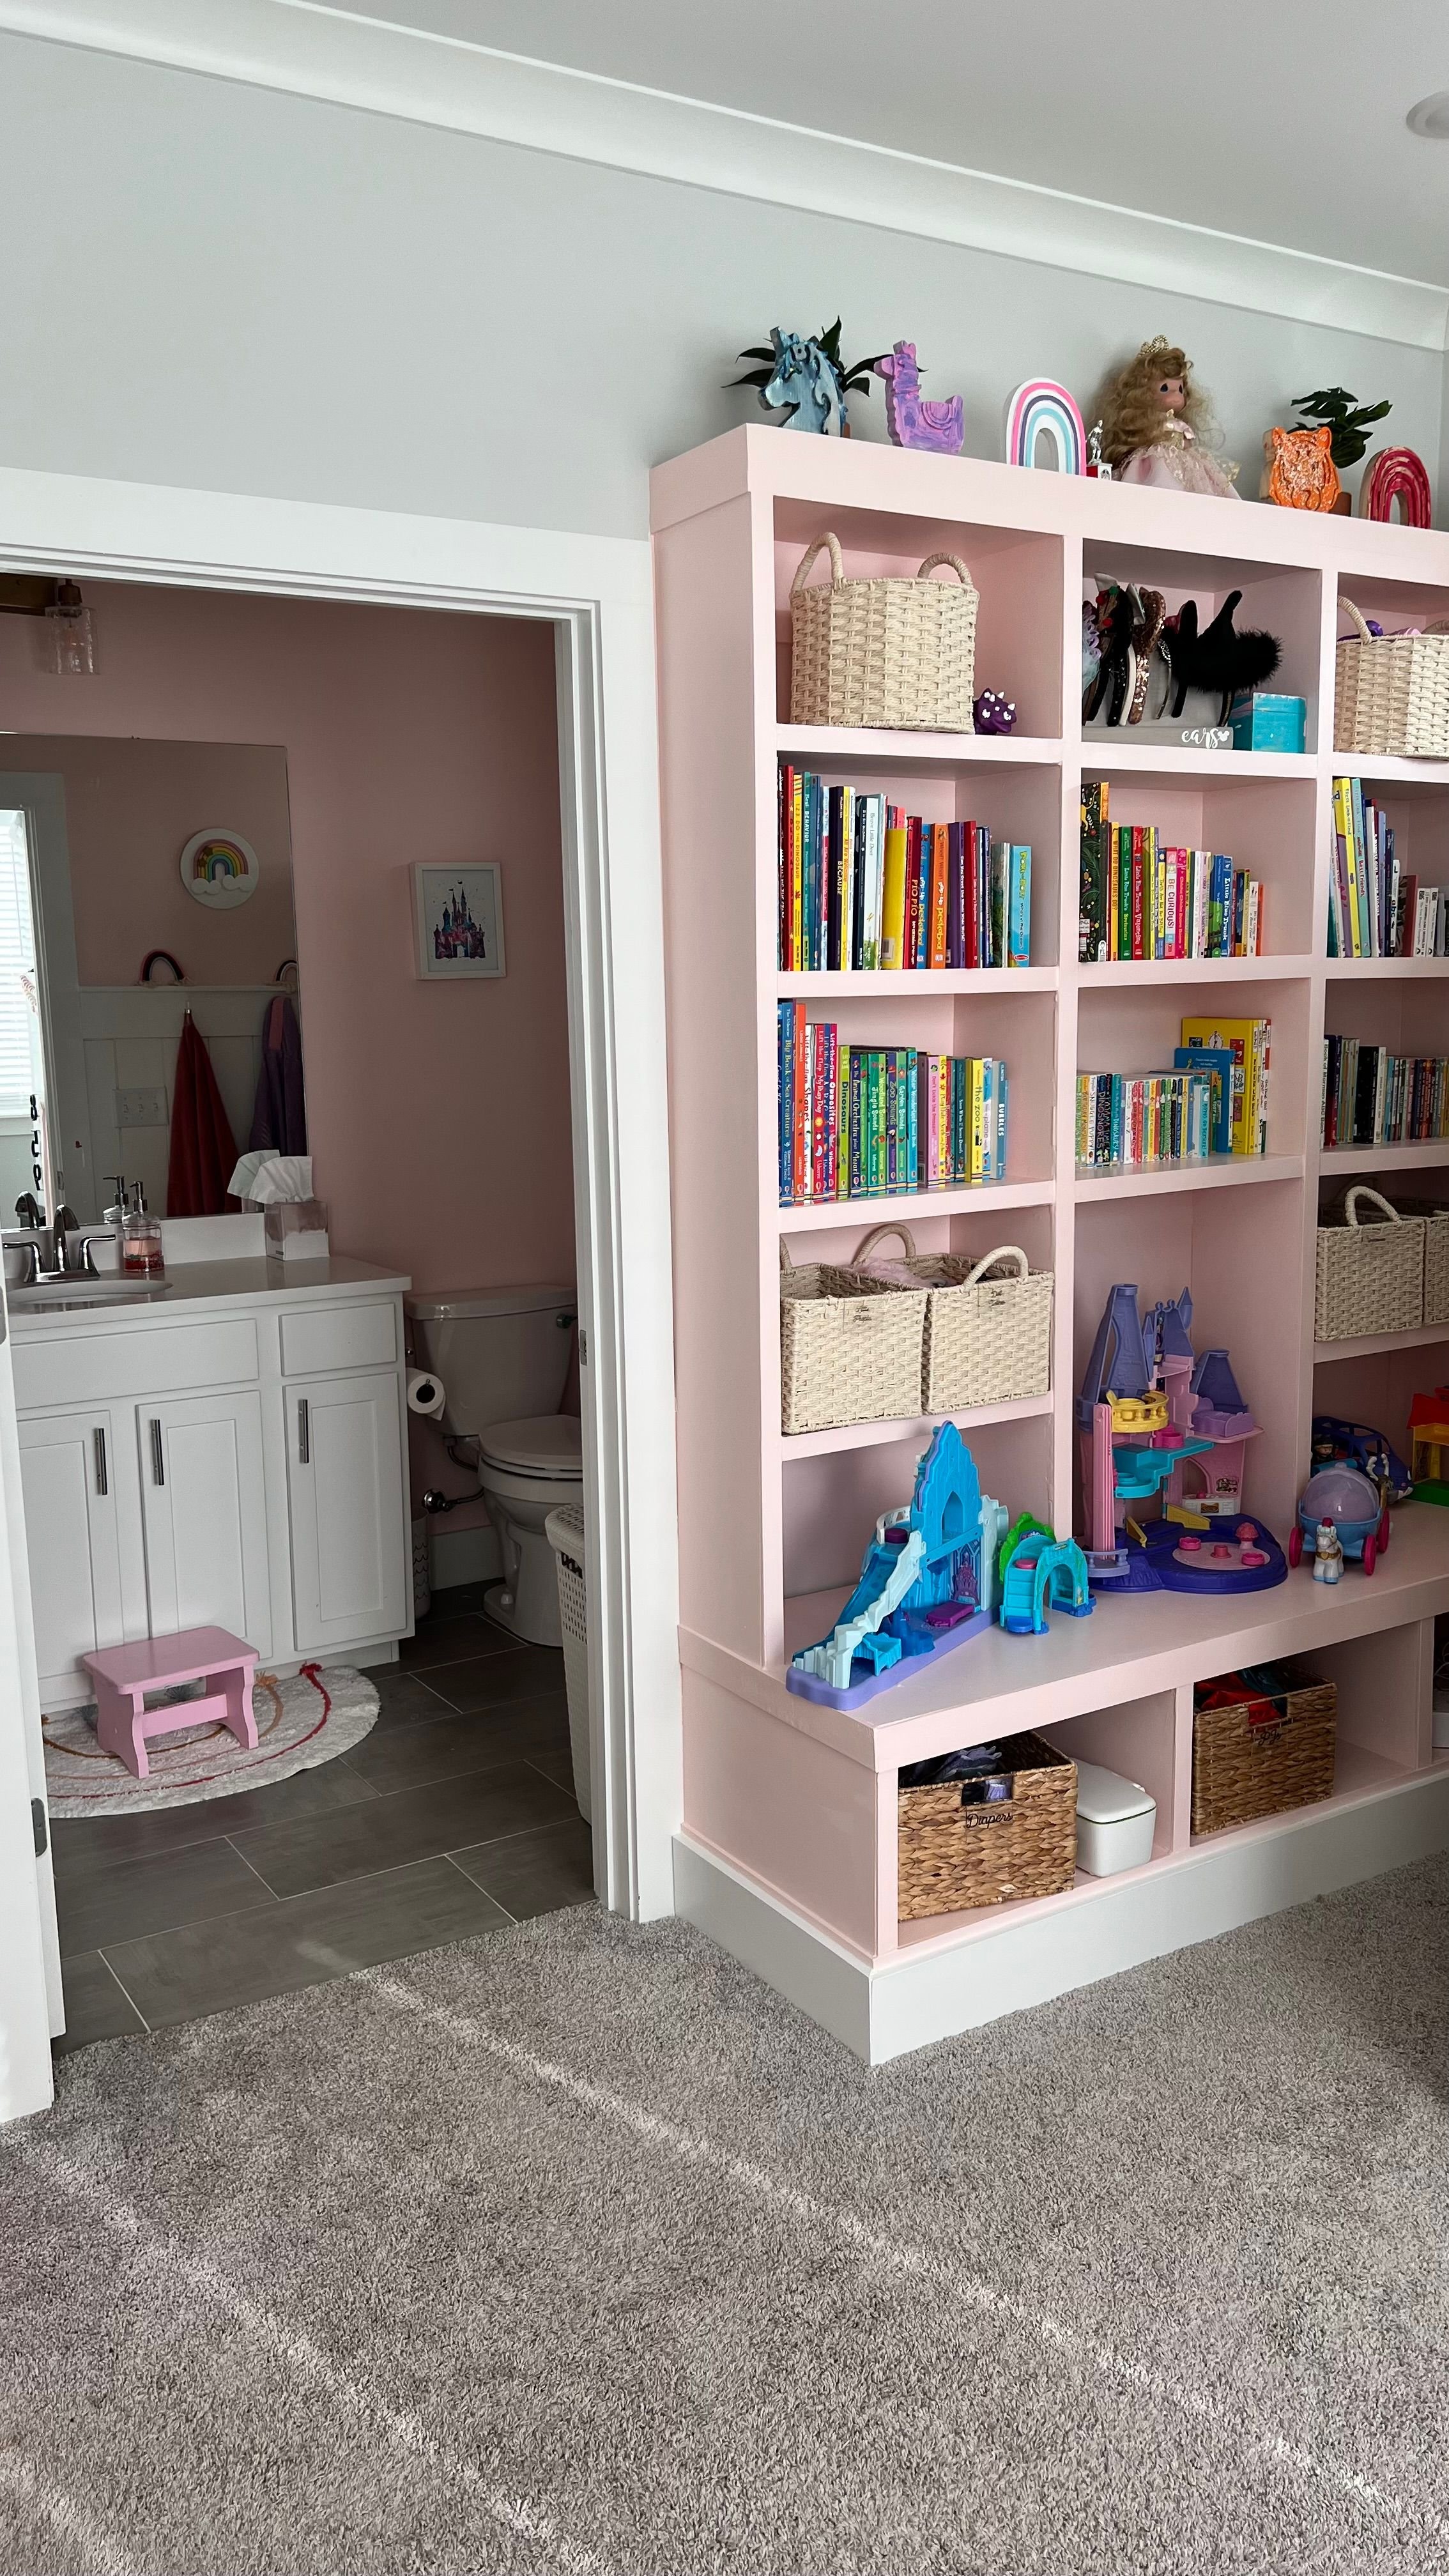
I spent a lot of time talking to a cabinet guy I know about how he got the amazing finish he gets on his work. His biggest piece of advice was actually to do two coats of primer before you even put paint on and to sand with two 20 grit sandpaper between each coat. He also suggested using a semi gloss or a gloss finish paint and to always finish off with 1-2 coats of top coat. I decided to use the color Valentine Memories by Benjamin Moore, which is the same color pink as Jackie’s bathroom. I love that this tied the two spaces together. I have a download available that walks you through how to build this entire thing, including measurements and all the materials you need.
Built in Bookshelves with Bench + Download | Shop
