
Under Bar Shelves
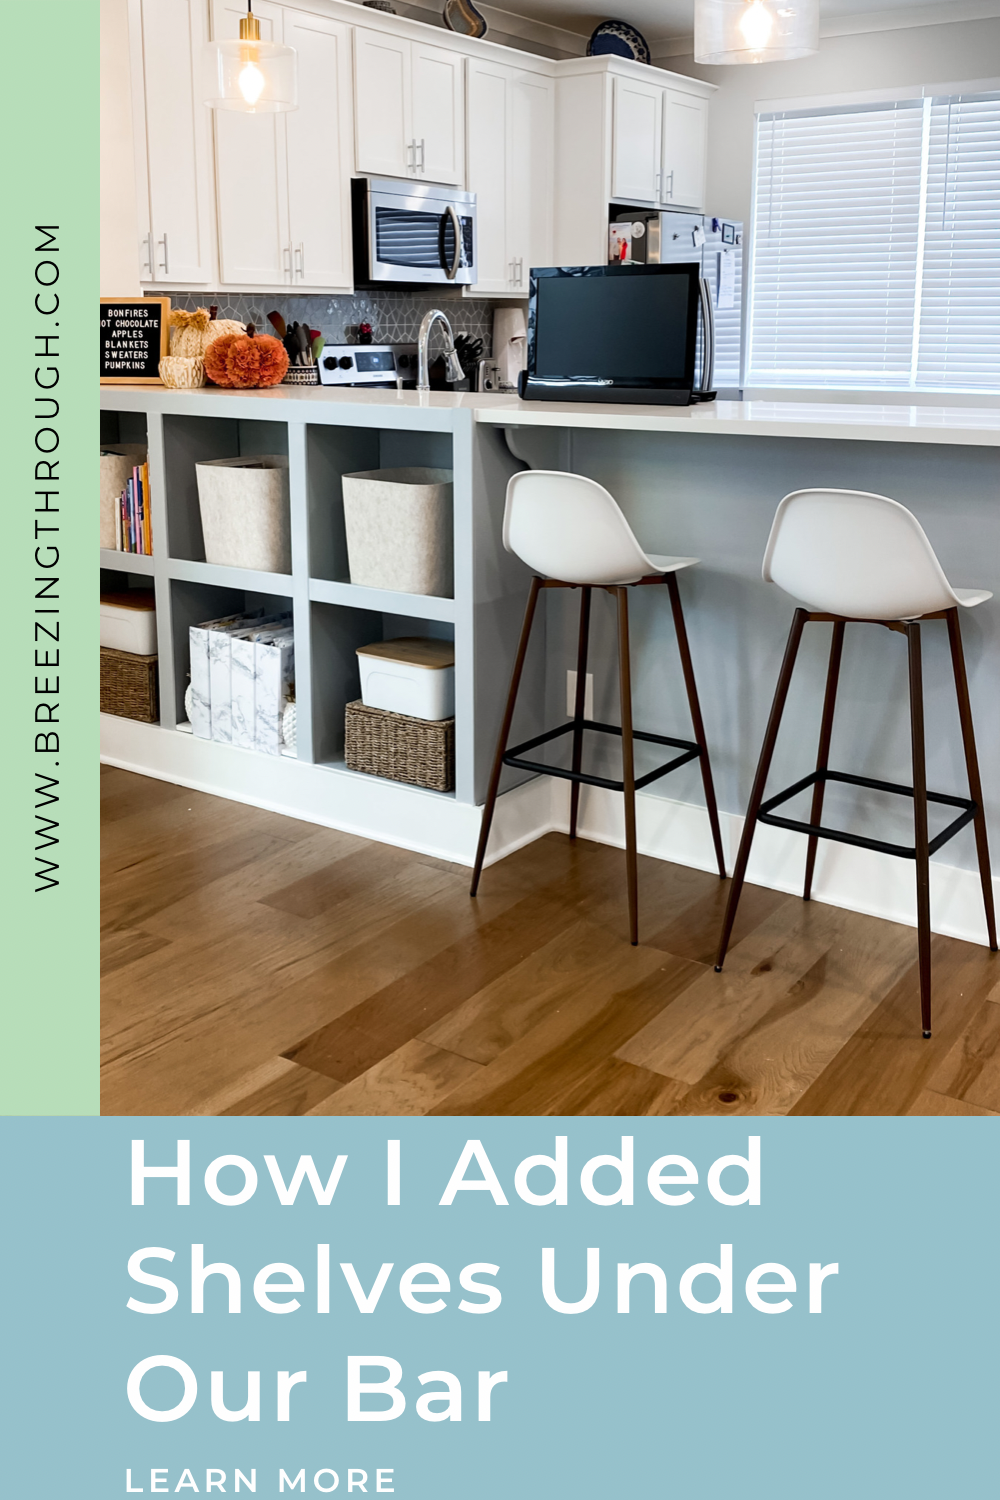
We have a 9 ft. long bar in our kitchen. Our house doesn’t have a lot of storage, so the bar just became a place for clutter to live. Every time I looked at it, I got frustrated because I couldn’t stay on top of the clutter, so I decided to do something about it. I did a poll on Instagram asking my followers if I should add shelves or leave it as is. I was unanimously told that I should not touch the bar. BUT if you know me, you know that if I have my mind set on something, I go for it. I decided that my family lives here so I'm going to do what's best for our family and our house to function. So I got to work!

Under Bar Shelves | Getting Started
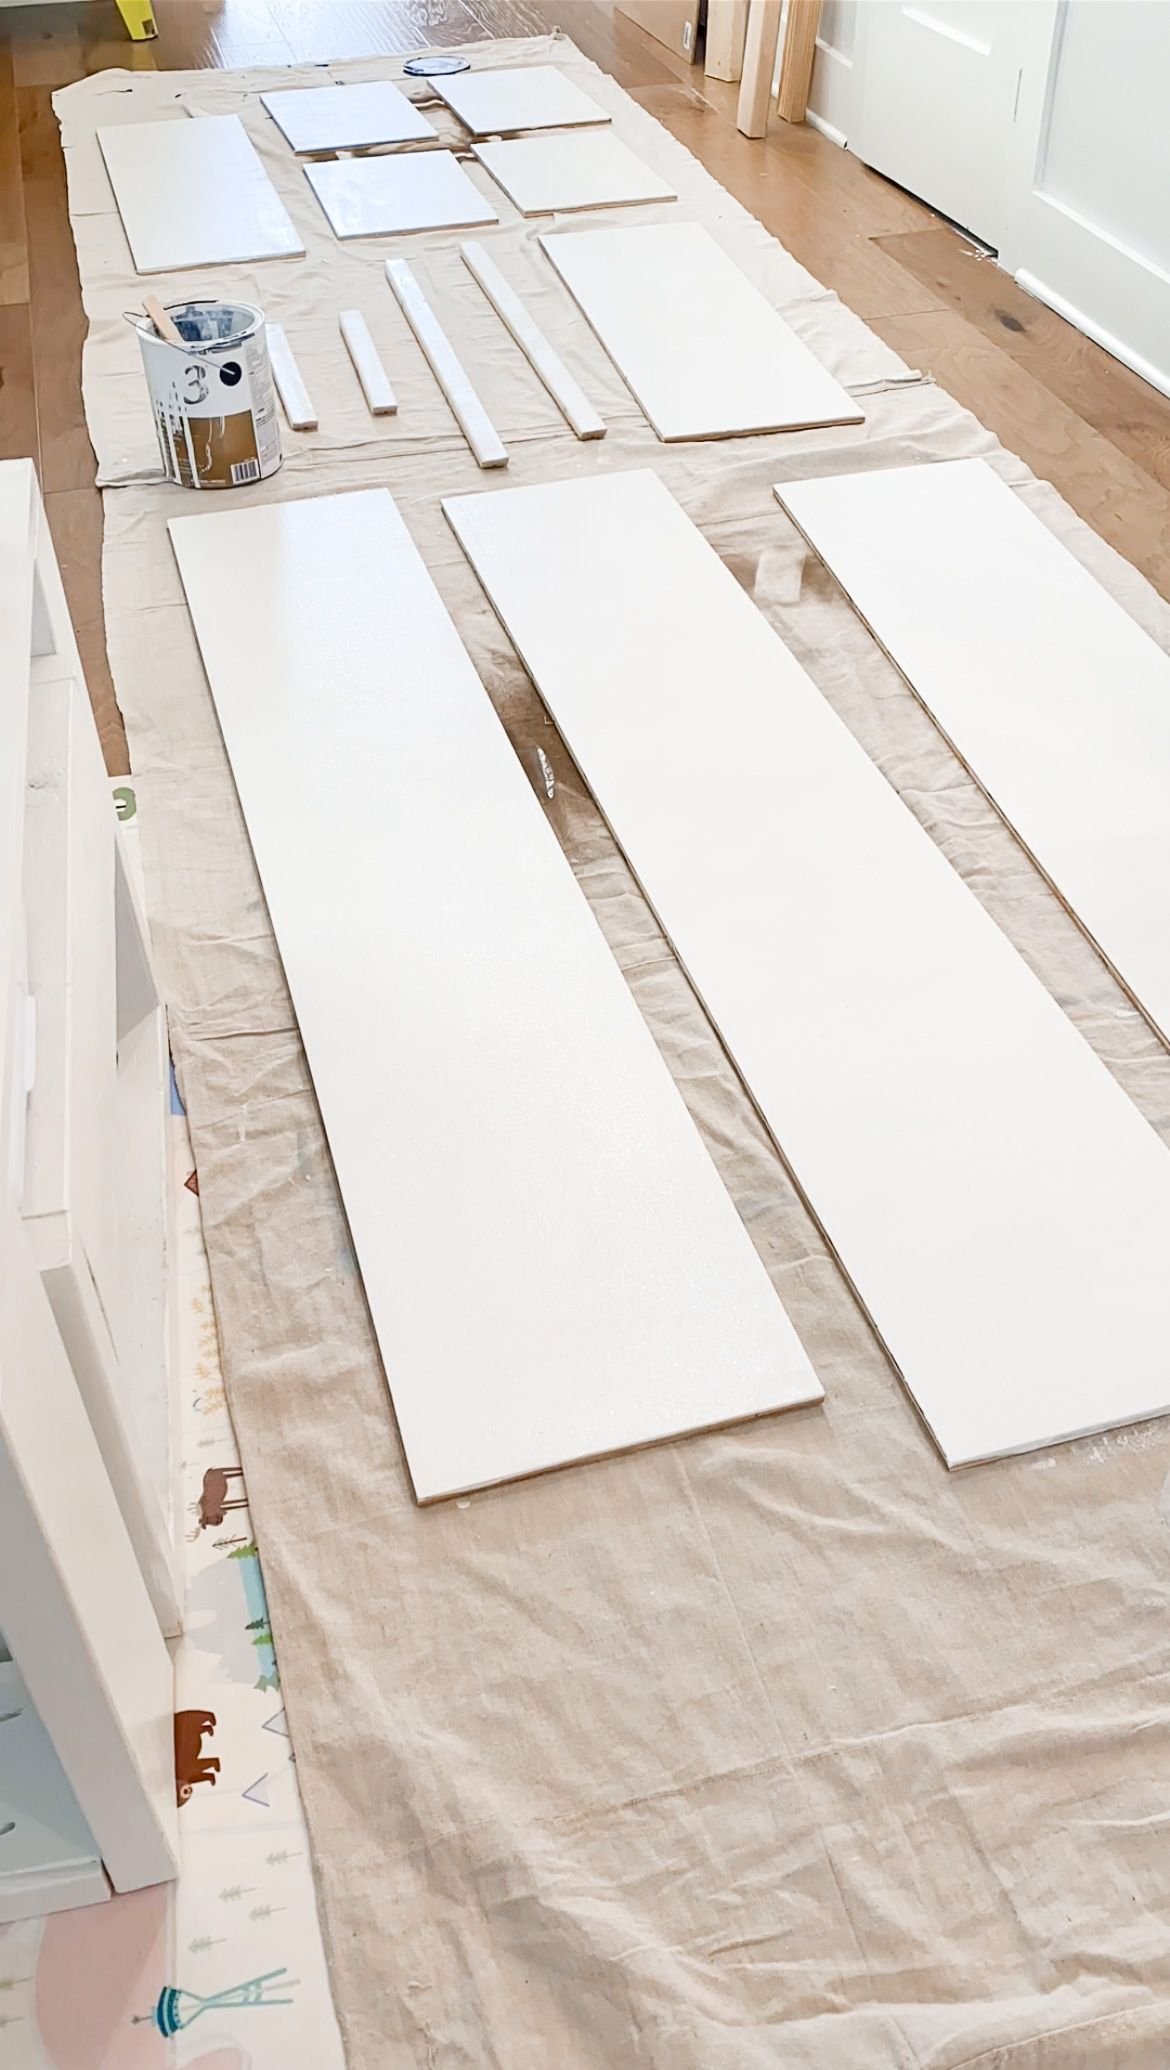
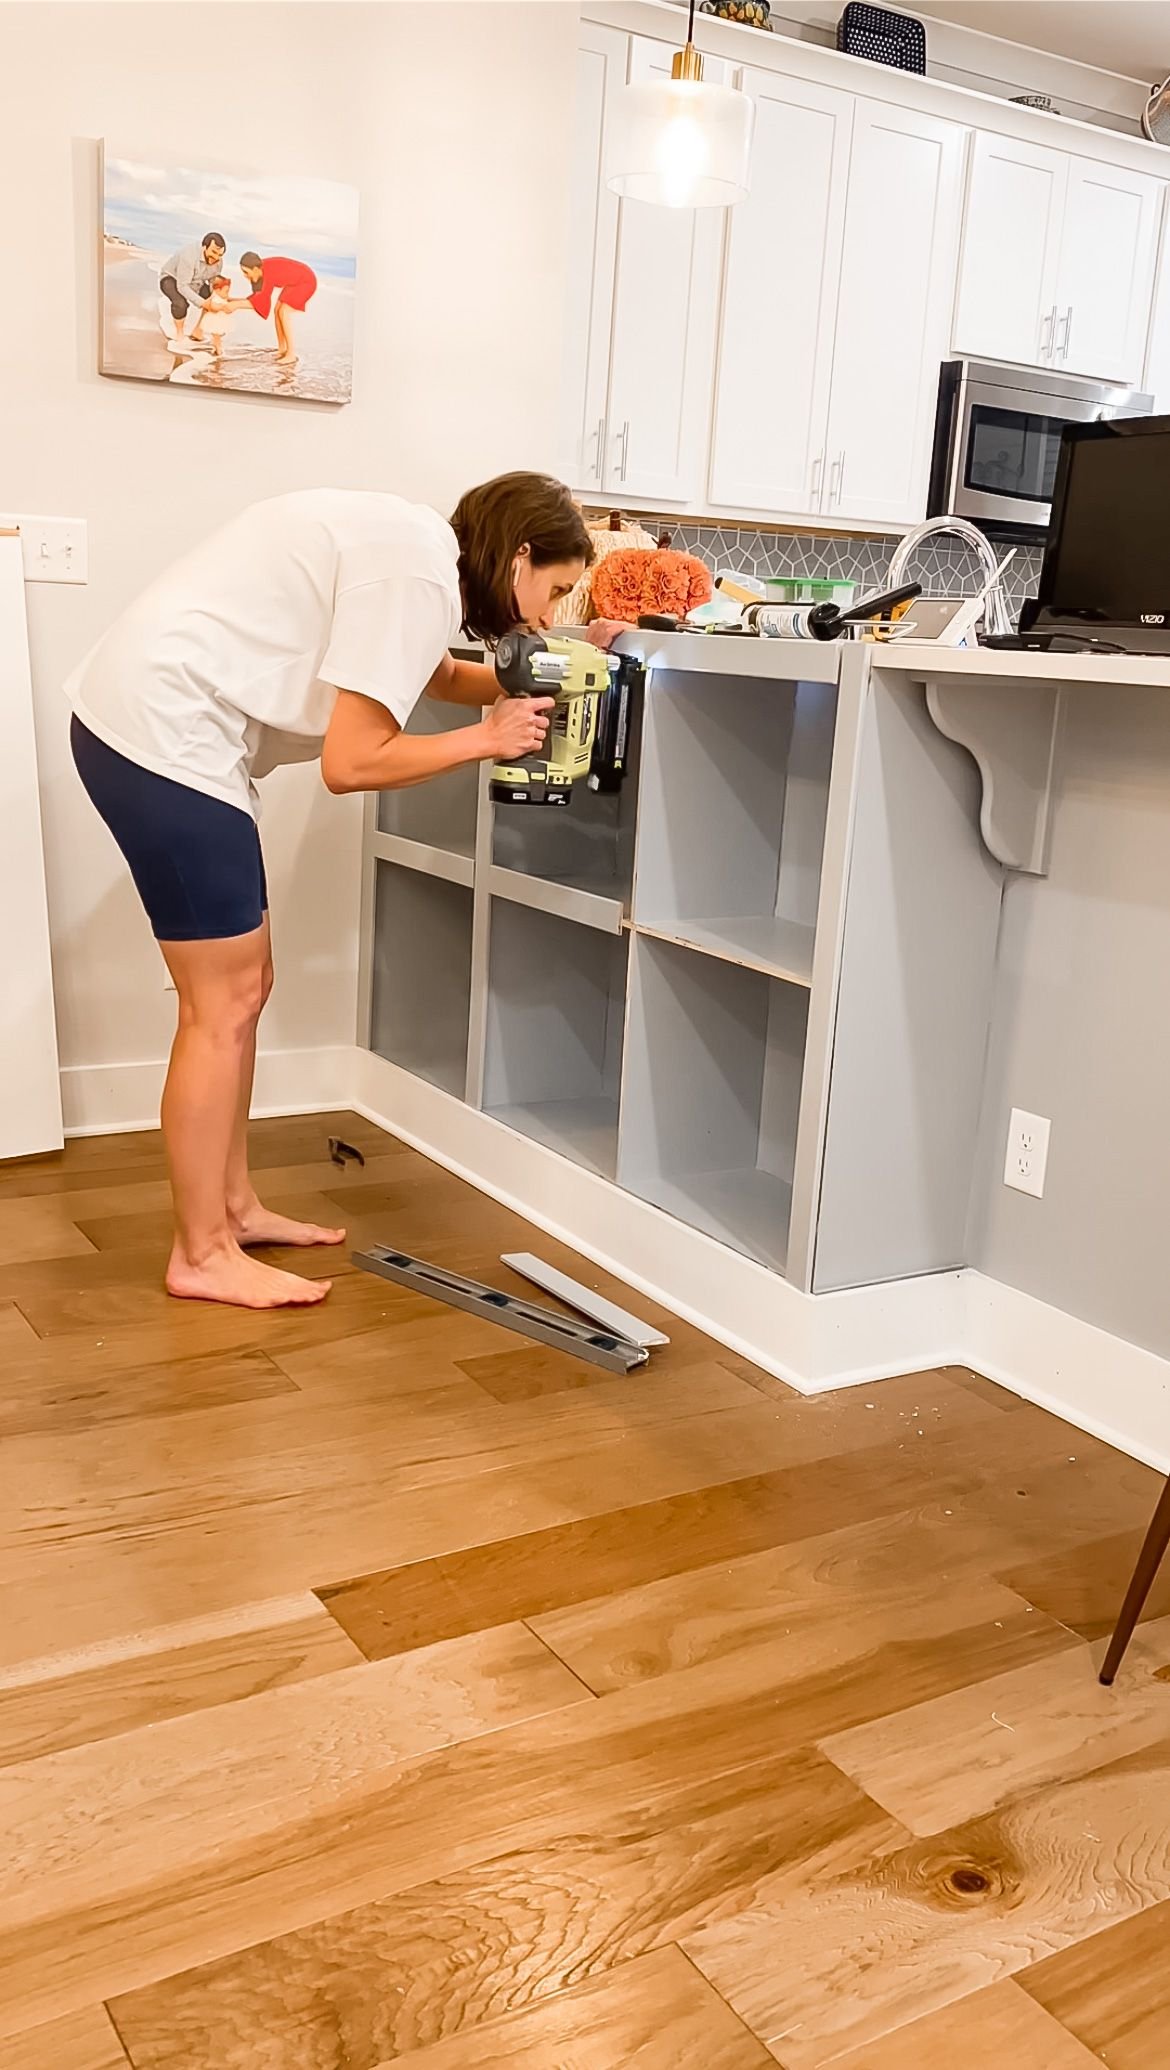
I cut a bunch of plywood using the awesome workbench that my husband got me for Mother's Day in 2021. I painted everything before I assembled it because I knew that there was going to be a lot to paint, and a lot of corners. After painting everything I started building the base.
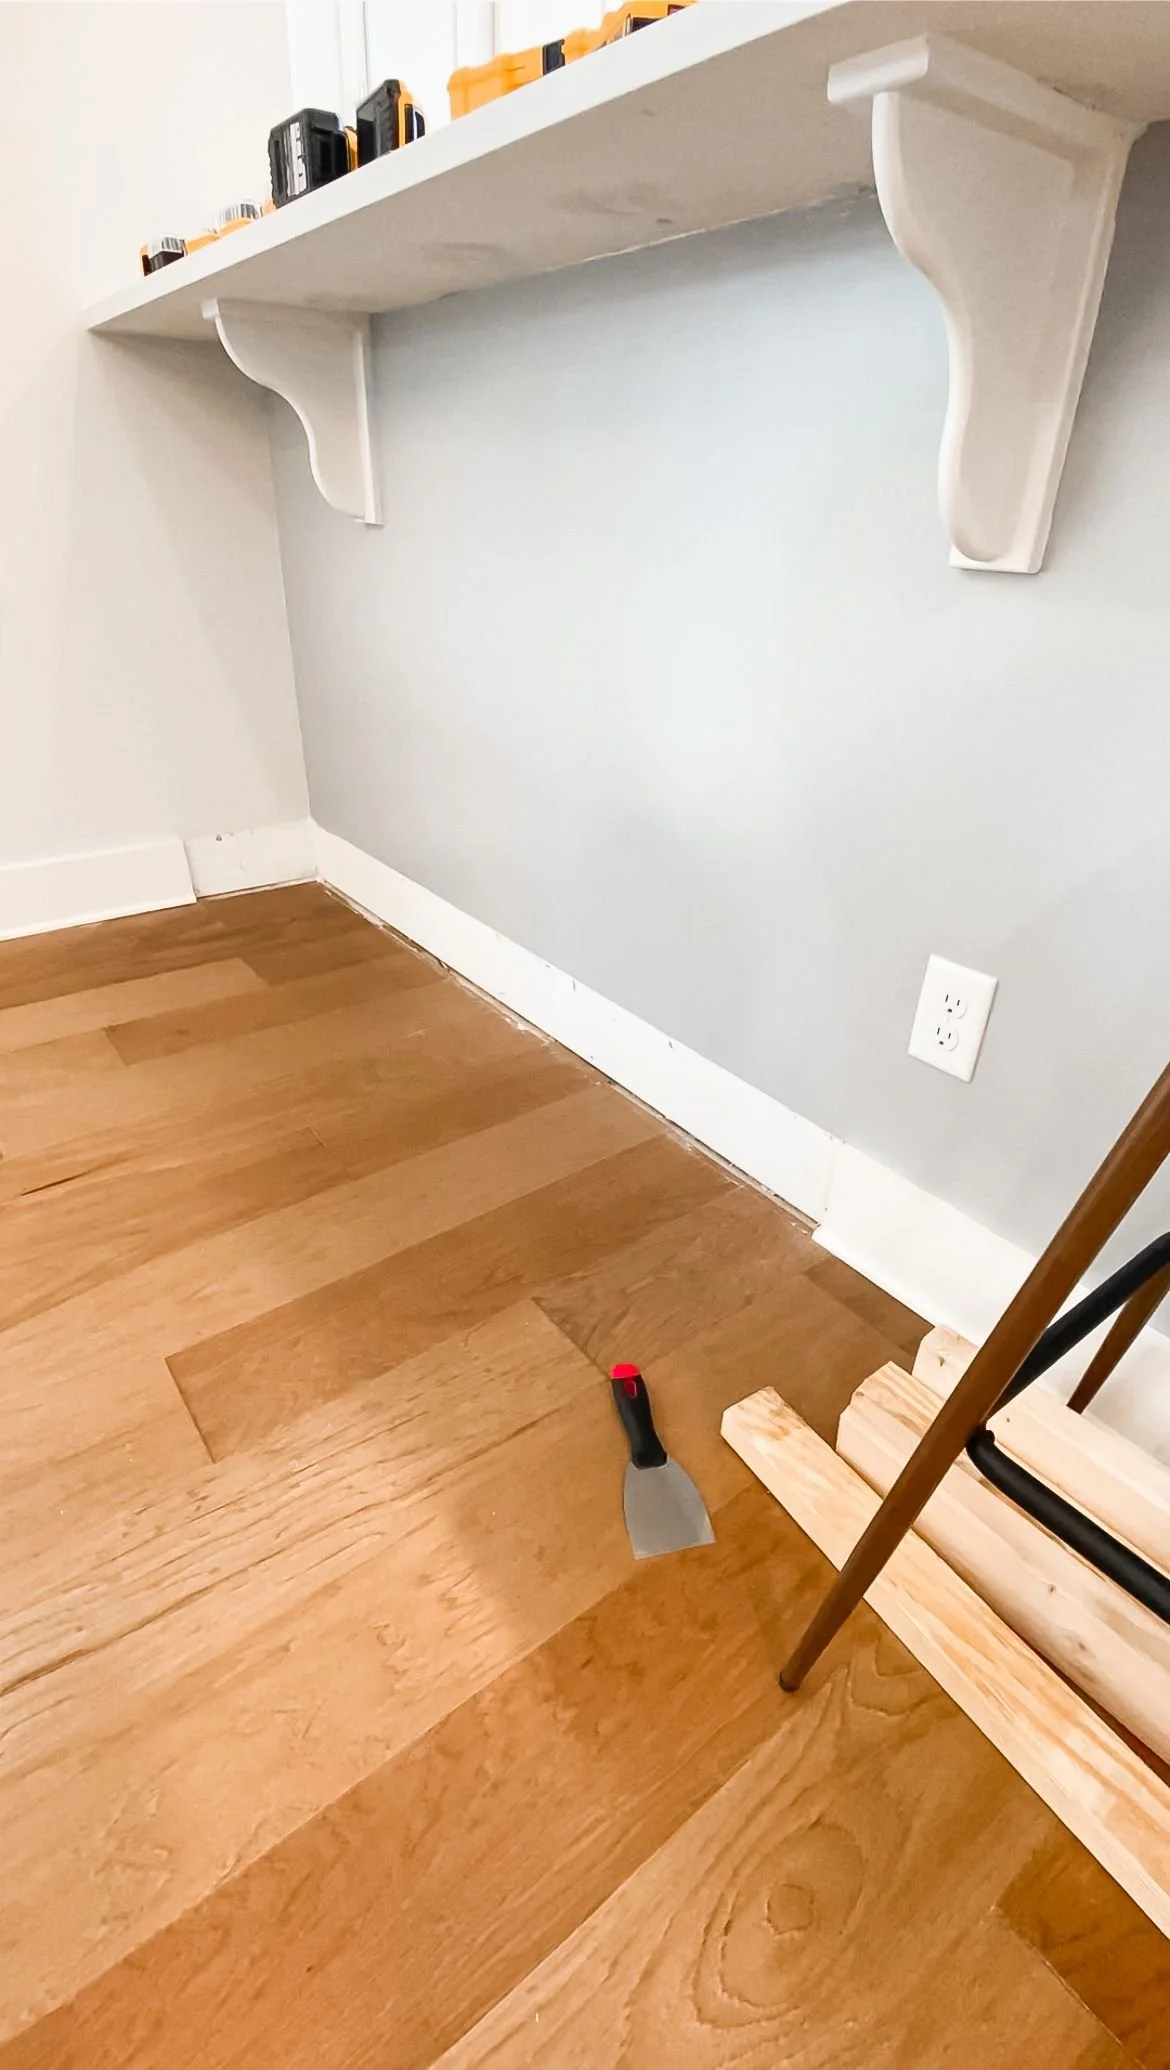
I took out the section of baseboard that was directly under the bar where I wanted these shelves to go. In hindsight, I should have just removed all of the baseboard and then put a new baseboard on later. I’ve said it before that I learn from each of my projects and this one is no exception! I built the base and then I screwed it into the studs in both the wall and the bar. The more studs that it is secured into, the more secure it will be. I made sure to build it up high enough that the baseboard would match up with the baseboard on the wall and the bottom of the shelf wouldn't go over the edge of the baseboard.


Under Bar Shelves | Assembly
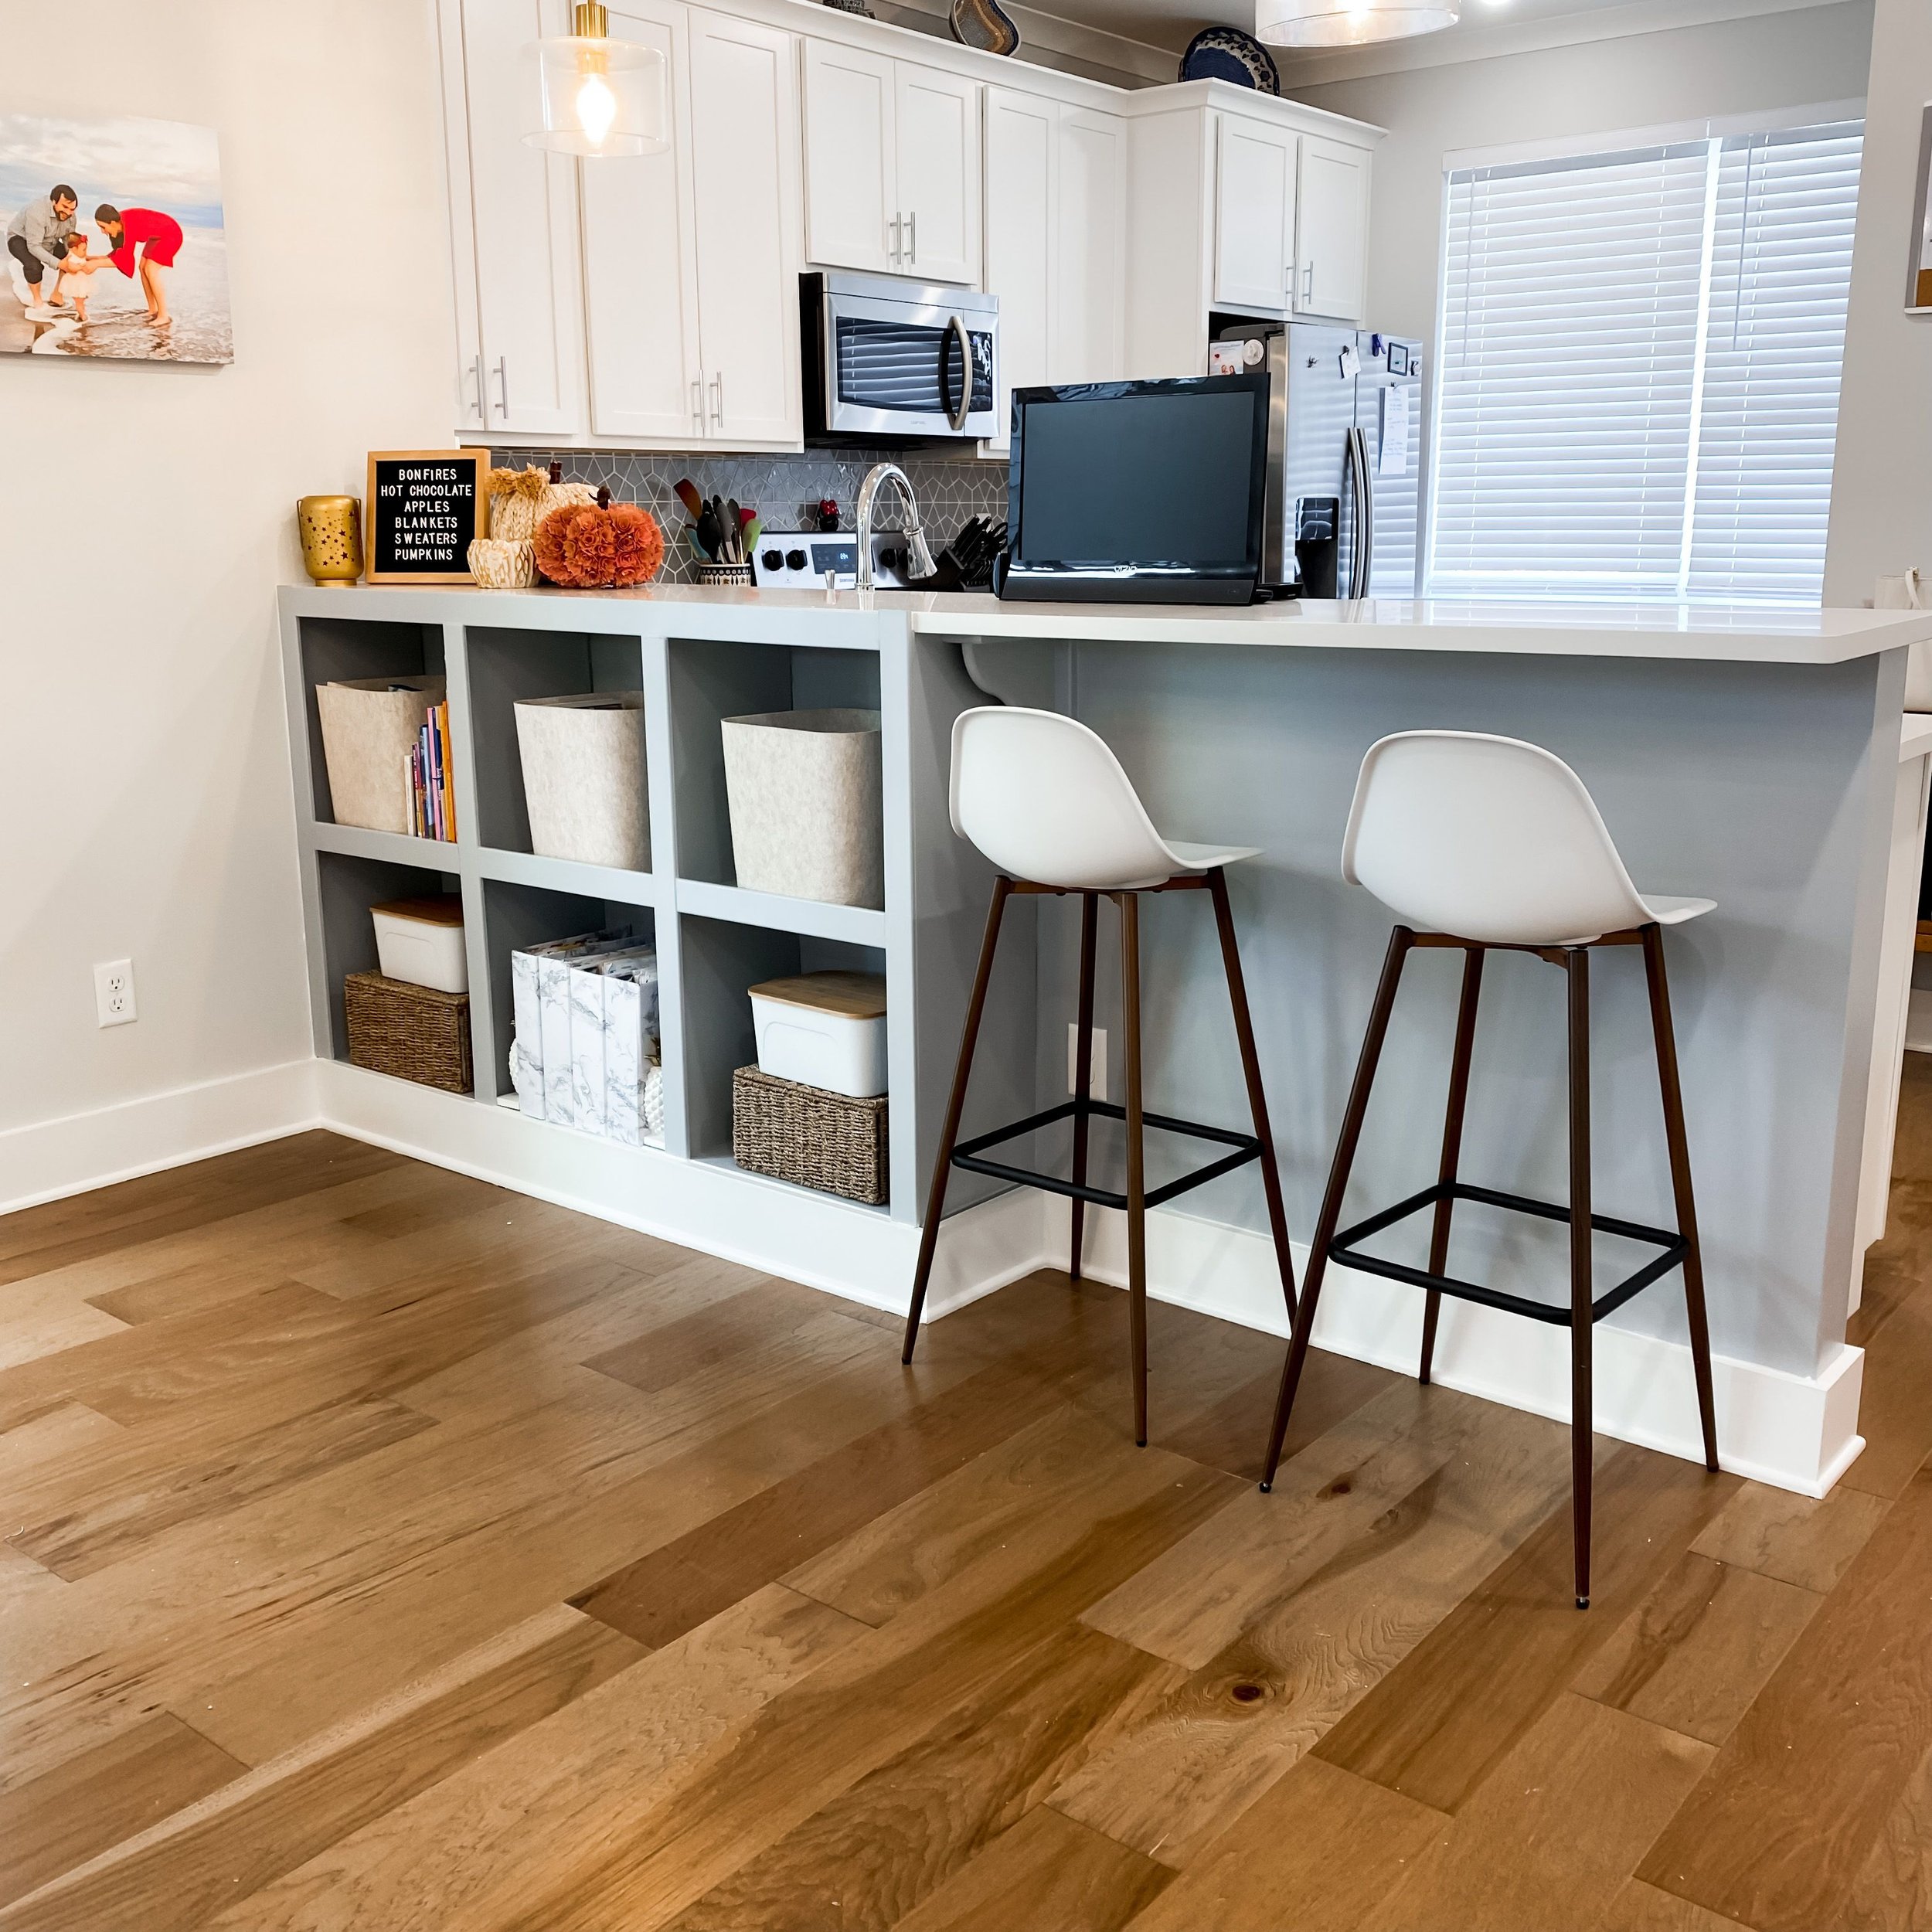
There are two white supports underneath the bar, and I just did not like how the white contrasted so drastically and made them stand out. I painted them to match the rest of the bar so that they blended in really nicely. This was a much more cost effective and faster option as opposed to pulling them out and figuring out new supports for the bar.
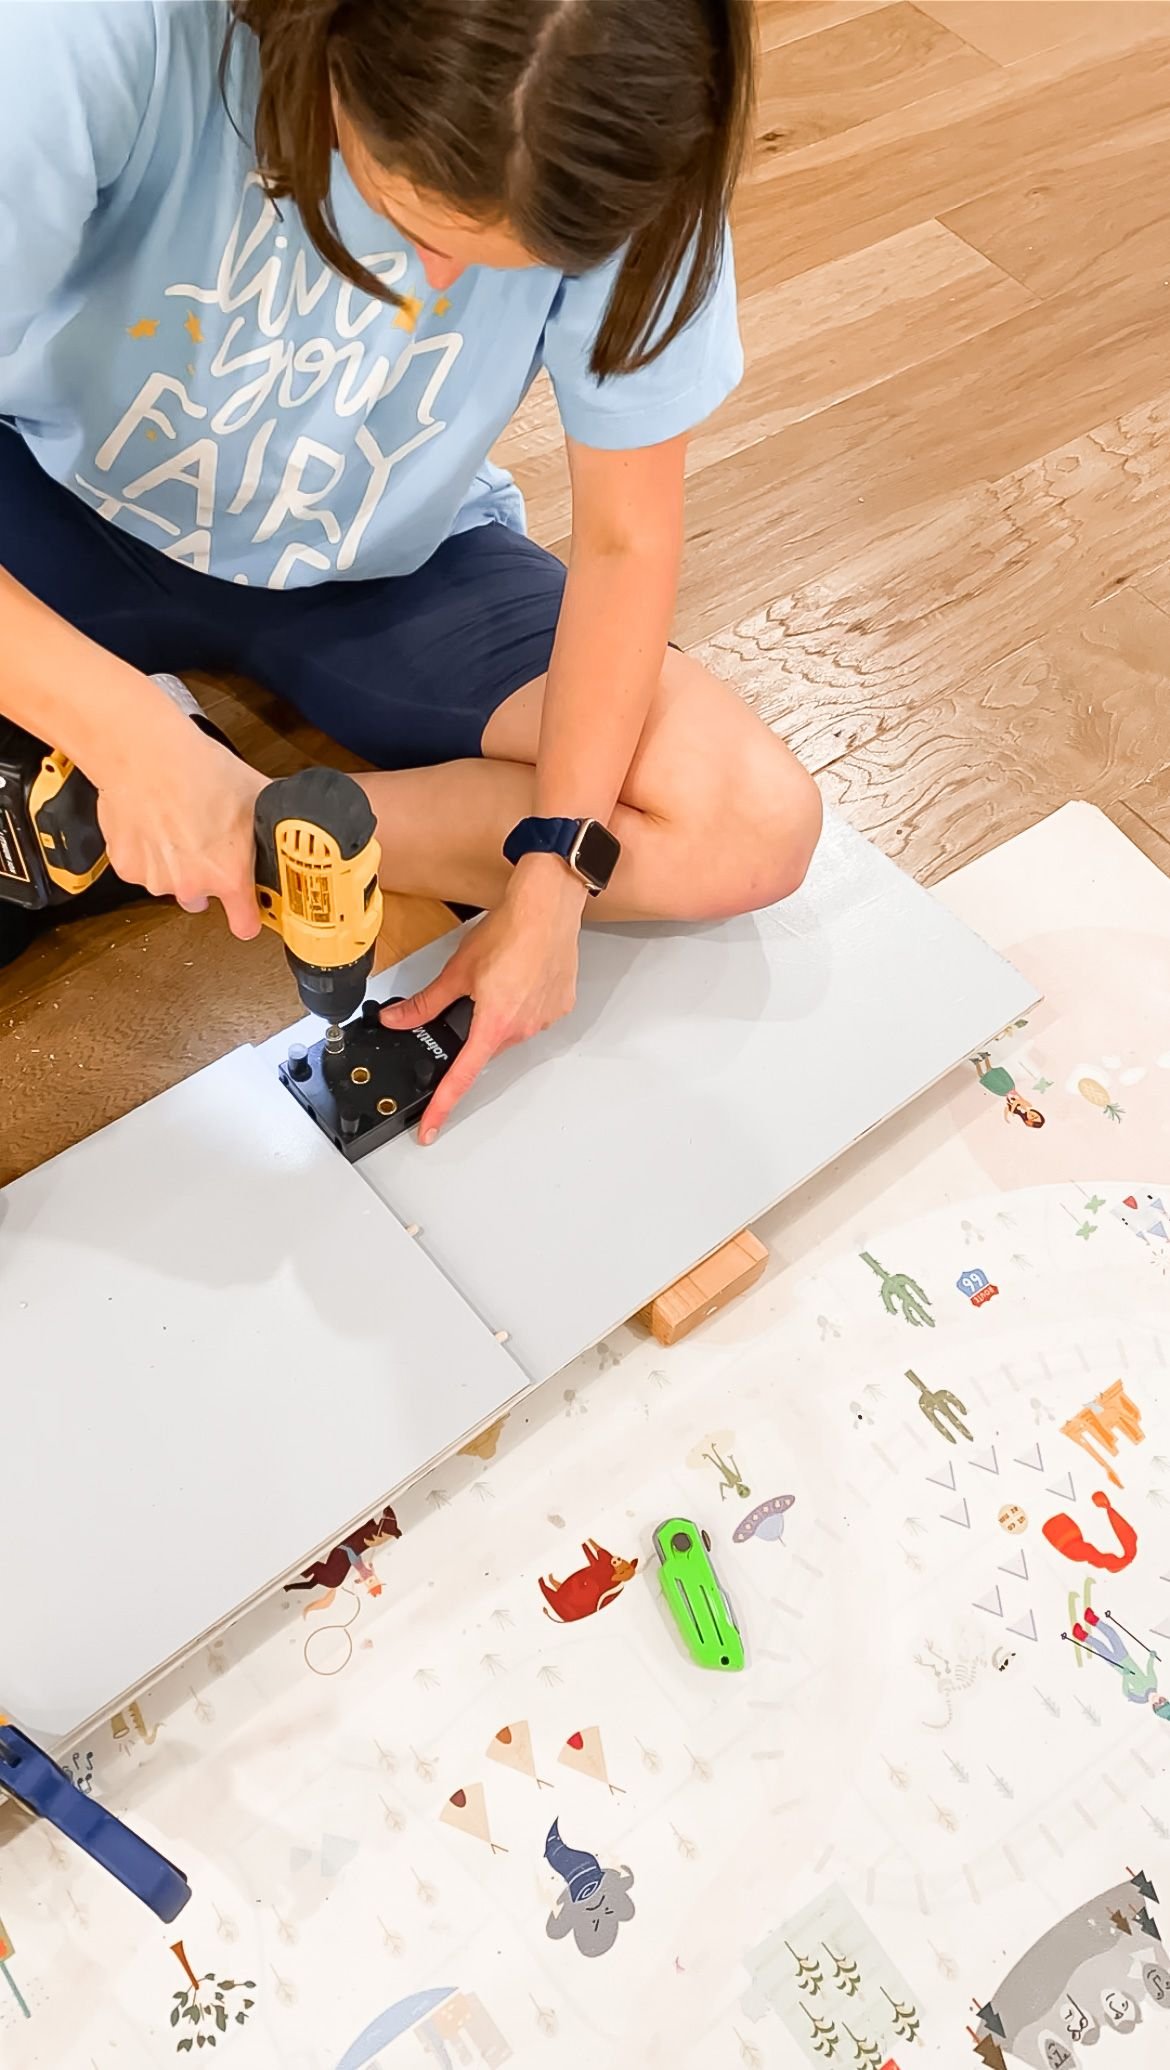
Then, I started working on assembly for the shelves. I drilled dowel holes to keep everything together (my favorite dowel hole jig can be found under DIY projects-tools-products). I took my time figuring out where I wanted everything to go, especially in relation to the supports. After a lot of configuring, I like where it all ended up.
I made sure to wood glue everything as soon as I got it where I wanted it and then secured the shelves to the base I built. I wood-filled everything and used caulk to fill in all of the gaps, because there were some decently sized gaps. Like I said before, every project teaches me something new! I made sure to use paintable caulk so that I could go back and paint over it.

Under Bar Shelves | Finish Work
I then went back in and started replacing the baseboard. This is where I realized that I should have just taken out the whole baseboard from underneath the bar and replaced it later. I figured out that when I cut out just the piece of baseboard that I was using, I didn’t cut it at an angle. This meant that the baseboard pieces wouldn’t meet up and be flush like a baseboard normally would be. So I cut the baseboards at the right angles so that everything looked good. When it was installed, I made sure to glue the quarter inch trim back on the bottom then caulked everything so it had the perfect finish at the end.

I wasn't sure when I originally I started this project what the trim was going to look like on the shelves. That's why I didn’t worry about painting the edges when I painted everything else. I decided to use 3 inch wide trim on all of it just to give the shelves a really good chunky look to them. I also included a piece for the top that would actually cover the bar so that everything looked cohesive. I just made sure the top of that trim piece lined up with the top of the counter so everything was flush. I used my brad nailer to add the rest of the trim pieces, making sure everything was level in every direction. Last, I went back and wood-filled and gave everything one more coat of paint.

Under Bar Shelves | Final Look
I absolutely love these functional and usable shelves that still leave space for two bar stools. The total cost for this project is $193.2. My personal cost was $84.57. You can find all of the products and tools I used below.

Under Bar Shelves | Shop
