
Lily Ann Cabinets Entertainment Center

I did receive product in exchange for this review. All opinions are my own!


I'm changing up the entire first floor of our house because we’re prepping for baby to come in March. The first step in this process is the family room. I’ve talked before about the lack of storage in this house so I knew I wanted to add as much as possible into our family room. I did a lot of research and finally decided on Lily Ann Cabinets. I worked with their designer and he provided me with a 3D design that I absolutely loved. I went with the Grey Shaker Elite cabinets and they are gorgeous! Once we finalized the design they shipped everything to me in less than a week. They do offer assembly, but this is me that we’re talking about, so I just assembled them myself.

Lily Ann Cabinets Entertainment Center | Cabinet Quality
Let’s first talk about the quality of these cabinets. Not only are these cabinets beautiful, but it’s obvious so much time and attention goes into each cabinet, even through the packaging. Each cabinet comes in its own box with everything you need, including hardware, doors, shelves, face framing and instructions. Not having to search through multiple boxes makes assembly a breeze! One of the most frustrating things with most furniture assembly is not having the pieces labeled nicely. Not with Lily Ann Cabinets. It was very clearly labeled which piece was which and how to they all came together. Now, time for assembly.


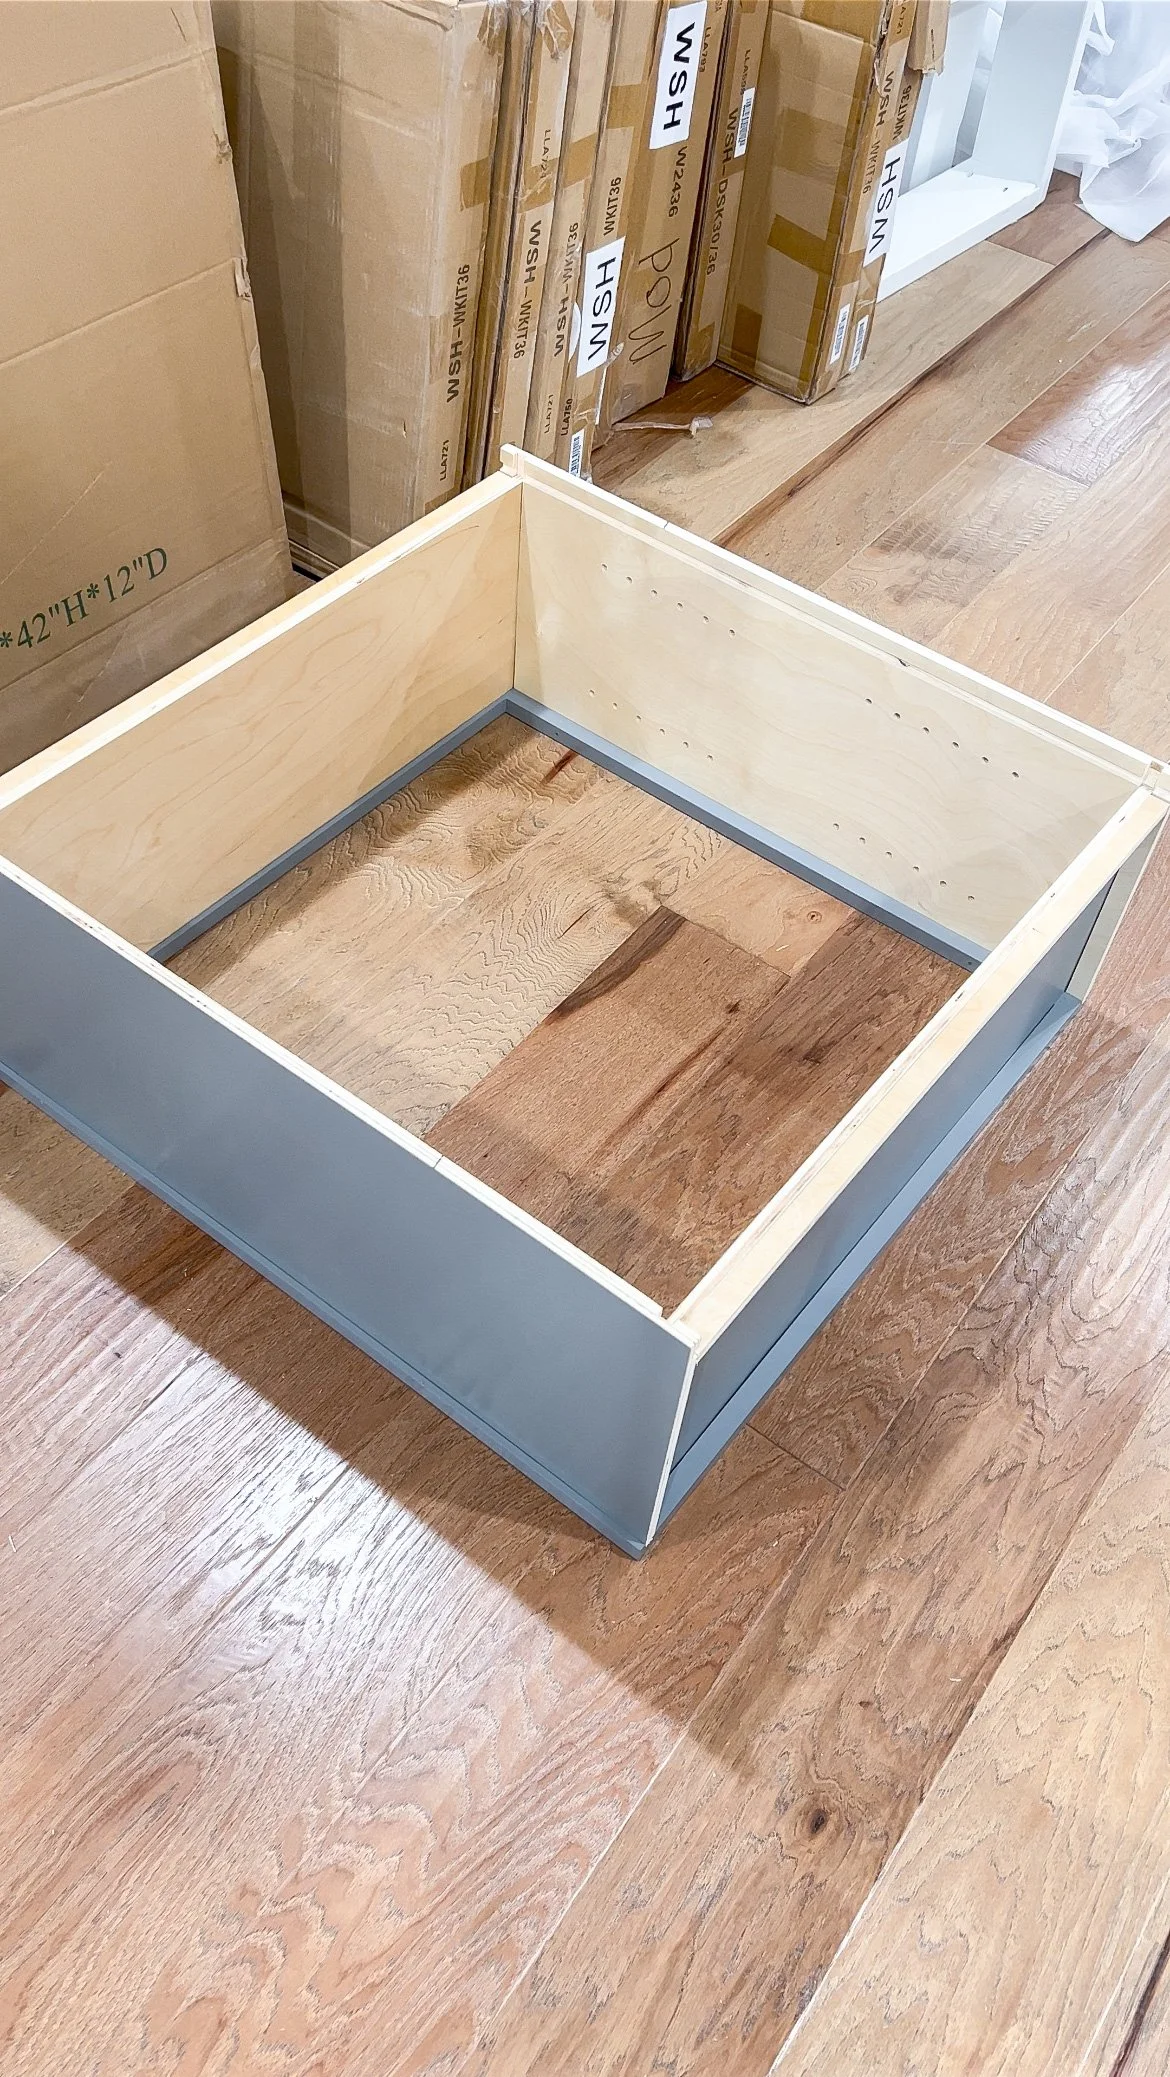
Lily Ann Cabinets Entertainment Center | Assembly
Putting these cabinets together is super easy. The face frame has two sets of notches. One of them is for the sidepieces, where you're going to connect the shelves. Each side has dovetail joints that make it so simple to just slide them right in once I added a little wood glue. For the top and bottom pieces, I first made sure everything was flush. This step is really crucial before starting the gluing process because it will determine how all of the other pieces fit together. After double-checking that, I simply, once again, added some wood glue to make sure everything stayed in place and then slid the top and bottoms into the notches. I really am just blown away with how cleanly everything comes together! Now, onto the hardware.
There is a lot of stuff that comes in the hardware box including all of the hardware for the doors. I’m going to save door installation as one of my last steps because I don’t want the doors flapping around while I’m installing the cabinets. With that, I grabbed the screws for the backs of the cabinets only. It is really simple to quickly screw in those screws and I now have a complete and very sturdy cabinet. 1 down, 9 to go!
Lily Ann Cabinets Entertainment Center | Install
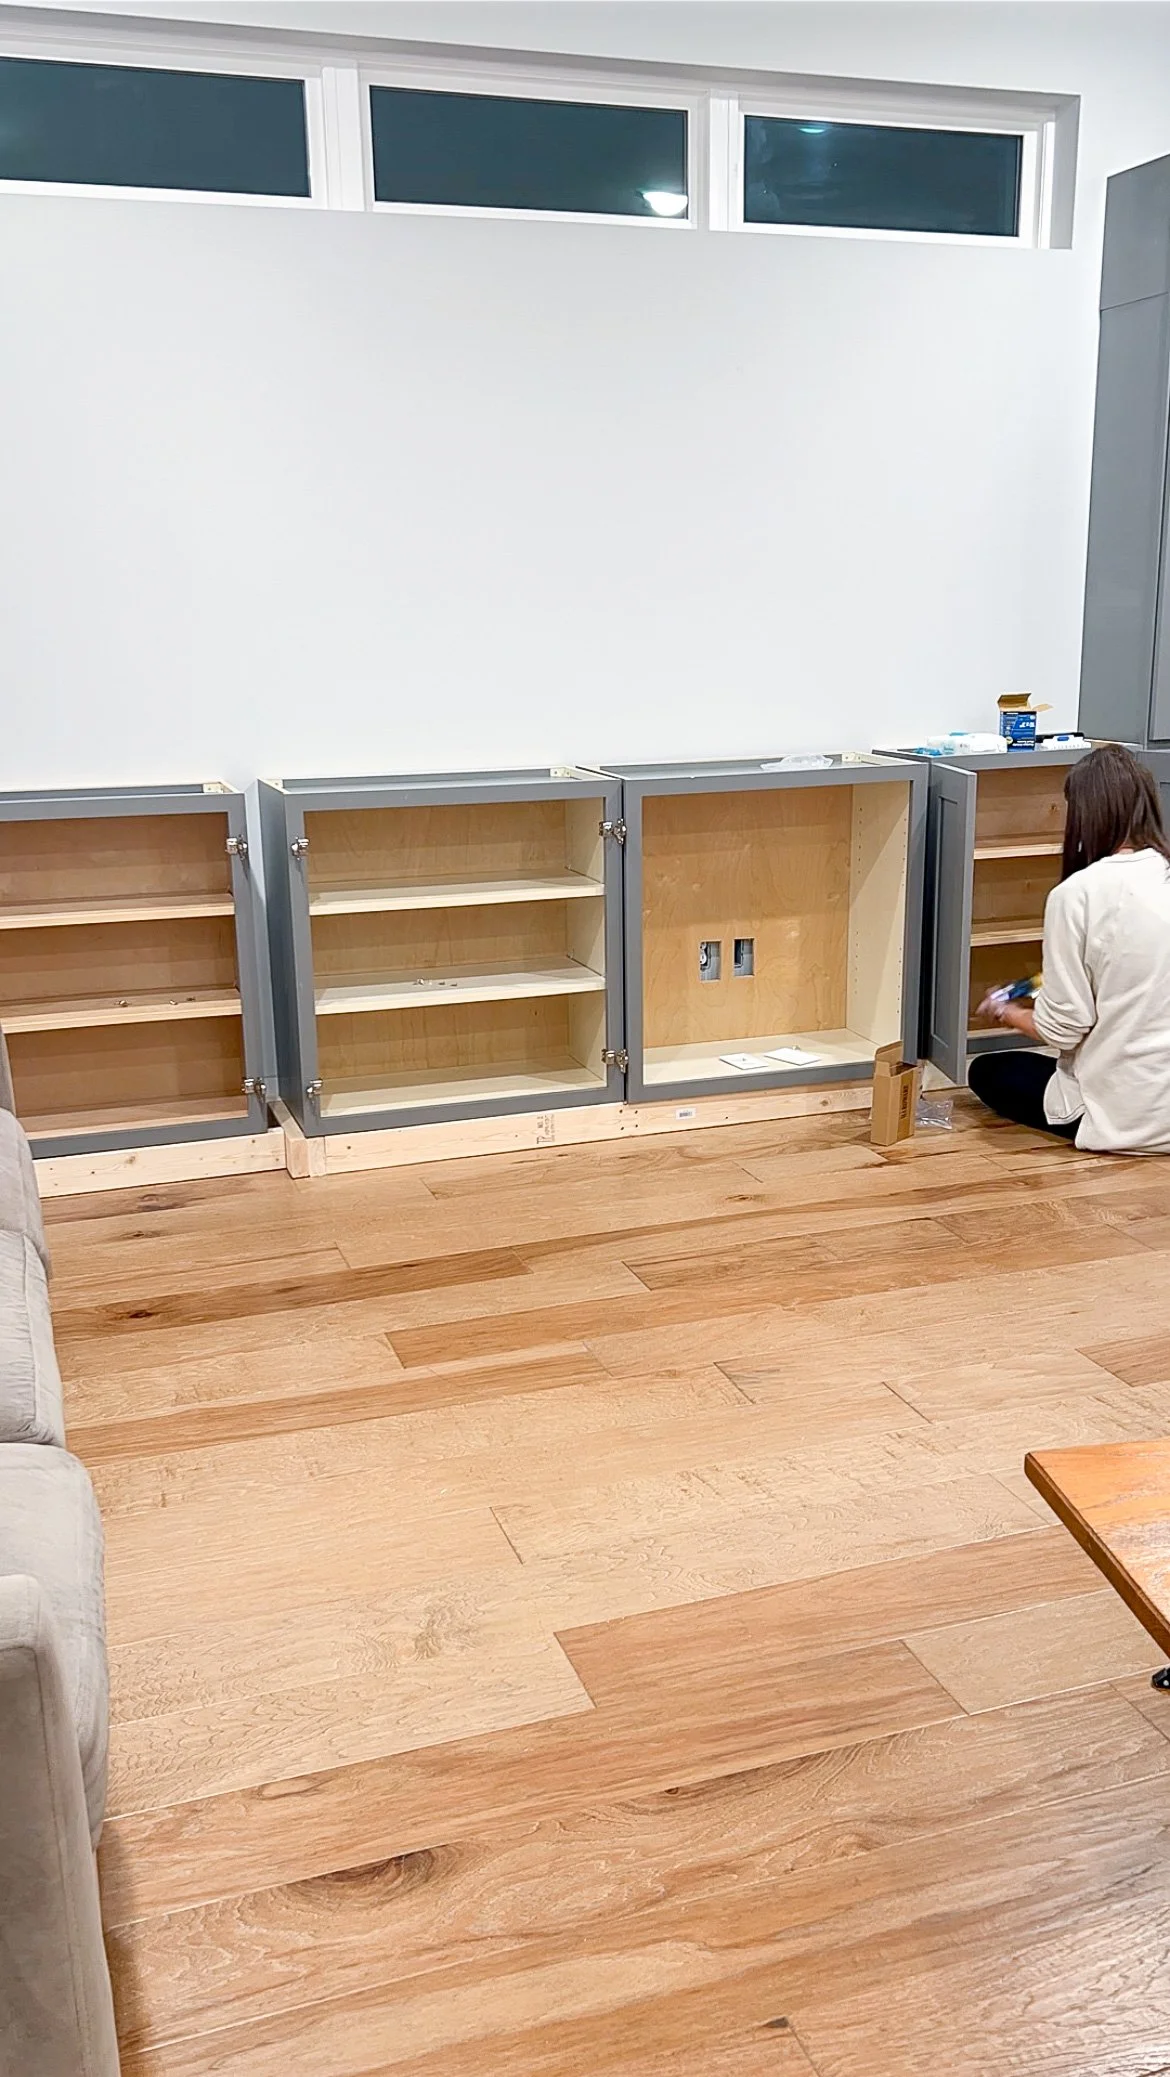
After assembling all 10 cabinets, I needed to get our family room all ready for the cabinets to be put in. I took out the baseboards and cleaned and prepped the area. Then, I moved onto building the base. I used 2x4s and made sure that there were 2 supports everywhere that a cabinet would rest. I then bumped the center base section out a little bit because the center cabinets are 15 inches deep and the rest of the cabinets are only 12 inches deep. For measuring that depth difference, I put a scrap piece of 2x4 on the walls so that the trim on the edges has something to attach to. I then started attaching the cabinets. I made sure I secured each cabinet to a wall stud so I was confident they wouldn’t go anywhere. I did have two cabinets that needed cutouts on the back of them. One was for plumbing access and the other one was for two outlets. We desperately need those outlets because that is where the TV is going to be plugged. So after quickly drilling out those, I added the shelves. Each shelf has holes drilled and clips that you rest the shelf on so that they're secure.
Next was door install. I’ve talked before about how much I despise doors. I’m not sure why, but I can never get them right. When I build them they are a disaster and even when I install them, I always seem to mess something up! So I was definitely dreading having to install these doors. However, I was so pleasantly surprised. These were so simple to install and I had zero problems, which is a huge win in my book!


Lily Ann Cabinets Entertainment Center | Trim
When installing the trim, I used liquid nails to attach the provided panels to the visible sides of the cabinets. Since there are two visible sides, these panels make the cabinets look so much more finished and professional. Then, I installed the kick plate (again, this came with the cabinets!). I like this better than just adding baseboard because it makes everything look built in. I used liquid nails so I wouldn't have to add holes that would need to be filled, color matched and painted. Next, I added the trim. There are two small sections between the 12 inch deep cabinets and the 15 inch deep cabinets that needed trim and then pieces on each end. Again, I used liquid nails and clamps for this to keep everything in place while it dried. Now it's time to move on and do the wood tabletop.


Lily Ann Cabinets Entertainment Center | Tabletop
I got 1x5 inch white oak boards from Home Depot. I wanted this part of the entertainment center to contrast nicely with the color of the cabinets, which is why I went with the white oak. I cut each piece down, not a whole lot because it's a really long tabletop, and then used wood glue and clamps to join the boards together. I let the glue dry overnight, and then placed it on top of the cabinets. I noticed that I still needed to do some cutting, so I marked exactly where the cabinets touched the wood, and then I measured how far it hung over on the 15 inch deep cabinets because I really liked where that lined up. I then pulled the tabletop onto the floor, measured out where exactly I would need to cut, and used both my jigsaw and my circular saw so I would get perfectly straight cuts.
Next, I gave the whole tabletop a good sanding first with 180 and then with 220 grit sandpaper, wiped it down to get everything off of it, and brought it inside. I then used 2 coats of my favorite triple thick coat polyurethane to seal the tabletop. I only used a clear coat because I really liked the tone the wood already was. I realized that I didn’t drill holes for the TV cords, which I definitely should have done before I put on the polyurethane, but I forgot. So, I drilled the holes and then sanded and touched up those areas with more of the polyurethane.


Lily Ann Cabinets Entertainment Center| Finish Work
I added the crown molding to both sides of the cabinets. I used my brad nailer to secure the crown molding from the opposite side of the cabinet so that there weren't any visible holes. Lastly I installed the cabinet pulls. To figure out where I wanted to place the cabinet pulls, I took the length of the door, subtracted the length of the cabinet pull, and divided that number in half. That gave me how far from the top and bottom of the door each cabinet pull should be. I used 8 3/4 inch pulls for the larger cabinets and 4 inch pulls for the smaller cabinets. Even though it took me a minute to get them all installed, I finished and with that, the project was done. I am absolutely in love with how everything turned out.
I cannot rave enough about how amazing it was working with Lily Ann cabinets. From design to customer service to install to quality to finished look, it has been fabulous! They have generously provided a code that will get you 5% off of your next project with them too. Use code “Emily” at checkout.


