
How to Repurpose Your Pumpkins This Year
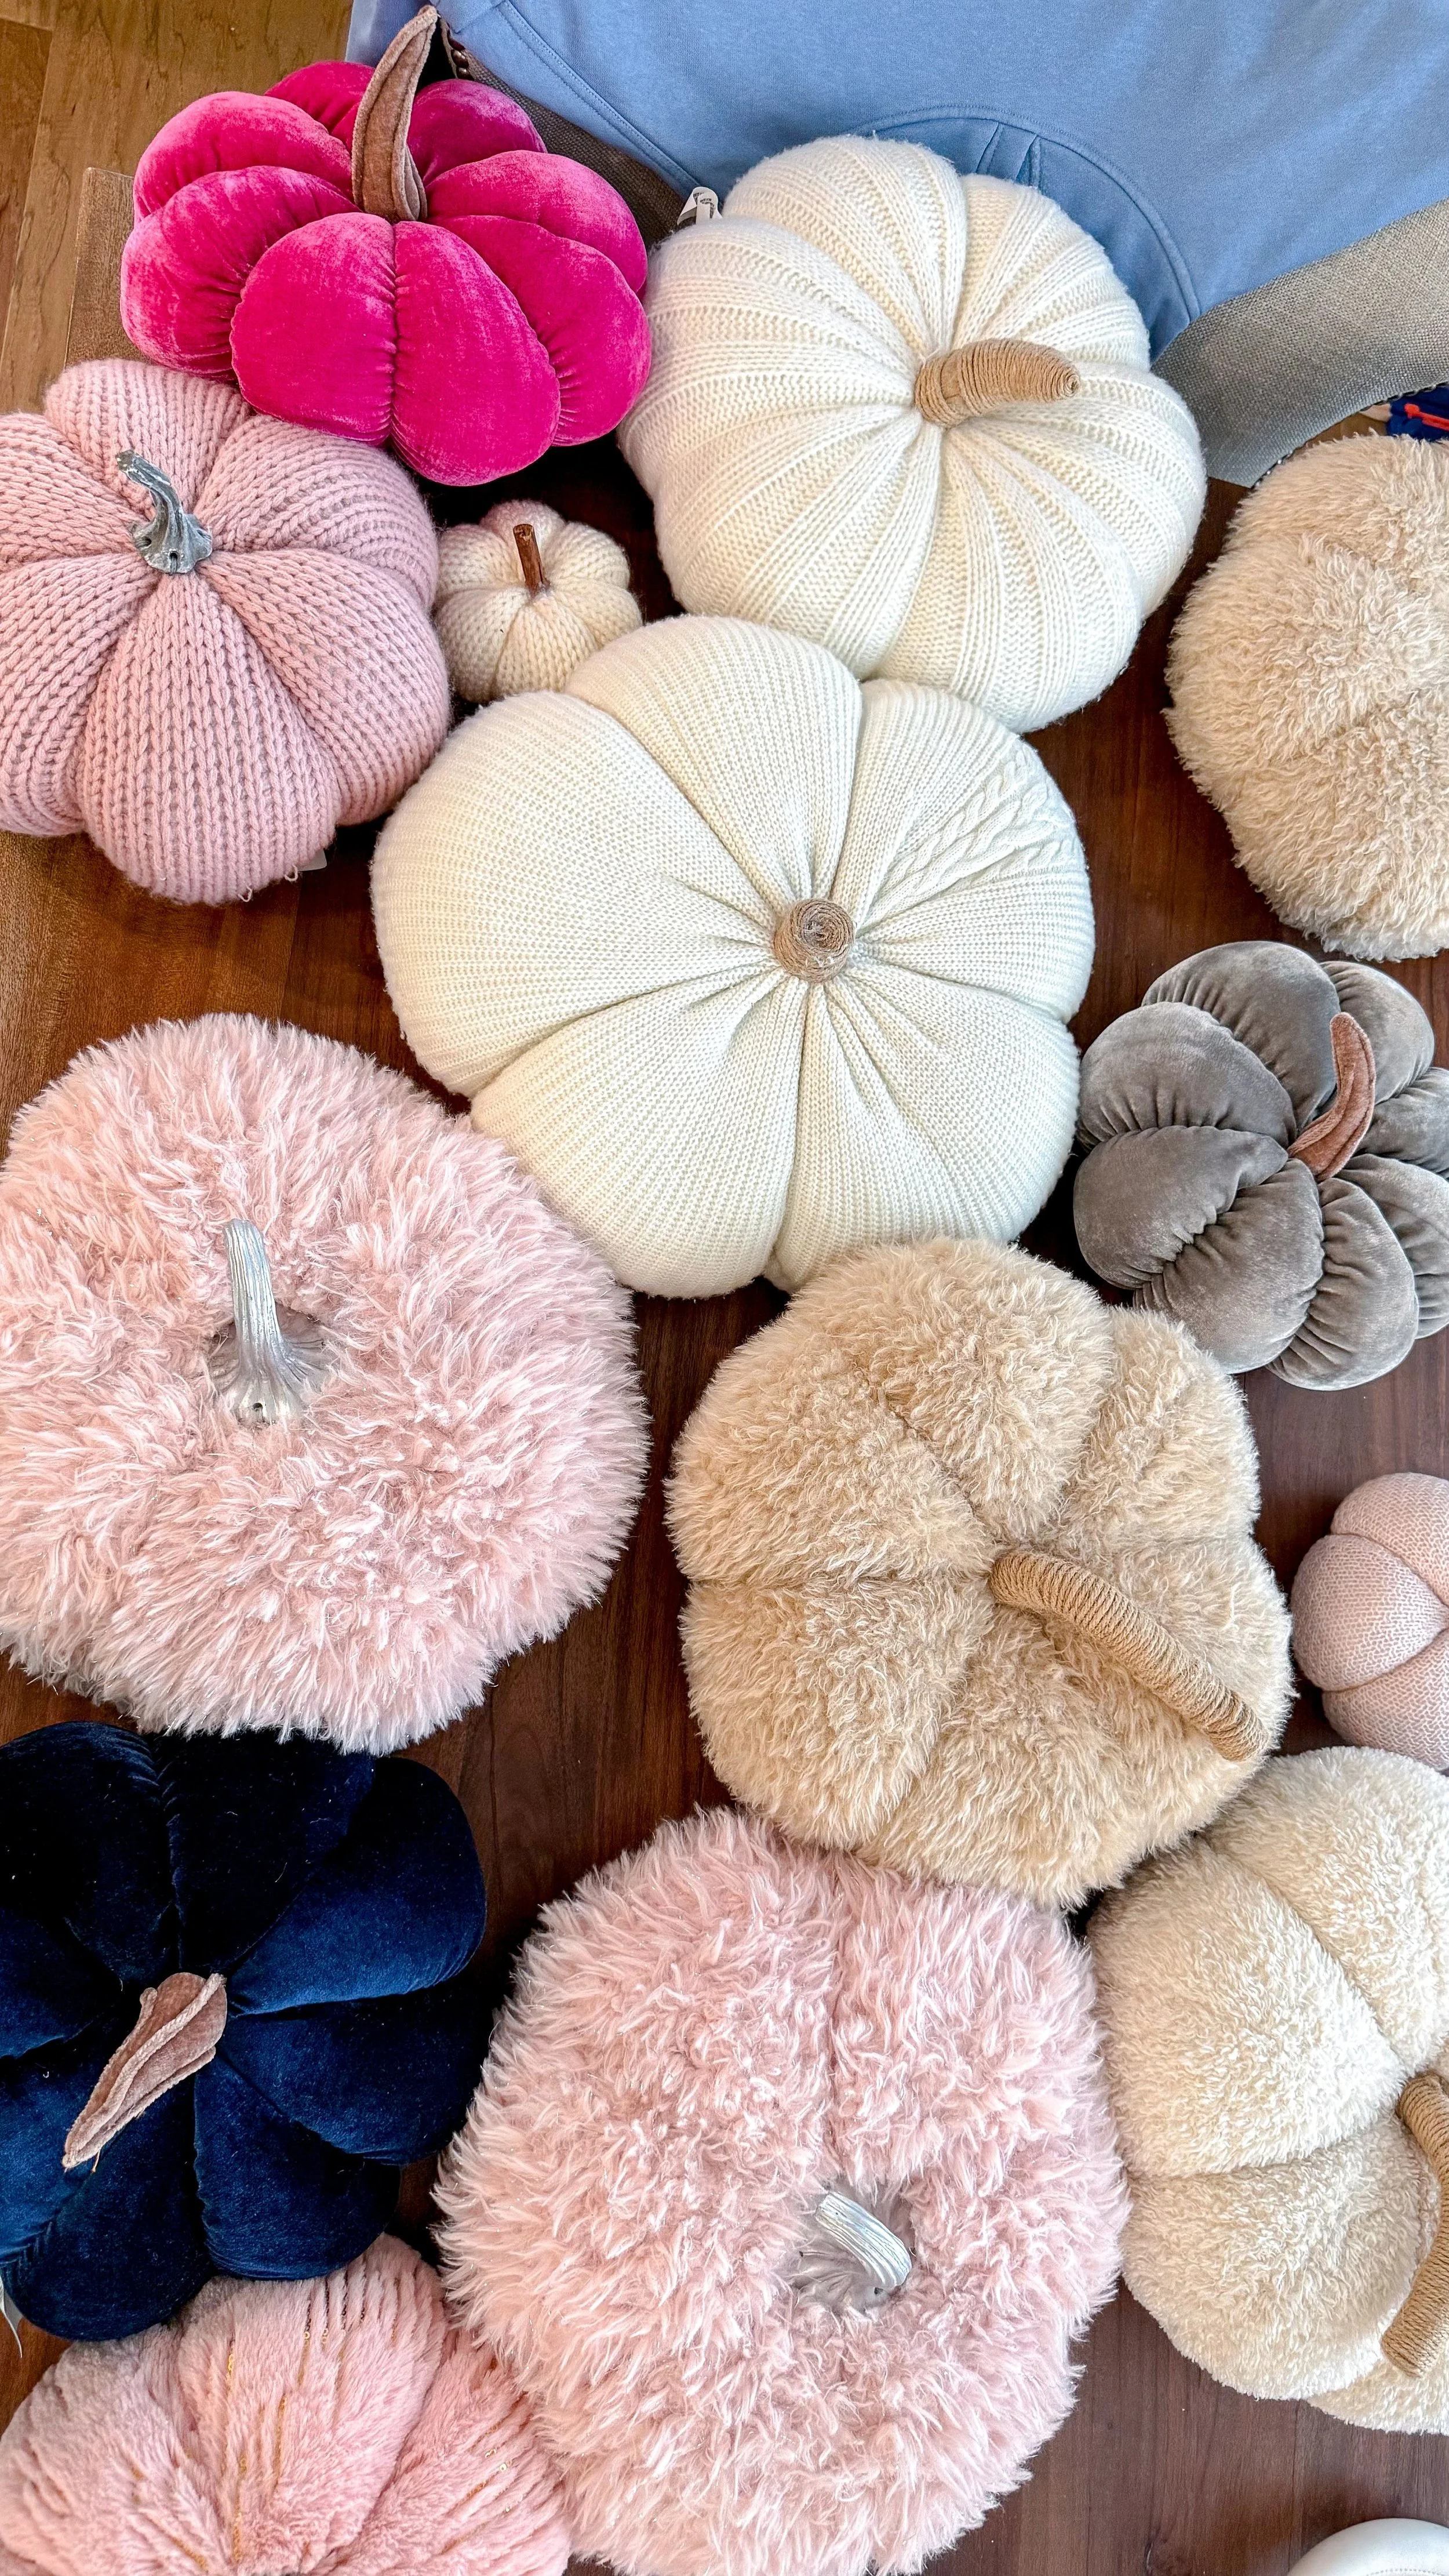
It's October, which means it's time to decorate for fall/Halloween! I love fall decorating and I probably love pumpkin pillows probably best of all. My husband says the pumpkins seem to multiply every year, but this year I haven't bought a single new pumpkin. I may have gotten a few other fall decorations but no new pumpkins, so he should be proud! Normally during this time of year, I have a bunch of fall-themed crafts or projects I want to do. I've done pumpkin wreaths, tile mat designs, reconstructed my mom's concrete pumpkin tower and more. This year, though, since my brain is so focused on my son's bedroom build, I haven't felt the fall craft energy like I normally do. However, my mom and I were recently out running errands and we came across two different decorations I absolutely loved. I knew I could recreate them at home and wanted to share them with you!
How to Repurpose Your Pumpkins This Year | Pumpkin Stack
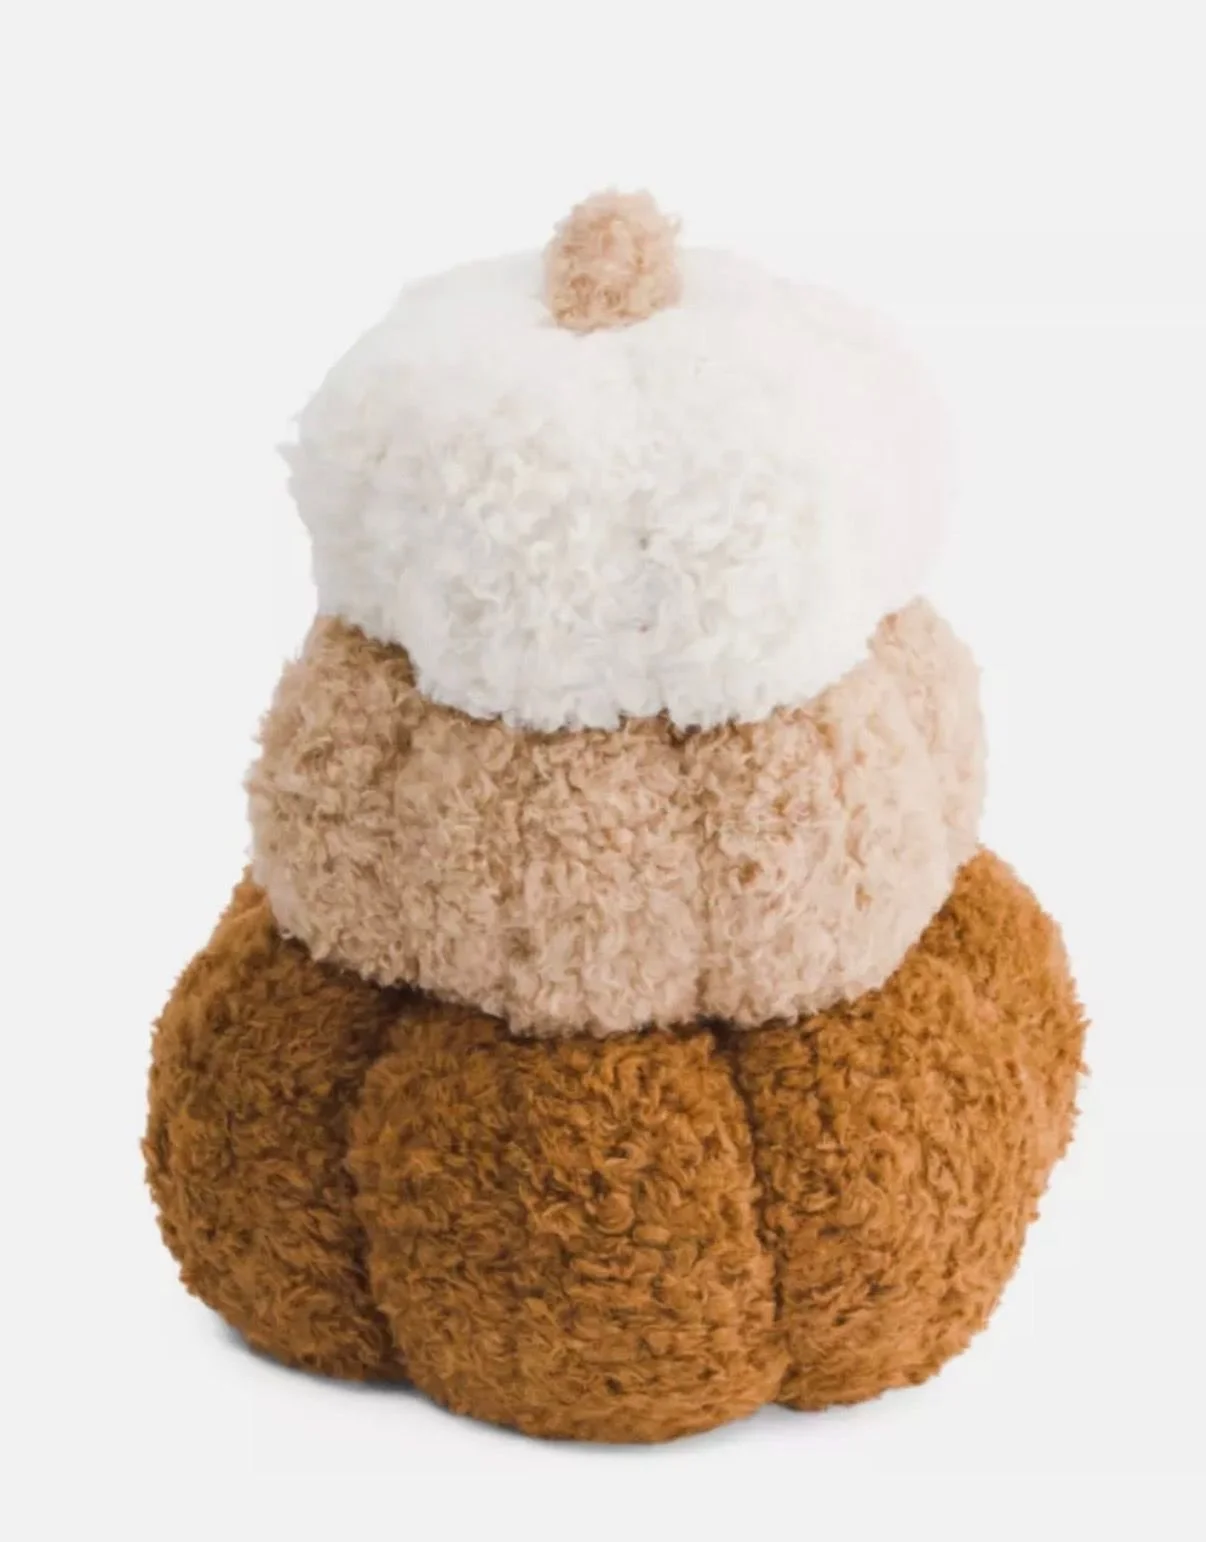
The first project is a cute plush pumpkin stack. I found a similar one online to show you the vision. I decided on my stack to do three pink pumpkins I already had. I used two for the base and cut off the stems so they could easily stack. After the stems were cut, it was time to start attaching the pumpkins to each other. It was easiest to just sew them together. I figured this way if I want to use the pumpkins again next year I can just snip the thread and they will still be intact. If you want to use hot glue that would work too, though. It just comes down to preference.

I did four sets of stitches around each pumpkin so it was secure on all sides. I made sure it was nice and tight and then tied it off. I repeated this for the top pumpkin tier. This one was a littler trickier because it's a knit pumpkin which means a wider weave in the fabric. I had to make sure I wasn't slipping the thread through the fabric at all. Once the three pumpkins were attached to each other, I debated using one of the original stems from the bottom pumpkins on the top, but decided since the top pumpkin is kind of tiny, it would look funny. I loved how it turned out. it's really cute and it was a nice way to use some of our pumpkins and reduce all of the many pumpkins we have in the house.
How to Repurpose Your Pumpkins This Year | Flower Pumpkins
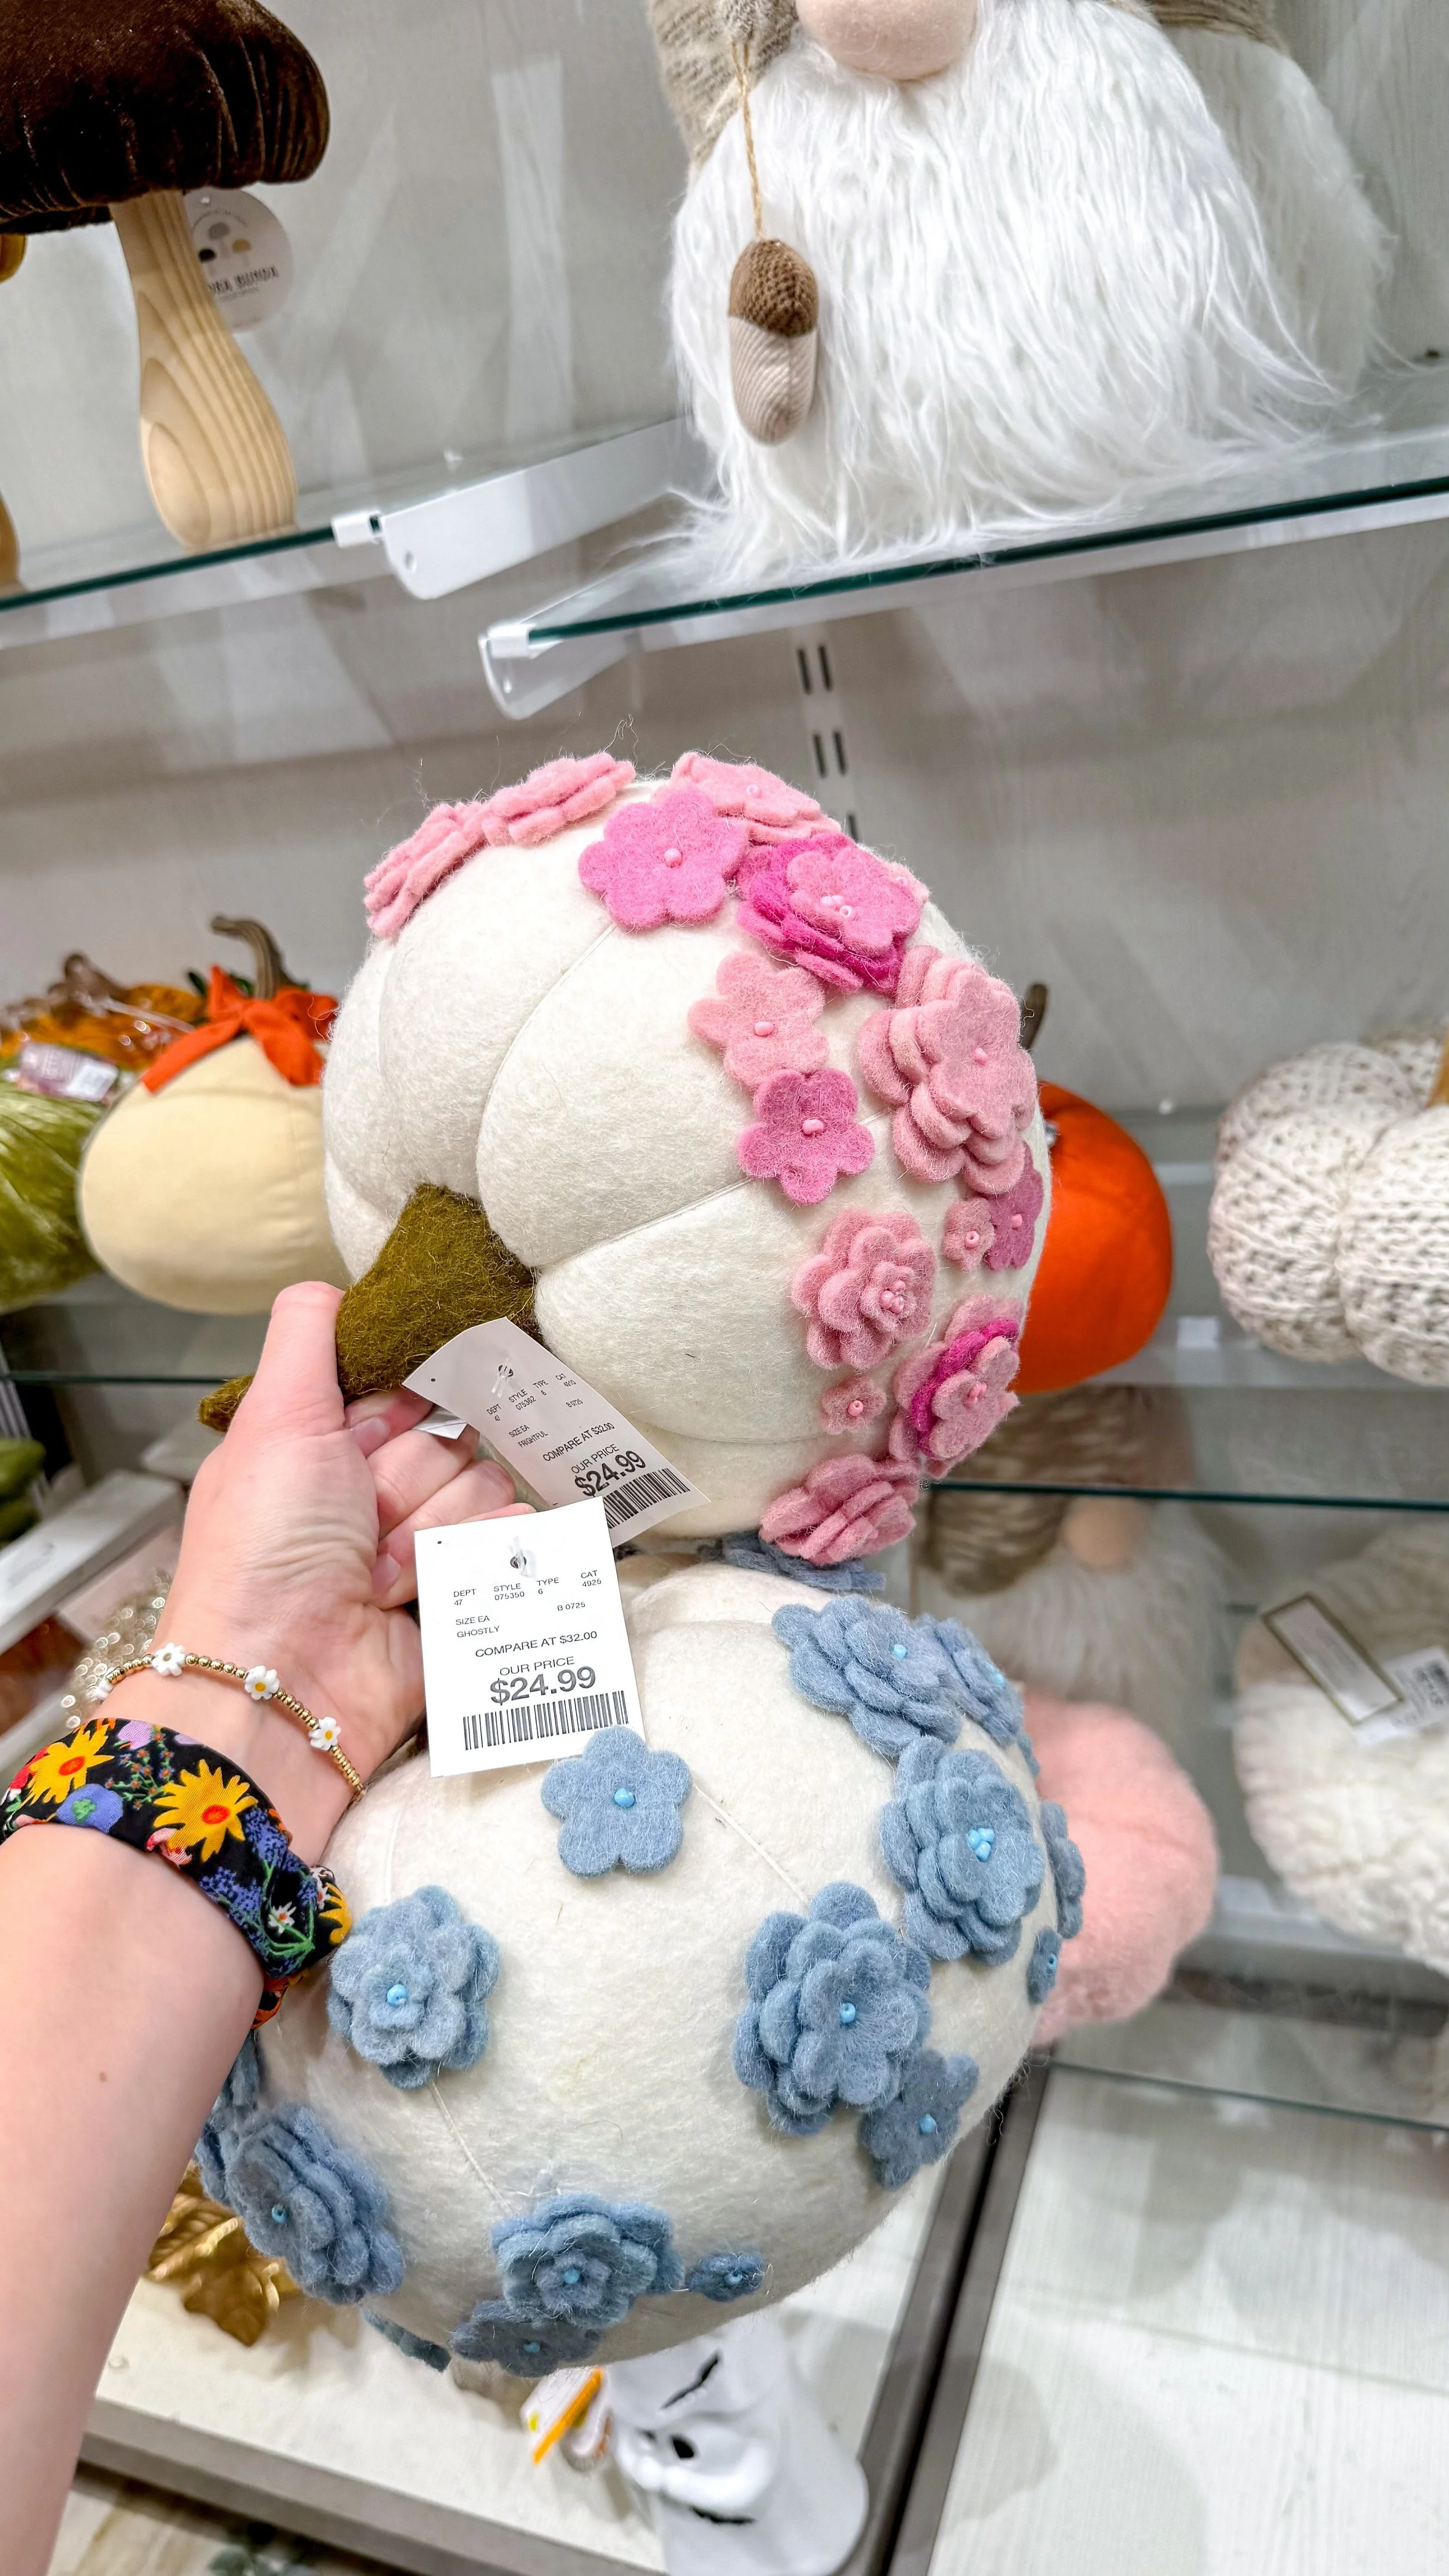
For the second project, I added felt flowers onto pumpkins. I got the inspiration from a set of pumpkins my mom and I found at HomeGoods and absolutely loved. I don't have felt pumpkins already, but I do have a lot of plush pumpkins. I used two I already have duplicates of. The first step is cutting the felt flowers and the easiest way for me to get a lot of flowers cut at once is to use my Cricut to do this. I spent a lot of time trying to figure out the best way to do this and finally came up with a plan that involved freezer paper. I know that sounds bizarre, but it works. I got freezer paper, cut it out to the same size as the felt, and then adhered the felt to the shiny side of the freezer paper using my heat press at 400 degrees for 30 seconds three times. Once the felt was adhered to the freezer paper, I put it on the fabric cutting mat and roll it on with a rolling pin. Again, it might sound weird, but it really works.
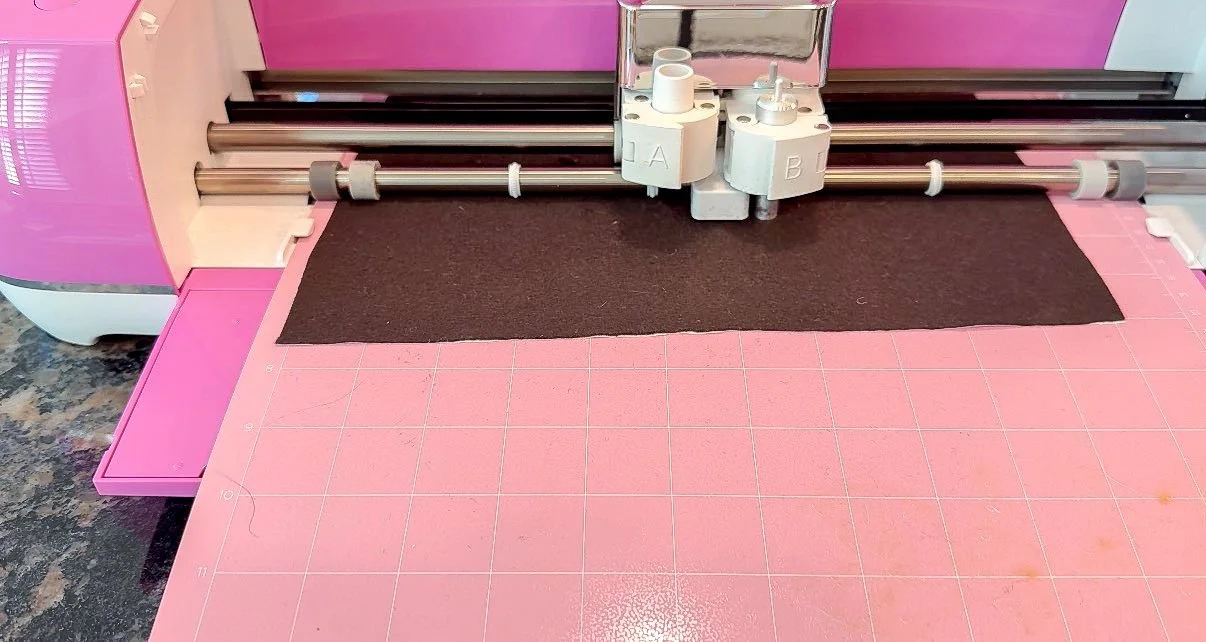
In order for it to actually cut, I did do a custom setting. In the Cricut application, you choose the size and make it on the mat. Once it connected, I went to "browse all materials" and scrolled down to "add new material" and named it "felt freezer paper" so it was easy to find in the future. I turned up the setting all the way up to 350, had it cut five times and then used a fine point blade. I was then able to go and select that material as what I'm using for this cut on the Cricut. I also changed the pressure to "cut more" because that just helps it cut through both the paper and the felt. I did have to babysit it a little bit because there were some times when the felt would get caught in the blade. I had to make sure it didn't pull too much in order to keep it from catching or cutting incorrectly, but it did fairly well. I wanted to use up felt I already had so I had flowers in the pink and brown families. I printed the flowers in different sizes so they could stack together. When they were done cutting, I peeled off the excess and took the felt flowers off.
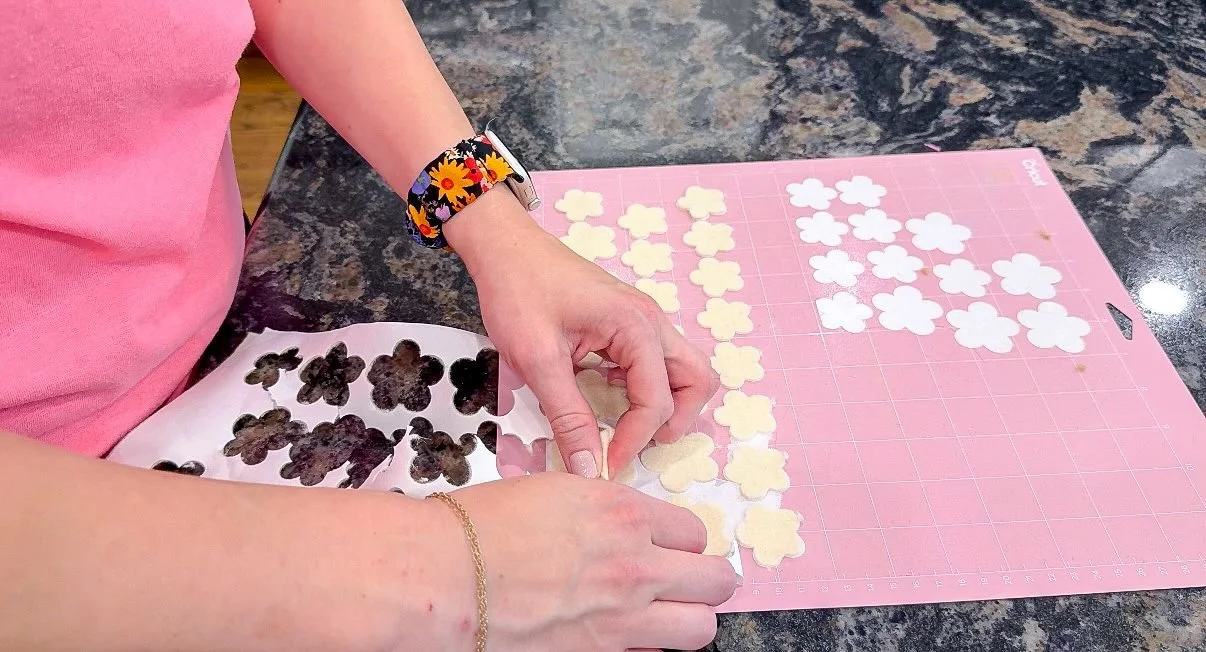
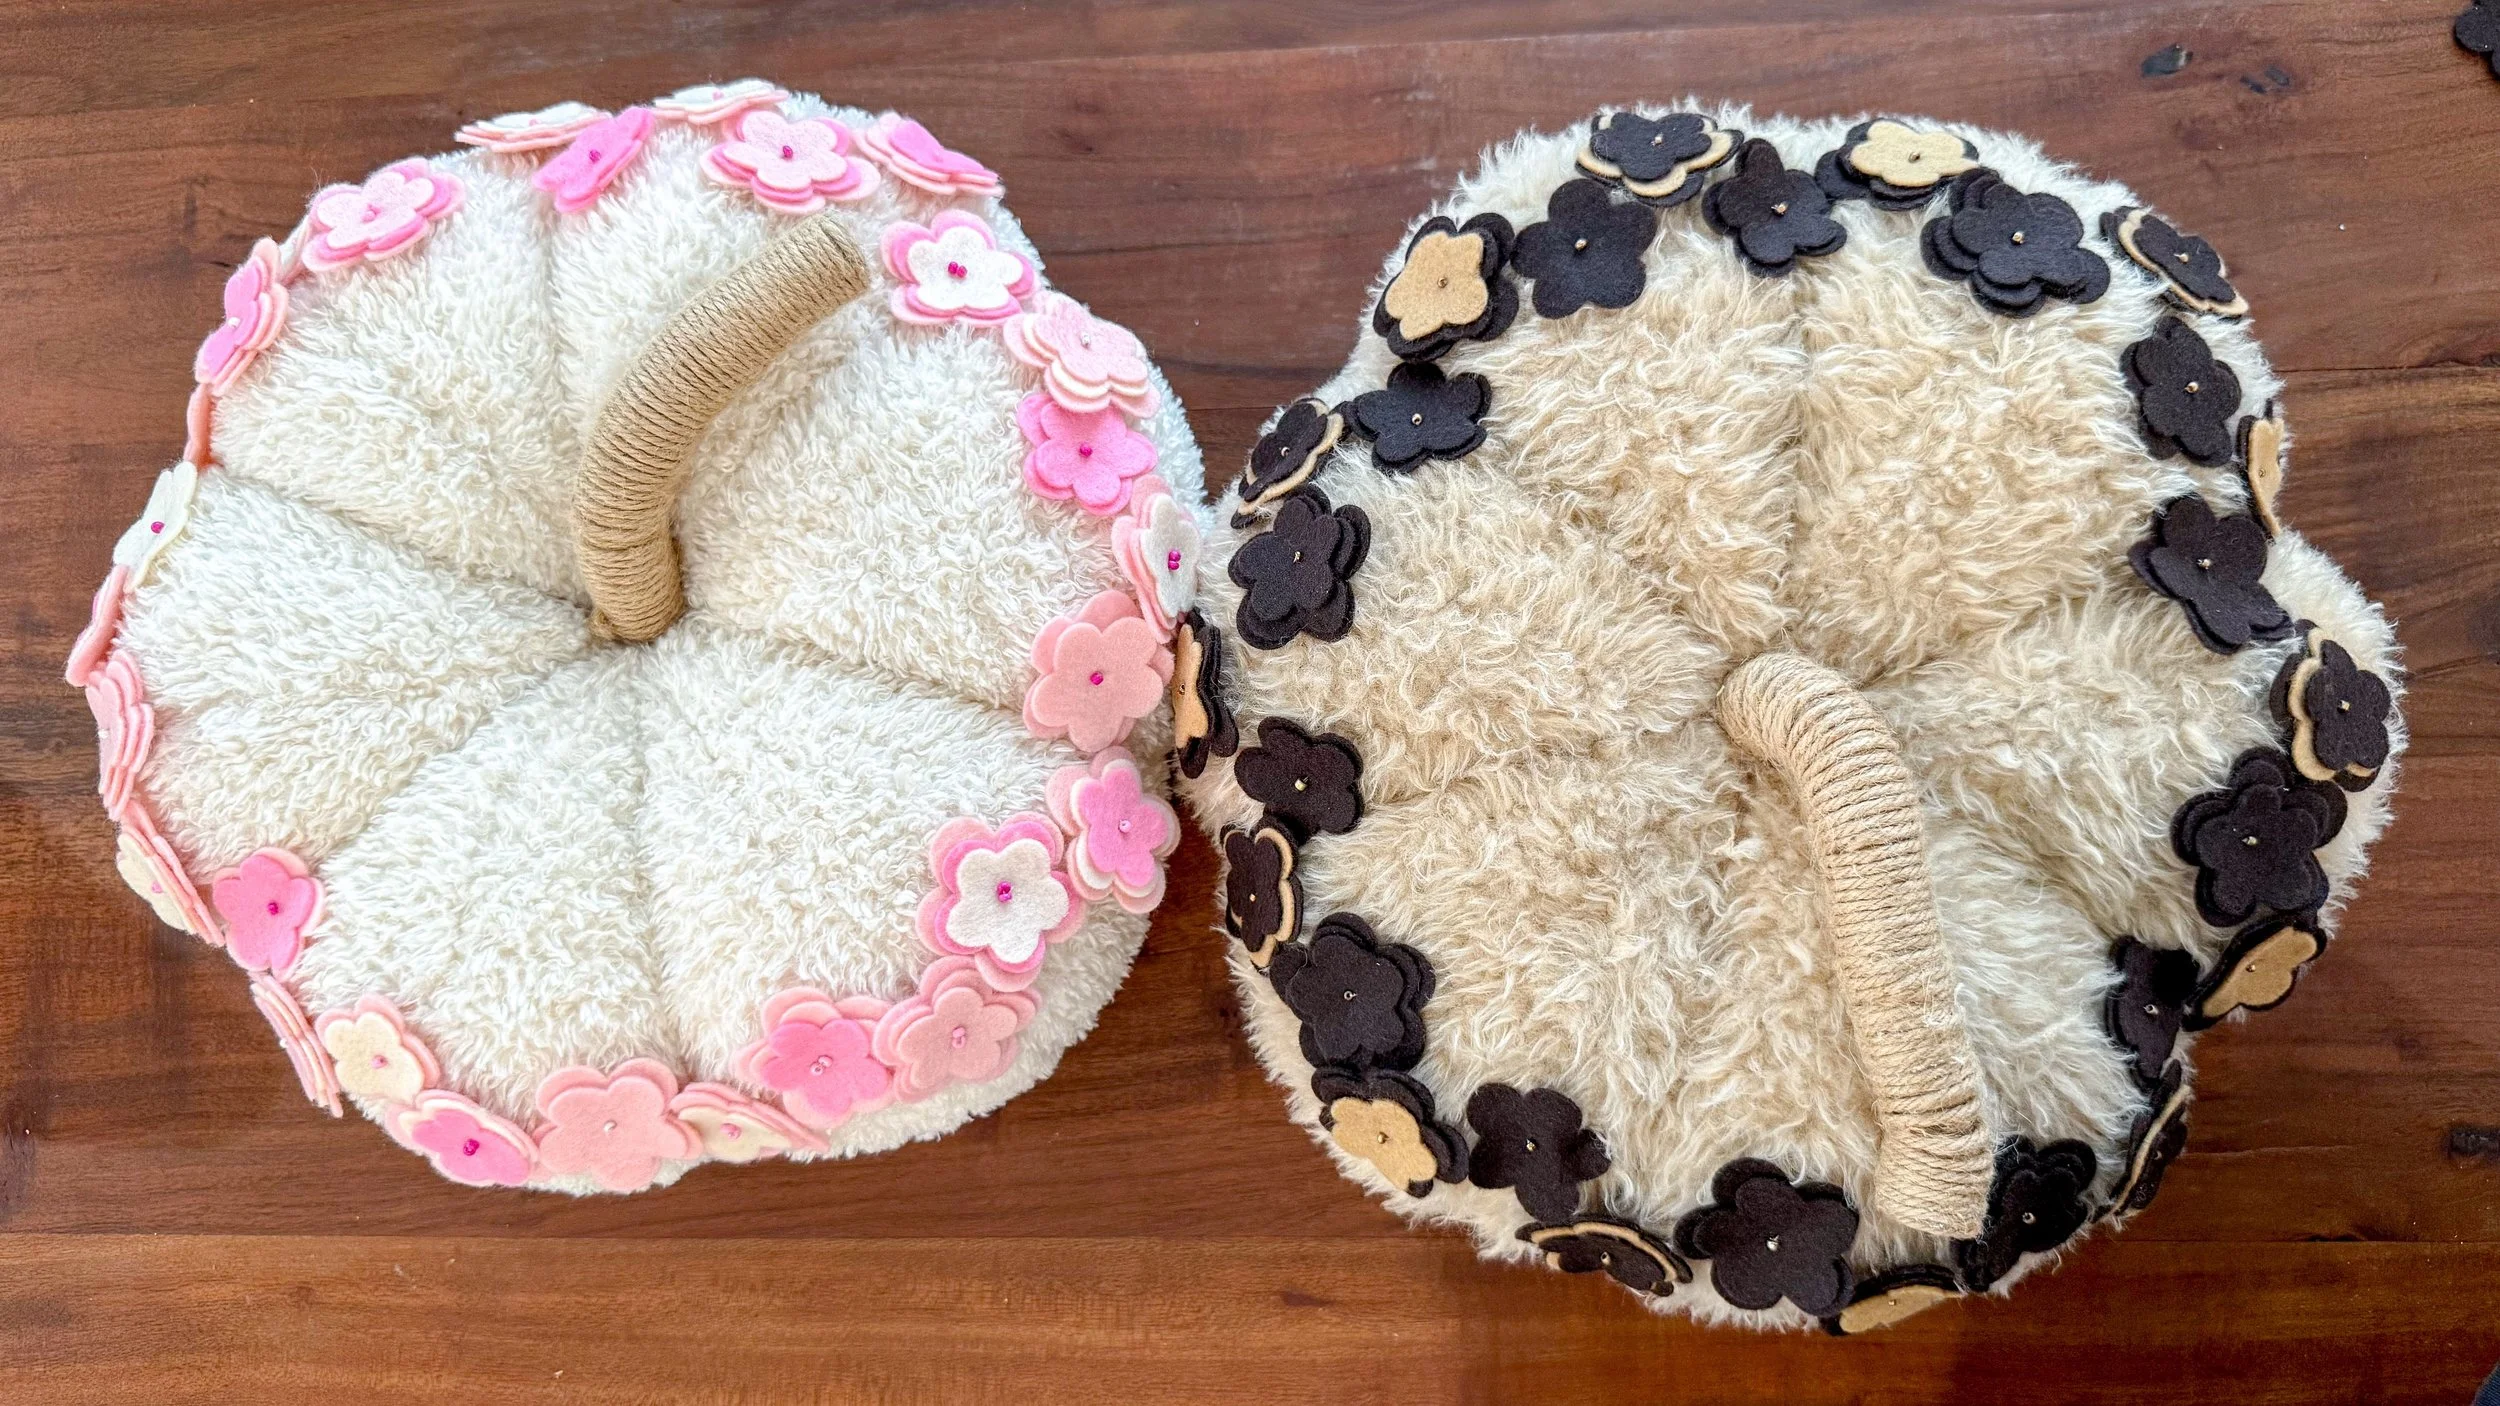
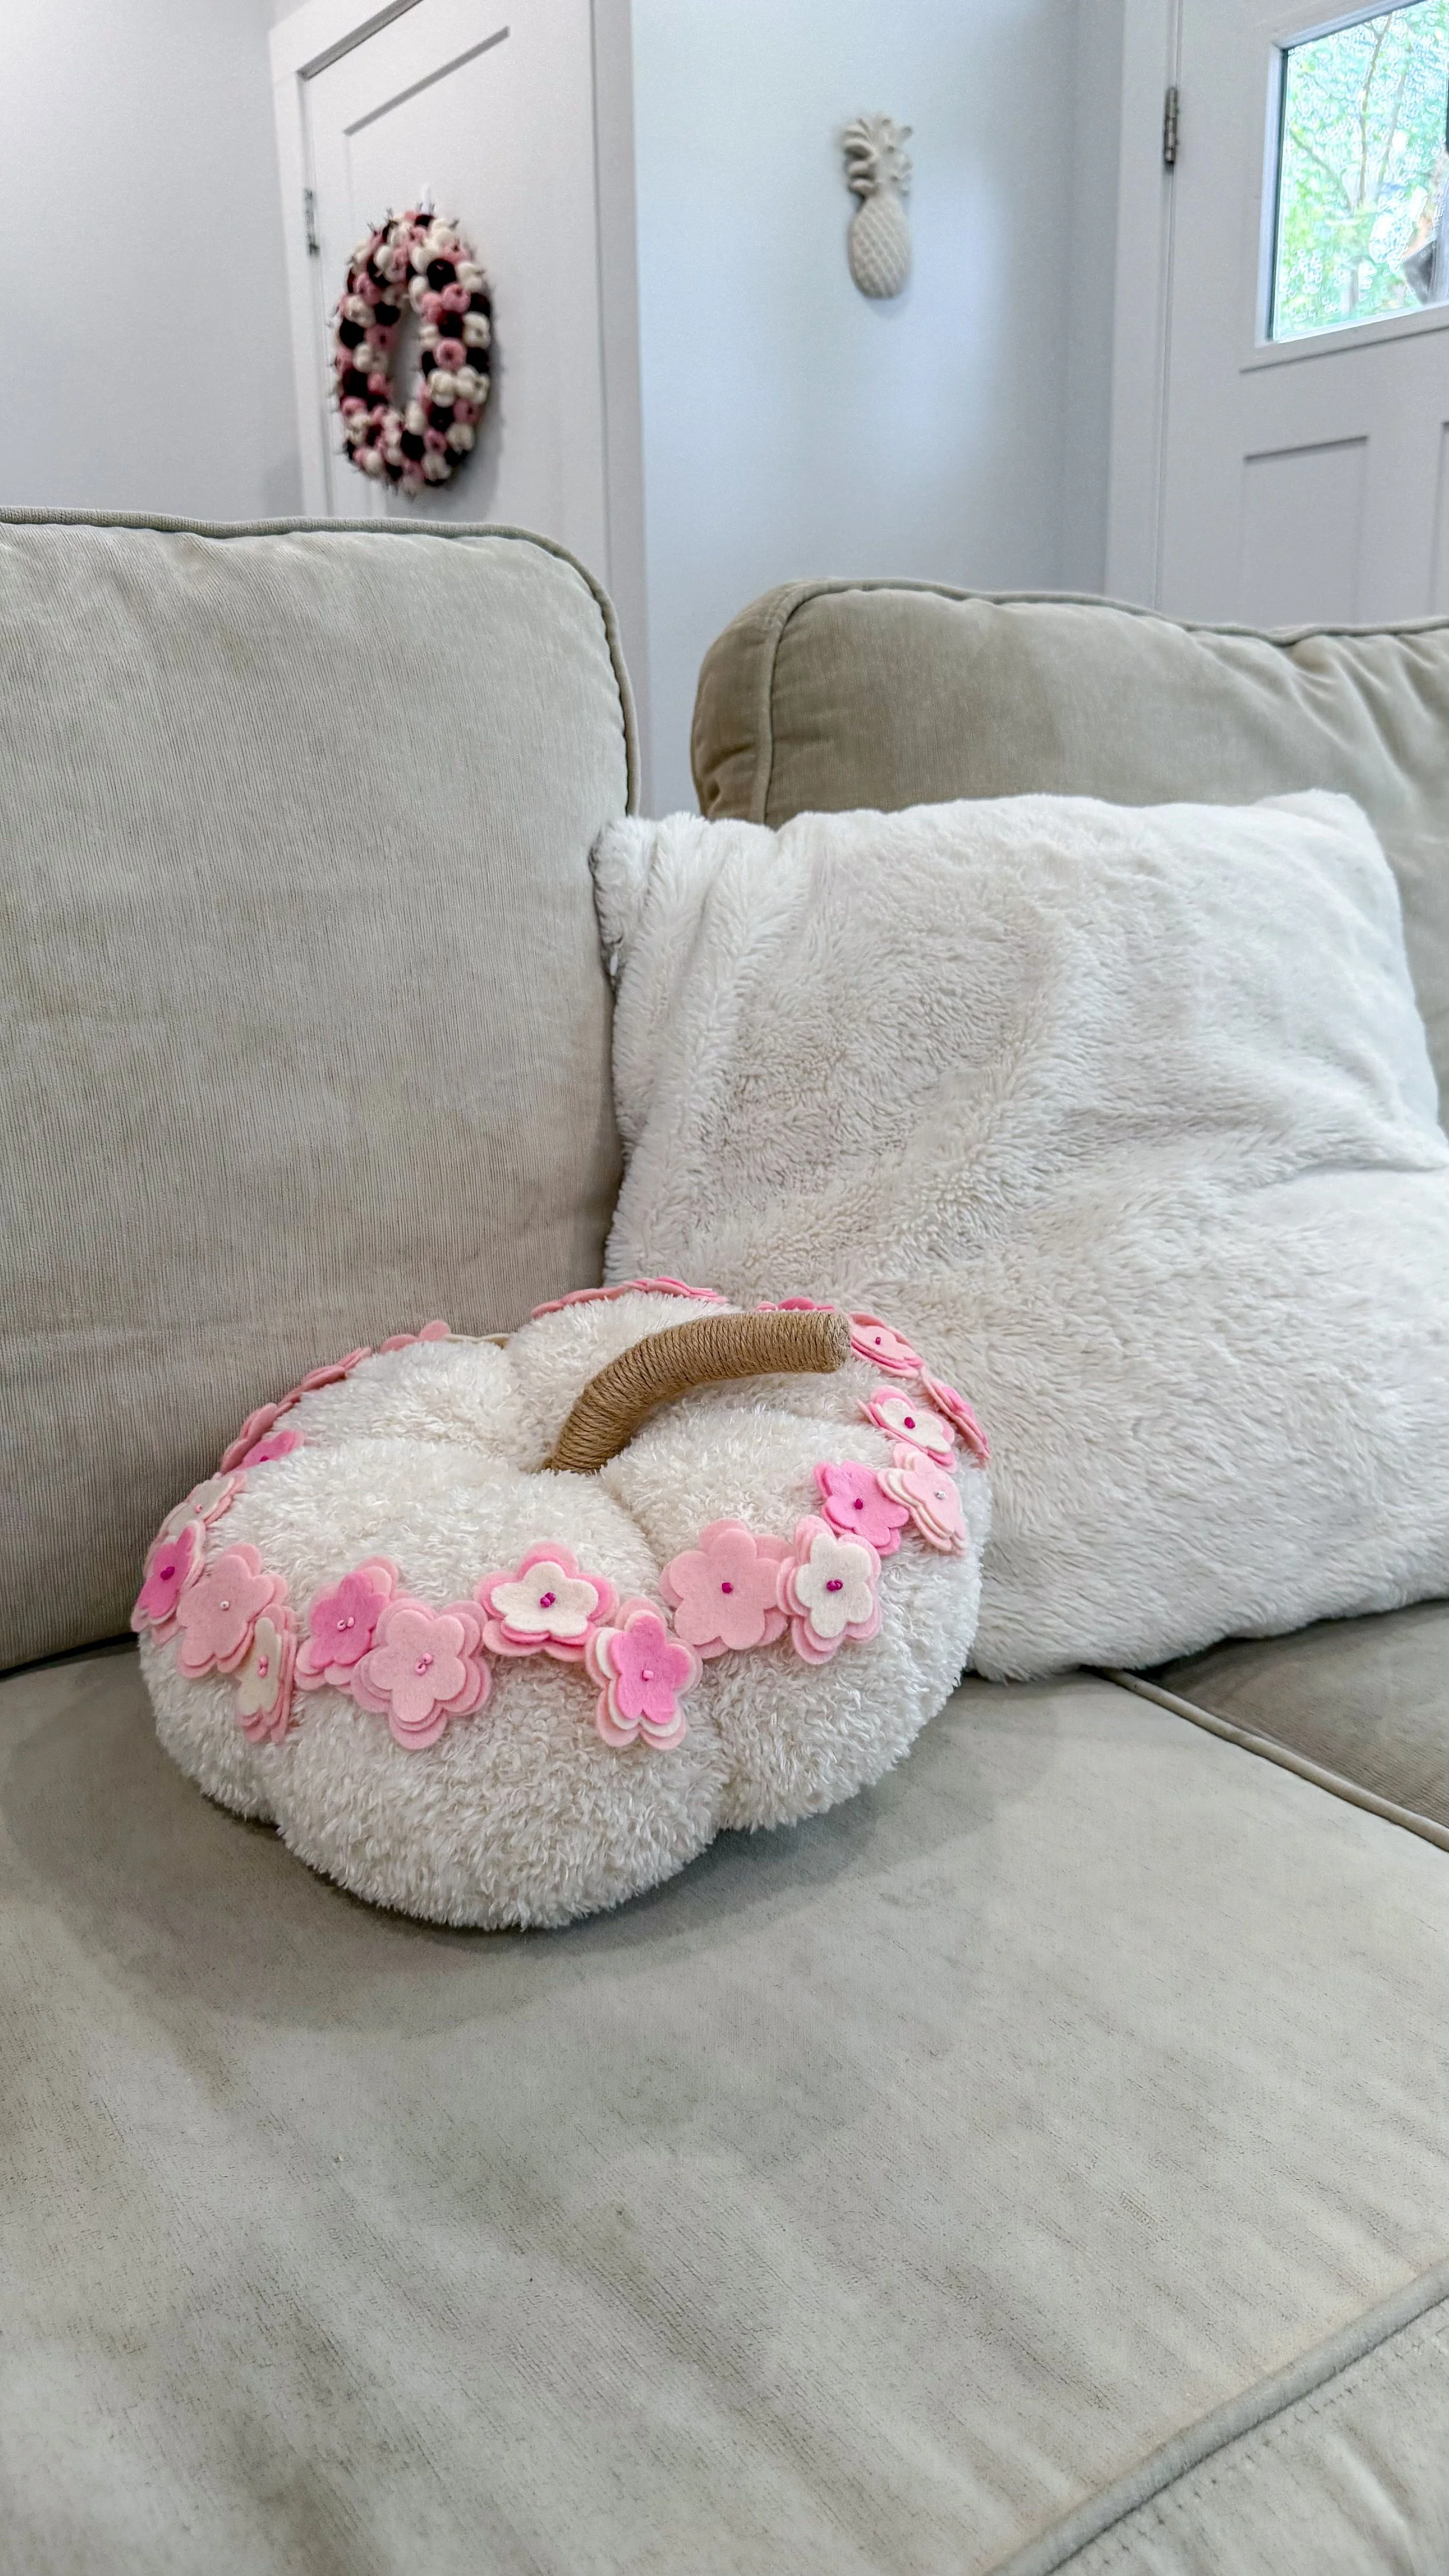
After everything was done, I had to spend quite a bit of time getting all of the freezer paper off of my cricket mats, but overall it worked pretty well. I combined all of the different sizes and colors and sewed little stacked flower bunches. I threaded beads in the middle in order have a flower center, and to add some embellishment. Once all of the flowers had centers in them, I started securing them to the pumpkins. I used light pink, dark pink, and cream felt for the cream pumpkin and alternated the heights of the flowers while attaching them. I sewed them on again so that I can repurpose the pumpkin again for next year if I want.

I had a lot more flowers for the darker flowers so I alternated putting the brown flower at the top and not as many with the beige. I decided to do the pattern this way where it's a dark flower, then a beige flower at the top, and then a dark flower followed by a flower that has beige in the middle and a darker flower on top.

I really like how the pumpkins turned out. The ones at the store were $25 so I love that saved money using supplies I had at home. They did take quite a bit of time to do so that’s something you'll have to consider if you decide to make them.
So which one was your favorite? I loved them all, honestly but my daughter is particularly fond of the pink flowered pumpkin. I love that I can sometimes stop in my project mode and do something small and creative that lets my more artistic side shine through.