
Making Over My Son's Room Part 4: Bridge & Railing
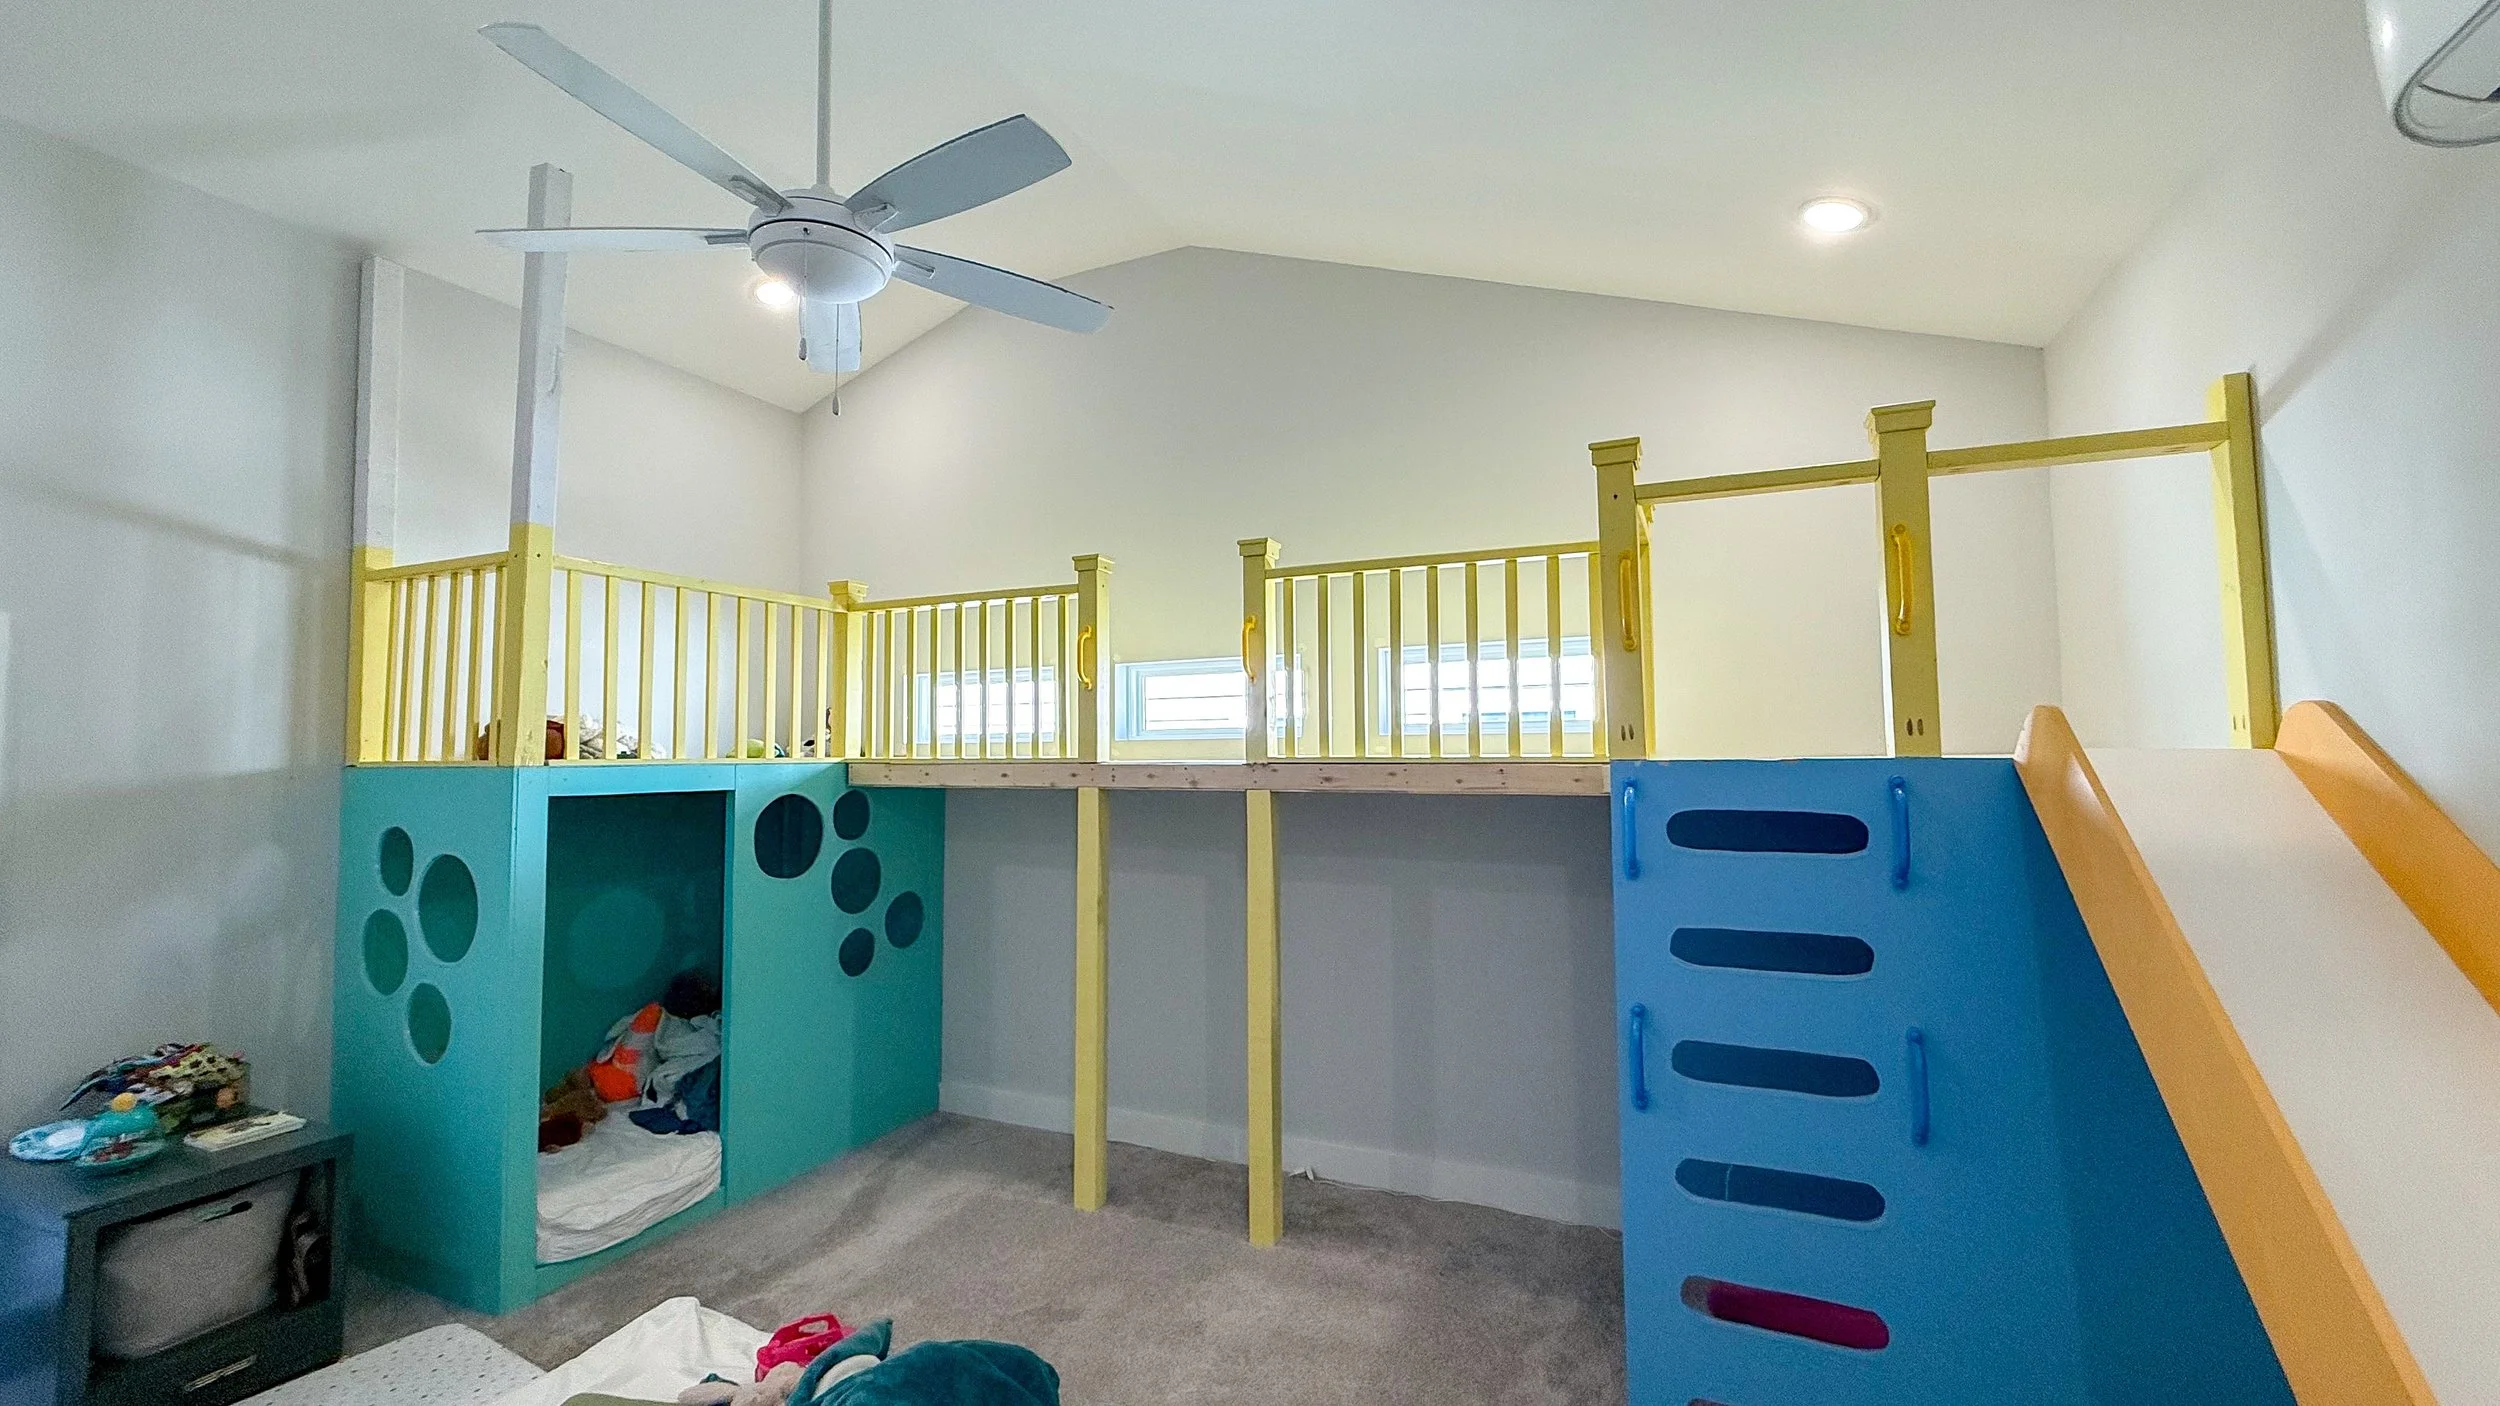
I know I made you wait two weeks for the next phase of my son's room, but this project is just too time consuming to have a new part every week. Thanks for being patient! To catch you up, so far I we have my son's bed on one side of his room, with a platform and slide on the opposite side. I installed a ladder and underneath is a reading nook. Today we're connecting the two sections with a bridge and safety railing. My original plan was to install the railing all the way across, but after creating the bridge and watching my son's joy of jumping off, I decided to change things up and cut the railing in half so there is an intentional section my kids can jump off of safely. This whole project has been so challenging as I adjust things and change up plans, but also SO fun as I learn new techniques, use my creativity and watch my children enjoy it. So, lets get started!
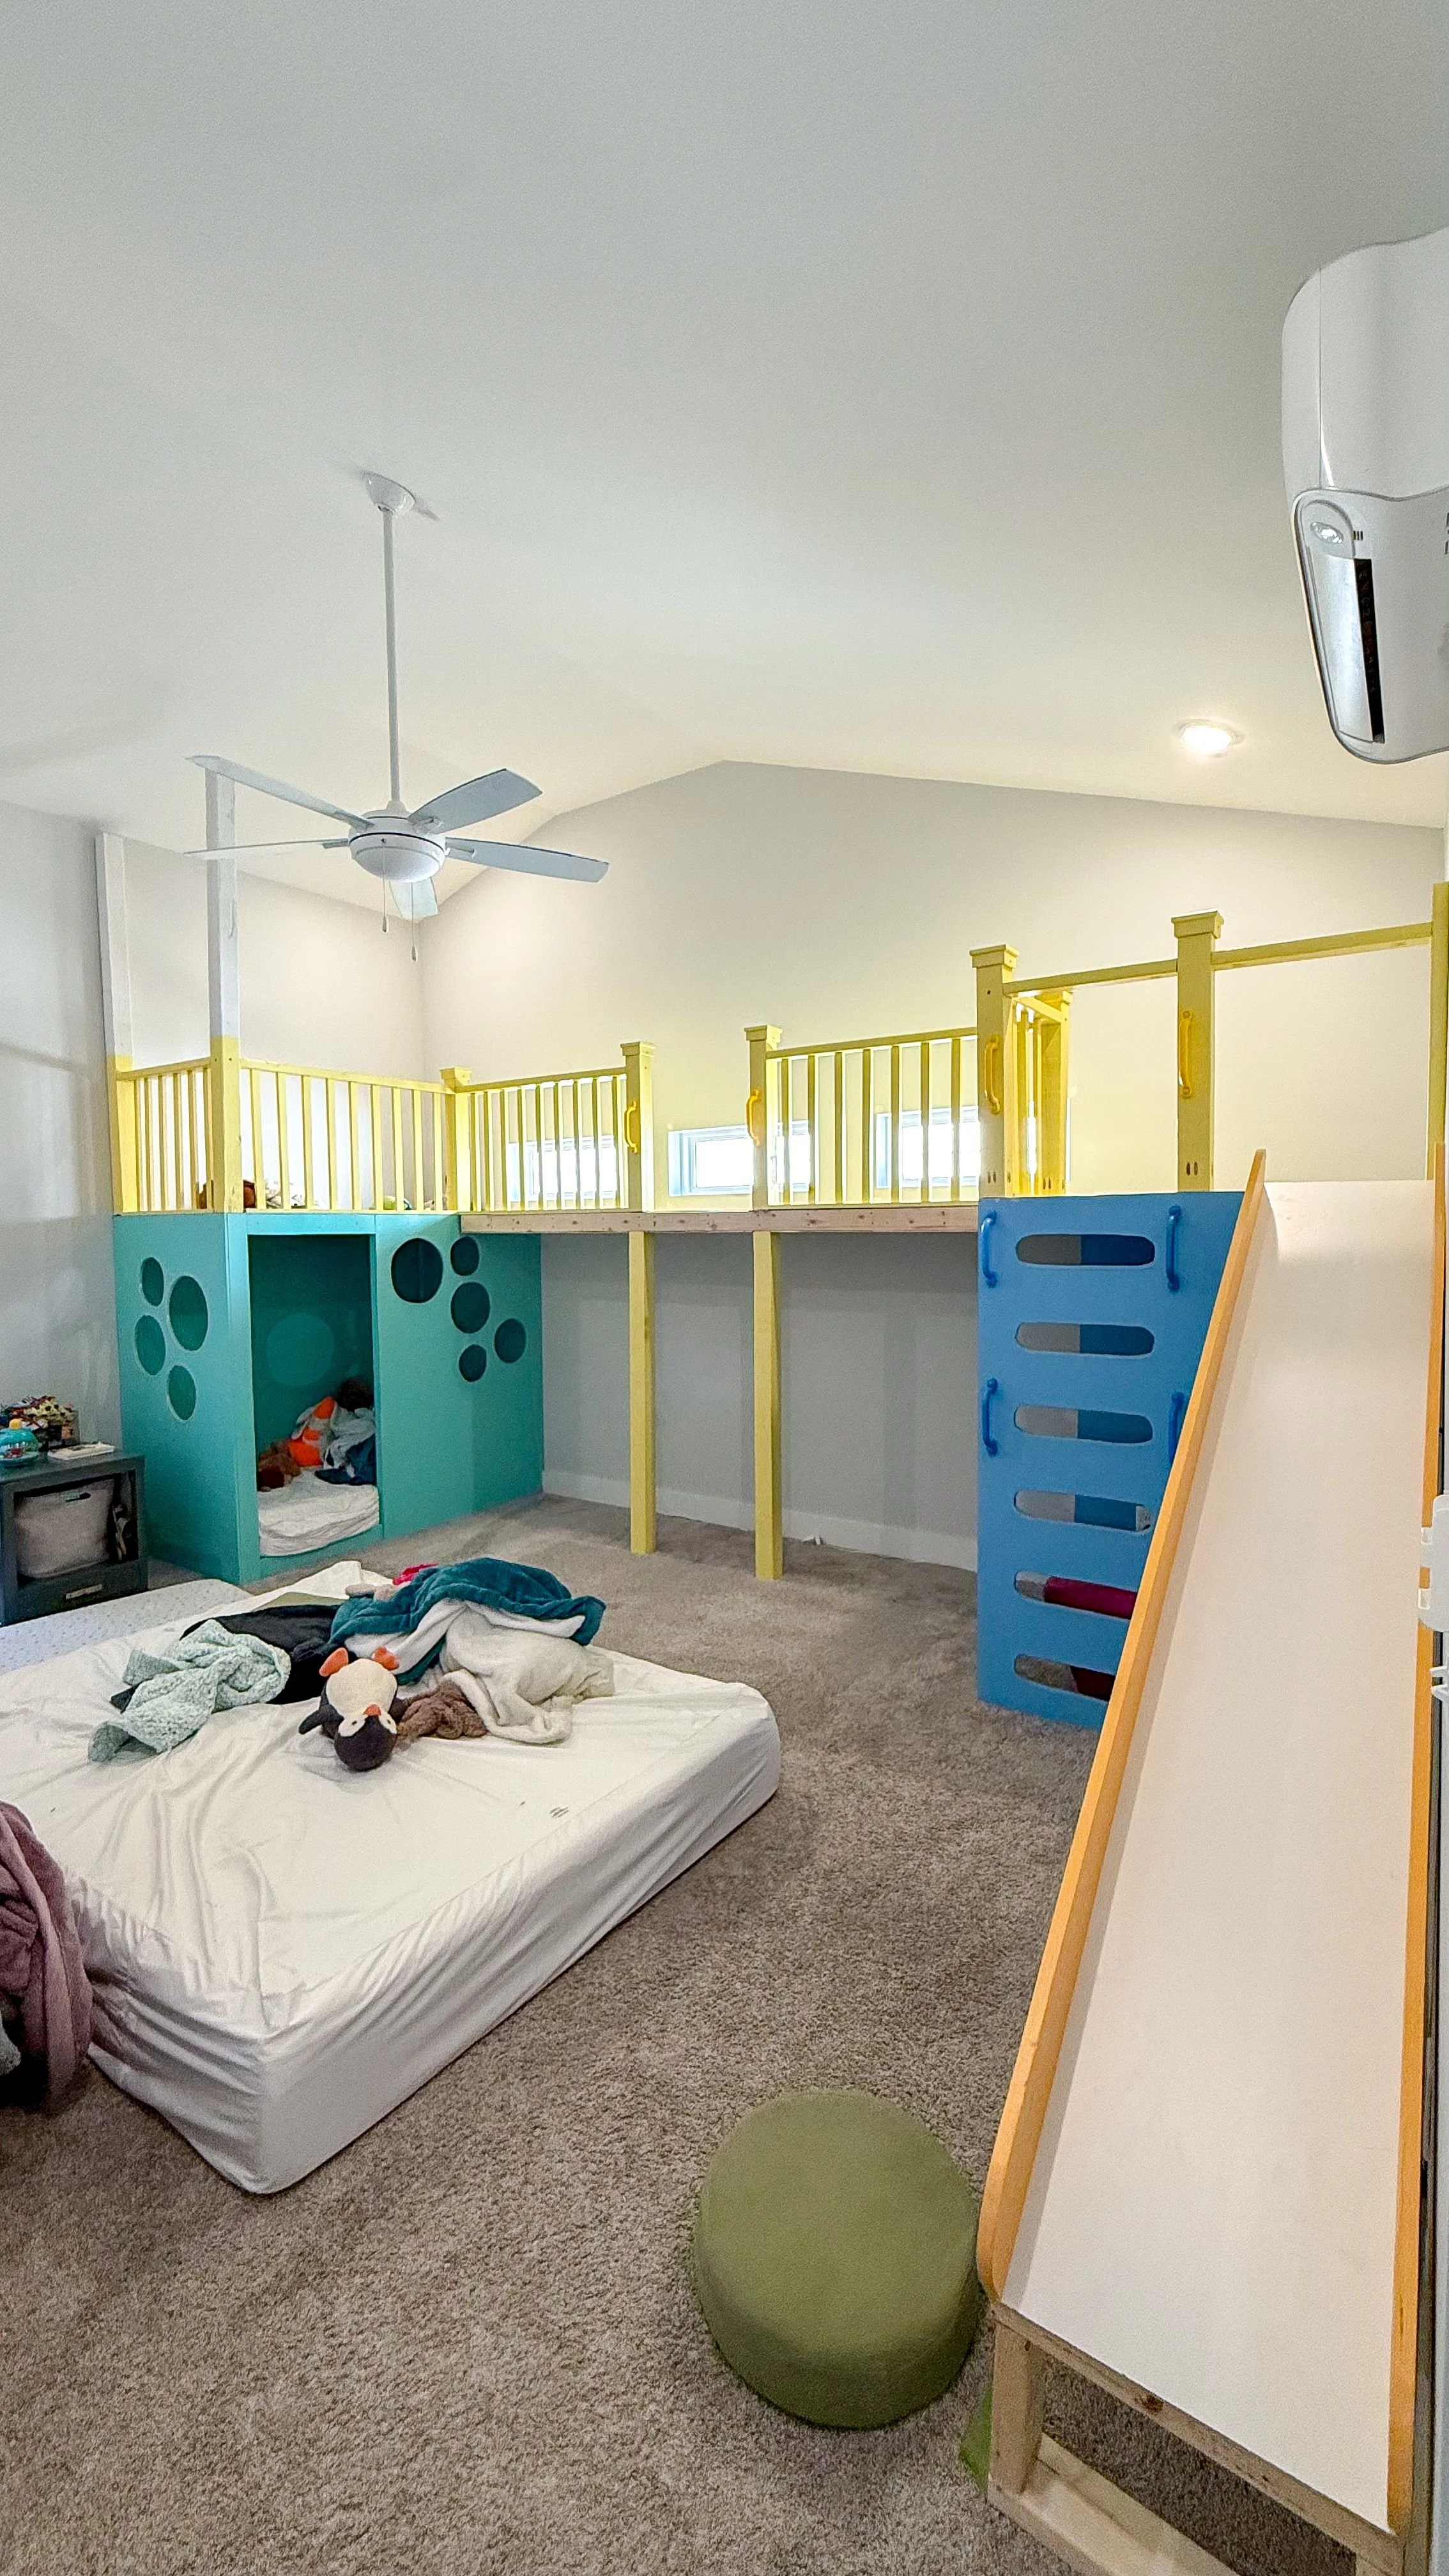
Making Over My Son's Room Part 4: Bridge & Railing | Bridge
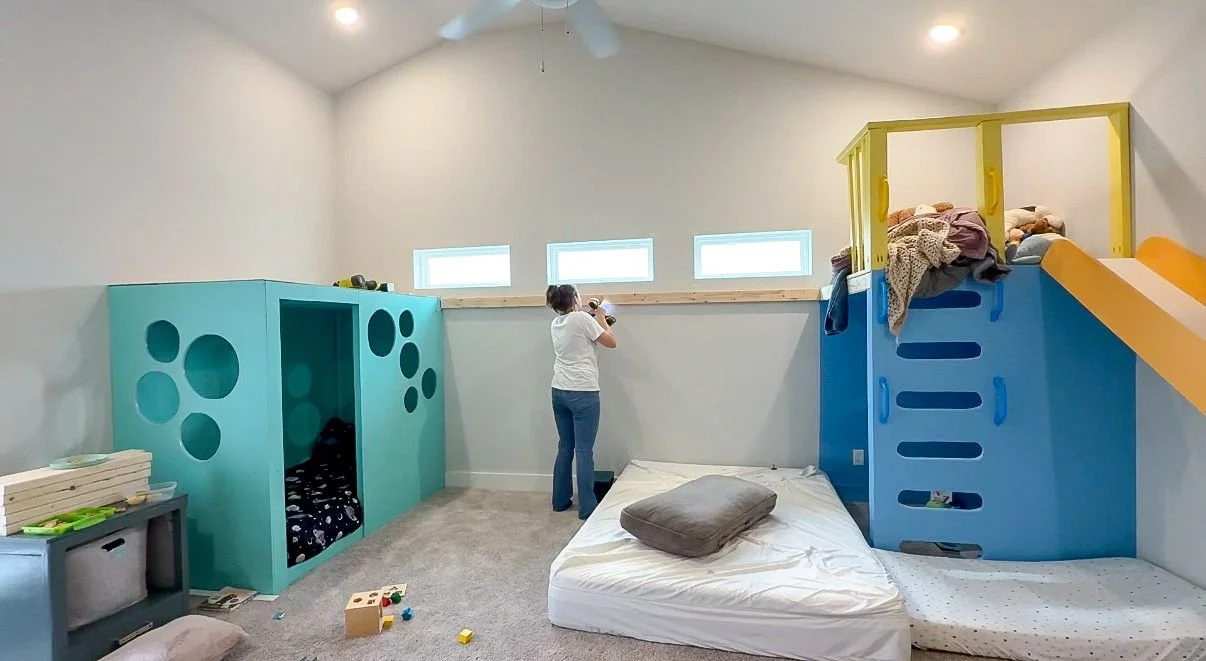
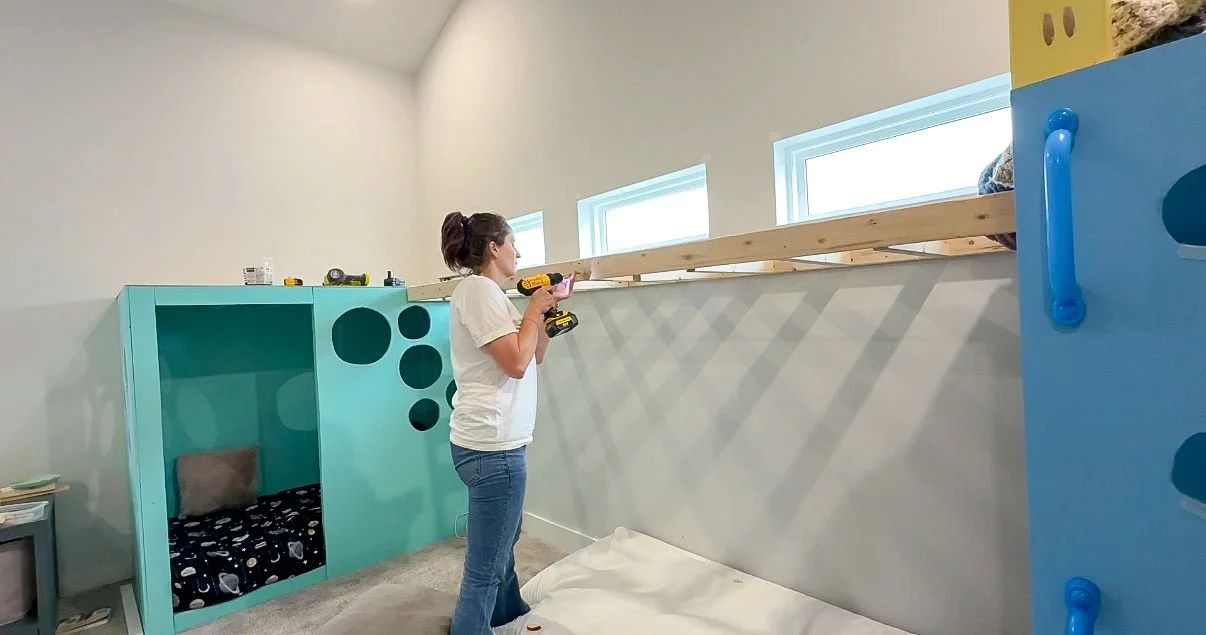
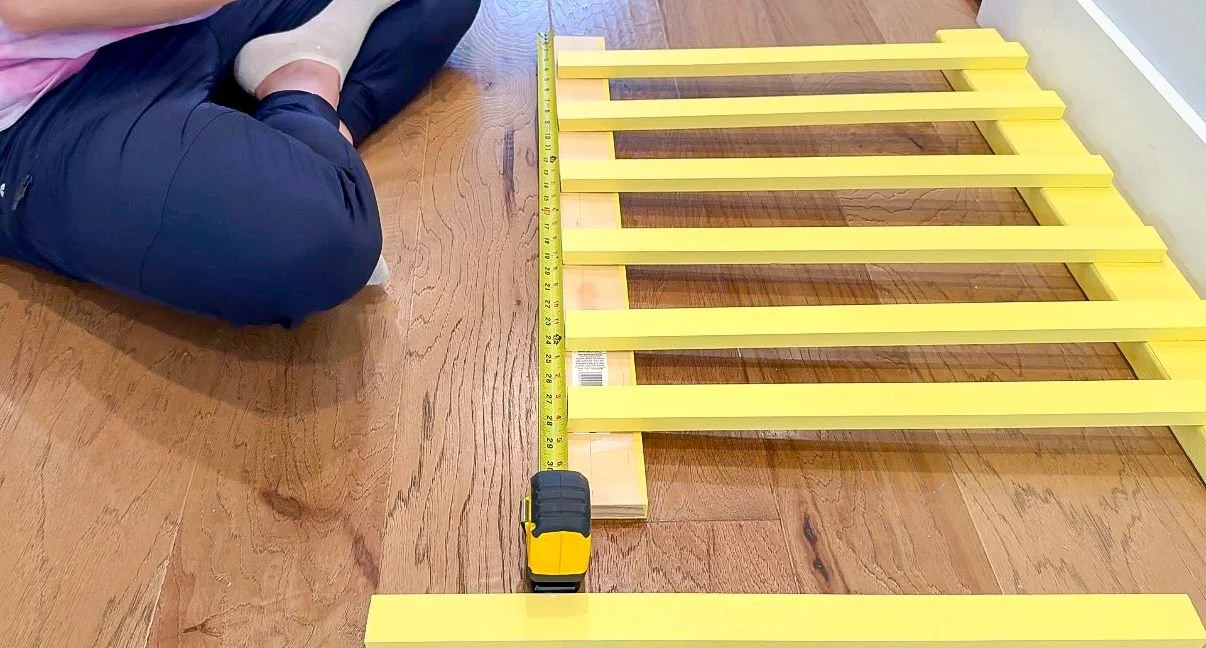
Before I got started, I had to take down the blinds. I got these blinds on a discount and I had to cut them because the windows up here are so oddly shaped. They are aesthetically cool, but functionally useless. Once the blinds were down, I measured to ensure my sons baby monitor was able to come out of his bed and down to the outlet on the other side of the room. There is technically an outlet in his bed, but I don't trust him to not mess with it. I drilled a hole through the side panel of his bed and then fed the cord through the hole and plugged it back into the monitor. After that was done, it was officially time to start on the bridge. First, I took a board that ran the width of the wall between the bed and the slide platform and secured it to the wall, making sure it was level all the way across. I secured it to the studs, and then I added support pieces coming off of the board. I secured a piece on each end directly to the bed frame and slide platform frame, and then spaced the boards out.
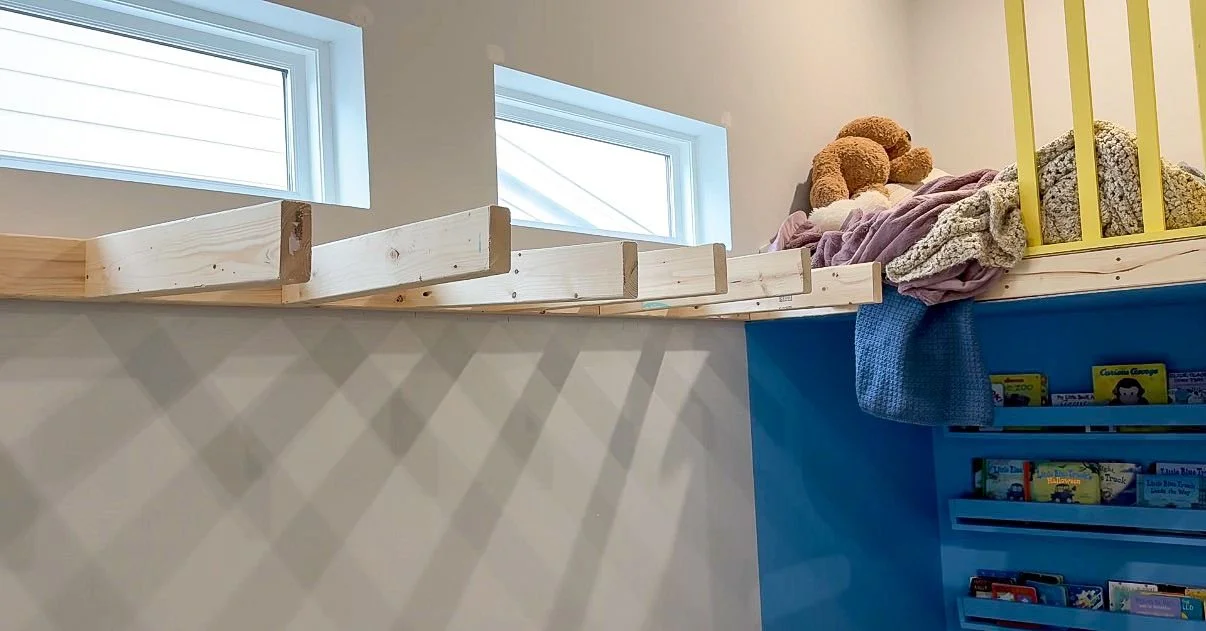
I spaced the boards 10 to 12 inches all the way across the board making sure they were level as I went. Once those were all in, I secured another board across the front, making it look like a giant floating shelf. It technically would be fine floating because it's screwed into the studs, but because it is so long, I wanted to add the extra security of supports. My original plan was to do a four by four post in the middle of the bridge as the additional support at the front, but that plan changed when I saw how much my kids love jumping off of the platforms. I wanted a designated spot for a jump off point so I could have padding underneath. In order to make the bridge usable, I added some underlayment all the way across and secured it to the frame so it can be walked on. After this, it was time to start on all of the railing.
Making Over My Son's Room Part 4: Bridge & Railing | Railing
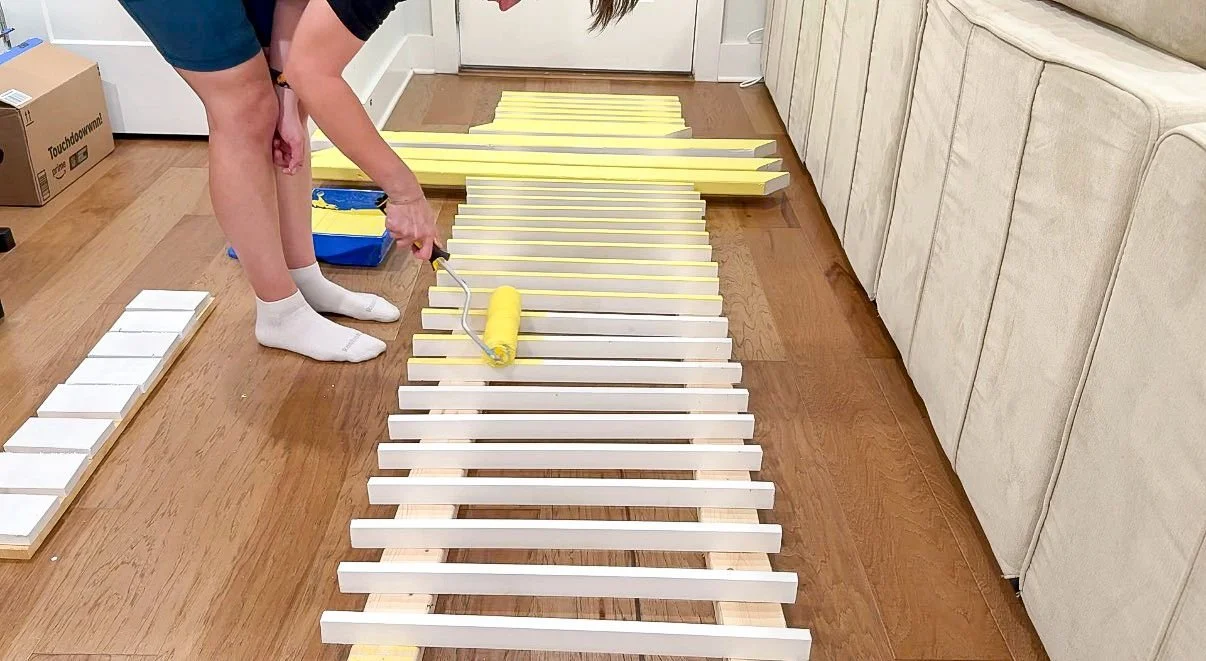
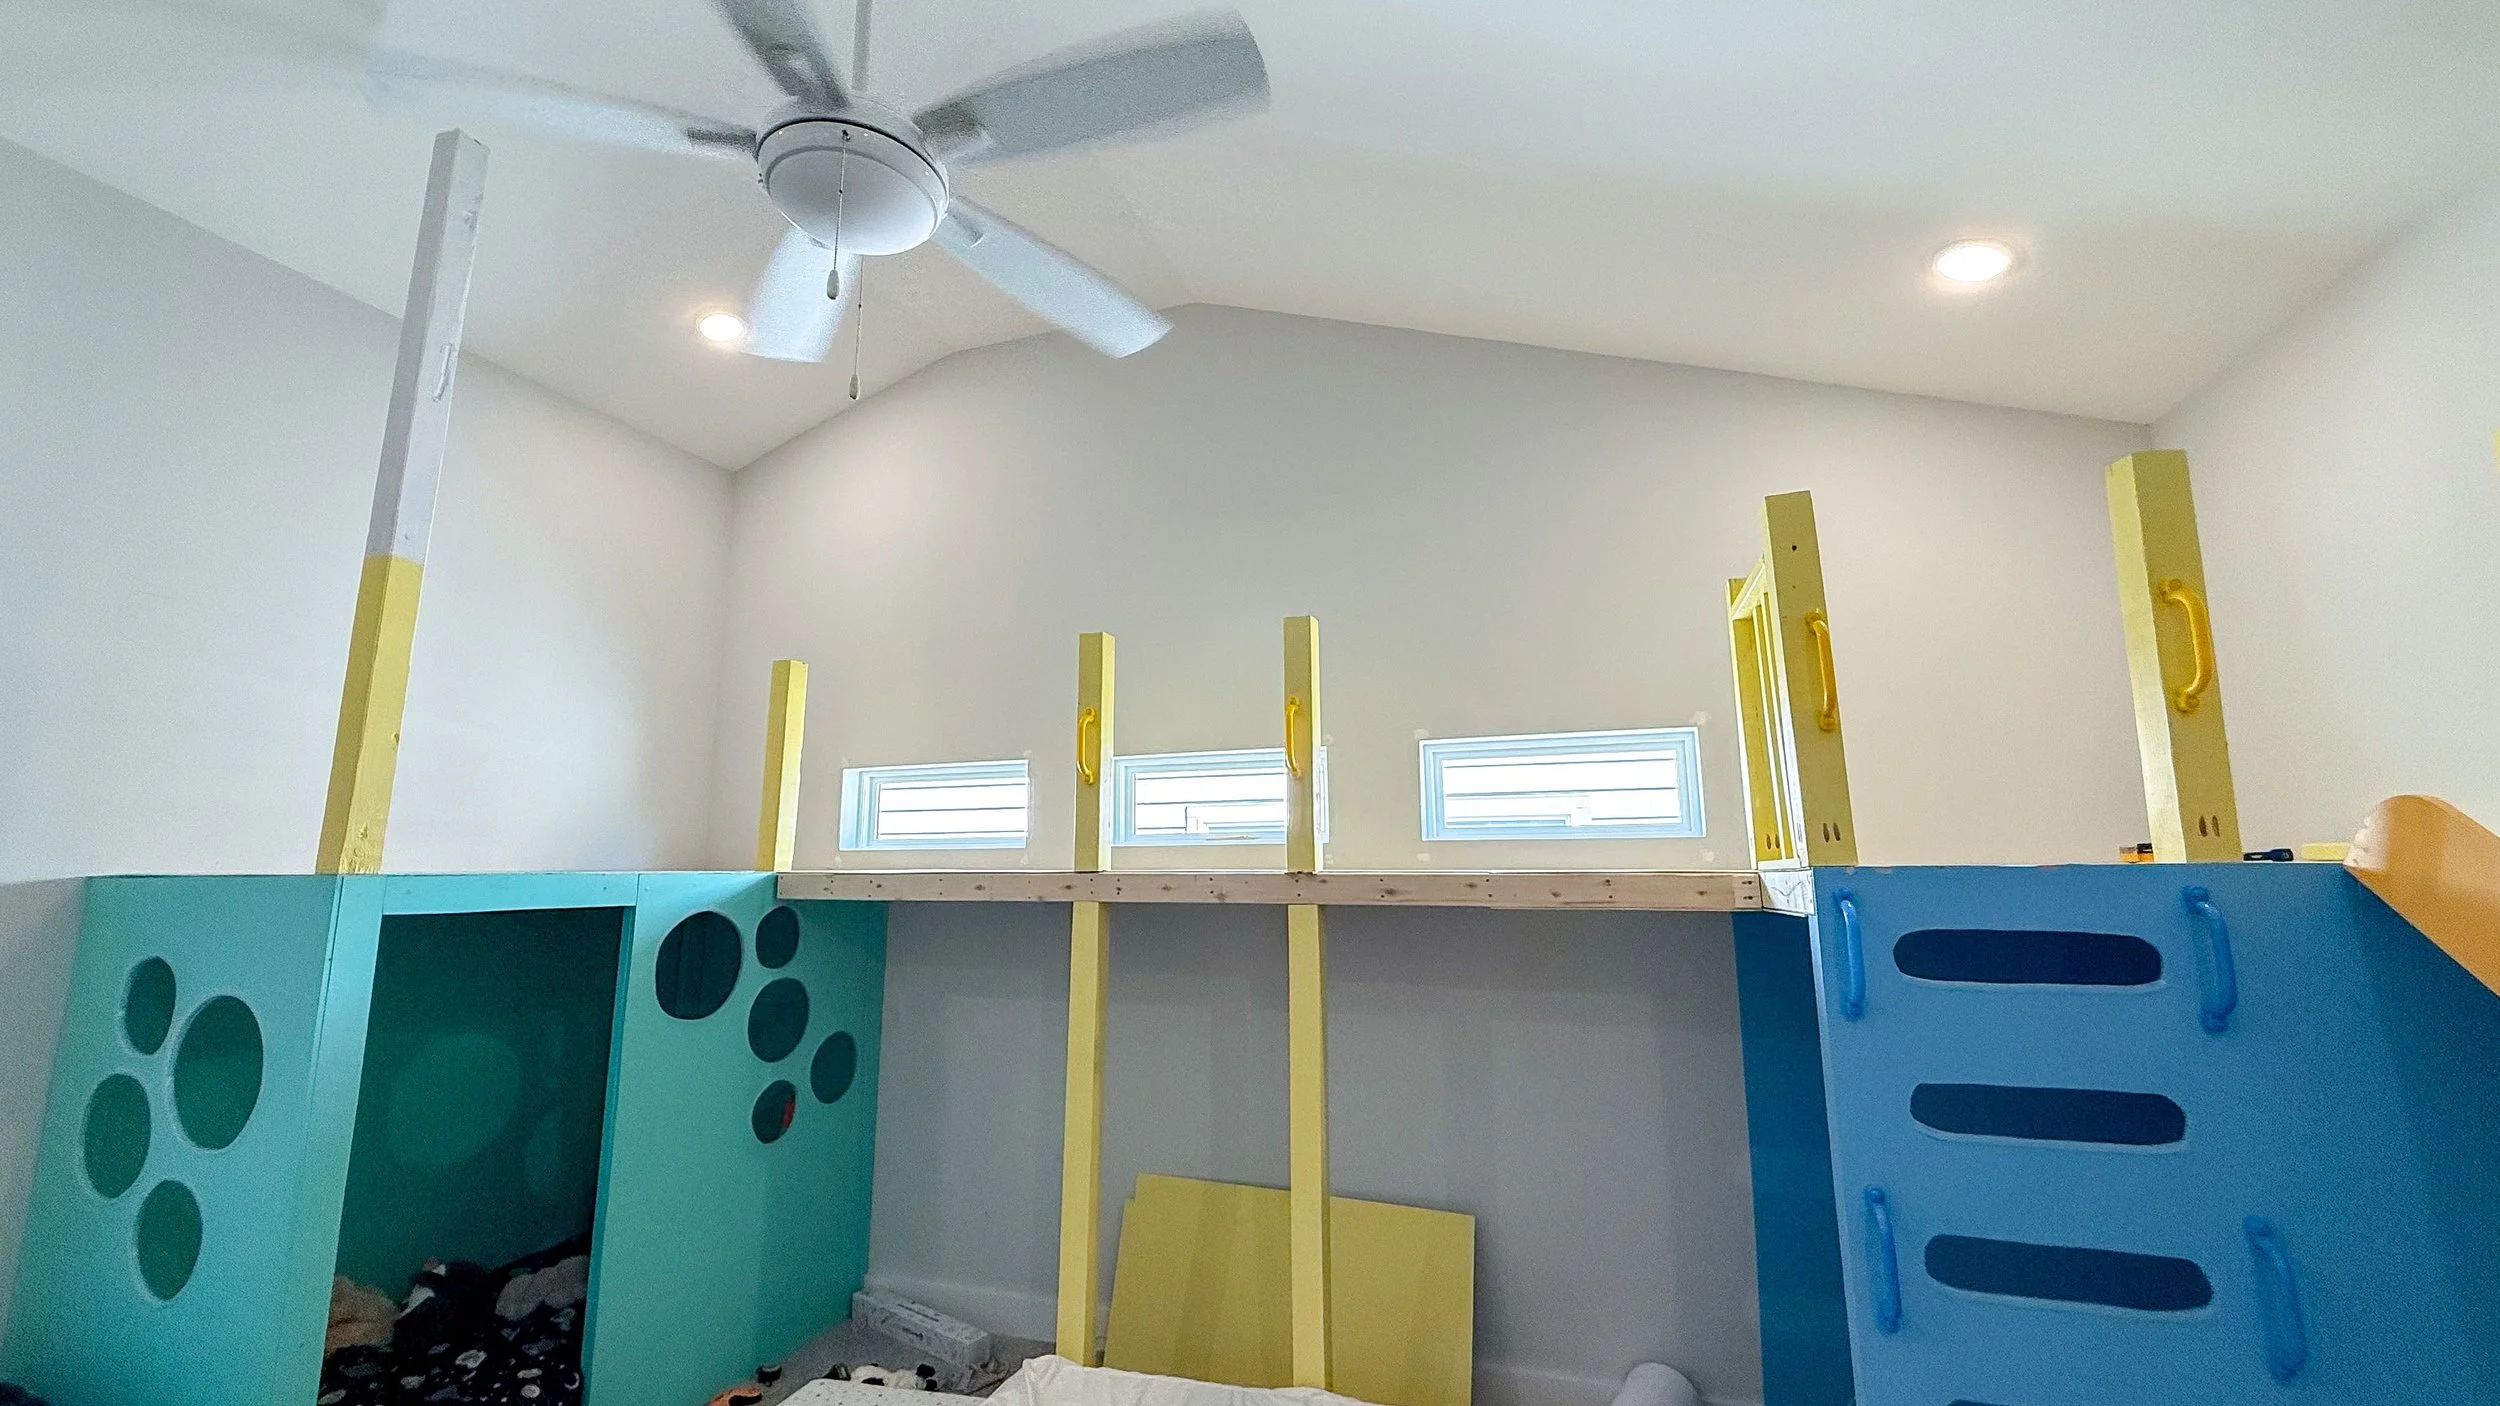
This project took a LOT of painting so I did as much as I could before install to save time. I did two coats of primer and used the color Limon by Benjamin Moore for two coats of paint. I used hanger bolts, which is basically a bolt threaded all the way through and has two different kinds of thread on each side, so you can thread it into a frame or post or beam, and screw something else on top of it. Once I got the posts put in for the slide platform, I moved to the bridge.
I wanted underneath the bridge to mirror the support pieces on top. I added the second post, making sure it was level and then secured those posts to the frame above it. I know I want to have a way for the kids to climb up between the two posts onto the platform, but I actually haven't decided how I'm doing that yet. It might be a rope ladder, it might be monkey bars, it remains to be seen. I installed all of the posts before installing the railing. I tested a small section of railing above to slide platform to make sure it works how was envisioning. Before I continued making all the rest of the railing, I installed six of what I would call normal sized posts. When each post was installed, I went back leveled everything out using shims to ensure each post was level. Any shims I used are going to be covered up once I change the flooring.
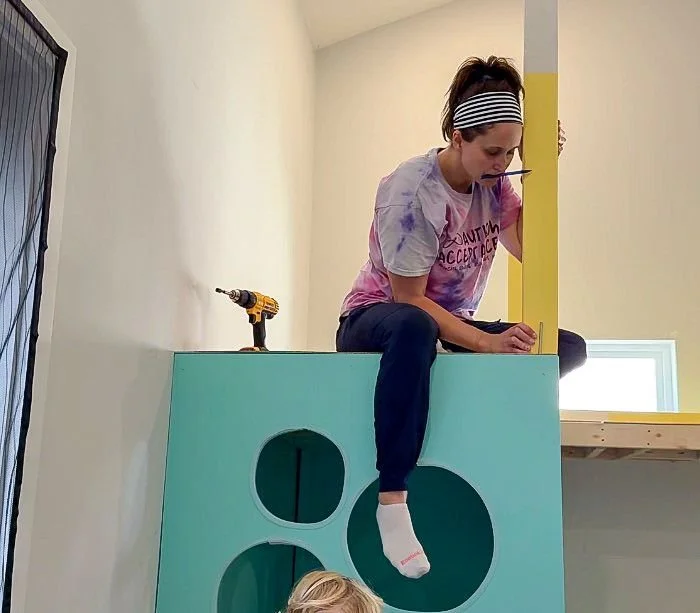
Next I added the two really big posts. These two taller posts are here because I will eventually add a third level to the structure that will attach to the posts. One post is 67 inches and the other one is 6'1" inches because my ceiling is slanted and nothing is normal in this house, even though it's a new build. Getting these posts up onto the platform and then screwed into the hanger bolts was tricky. Once they were secure, everything was good. In order to make sure the post up against the wall was as flush as possible, instead of screwing it into the hangar bolt, I drilled a hole that was slightly bigger than the hangar bolt into the post and placed the post.
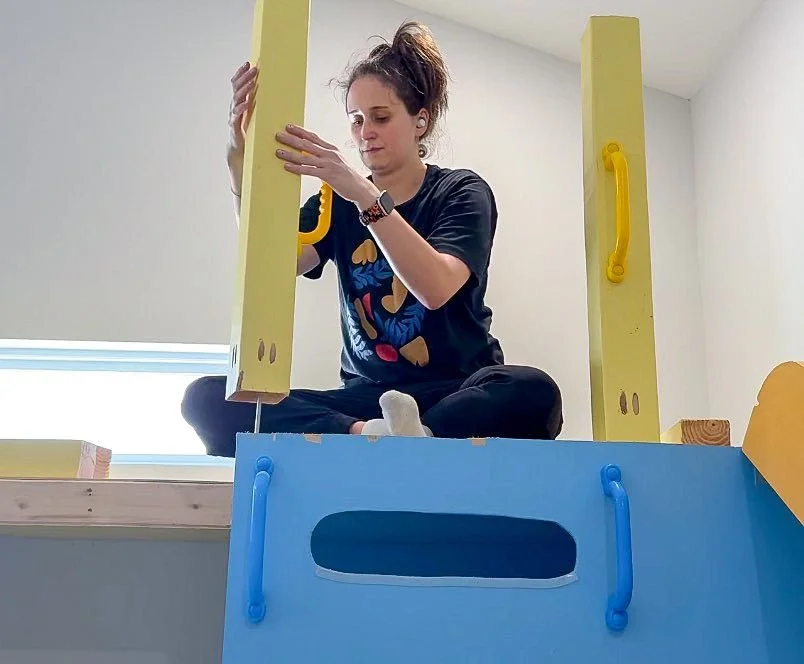
Using wood glue and L brackets, I secured the post to the wall and to the platform. Once all the posts were in, it was time to start on the railing. For the railing, I measured the distance between each set of posts and then cut a 2x4 and a 1x4 to that length and 36 1x2 in 25" pieces. When I started doing the math, I realized the best way to space the spindles, which are the 1x2s on each set of boards, so that there would be a consistent spacing while also not having too many spindles on each set. I landed on having a 3.5 inch gap between each spindle. The space between the last spindle on each edge and the posts that are going to be connected to varies based on the size of that section of railing and the 2x4s on the top of the railing, so in order to secure the spindles to 2x4s, I drilled pilot holes in both and used hanger bolts in the marked spots.
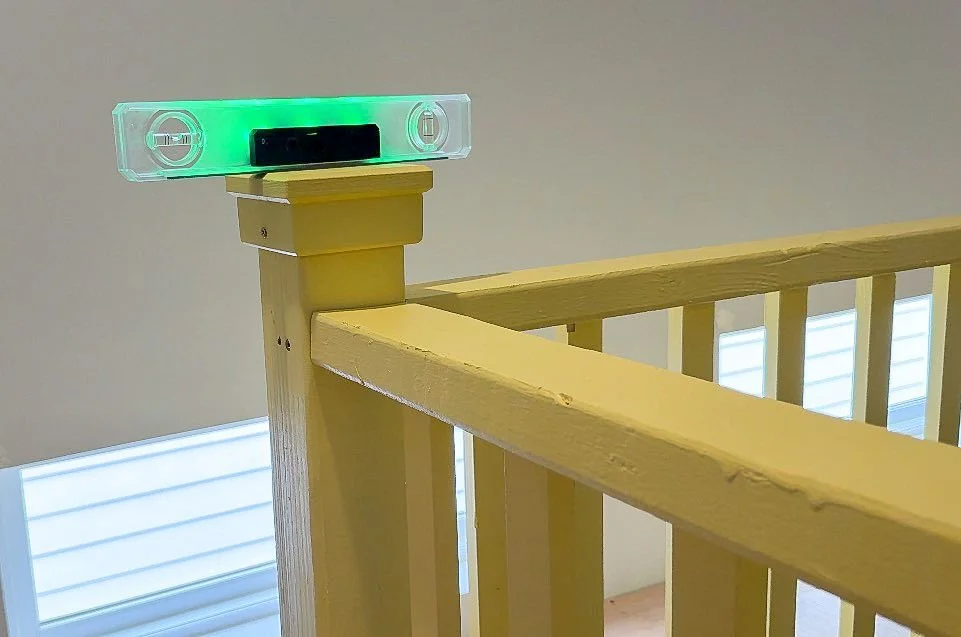
These are much, much smaller than the ones that I used for the posts. The 1x4 is going to be the bottom of the railing, so I used screws to attach the spindles to the 1x4. I had to repeat that for four more sets of railings. I did not like how the tops of the posts looked, so decided to add a total of 6 post caps
I was a little nervous because some of the posts were still a little wobbly before I started installing the railing. However, once the railing went in, it all became really stable. I made sure the railing was flush with the edge of the platform and then secured the bottom of the railing to the frame of the platform below it. I used pocket holes to put it into the post against the wall and then used 10 inch screws to secure it to the outside post. I added additional 2x4s to go between the posts above the ladder and the slide because it stabilized those posts a lot more.
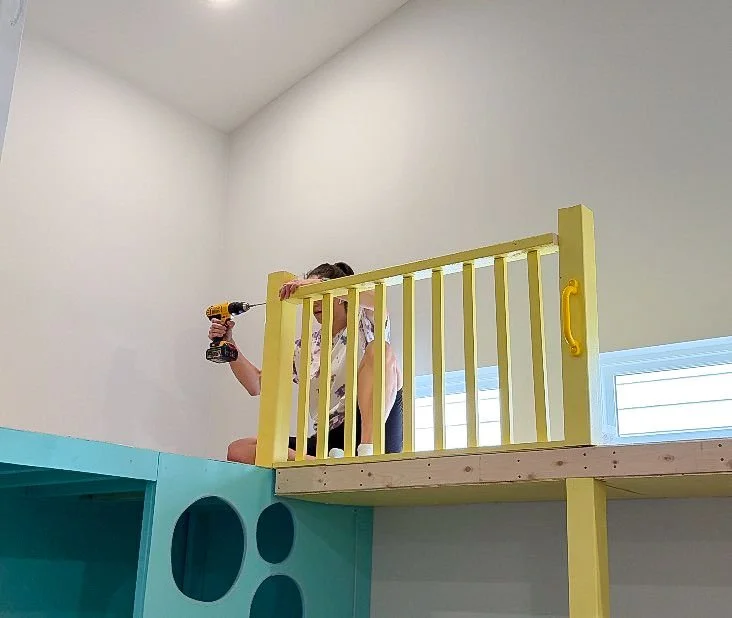
Installing the actual railing was probably the easiest part of all of this because everything was measured correctly and once it was going in, it was super fast. I was pretty worried with how my son would react to the railing going in because both of my kids loved having the space open before, but they really didn't seem to care, which was a relief.
It is so amazing to see this vision I've had in my head for over a year now coming together step by step. There is so much more to do, but can you see my vision for the color palette so far? It’s just so bright and playful! Stay tuned for the next platform and the Murphy bed and built in coming soon. I'm so excited to share this process with you and hope you are as excited as I am to see it coming together.