
Play Table & Benches Build + Build Plans

On the last blog post I talked about the play kitchen we got Jackie for Christmas last year. It’s so cute and functional for the space, but having tea parties on the floor wasn’t going to cut it. So, what goes perfectly with an adorable built in play kitchen? A custom play table dining set with enough seats for all of her “girls” (her dolls)! When I asked Jackie what she wanted, she requested a table with soft benches instead of chairs. So I gathered my supplies and got started.
Play Table & Benches Build | Supplies
Tools:
Staple gun
Scissors
Drill and driver
Miter saw
Orbital sander
Planer
Materials:
Wood
Upholstery foam
Fabric
Wood screws
Pocket hole screws
Wood-filler
Play Table & Benches Build | Getting Started
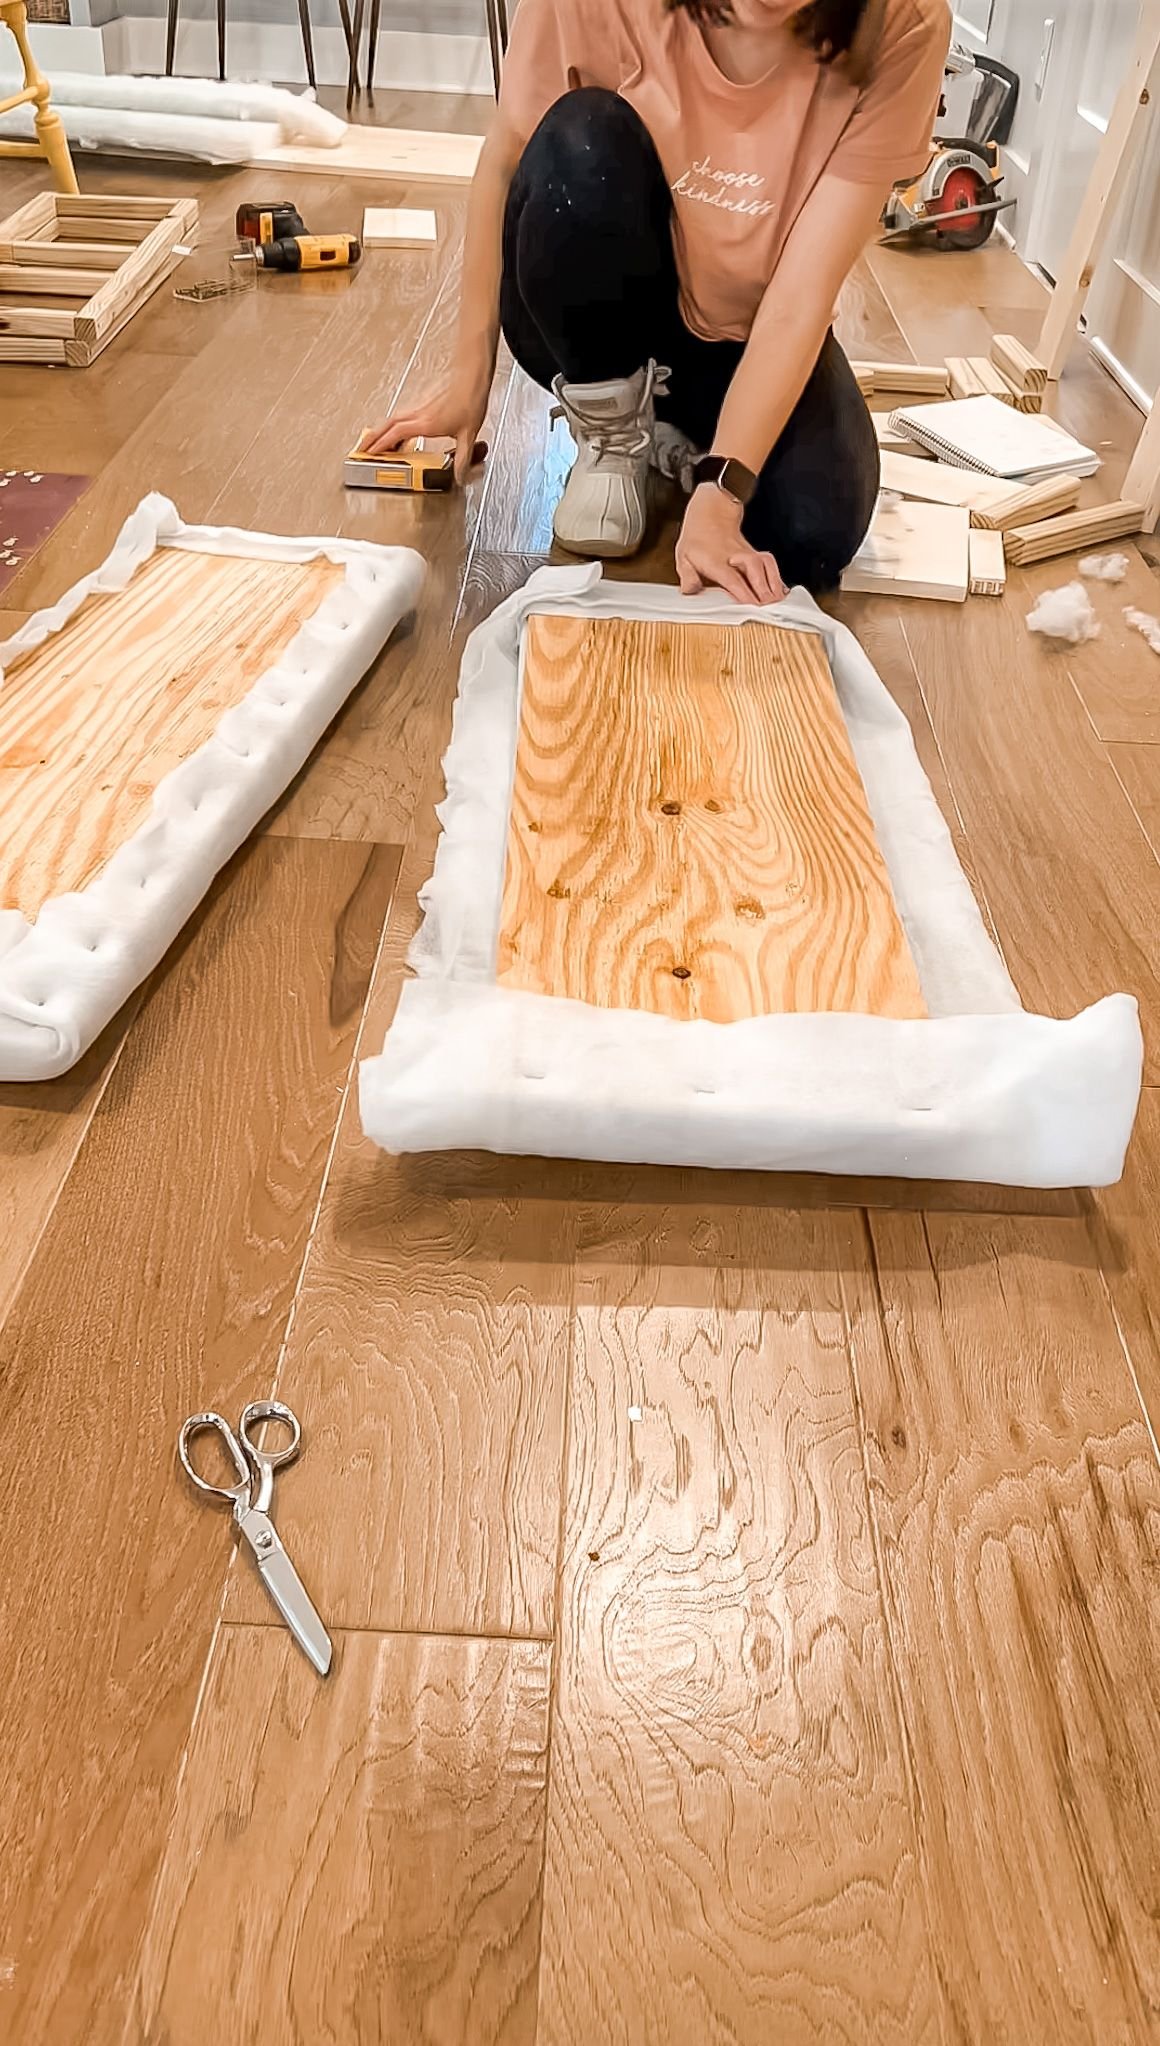
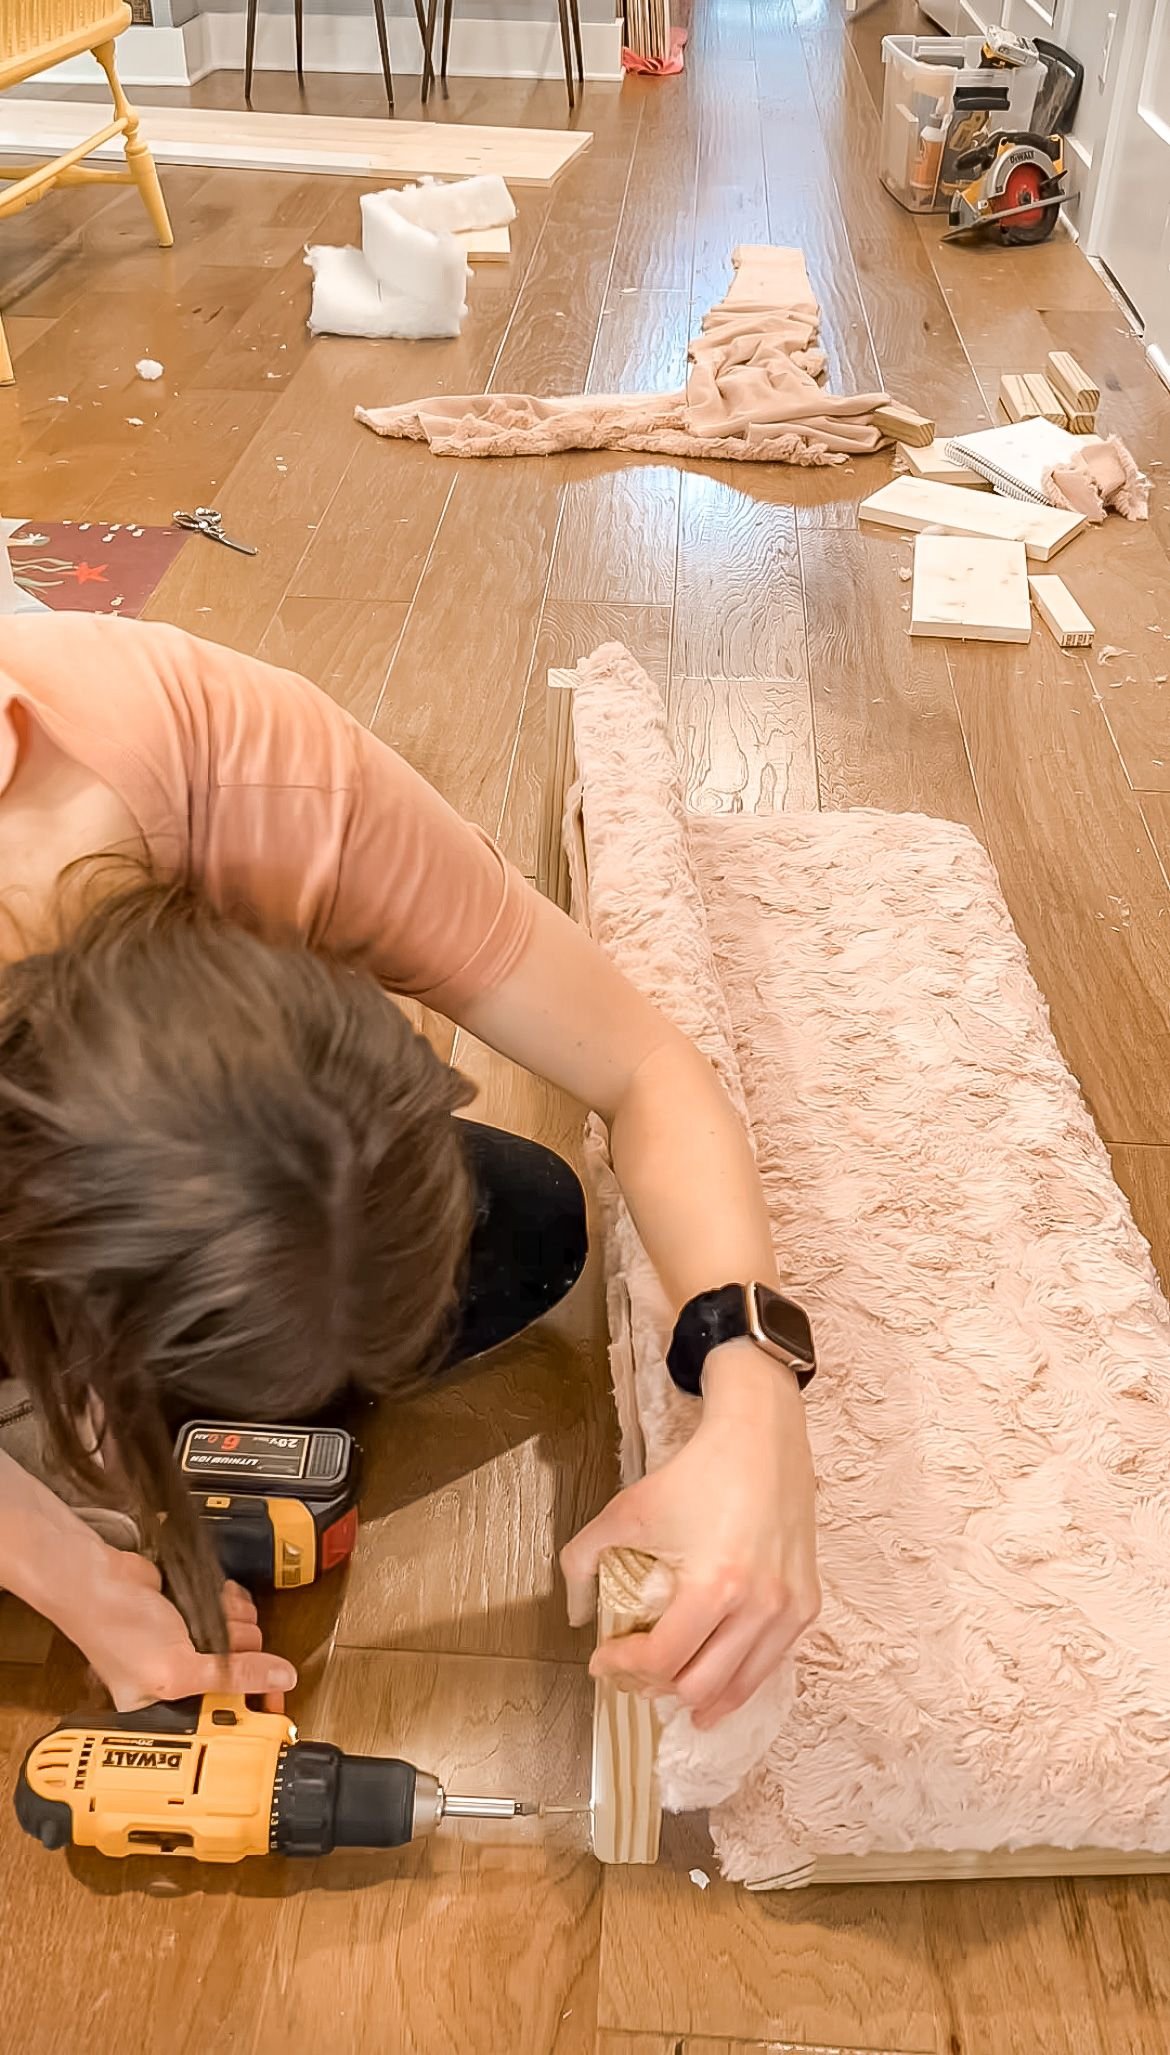
I decided to start on the benches first. I built a frame for the base of each one. Then I cut the upholstery foam to fit the shape of the bench and added a layer of batting on top of that. I put a layer of this soft pink minky on top of the foam and batting, wrapped it around the base, and stapled it all together. I repeated this process for the back of the bench and then also upholstered the backside of the bench so that the whole thing was soft and it looked more put together. I secured the backs to the base using a two by two and then repeated the process for the next bench.

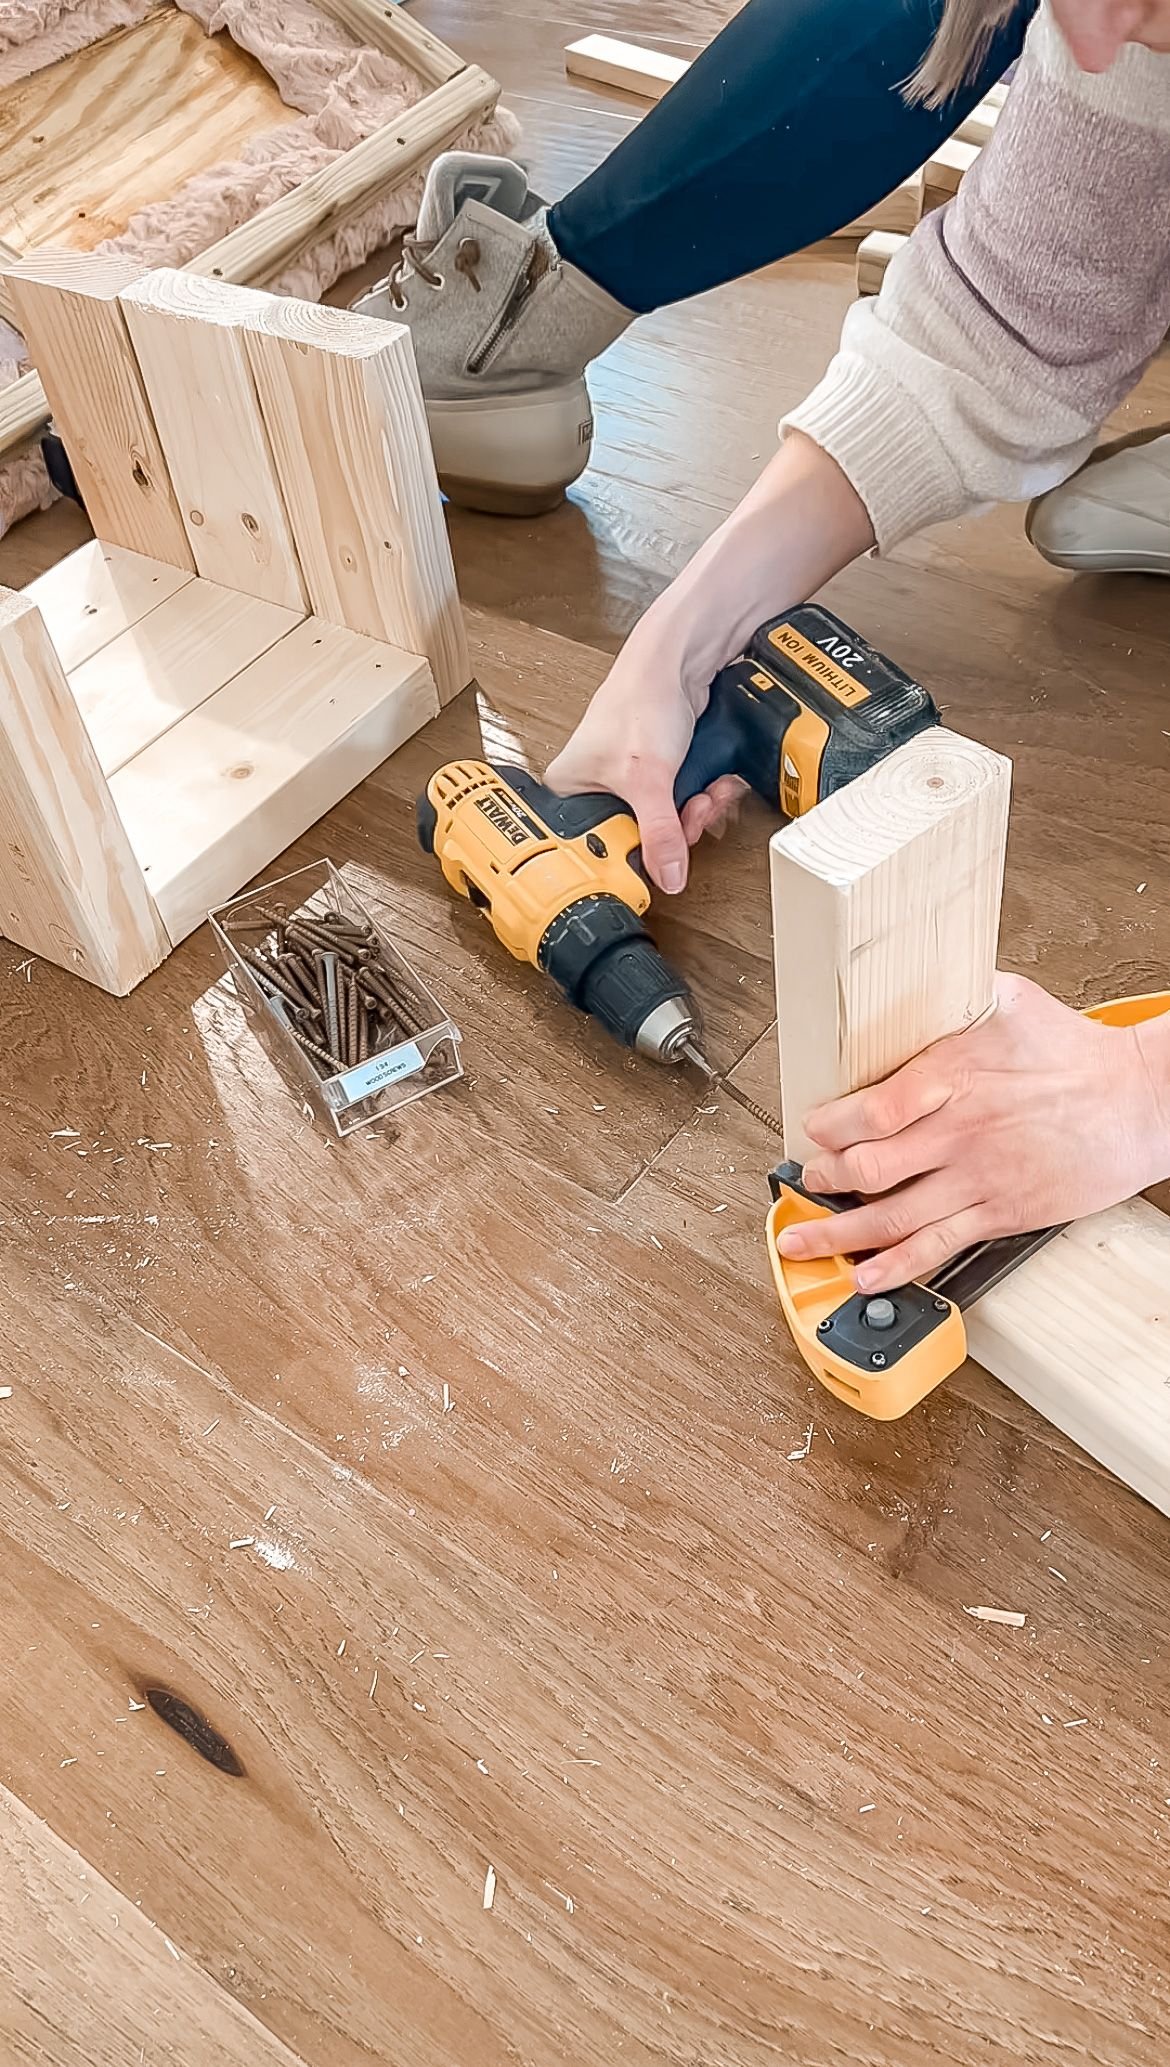
I made simple U-shaped legs out of 2x4s and filled in all of the screw holes with wood-filler. I was originally just going to leave them raw wood, but Jackie informed me that she wanted the entire bench pink. That meant I had to go back and cover the whole bench in plastic so that I could paint the base to match. I decided to paint the legs as well as the base of the frame Valentine Memories by Benjamin Moore. I’ve used this color in her bedroom as well as the built in shelves in her room. She loves it and it makes everything look cohesive so it’s a win-win. I attached the legs and now moved onto the table.
Play Table & Benches Build | The Table
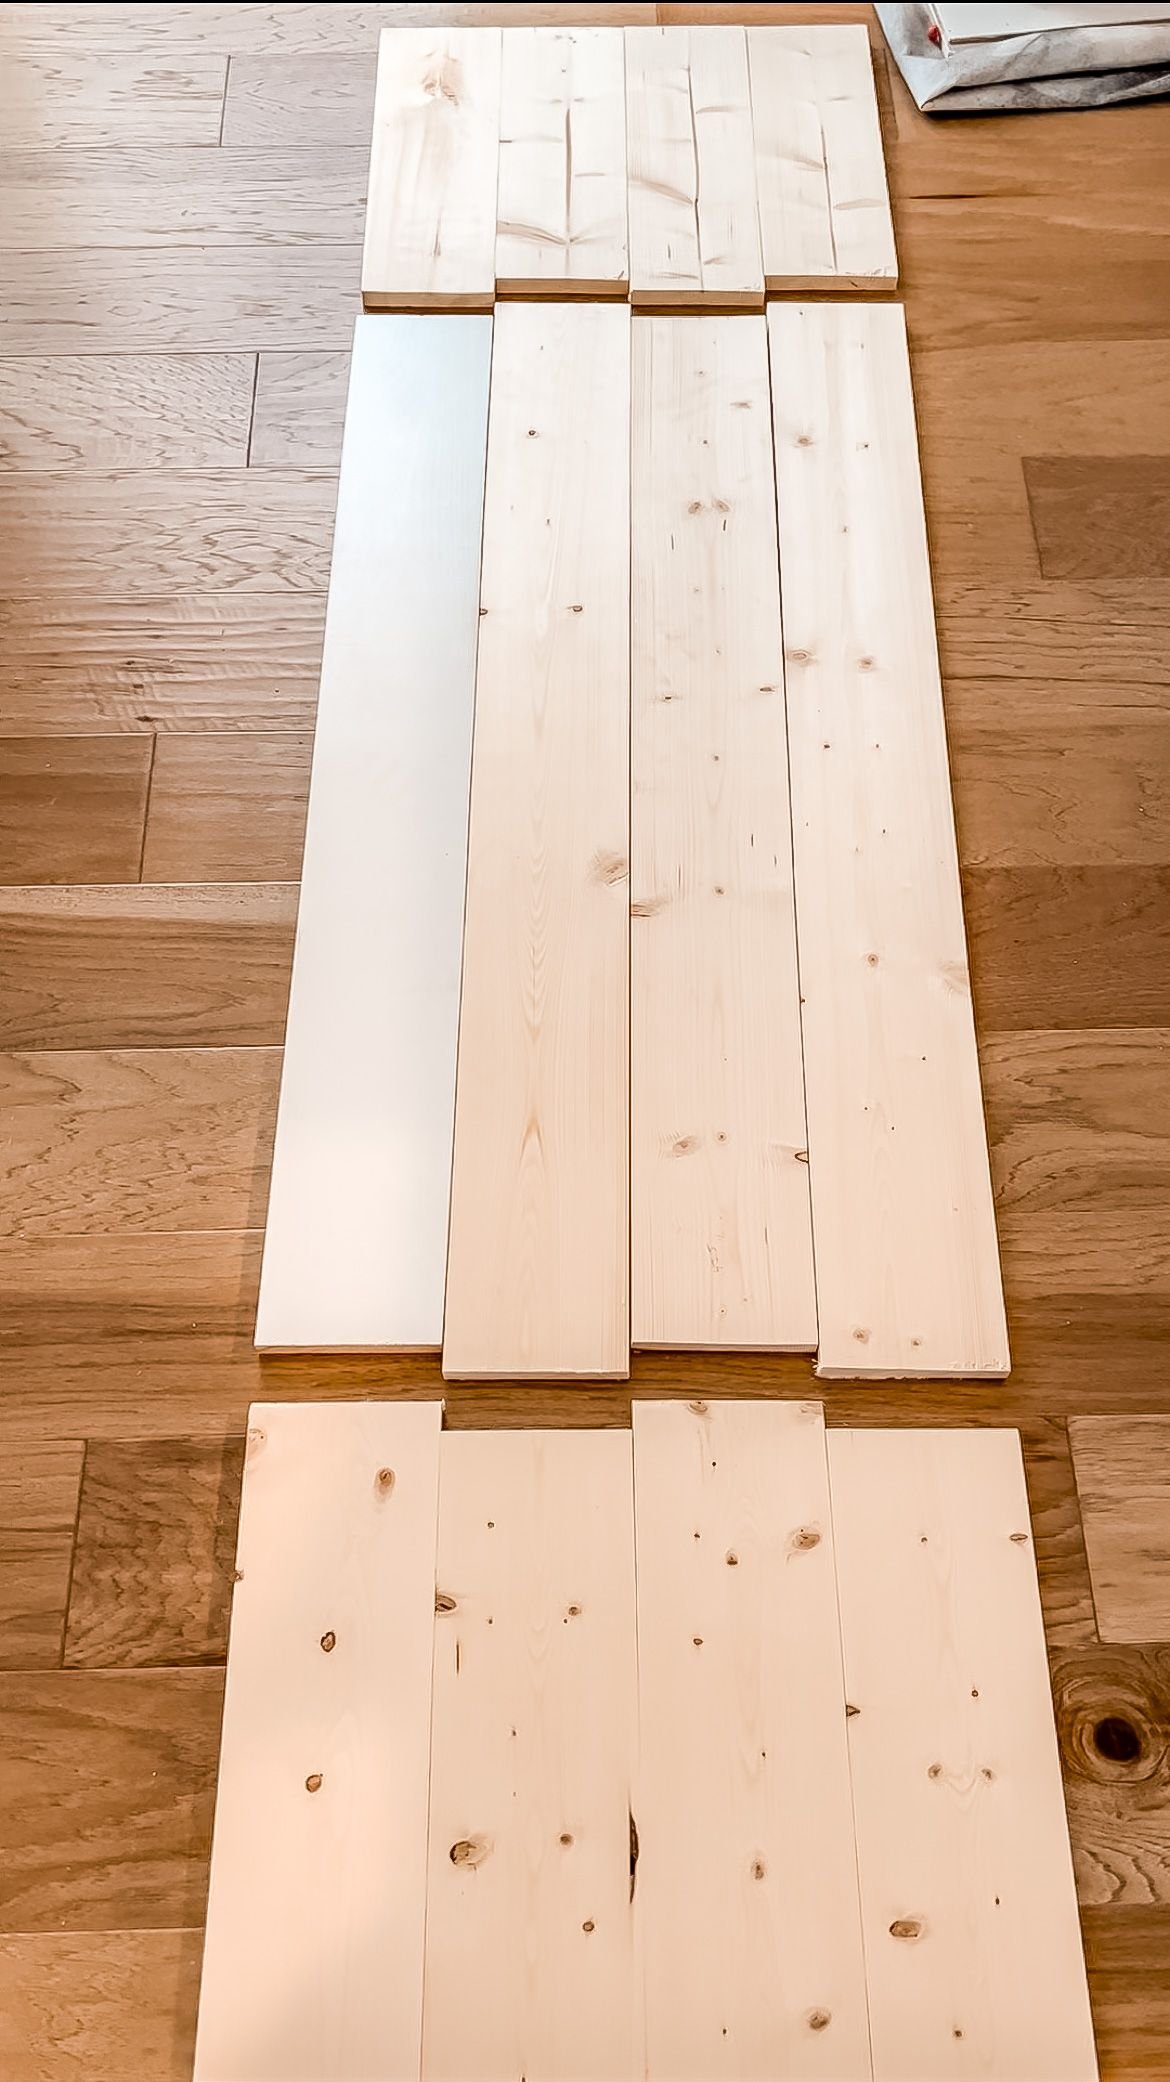
I was using this as an opportunity for me to practice making a waterfall style table, because originally I wanted to build one for my kitchen. Spoiler alert, that didn't end up happening. I went with something else for my kitchen, but I learned from making this table and now know what to do if I ever want to make one in the future.
Anyway, I used my planer tool to get all of the wood to the same thickness. Then, I used wood glue, pocket holes and pocket hole screws to connect the boards. I did three sections of these, the top and then the two sides. Once I had everything clamped in place and the wood glue was drying, I went back and wood filled all of the knots in the tops of the sections. I designed this table so that the wood was staggered. That way the wood would line up together and create this waterfall pattern.
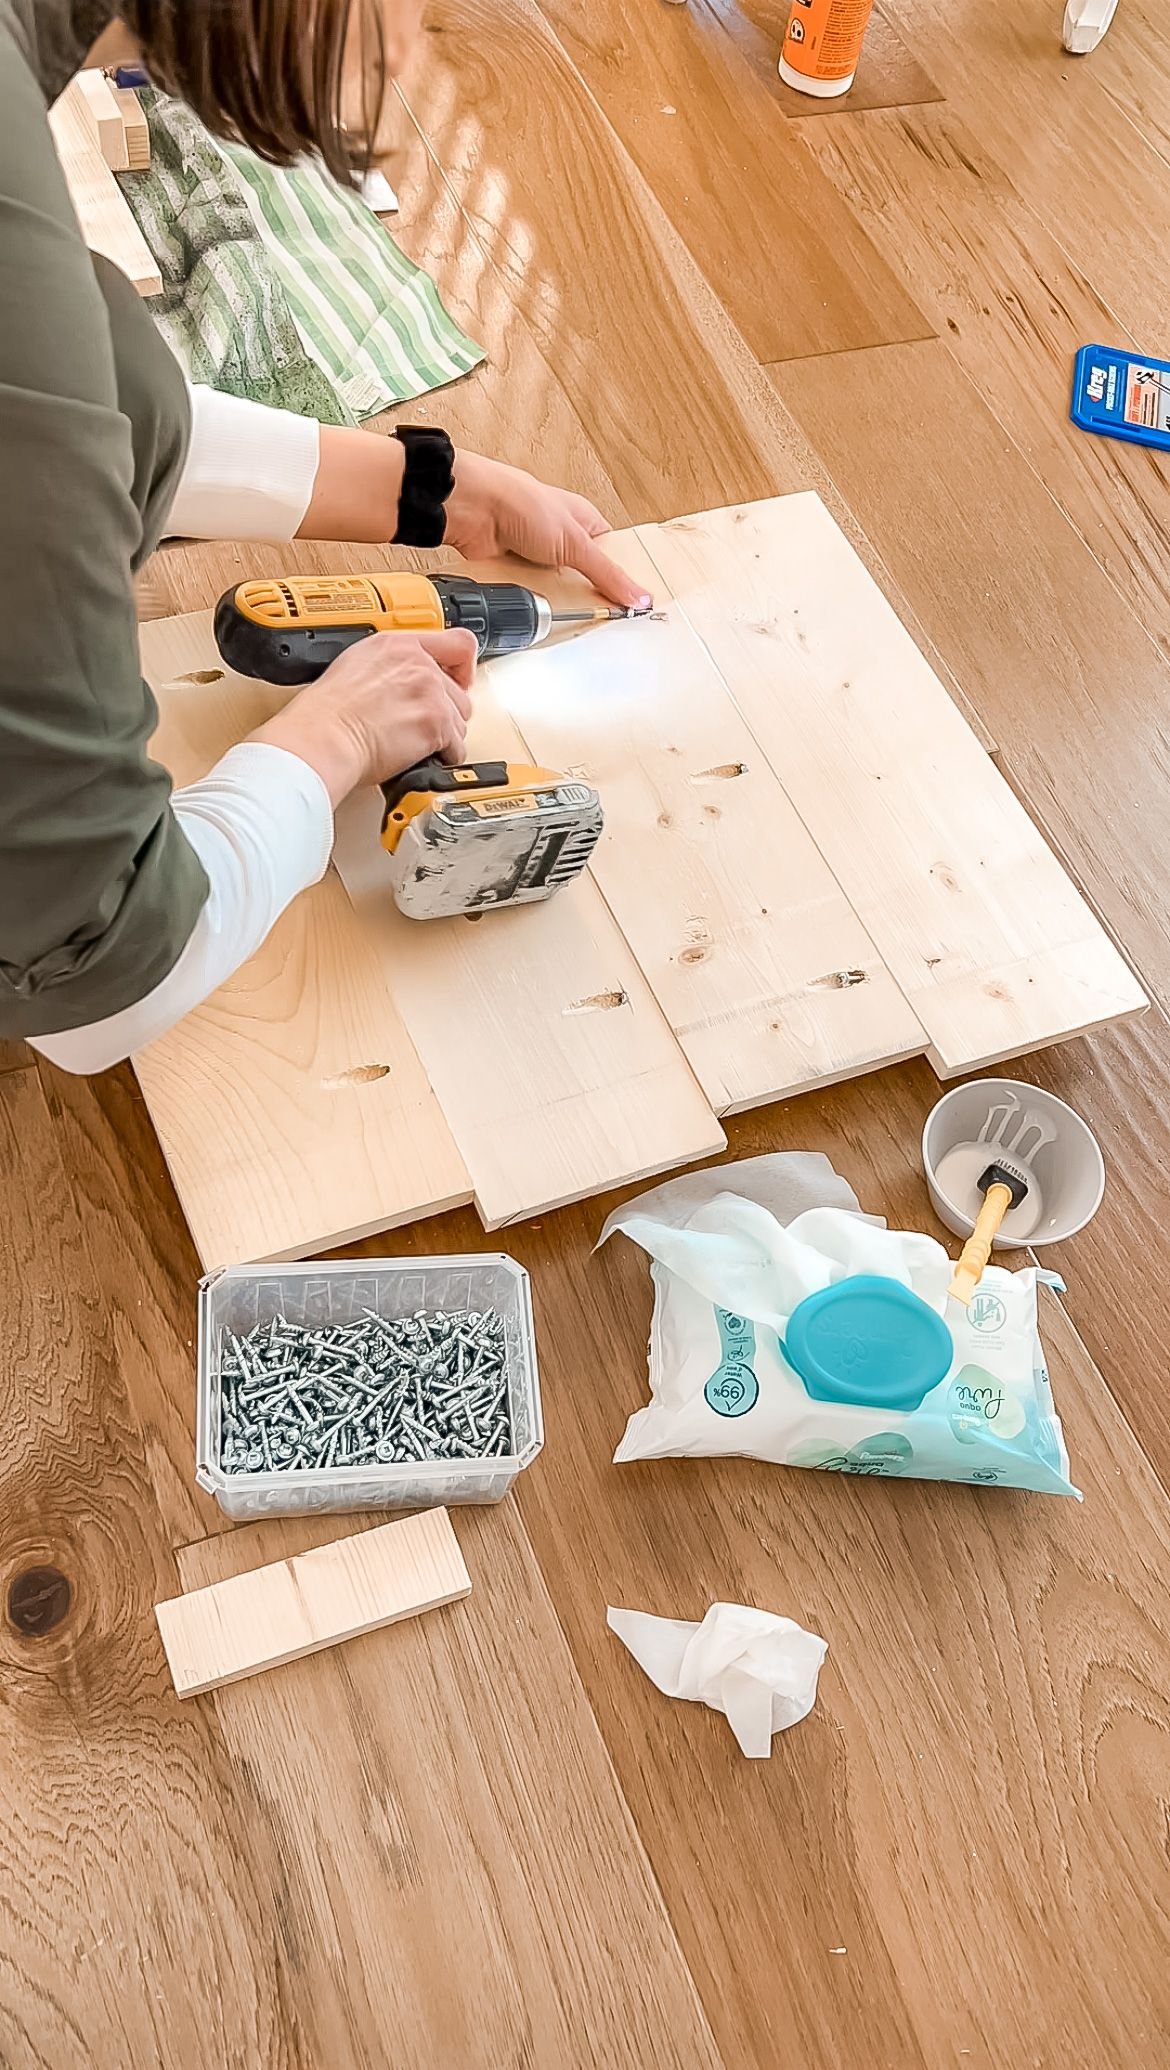
After everything was dry, I started to join the top and the two sides together. I secured the boards with screws, and then wood filled those holes. I did make some mistakes here and I had to go back with my multi-tool and smooth everything out.


I sanded the whole table down so it was nice and smooth. Again, I would have preferred to leave it raw wood. Since this is Jackie’s table in her room, I let her decide and she wanted it painted white. I primed and then applied two coats of paint, sanding down between each coats so it was nice and smooth.
Play Table & Benches Build | Final Look
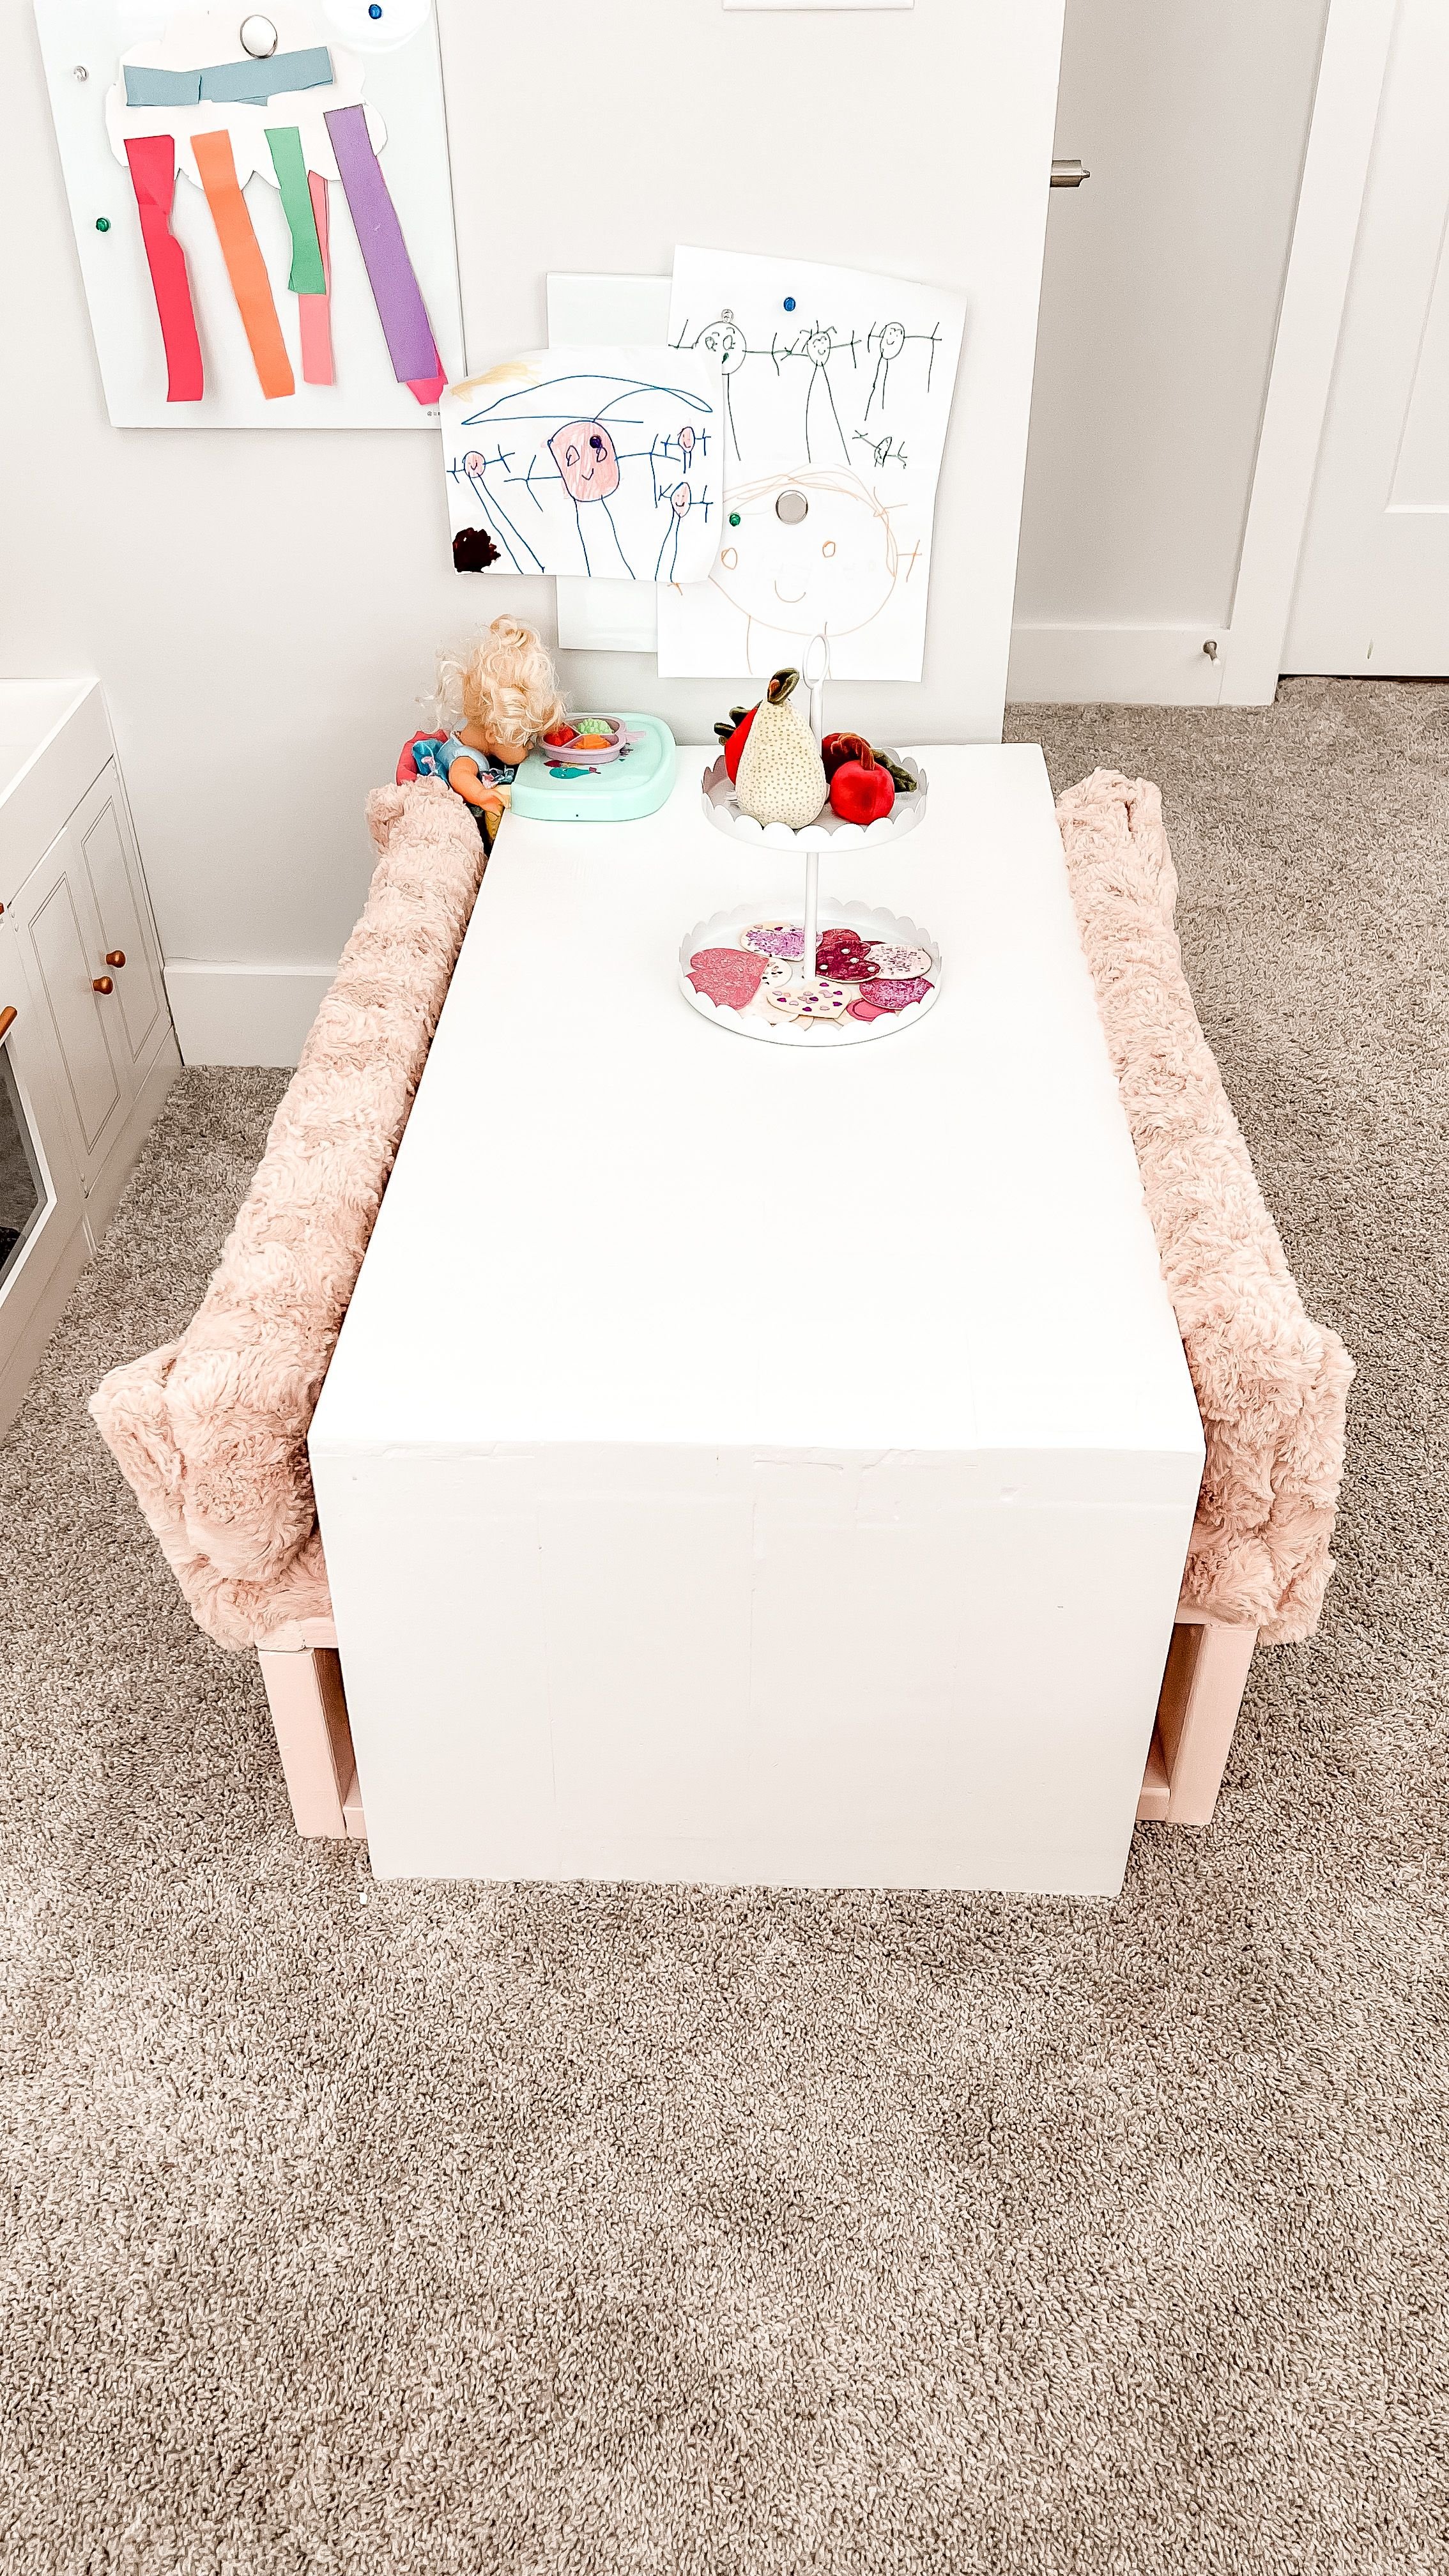
After it was dry, we brought it up to her room and paired it with the benches. She absolutely loves it and loves that she can have all of her “friends” together for a tea party. My personal cost was $215.14 for this project. You can find the downloadable build plan with cut list and full materials here.

Play Table & Benches Build | Shop
