
Laundry Basket Tower Build & Build Plans
I get so many questions about the laundry basket tower from the laundry room build. It’s such a unique laundry set up and I’ve used it to make a laundry routine that works wonders for our family. With the questions about the full build, I always get asked how I actually implement this system. So, I figured I could first go over that and then explain how I built the physical tower.
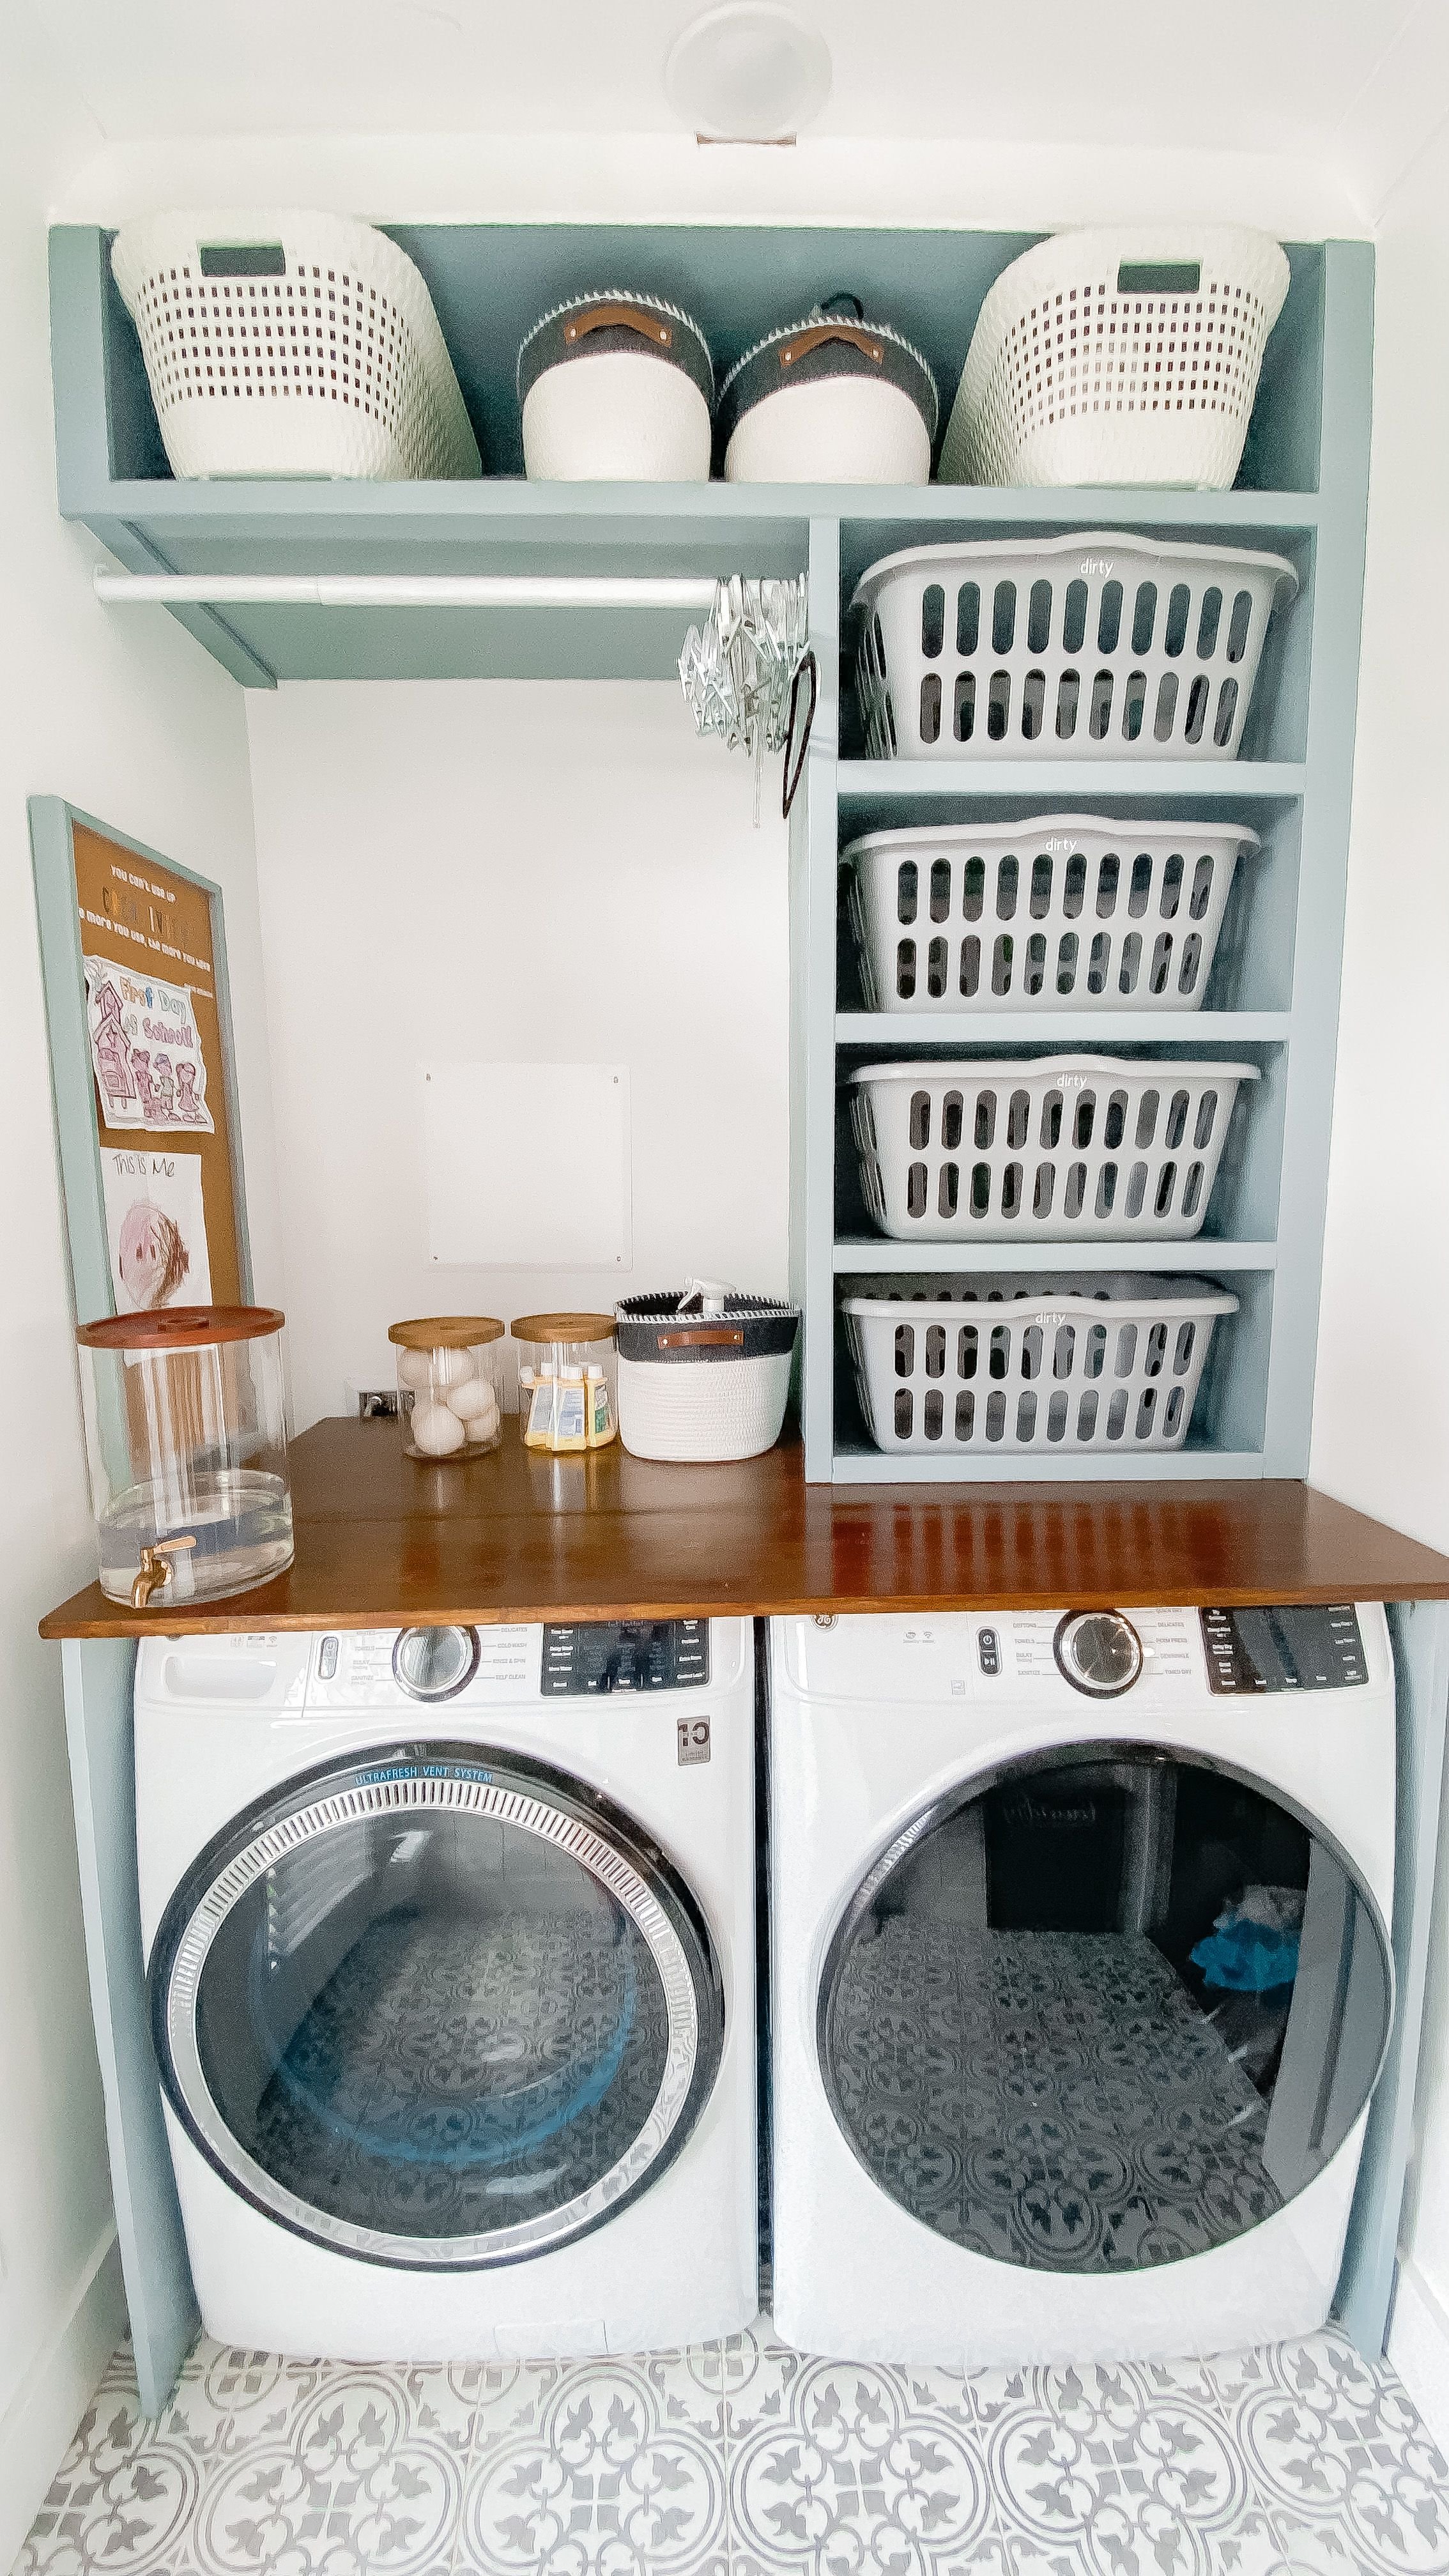
Laundry Basket Tower | How We Use Our Laundry System
Everyone in our family has separate dirty laundry hampers in our bedrooms, but I use the gray baskets from the laundry tower to sort the laundry by colors. I bring the tower baskets back downstairs and into the tower. I then am able to quickly toss the already sorted clothes into the washer. When all the baskets are emptied the clean laundry goes back into them and then taken upstairs to sort into rooms.
Laundry Basket Tower | The Build
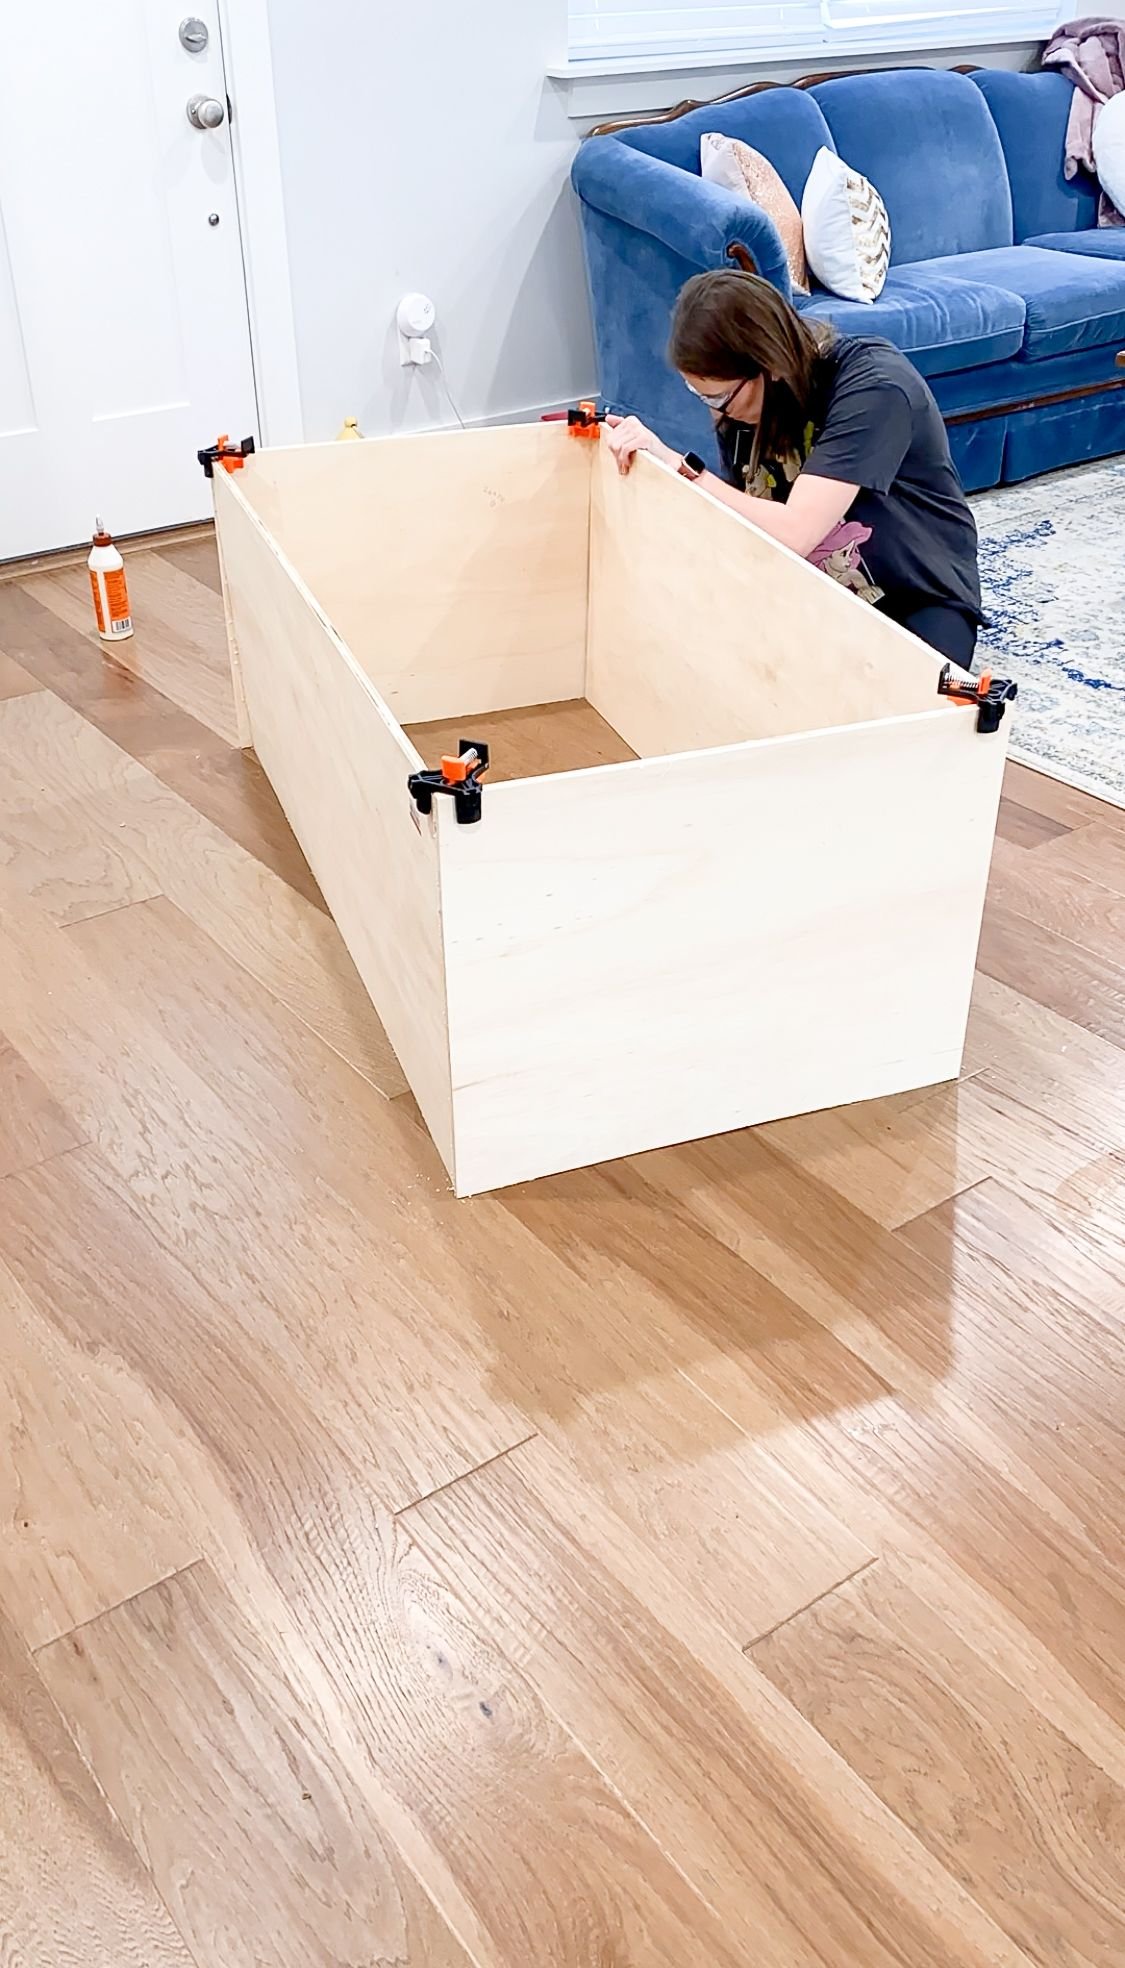
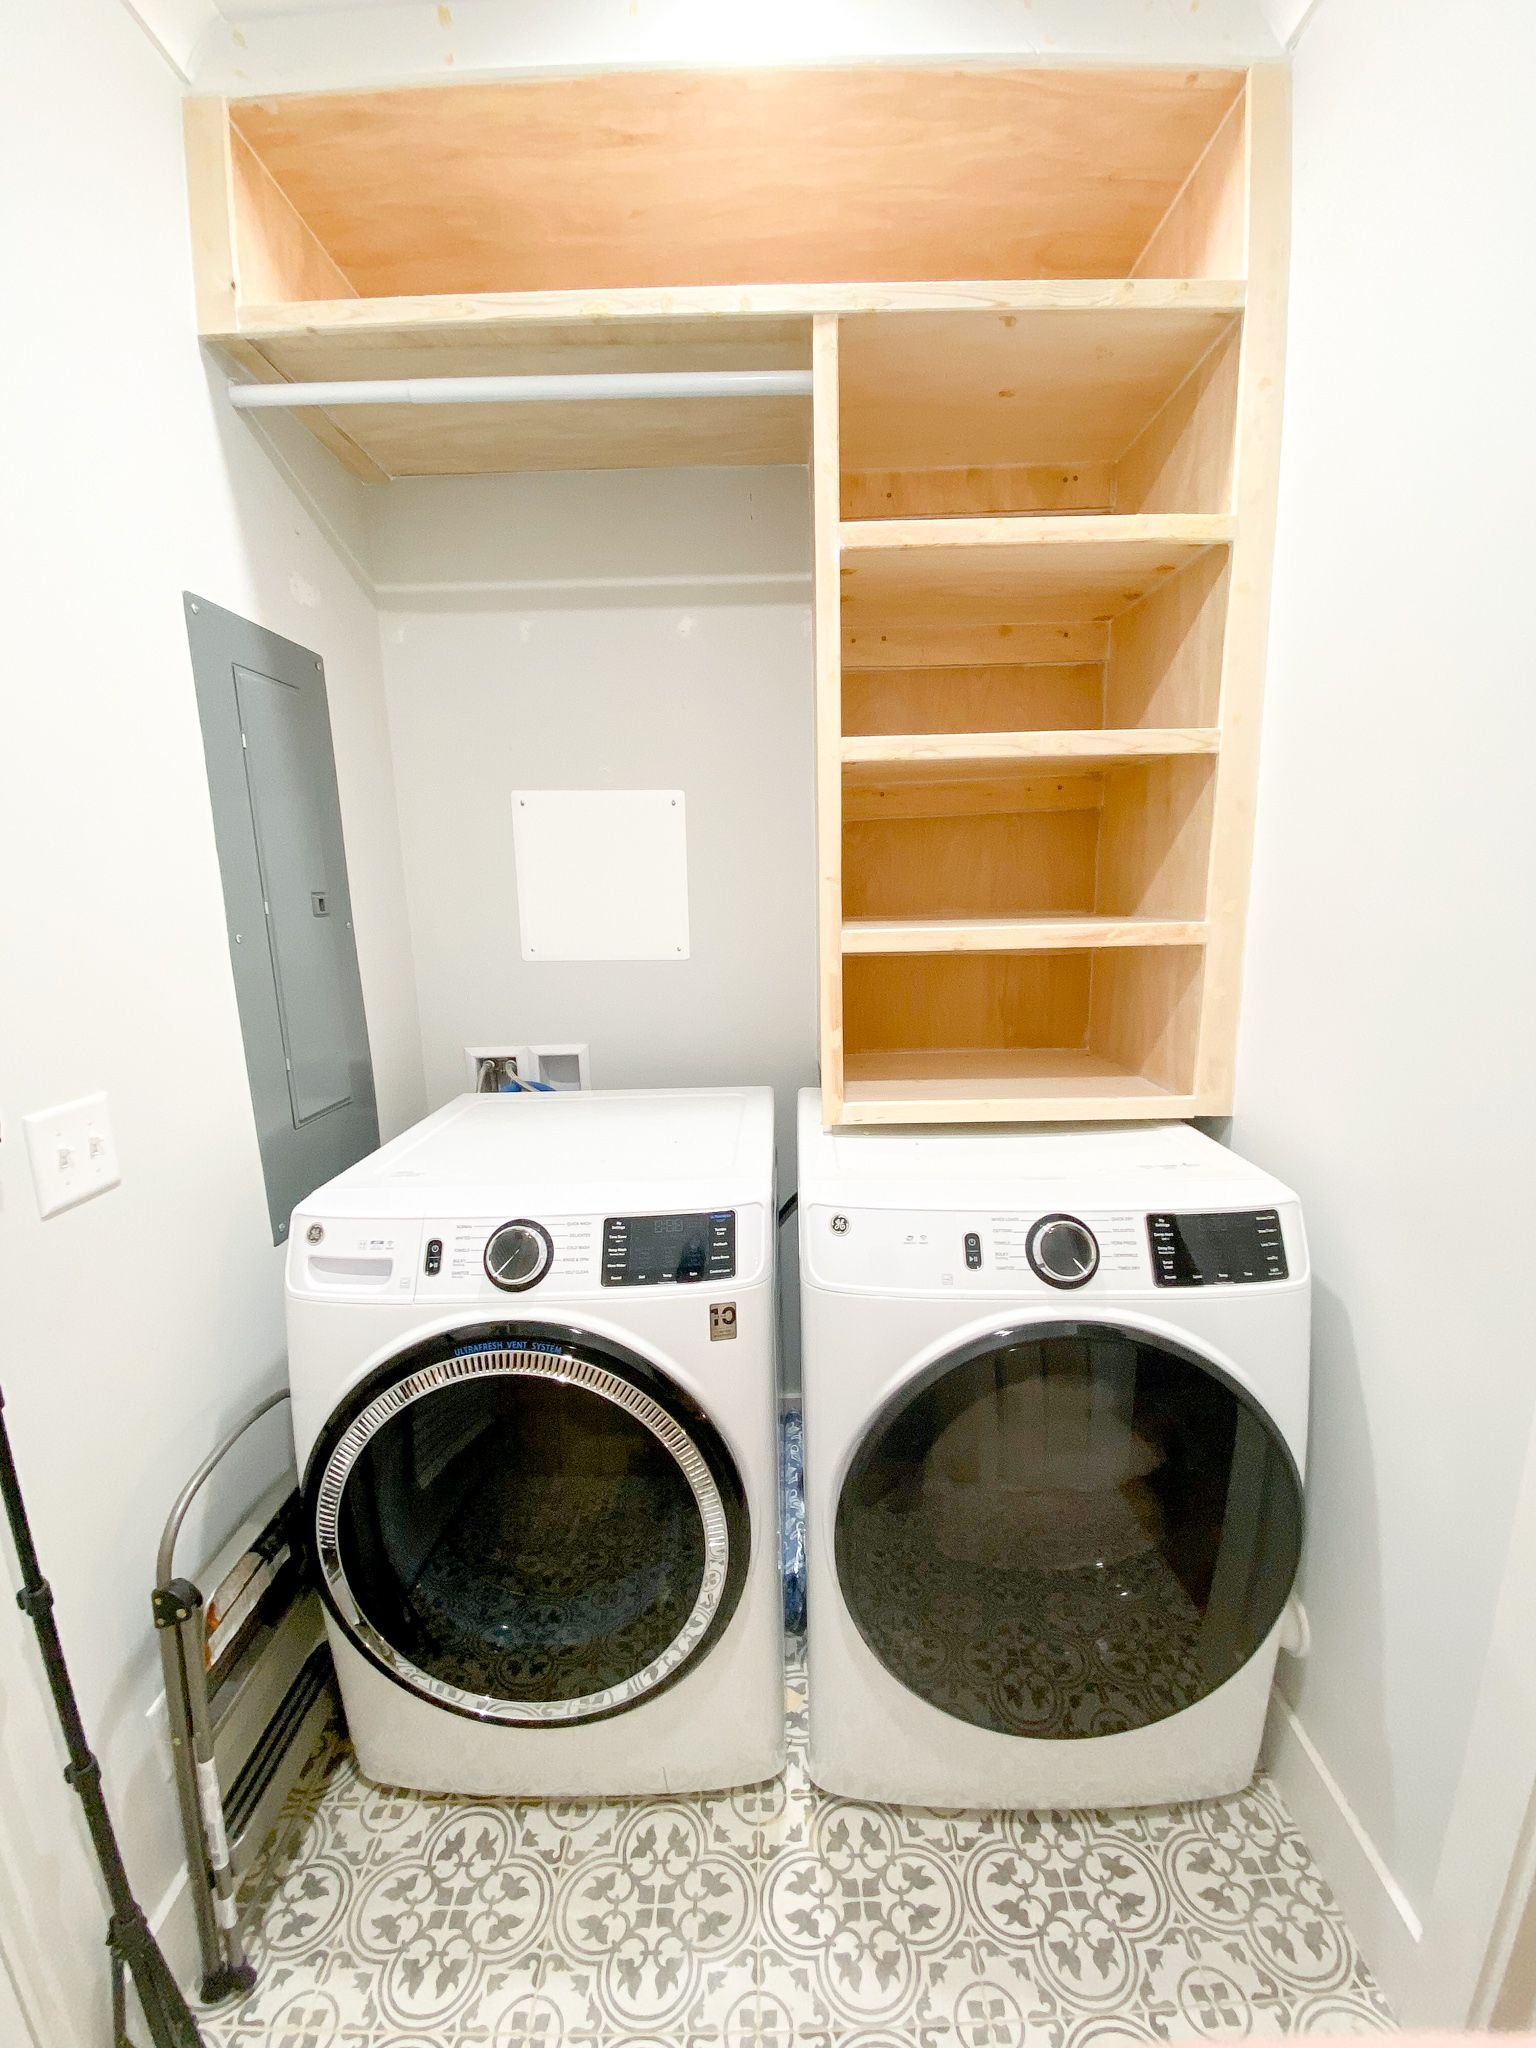
Now, onto the build. I measured and then cut the pieces of wood that I needed for the tower, drilled a ton of pocket holes and then assembled the outside rectangular frame. I used 90 degree clamps to keep the frame together. I secured everything with pocket hole screws and wood glue. Then, I determined how far apart I needed the shelves to be by using standard laundry baskets (I got mine from Target). I made sure to give about three additional inches for each laundry basket, just so there was enough room to get them in and out, especially if they had clothes in them.
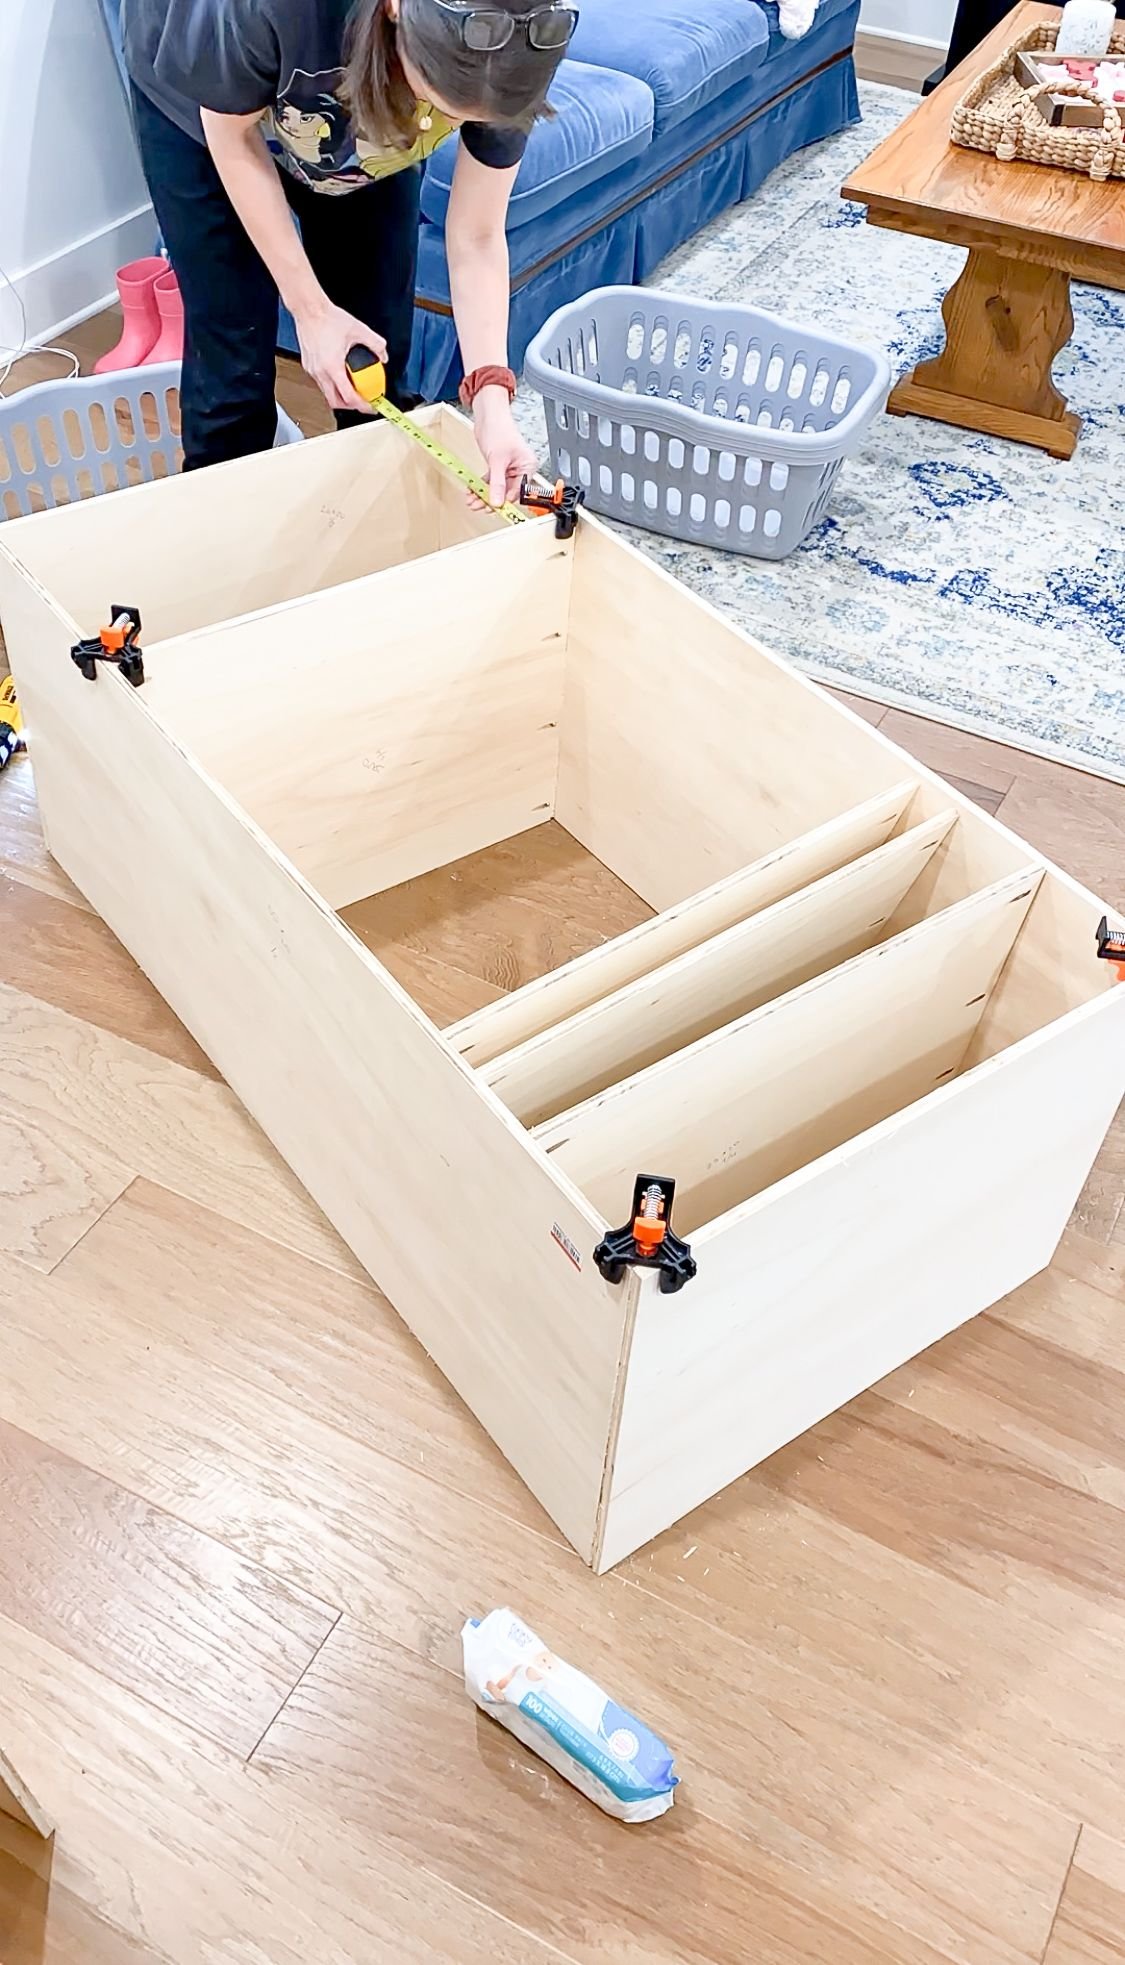
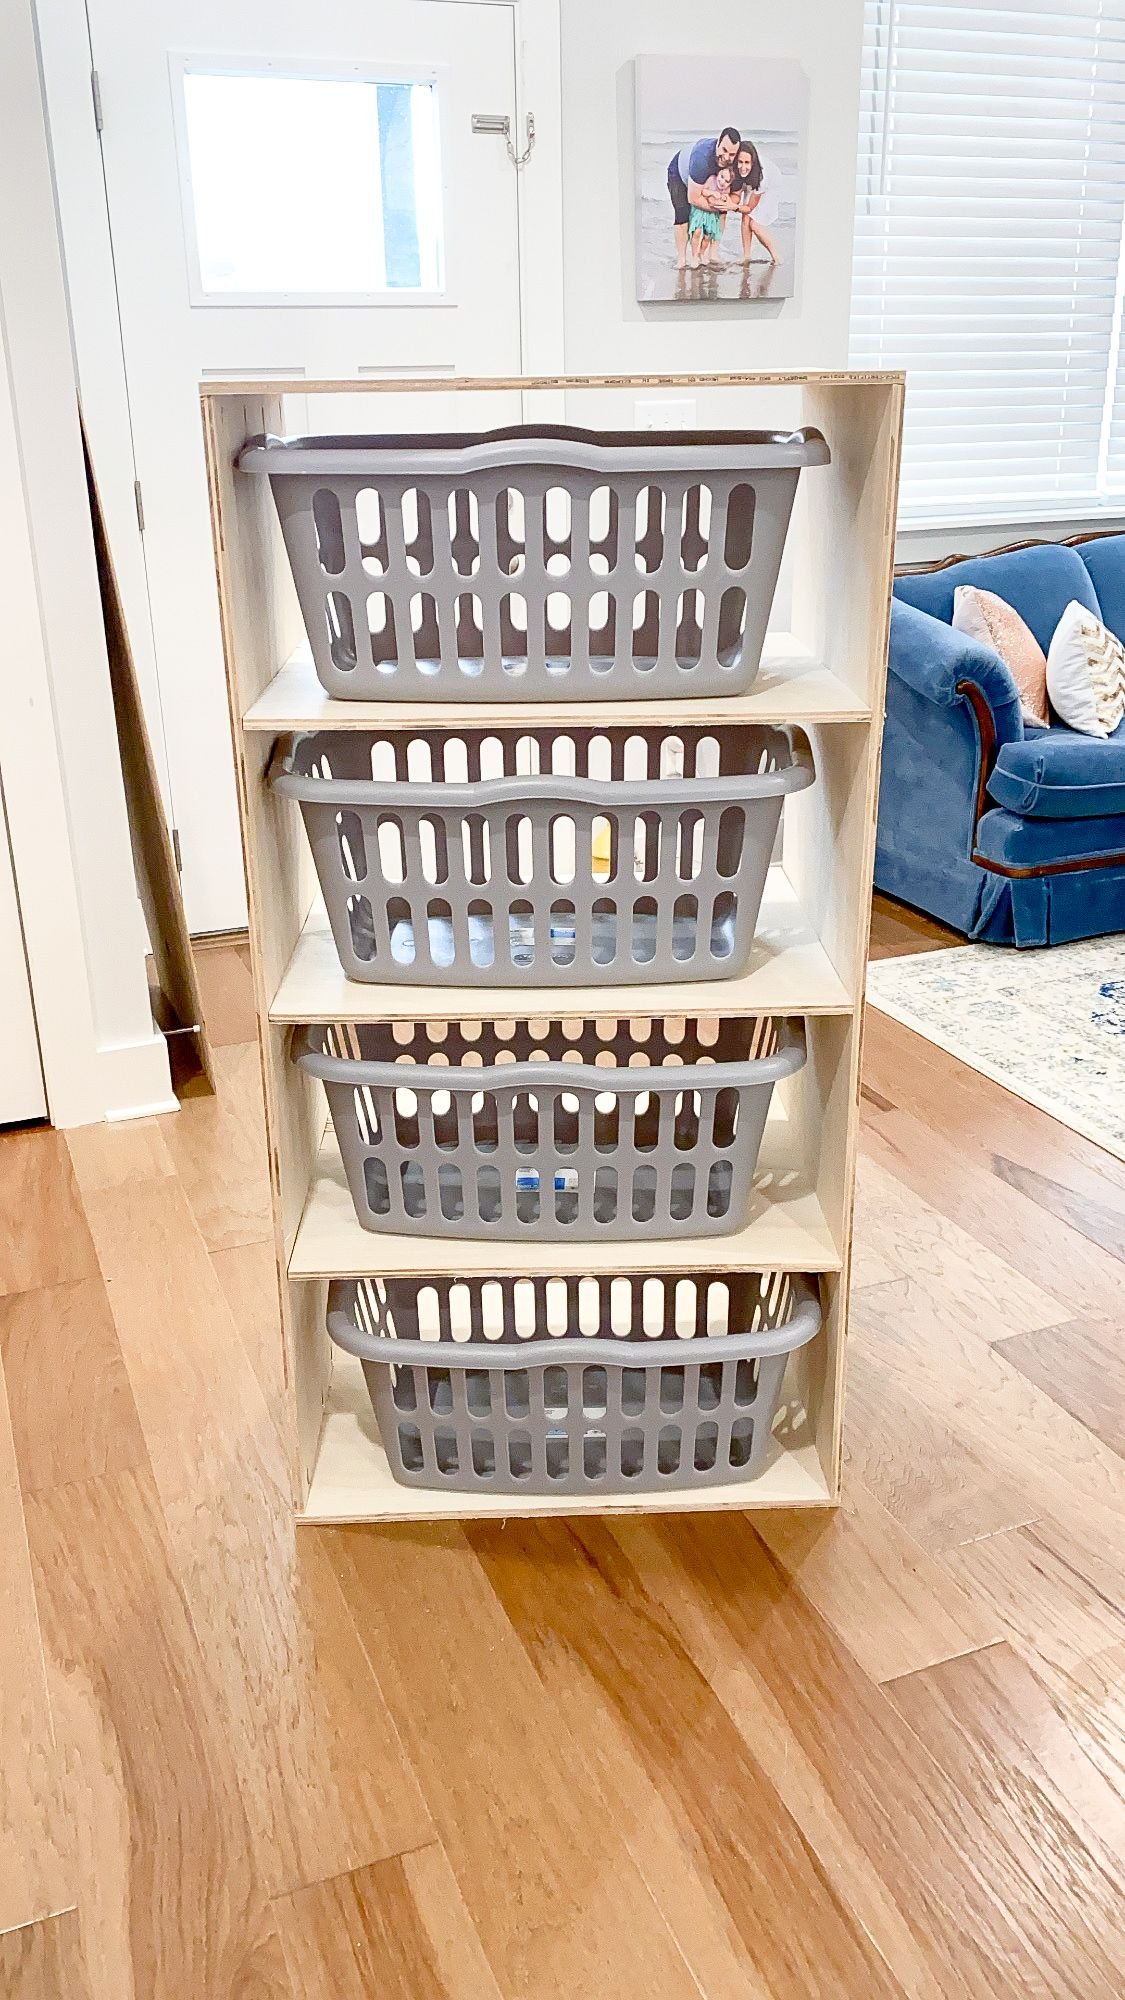
I secured the shelf using wood glue and pocket hole screws, and then measured and continued that for the next three shelves. I added supports to the back of each section so that it would be easier to hang to the studs on the wall. I hung the laundry basket tower underneath the first shelf that I built in the whole laundry room system (see my previous blog post on the full laundry room build) and secured it to the studs in the wall. When I installed both sets of shelves, I made sure that there were gaps on the sides between the shelves and the wall. I did this so that when I put the trim on, the trim wouldn't overlap on top of the shelf.
Laundry Basket Tower | Finishing Work
Once it was all flush and installed securely, I spent a lot of time on my trim. I tried really hard to make sure that the baskets could come out easily to make my whole laundry process run smoothly. Then I did all of the finishing work. I wood filled, caulked, primed and painted.

The total cost for this project is $314.10. My personal total cost was $264.64 since I had some of the supplies already. You can get the download with the materials list, the cut list, the tools that you'll need and a step by step guide to build this yourself here. I can’t wait to see what you create!