
DIY Mug Hanger

I originally got a large piece of wood from the lumberyard to use for the headboard on my bed. However, I ended up going with a different piece of wood for the headboard. My mom asked me if I could take the unused piece of wood and make a custom mug holder for her. Let me show you how I did it!
DIY Mug Hanger | Getting Started

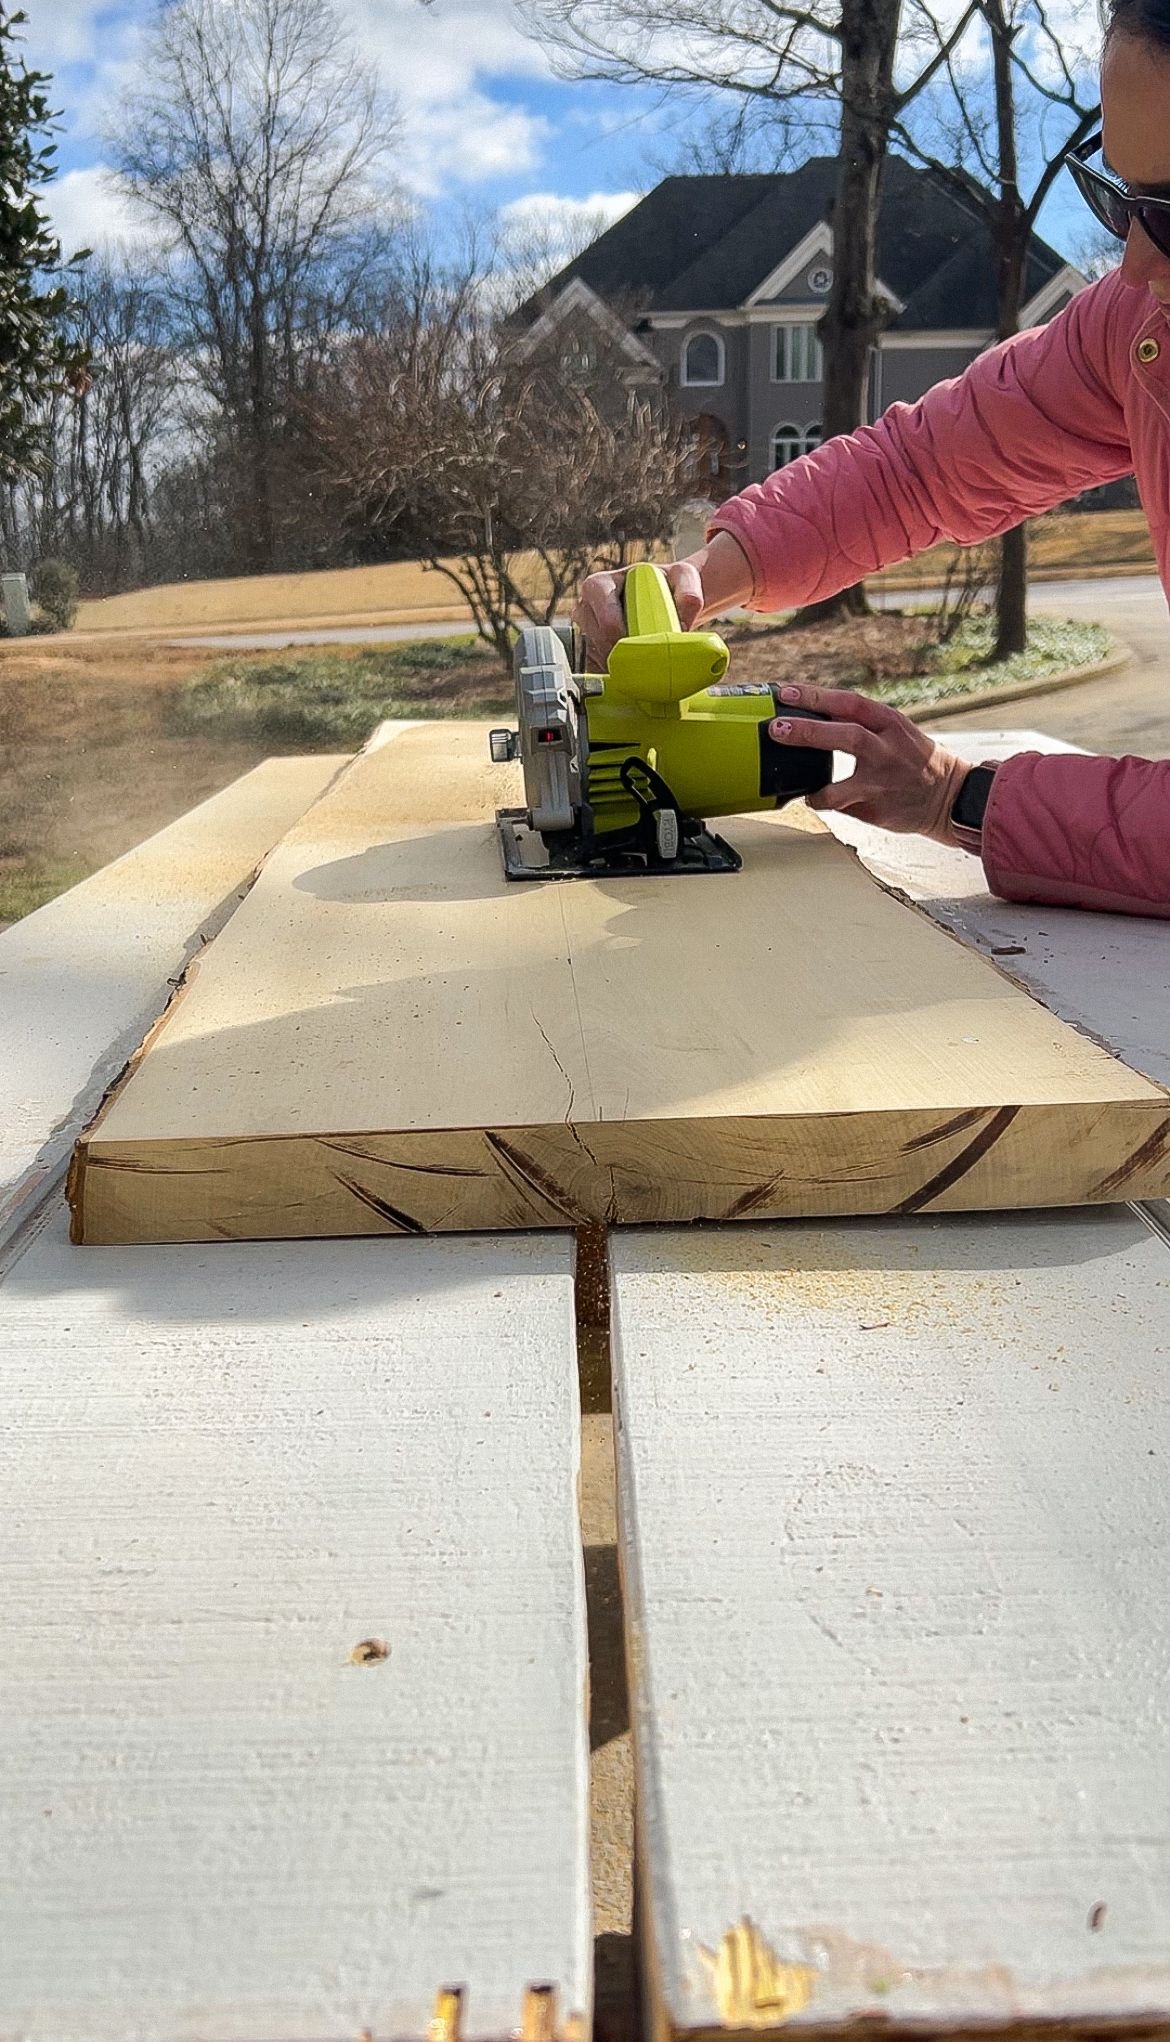
First, I cut it in half lengthwise so it was two pieces of equal length. I used my circular saw to cut this down the middle. I measured it first just to make sure I was in the exact middle all the way down.
Once the piece was cut, I sanded everything down again, avoiding the bark. My mom liked the look of the original bark on it, so I tried to preserve it as much as possible. I started off with 60 grit sandpaper, then went to 80, 120, and then 220 to get it as smooth as possible. Next, it was time to seal it and preserve the bark.

DIY Mug Hanger | Epoxy
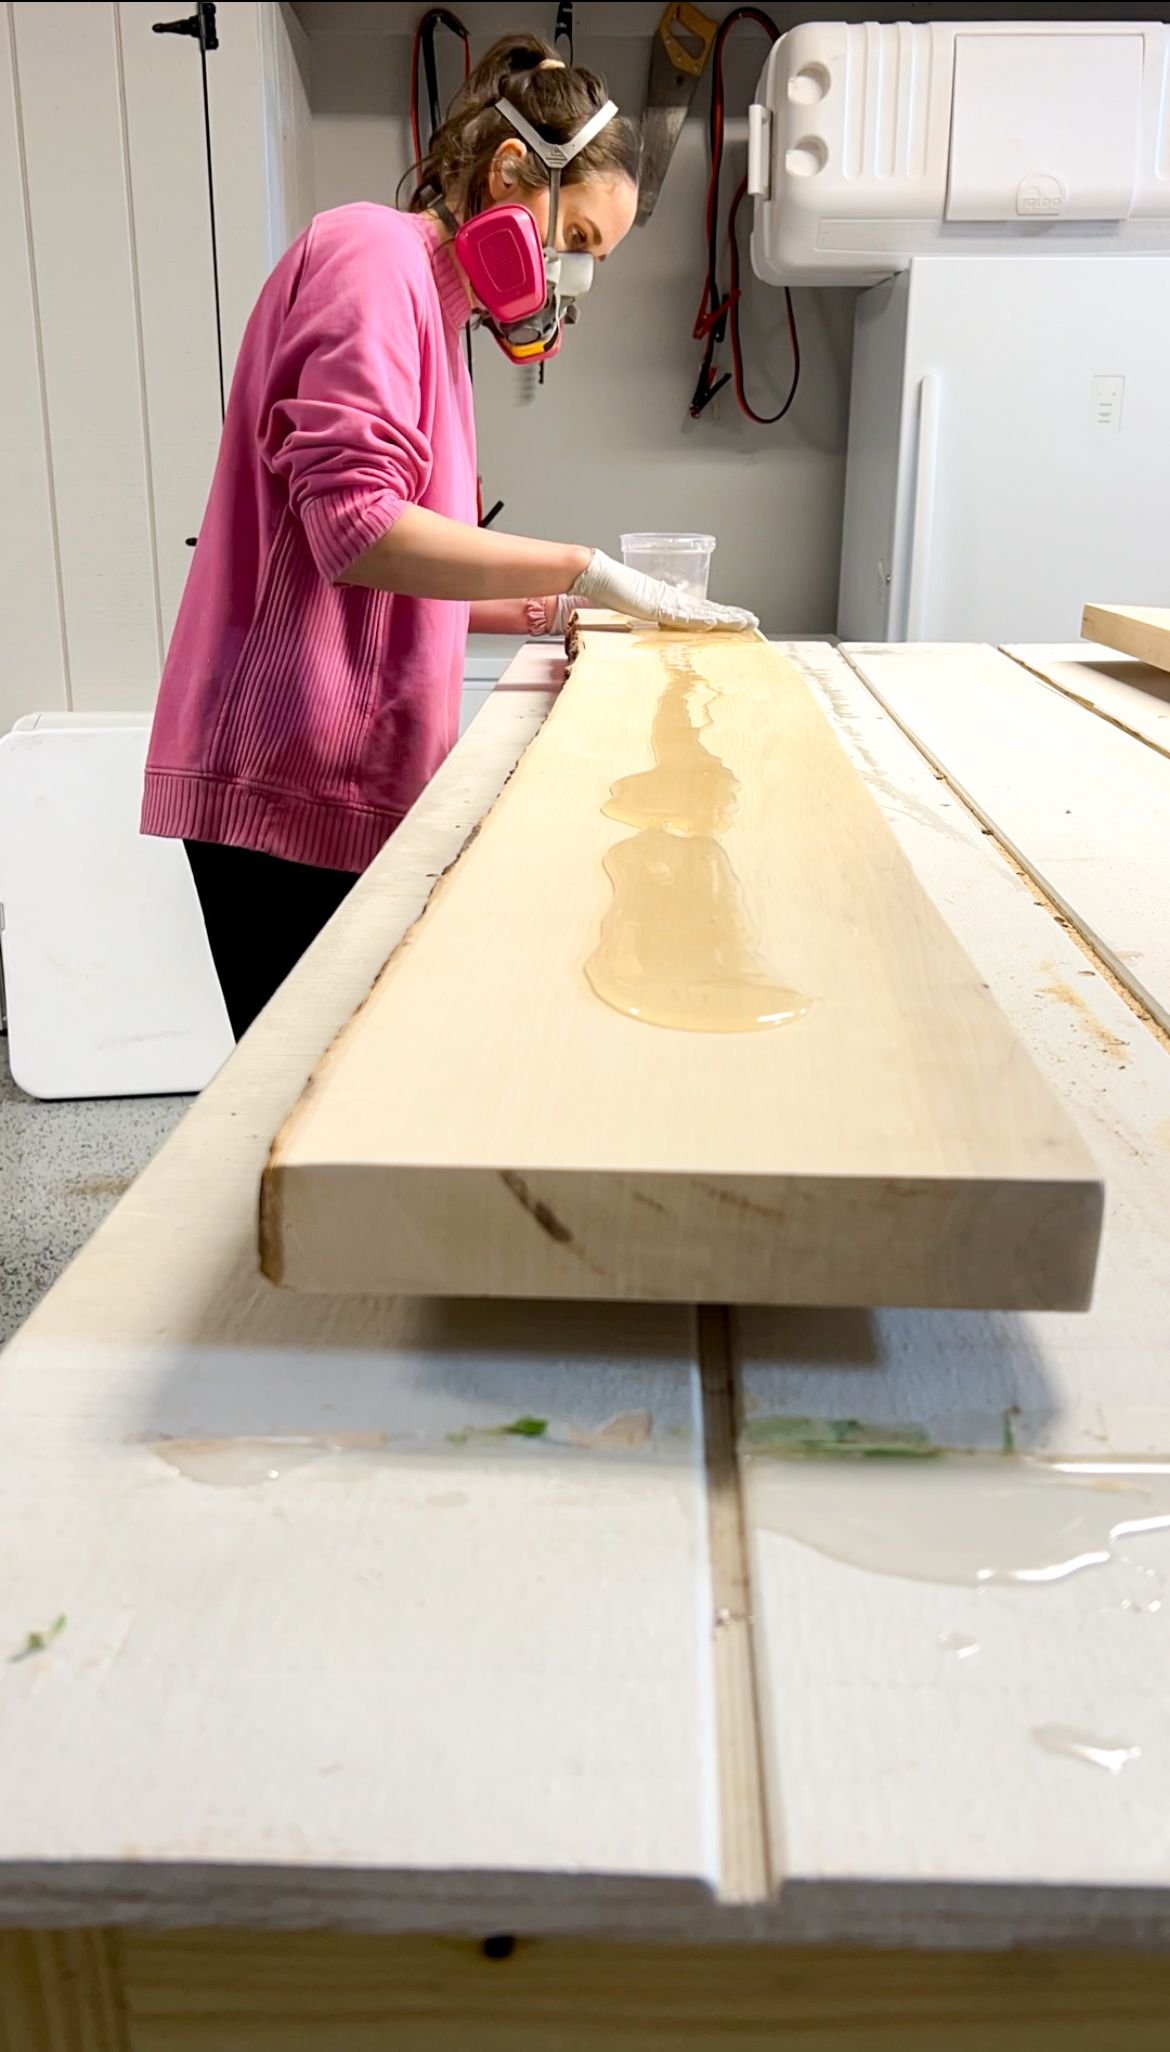
I decided to use epoxy resin for this. This is only the second time I've used this on a piece of wood, but I have liked it so much I'm trying to figure out how to use it as much as possible! The last time I used epoxy, the slab of wood I was using had a lot of cracks and holes in it, and so I had to do a multiple pours of epoxy. This time, I'm really only using the epoxy to keep the bark intact and preserving it while doing it. I only have to coat the top of this piece, so I don't need a lot of it, possibly two pours maximum.
I found some spots that were uneven with my first pour, so I definitely decided it was time for a second pour and I wanted it on the bark as well to make sure that everything stayed put. The epoxy requires twenty-four hours minimum between pours of epoxy, so I made sure I made sure I gave it plenty of time for curing in between pours. Once it was completely cured, I left it outside for a solid week minimum to get rid of the smell that comes with the epoxy. When I did my headboard, I brought it right into my house after the twenty-four hour curing period, and our bedroom smelled like epoxy resin for several months, so this step is pretty crucial. Once it had been outside for 10 days, it was time to add the hanging hooks.

DIY Mug Hanger | Adding Hooks
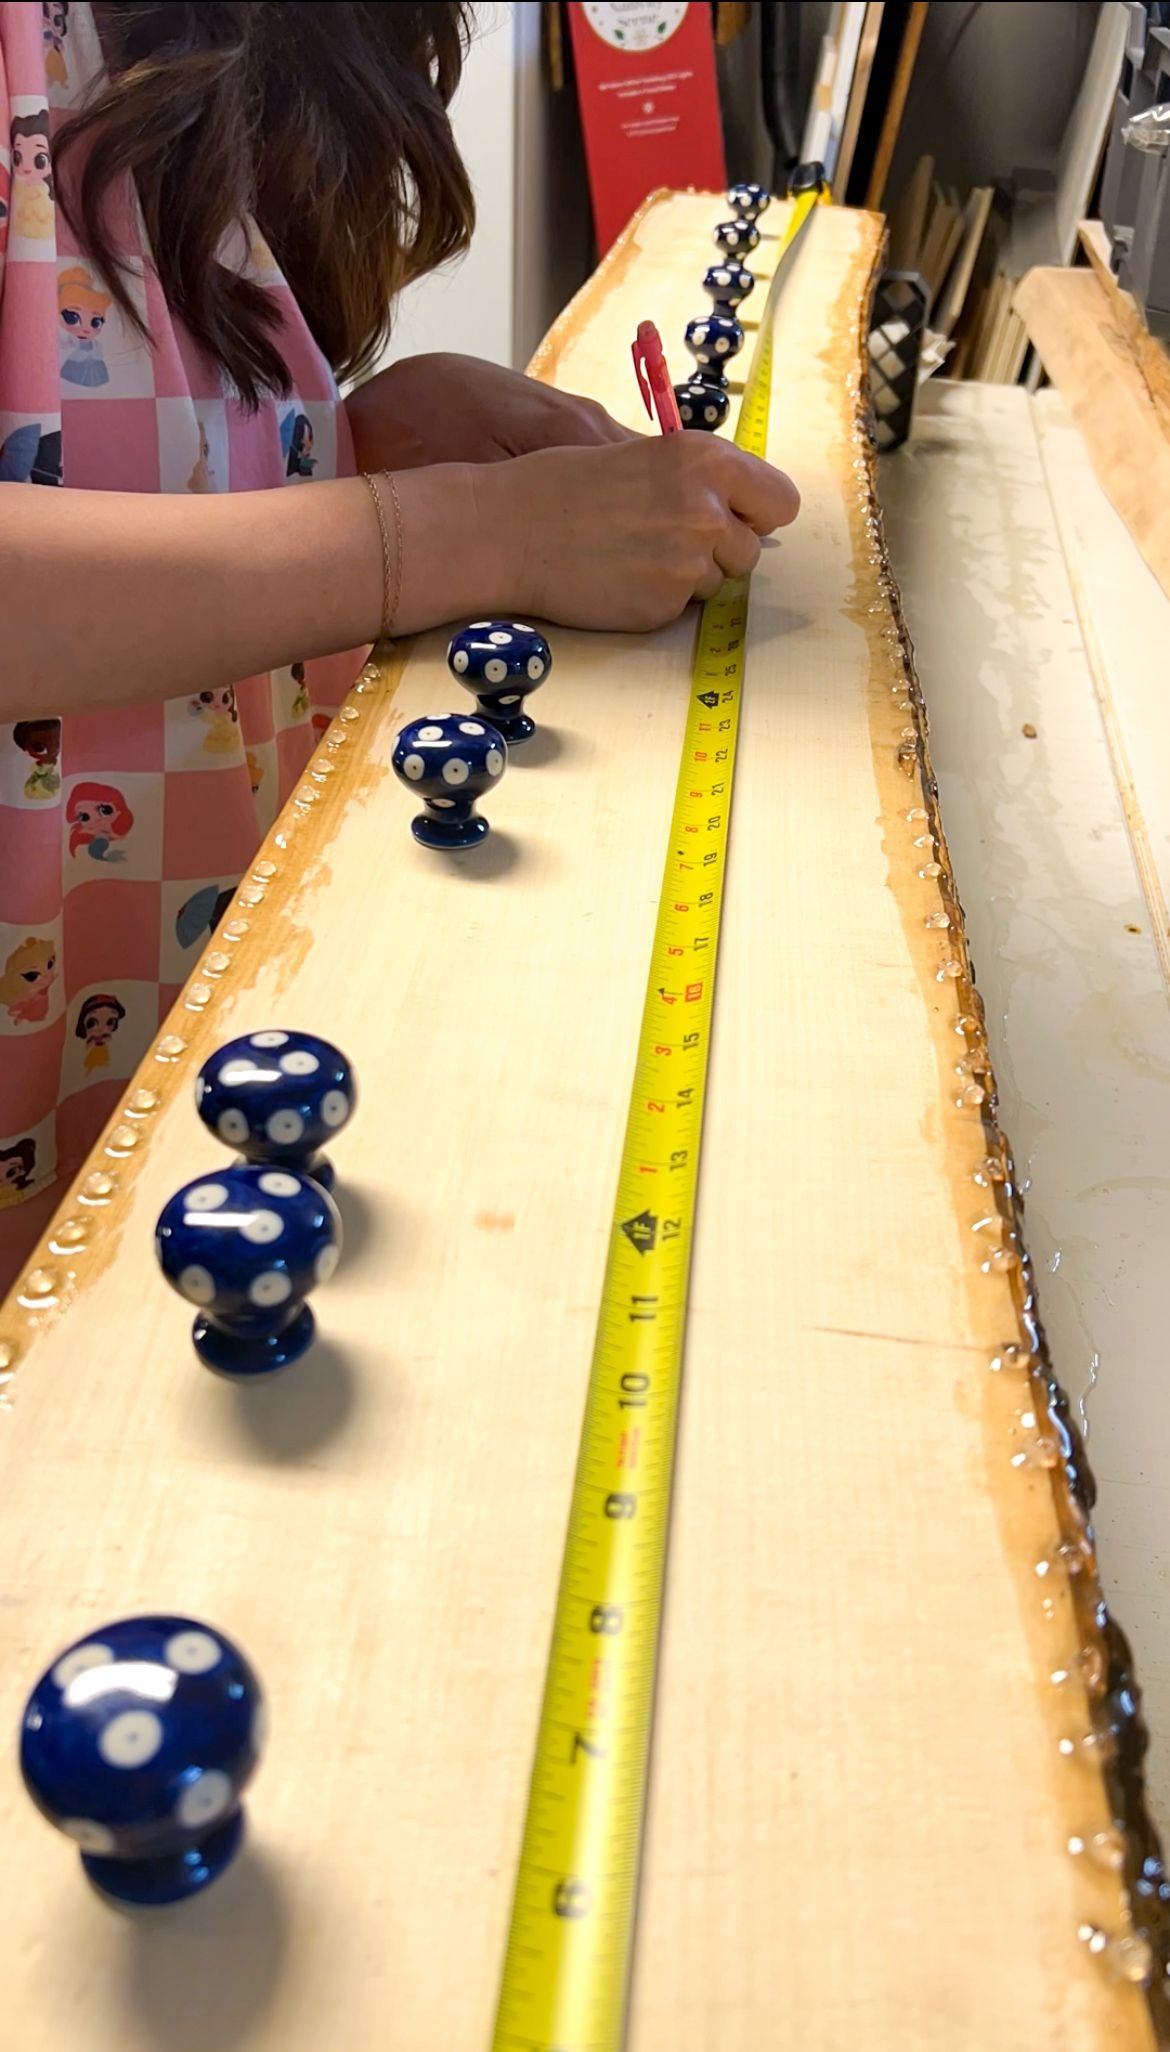
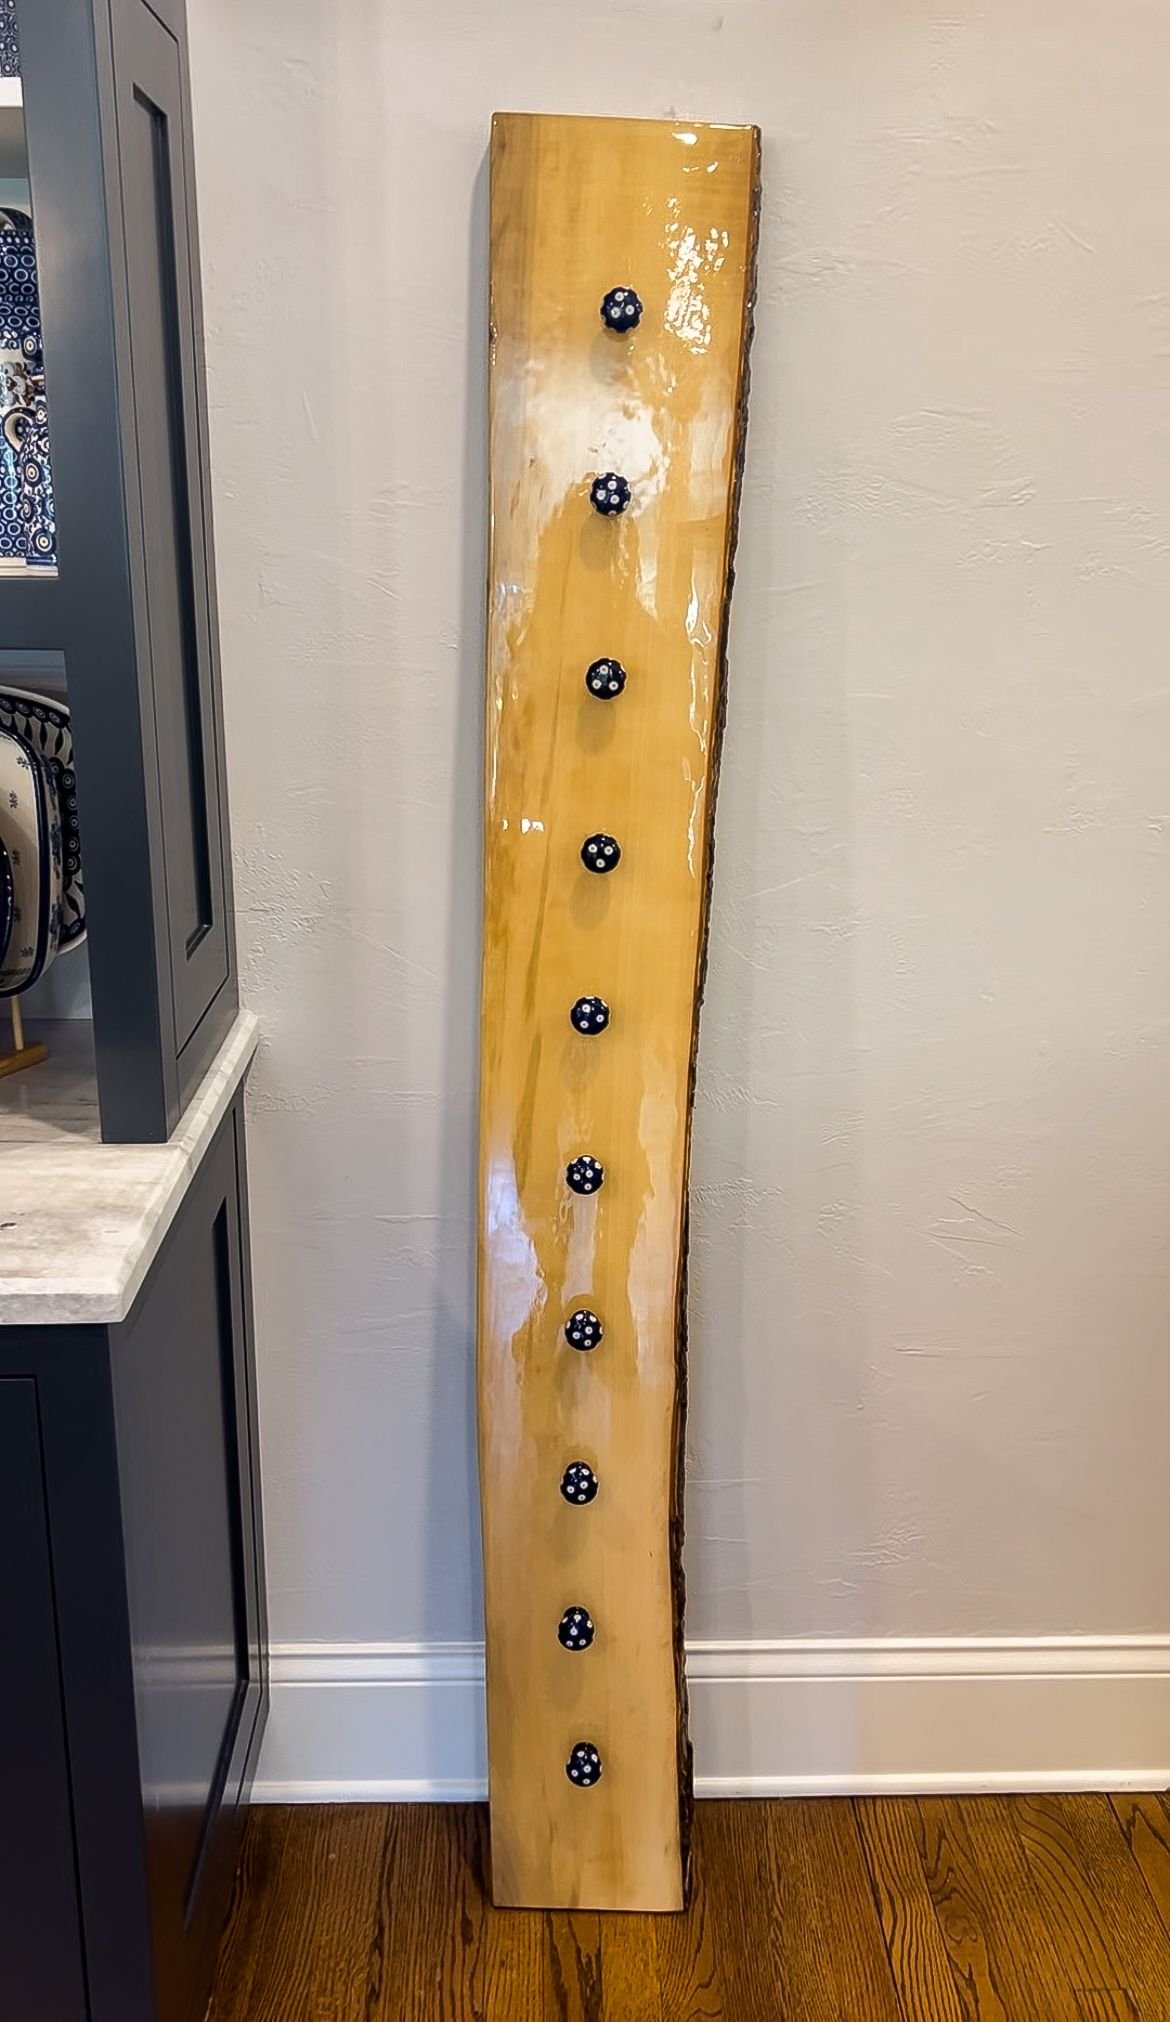
My mom is very much into Polish pottery. It’s this amazing, versatile and gorgeous pottery specifically made in Poland, and she has A LOT of it. She wanted to have Polish pottery hooks on this piece. We decided 10 was going to work out the best for the length, so I laid them all out and measured. This is a 67 inch piece of wood. I placed the knobs 6 inches apart and then had 7 inches from the knob to the end of the piece of wood.
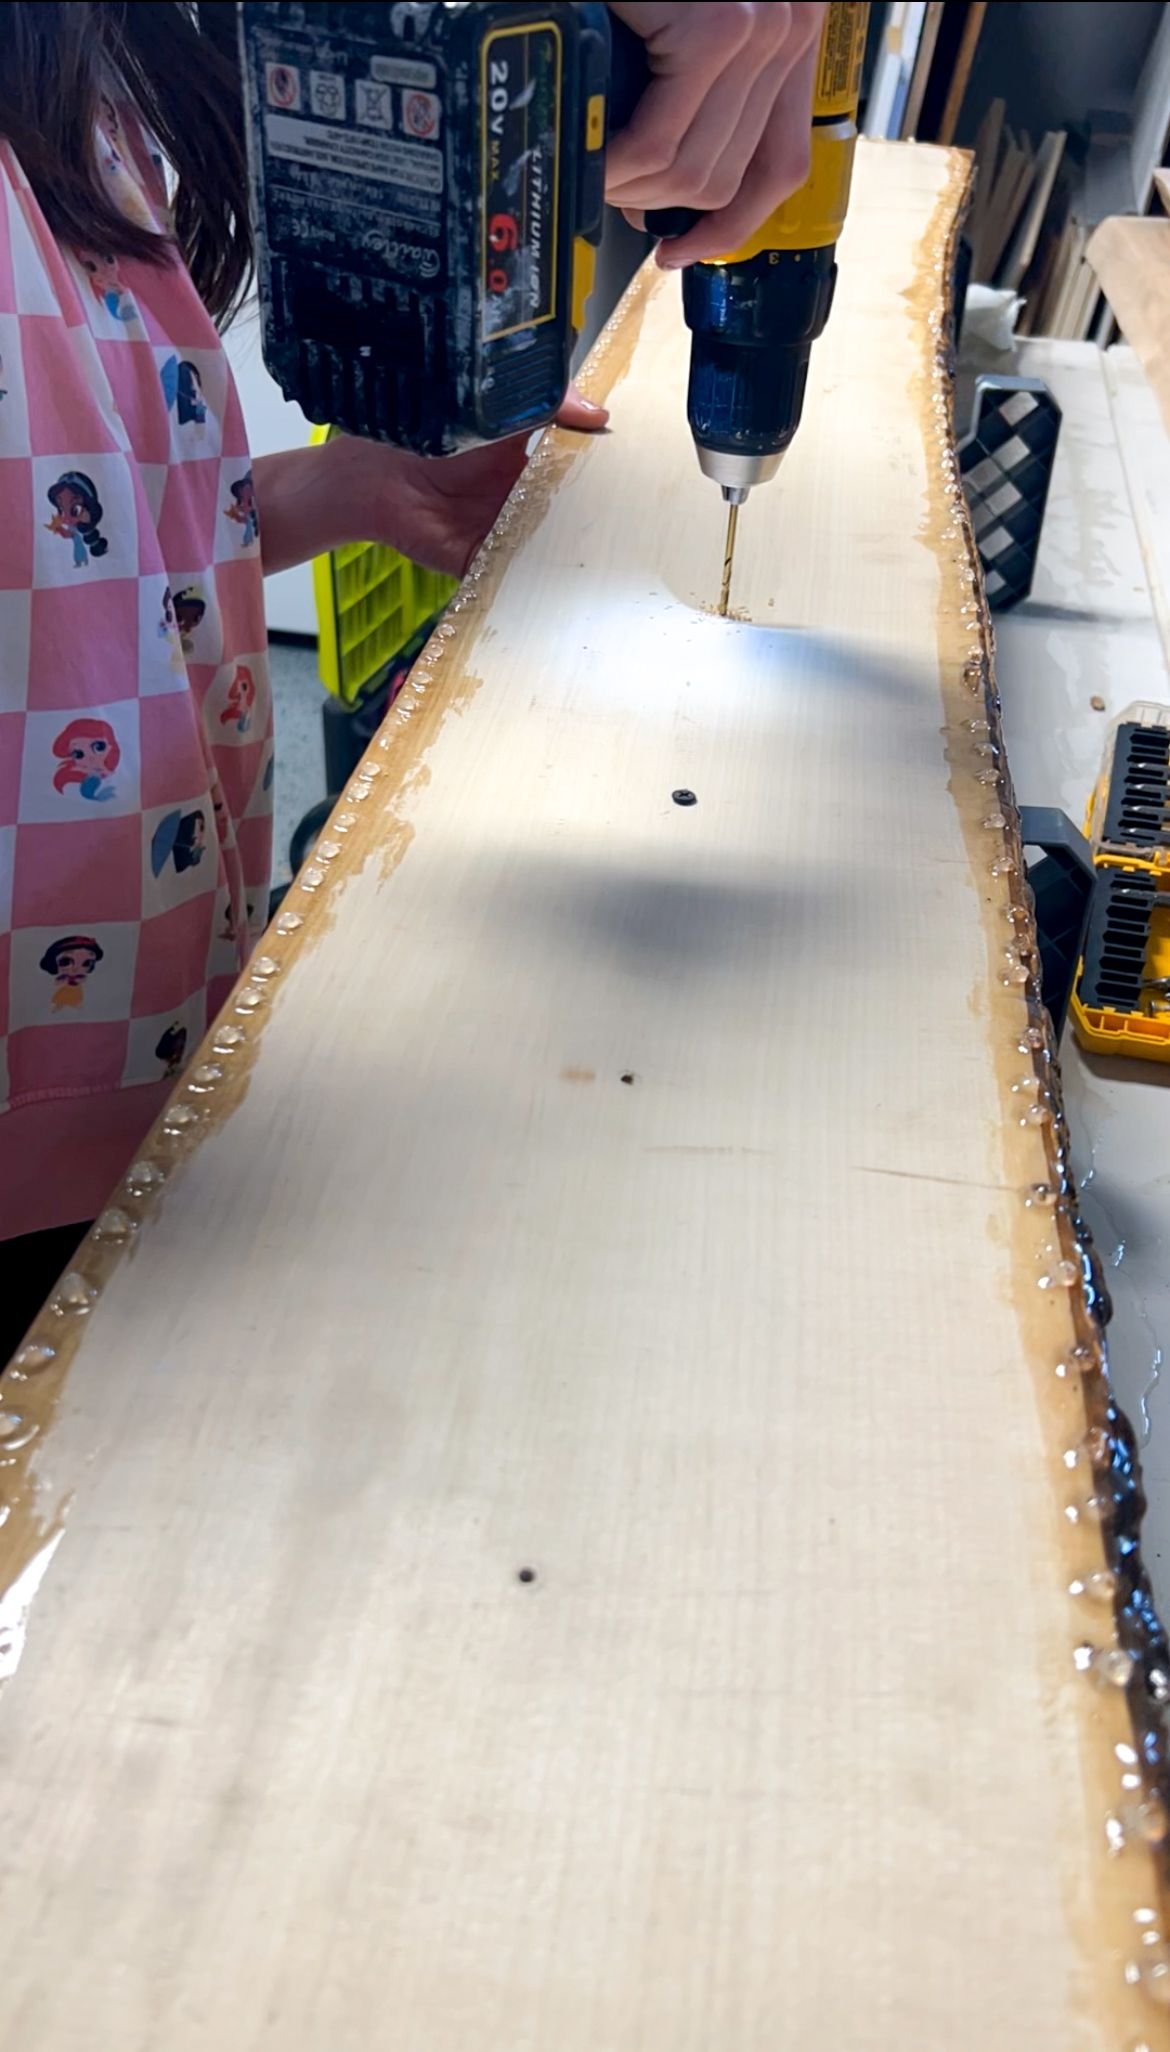
The screws that came with these knobs weren't long enough for how deep this piece of wood is. I dug through all of the screws I had in my workbench, and was able to find 10 that were the right size. I marked where each knob was going go, and to made sure they were all exactly straight. I measured the halfway point on the board so I knew it was going to be a perfectly straight line of knobs, even though there is a wave on the top of this board. I then drilled a pilot hole for each screw. I was honestly slightly terrified to do this because this, again, is only my second time working with resin, and the first time I have drilled into resin. I drilled from the back because I figured that was going to be the least messy, with the least probability of cracking the resin while doing so.

DIY Mug Hanger | Finishing
Once it was completely finished, I was really excited. It looked so, so good, and I took it into my mom's kitchen where I was going to hang it. I then realized we talked about cutting the board lengthwise so it was half of the width, but we hadn't talked about cutting it so the wood would be shorter and be the correct length for the wall that it was going to go on. This is a 67 inch long piece of wood. The maximum length it could be for this wall space is 42 inches. Unfortunately, it won't work! So now I have this gorgeous piece that doesn't fit anywhere in my mom's house. I'm actually thinking about selling it, but I'm also going to make a much smaller piece for my mom that will fit in her kitchen. It just goes to show that DIY doesn't always go as planned!
I'm still so happy with this piece and am glad I was able to gain even more confidence for the epoxy. Don't worry, the next one I make for my mom will be even better!