
Workbench Fix
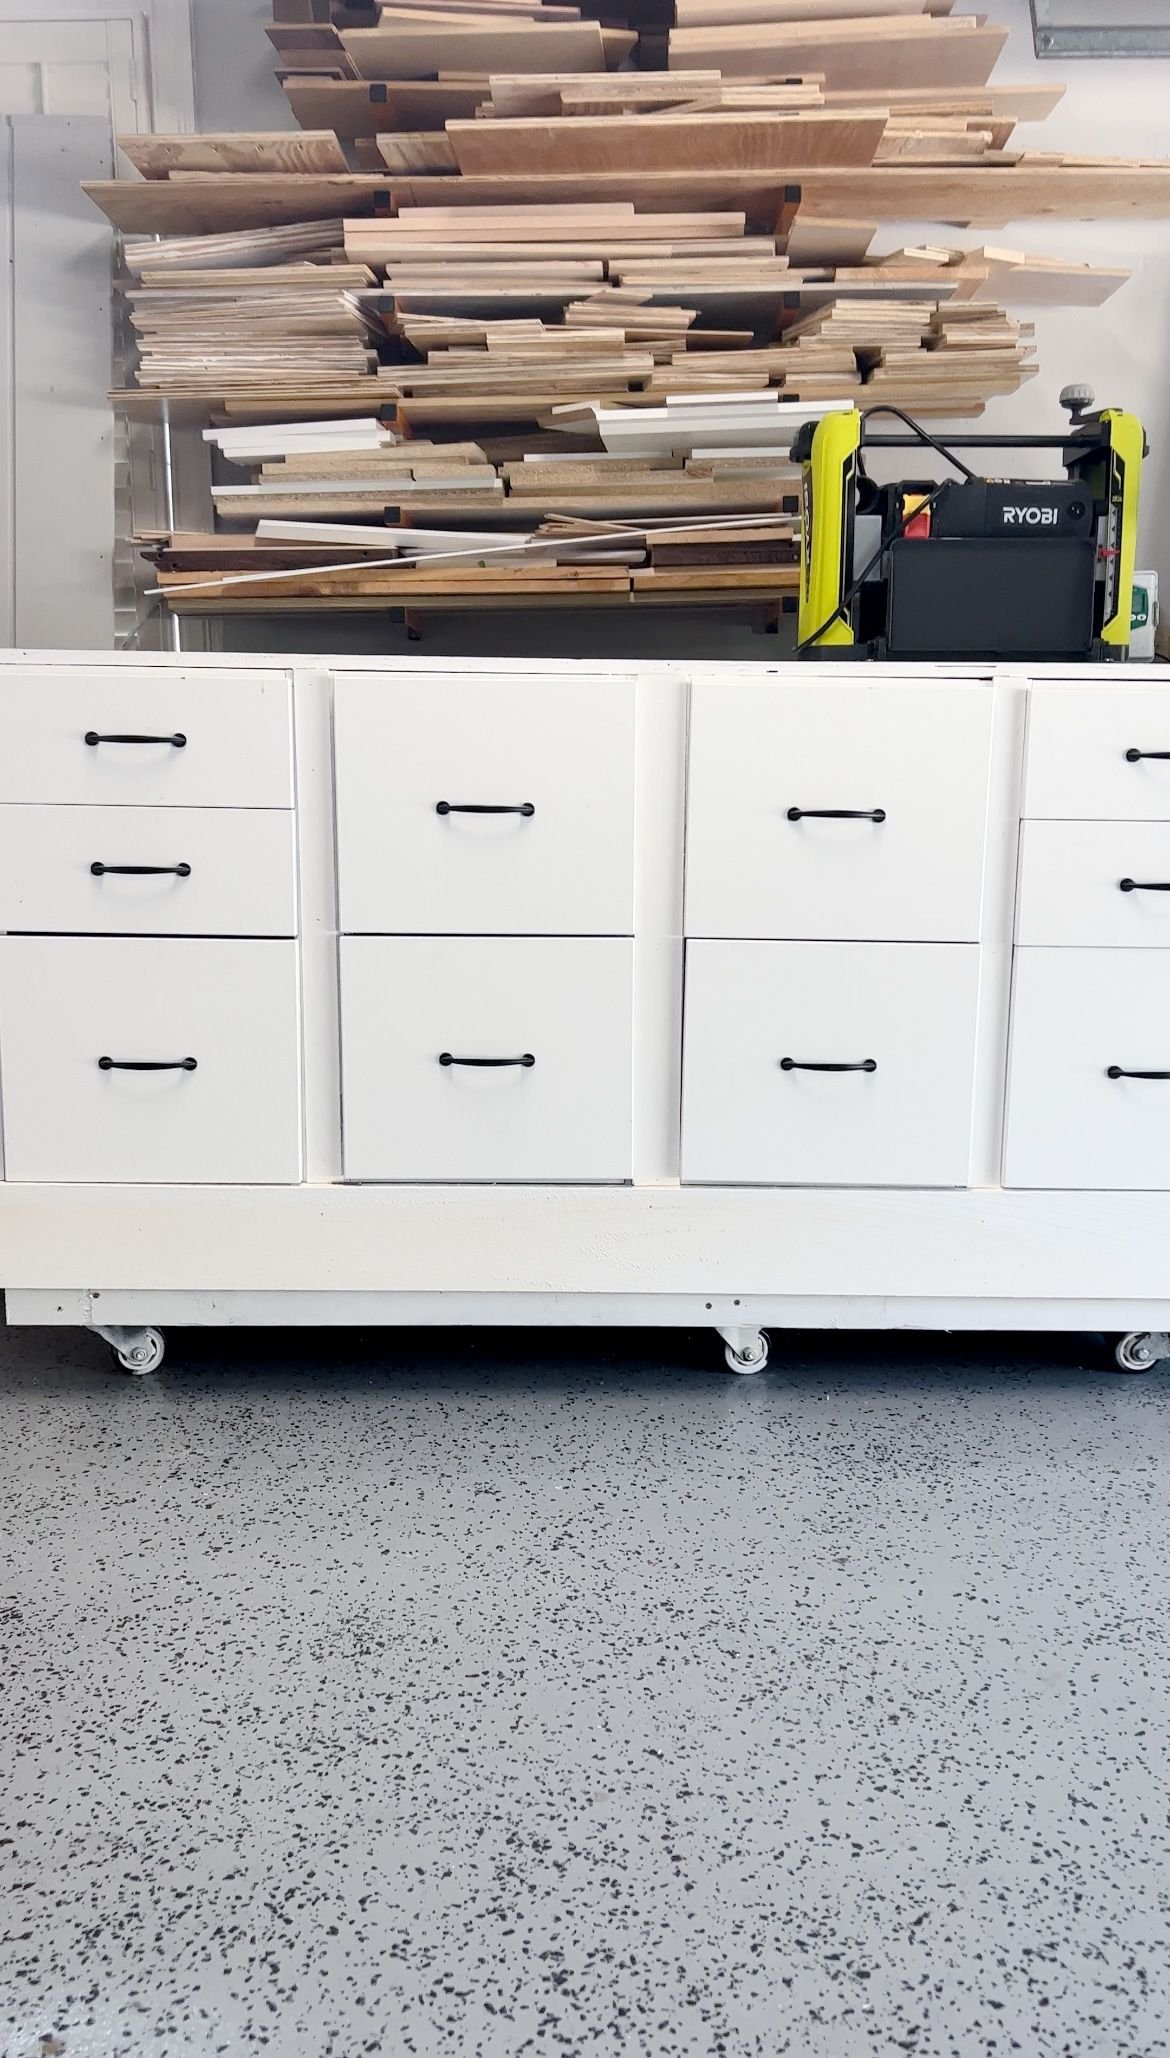
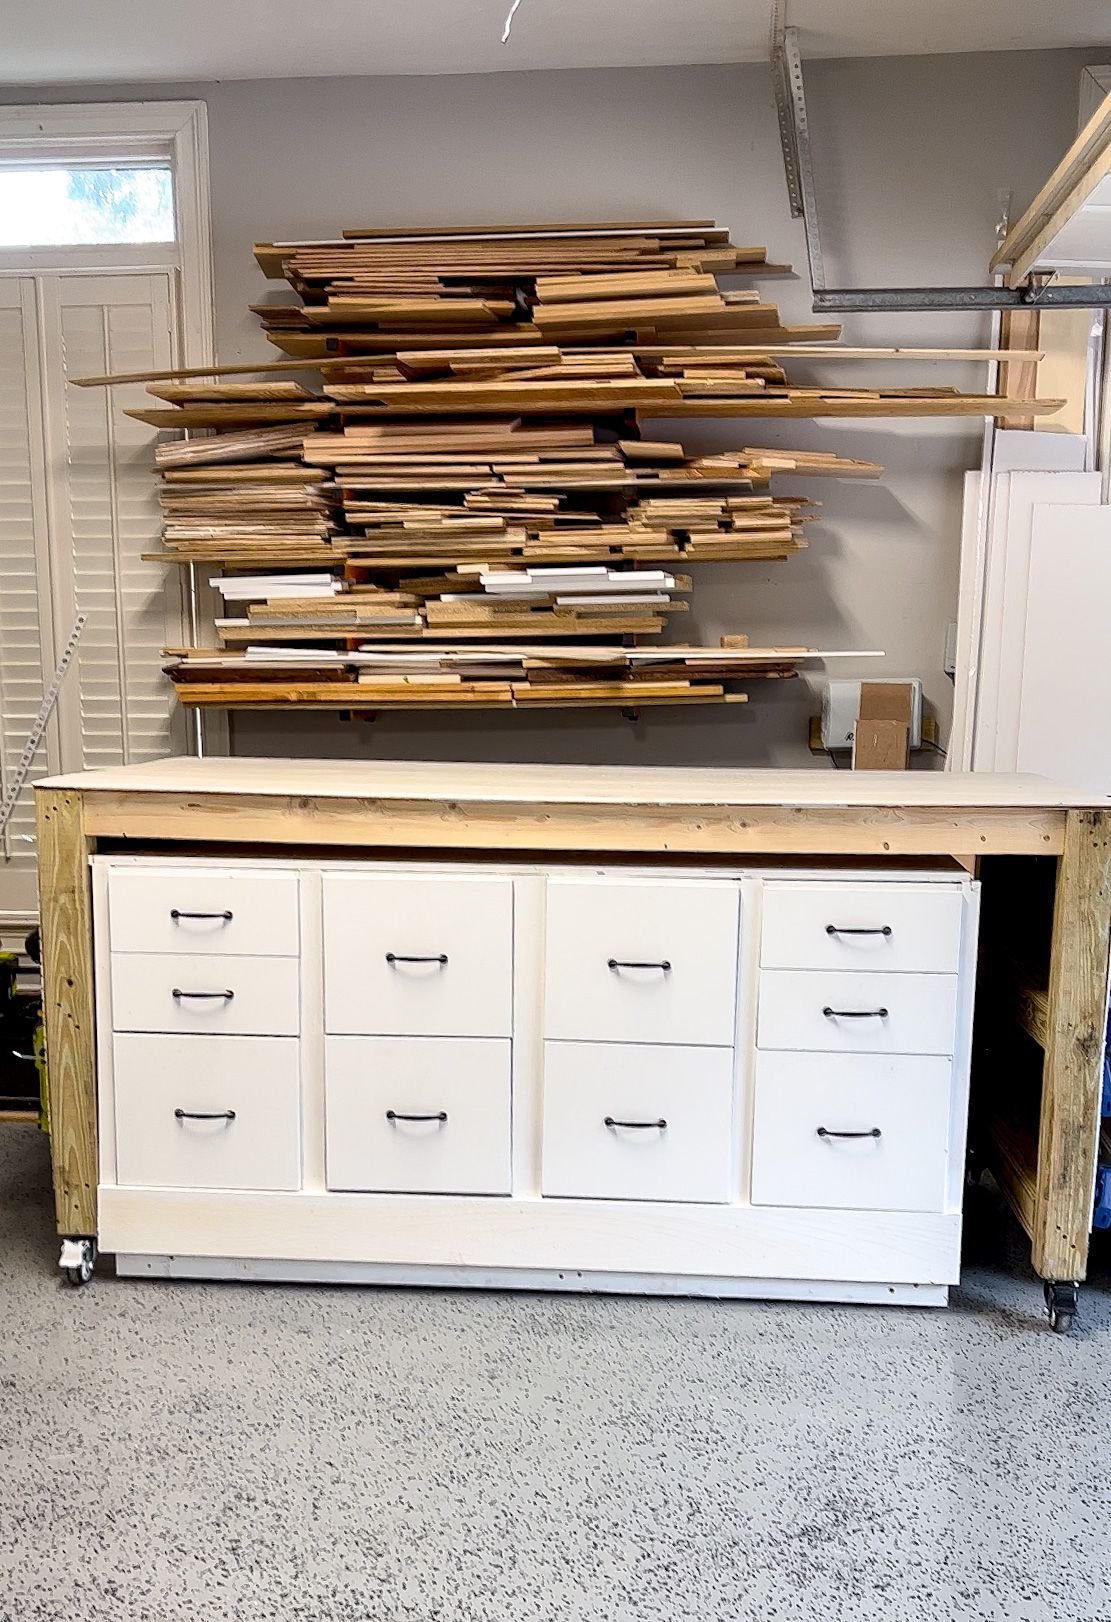
Last year I built two workbenches using drawers from an old office and cabinets that my grandmother had gifted to me before she passed away. Unfortunately, with all of the drawers and space in the back filled, the wheels started coming off of the big workbench. Every time I did a quick fix they would inevitably break off again. So, I had to come up with a new solution and I figured this was a good time to revamp my workbenches to better fit my needs. Let me show you what I did!

Workbench Fix | Getting Started
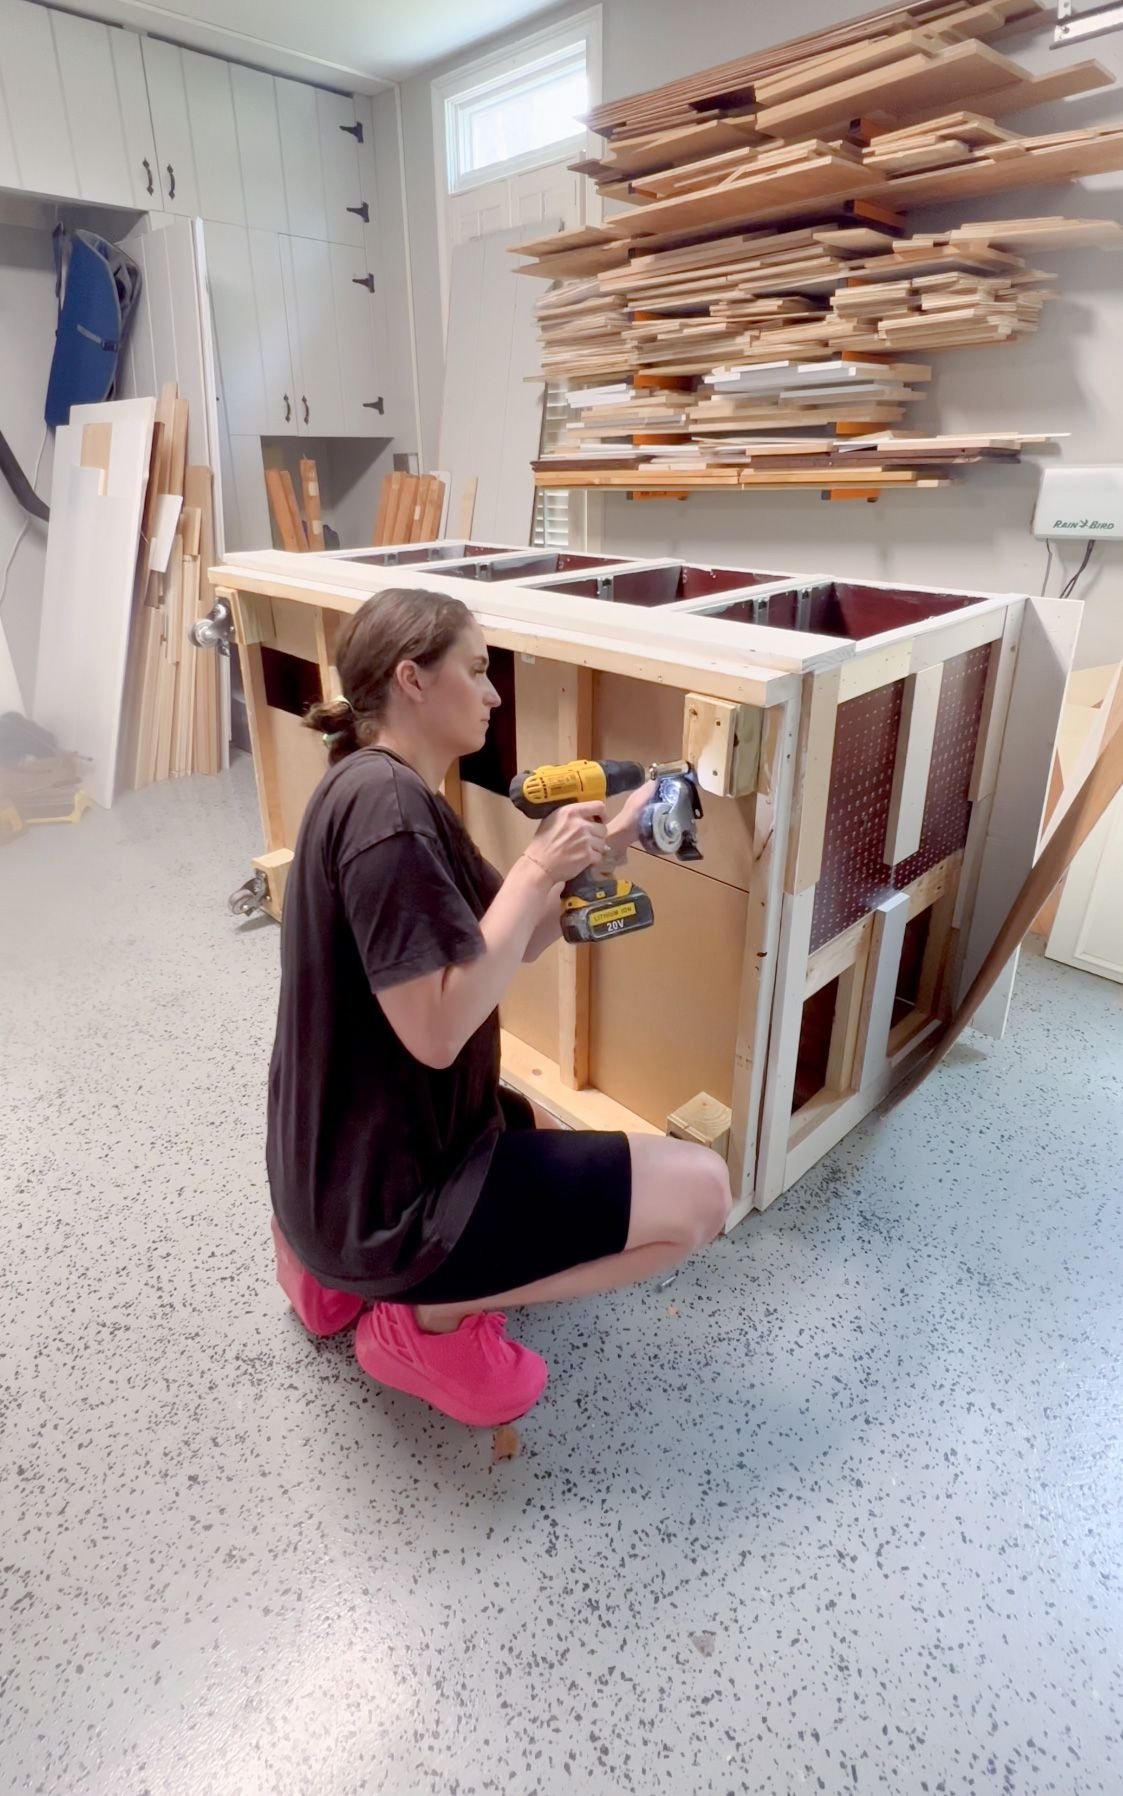
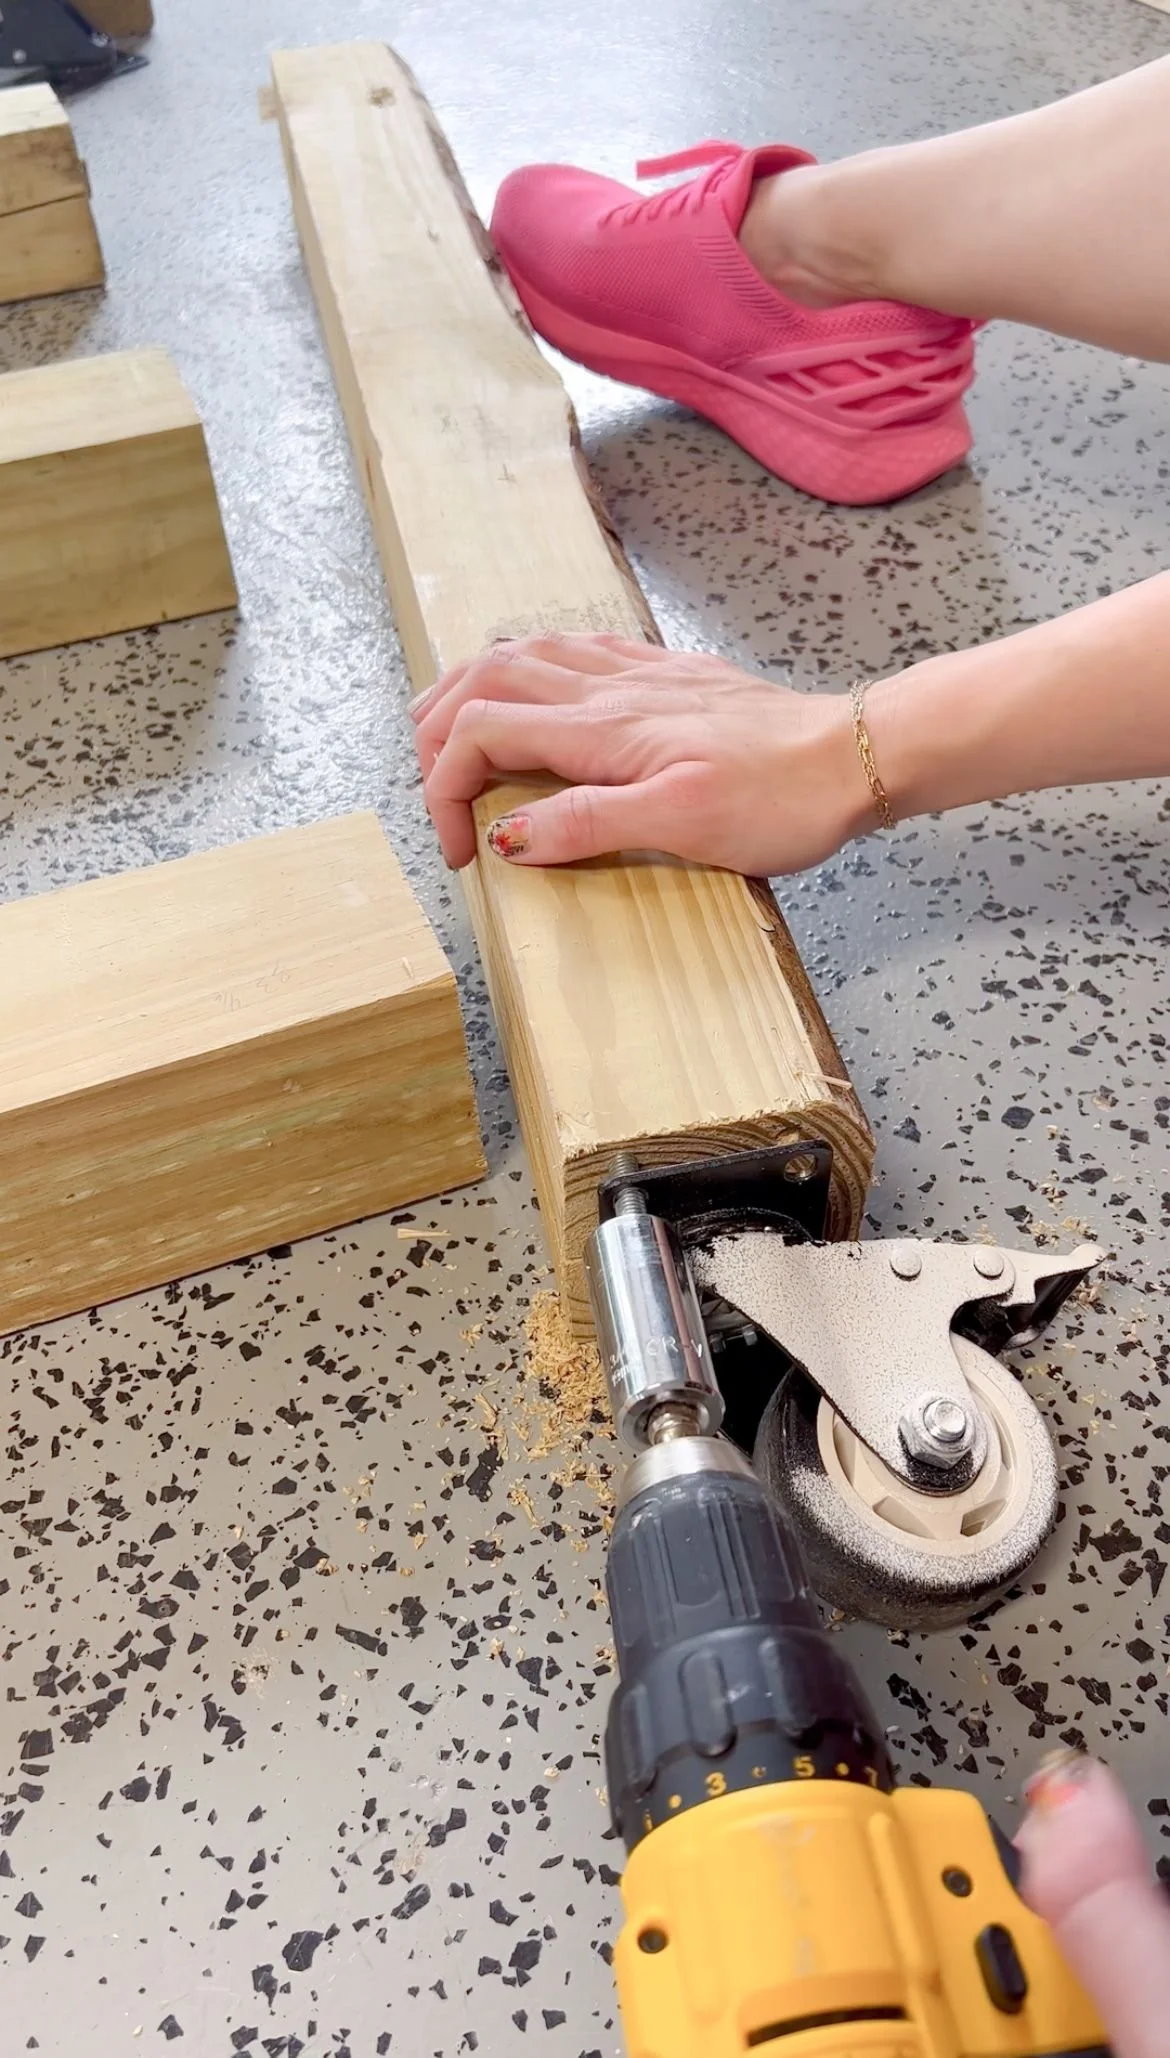
First, I had to remove everything from the workbench so that I could flip it onto its side and remove the wheels using my universal socket to remove the bolts that kept the wheels attached. To give you an idea of how big and heavy this piece is, it took four adults to flip it back over. Once the wheels were detached I put everything back in, and put all of the tools and the clamps back on the pegboards. The problem I was facing now was that by removing the wheels I took away my giant cutting space. So I went to work building a new one.
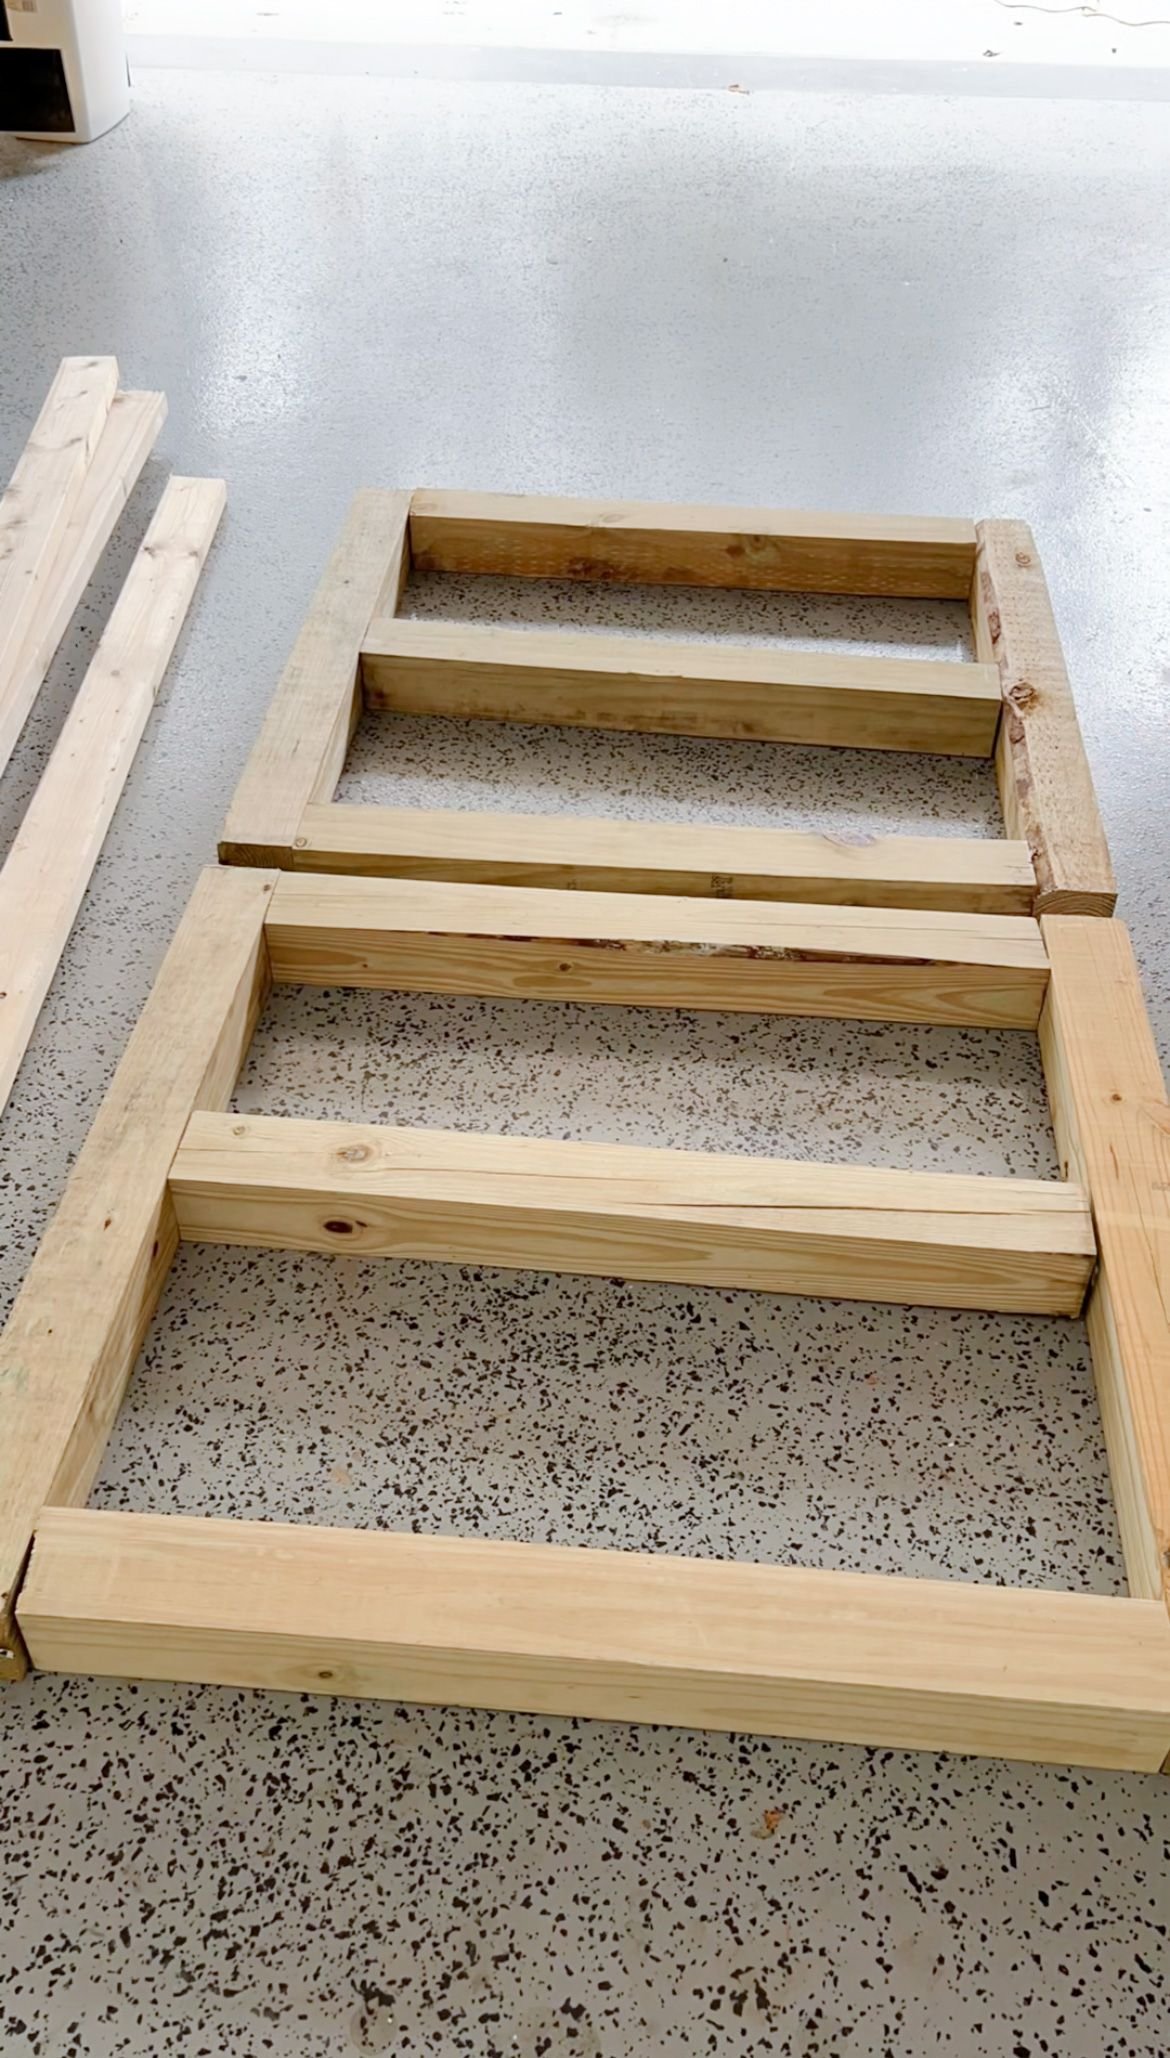
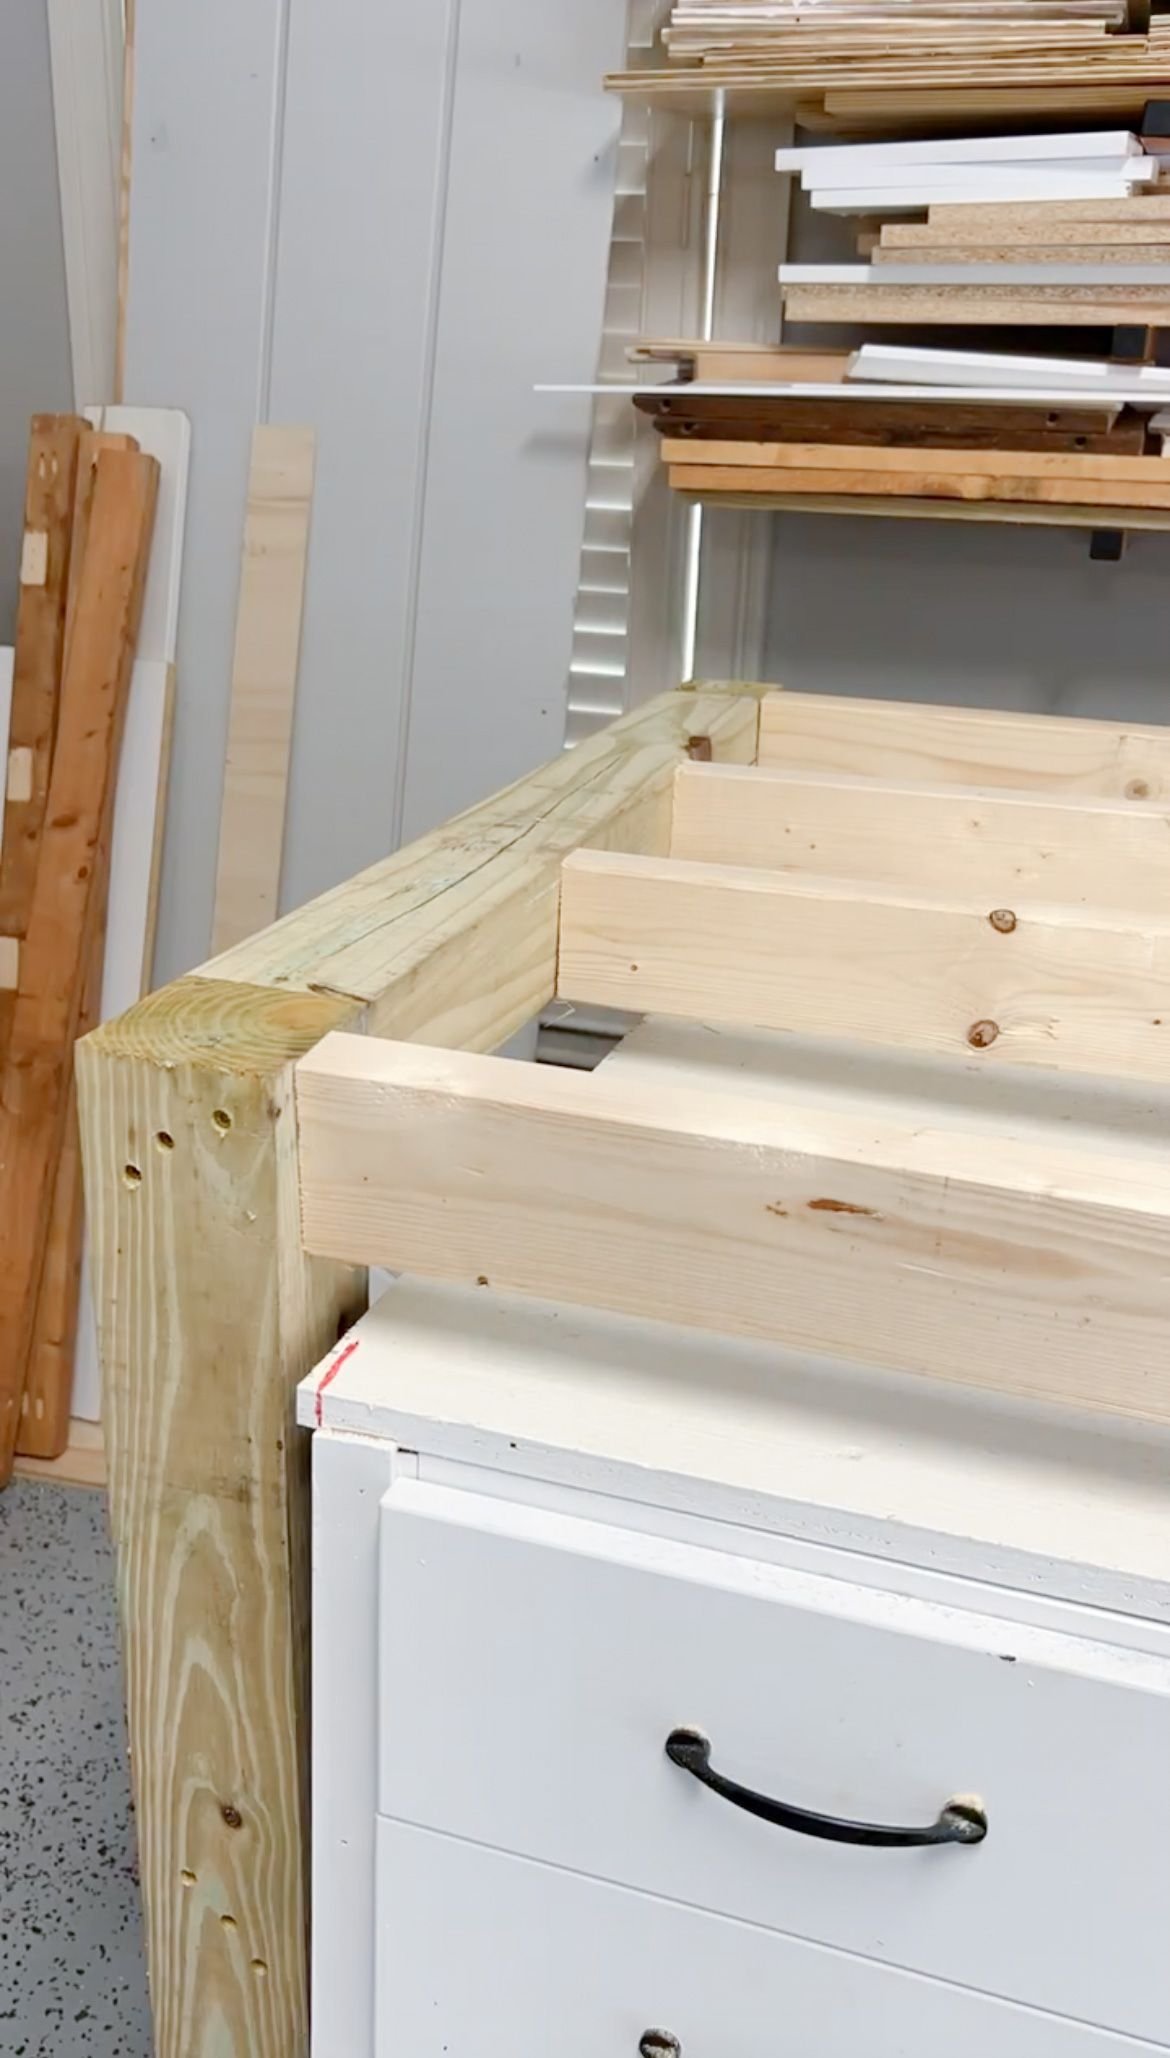
I took some 4x4s to create sides for a mobile workbench table and attached the wheels the those sides in order to ensure that these sides were really sturdy. I used five different pieces of 4x4s and secured them together using six inch wood screws. The point of this new mobile workbench/cutting space is that it needs to be able to slide over the old workbench because I still need the storage that the large workbench has.
Next, I needed to cut down the overhang that was on each of the sides of the large workbench so that the new cutting space could slide on top. Once I had the overhangs cut down, I was able to secure the 2x4s again with the 6 inch screws to the two legs of the workbench. I turned the 2x4s this direction because they actually hold more weight when they are like this.
Workbench Fix | Finishing Up
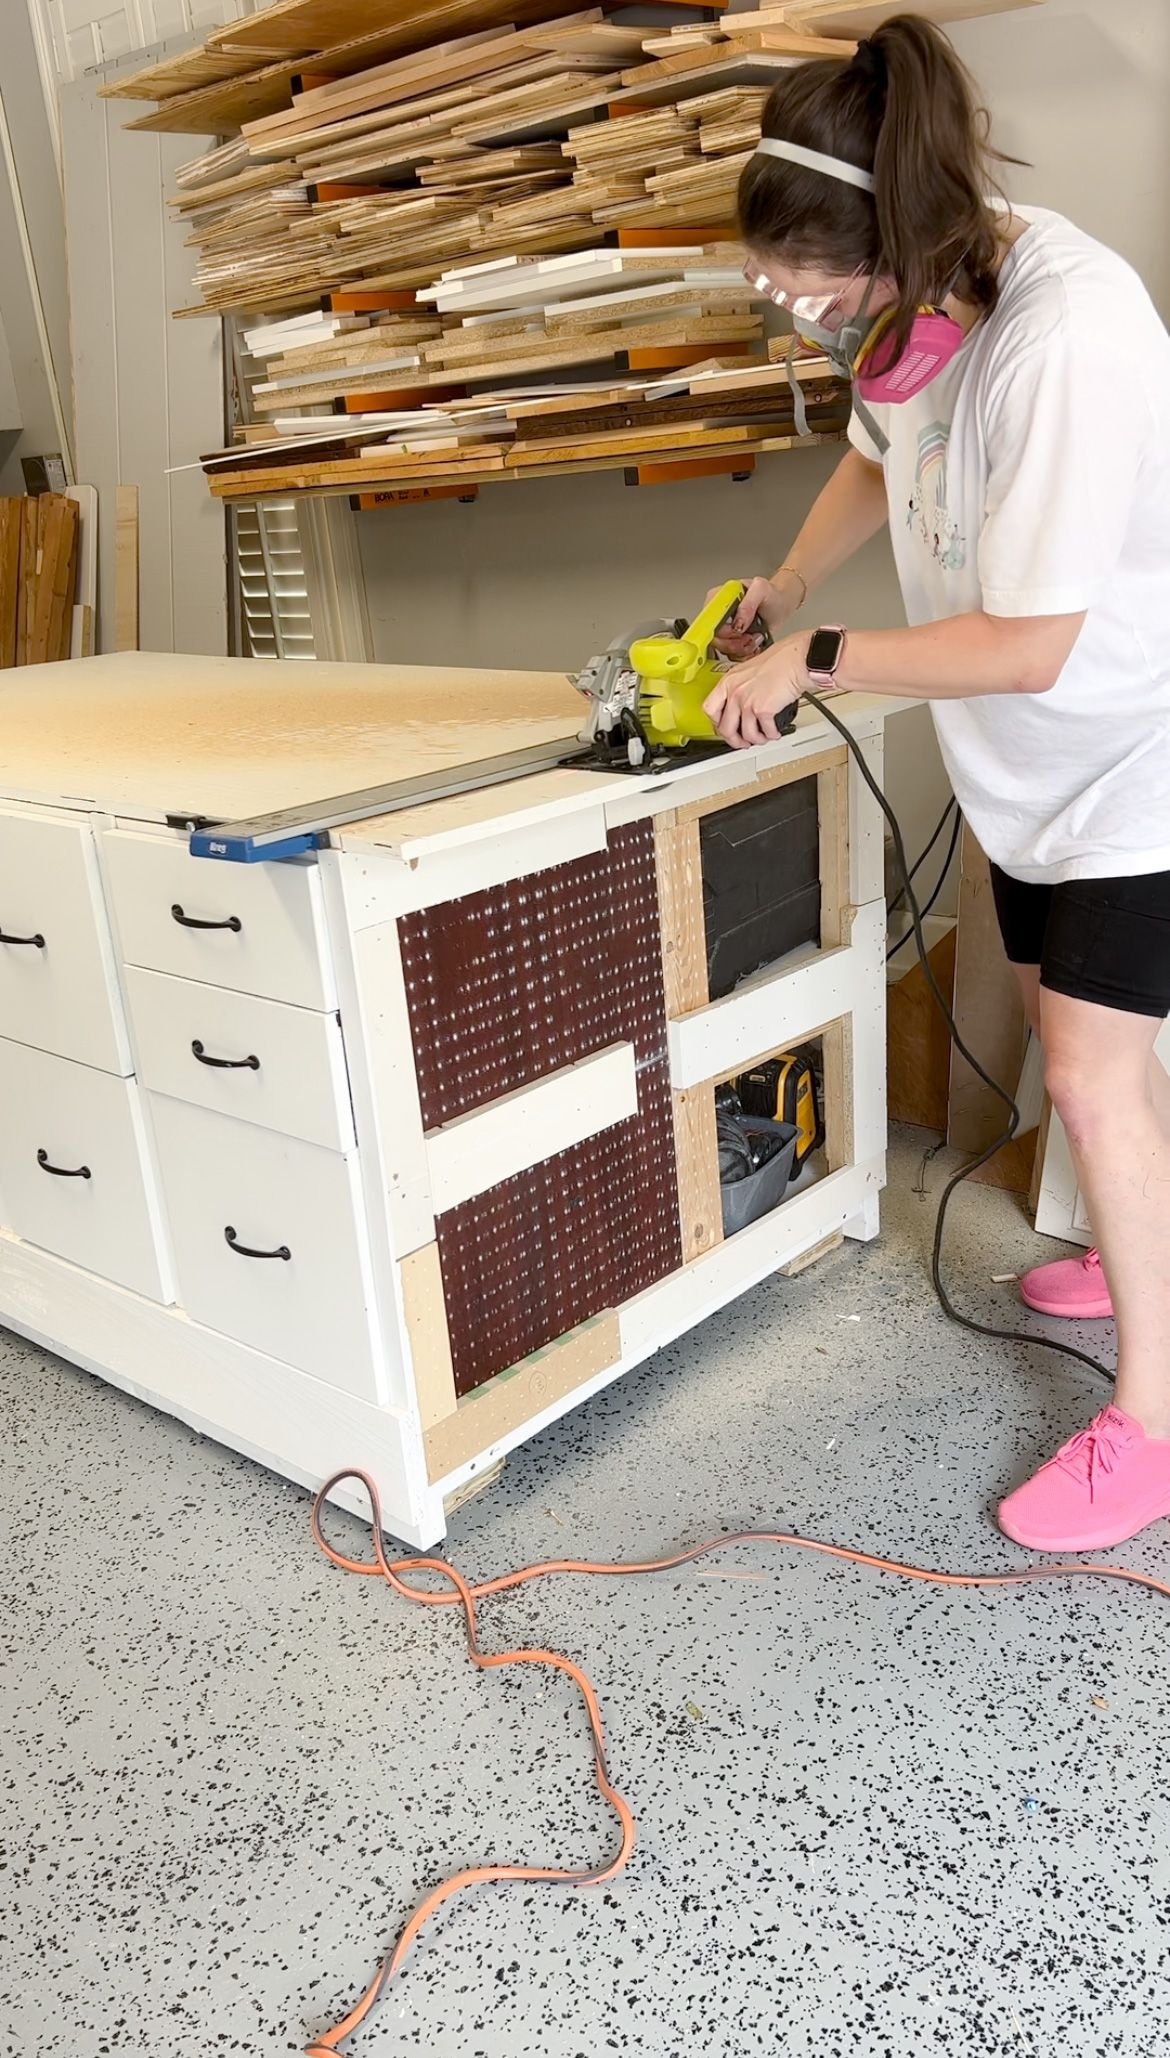
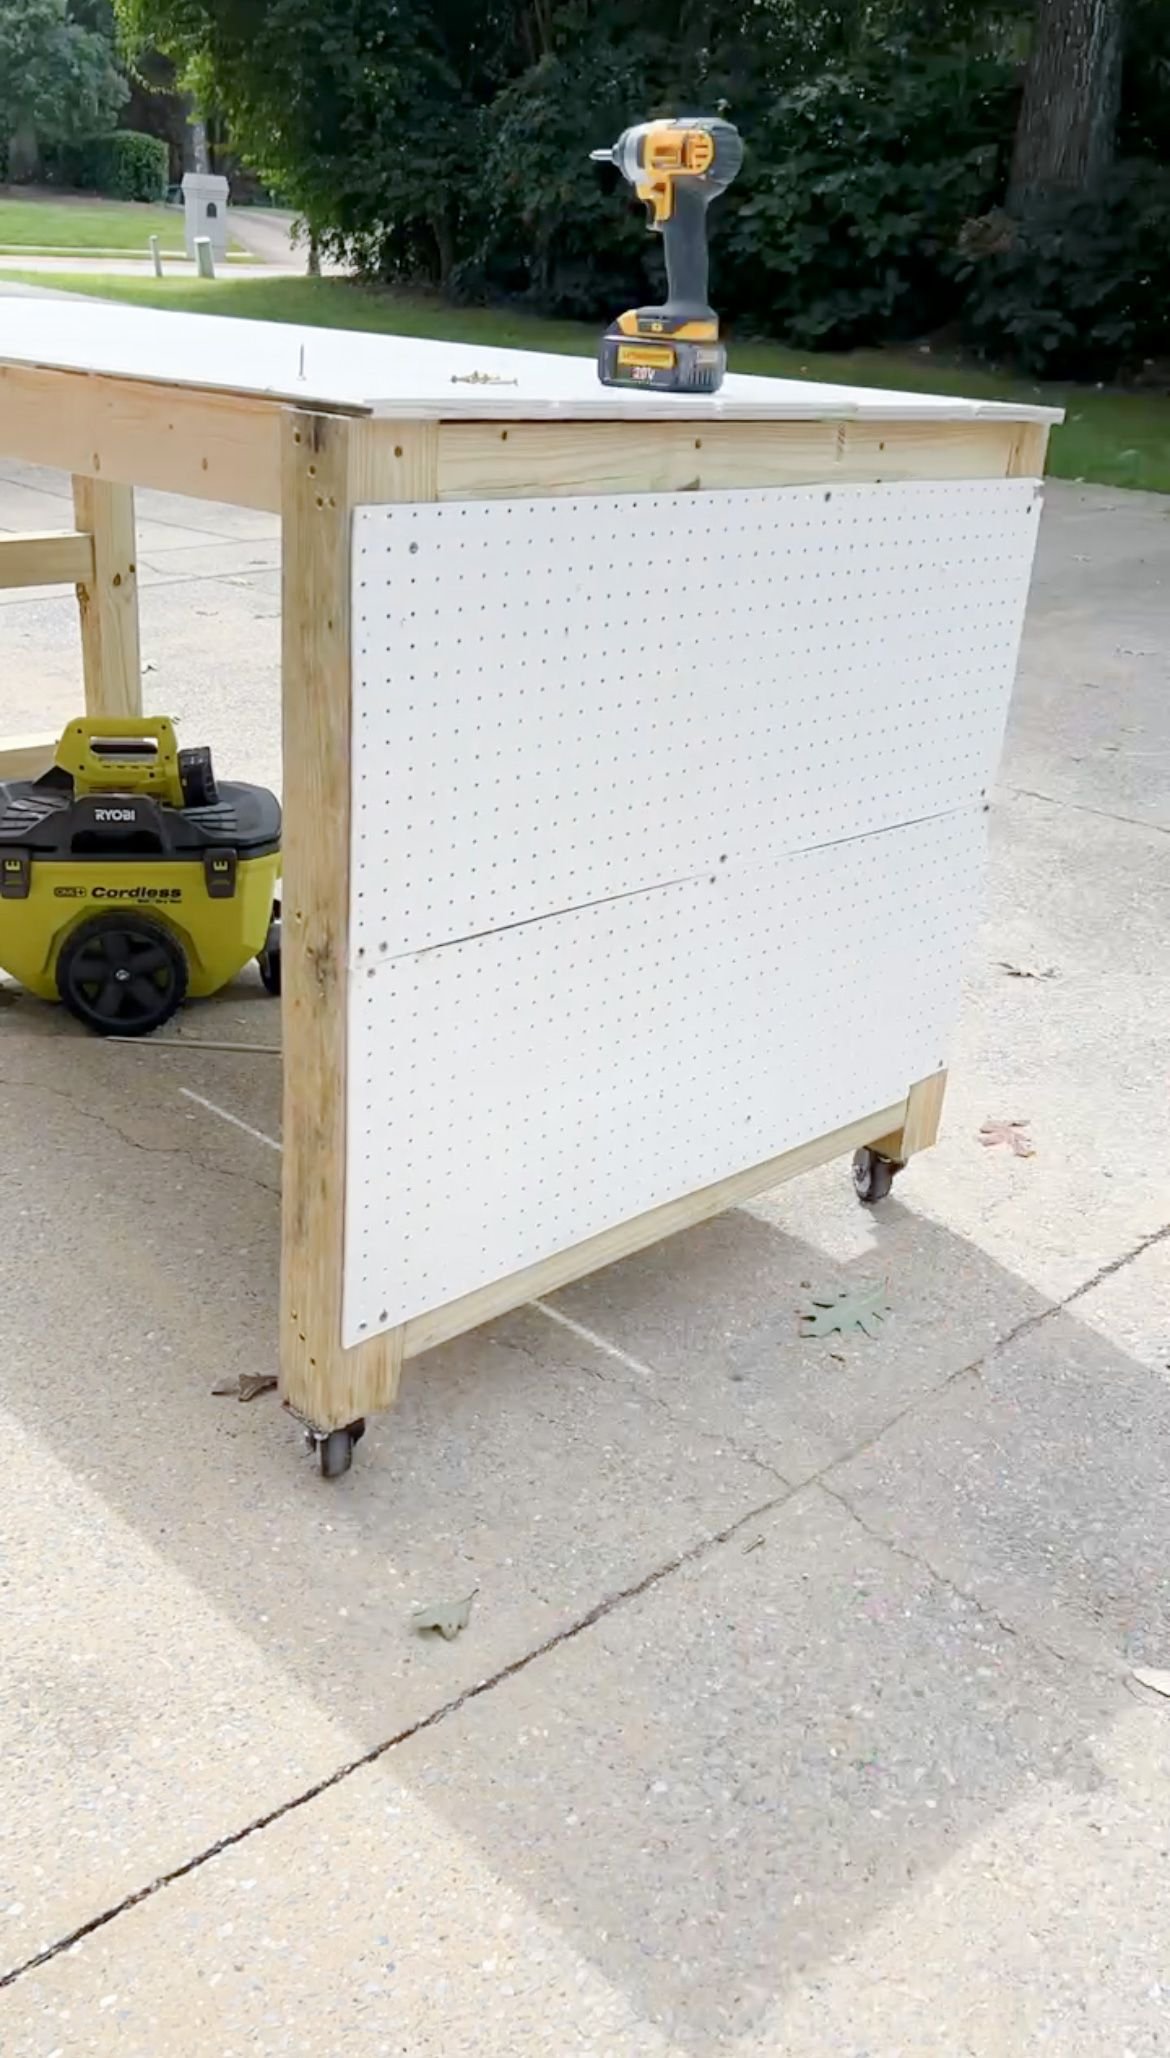
For the top of this cutting space, I was able to repurpose an old door from my parents garage. It looks really similar to the top that is on the other workbench and, to reduce the amount of work I needed to do, I kept the painted side as the top. I secured the top with three inch screws and then I took it outside so I could do the next step.
I used my circular saw to cut out one of the middle grooves in the door. This allows me to lay large pieces of plywood down flat on the cutting space and cut with my circular saw without having to prop it up on anything. Also, I don't have to worry about cutting my table. It just gives more stability to everything.

Lastly, I took the peg boards that I'd removed from the other workbench and I put them on this one so I could hang my tools and all of my clamps and it was finished! I probably will paint this eventually so it matches everything else, but didn't feel like it at the moment just because there's a whole lot of other stuff going on.
I did have a little bit of a hard time getting it on the first time, but with some practice I was able to get it to slide very nicely on top of the other workbench. I love that I still have all of the storage from the drawers and the shelves on the back of this, now stationary, workbench.
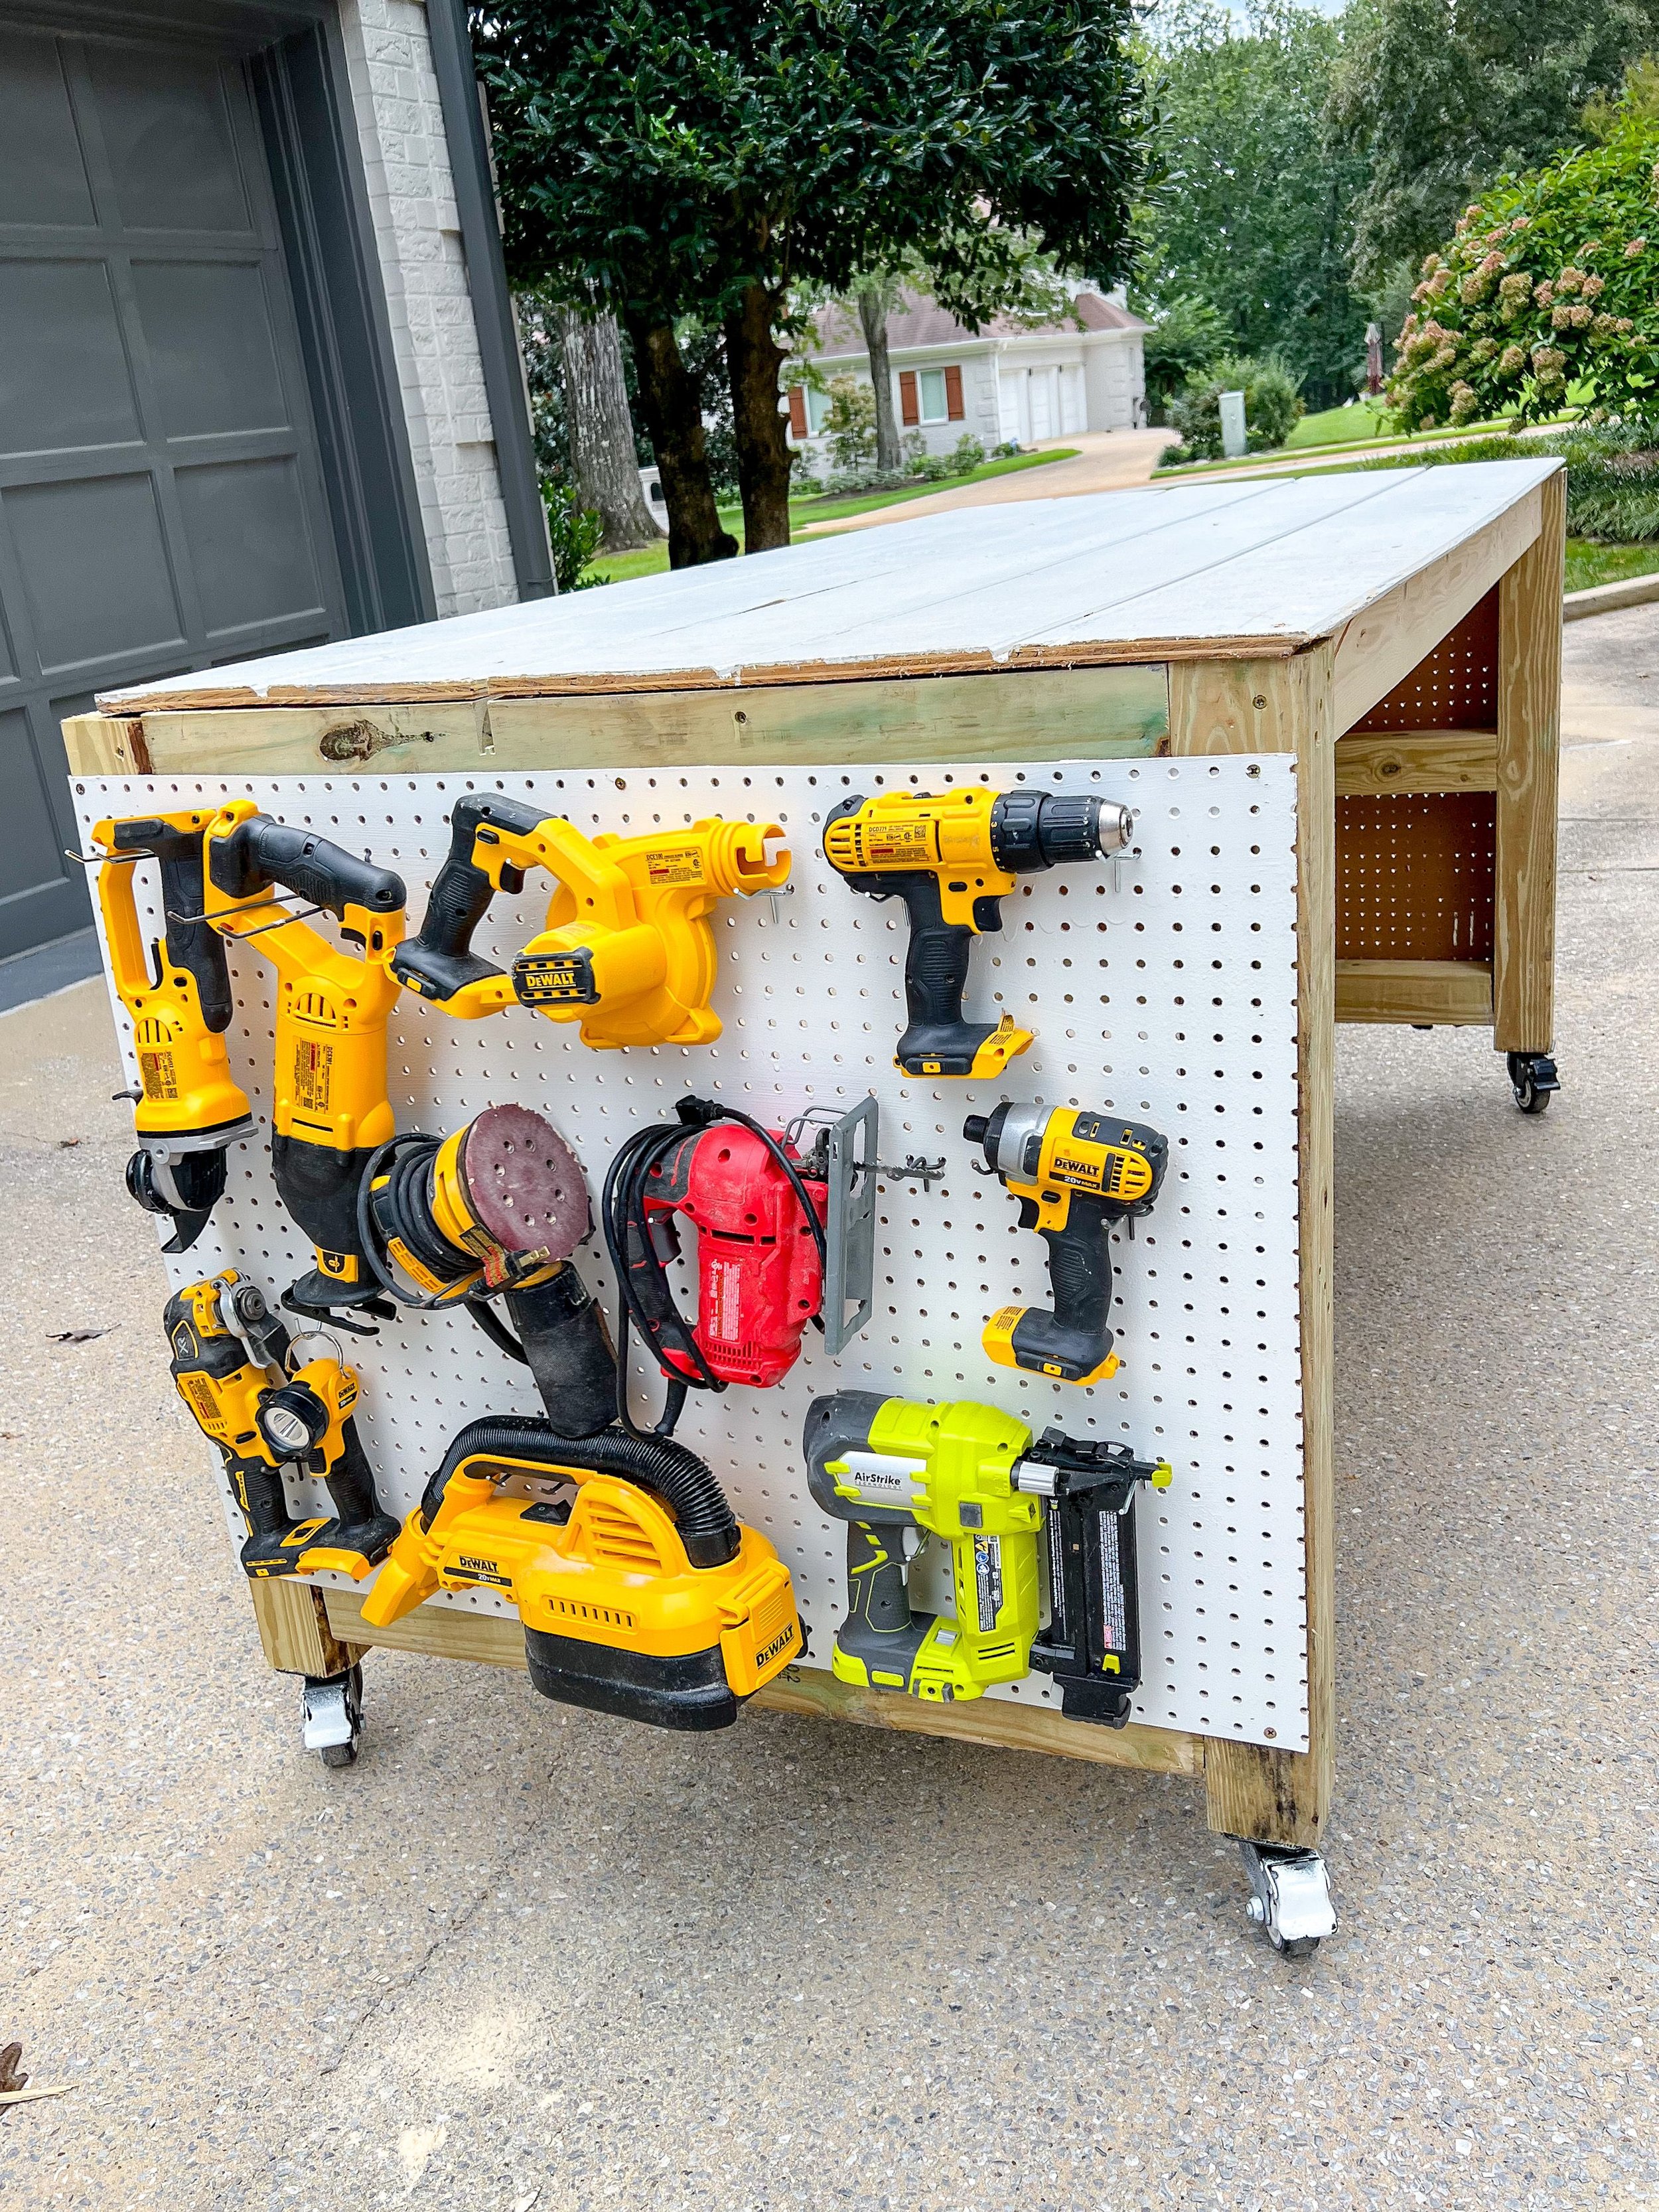
I also love that I now have a large cutting space/workspace that I can easily take outside so I can cut projects without having to make a mess in the garage. If you want to do this project too, I made a free download that I have available in the shop. You can shop all of my tools and supplies below, happy building!
Workbench Fix | Shop