
Redoing My Mom’s Coat Closet
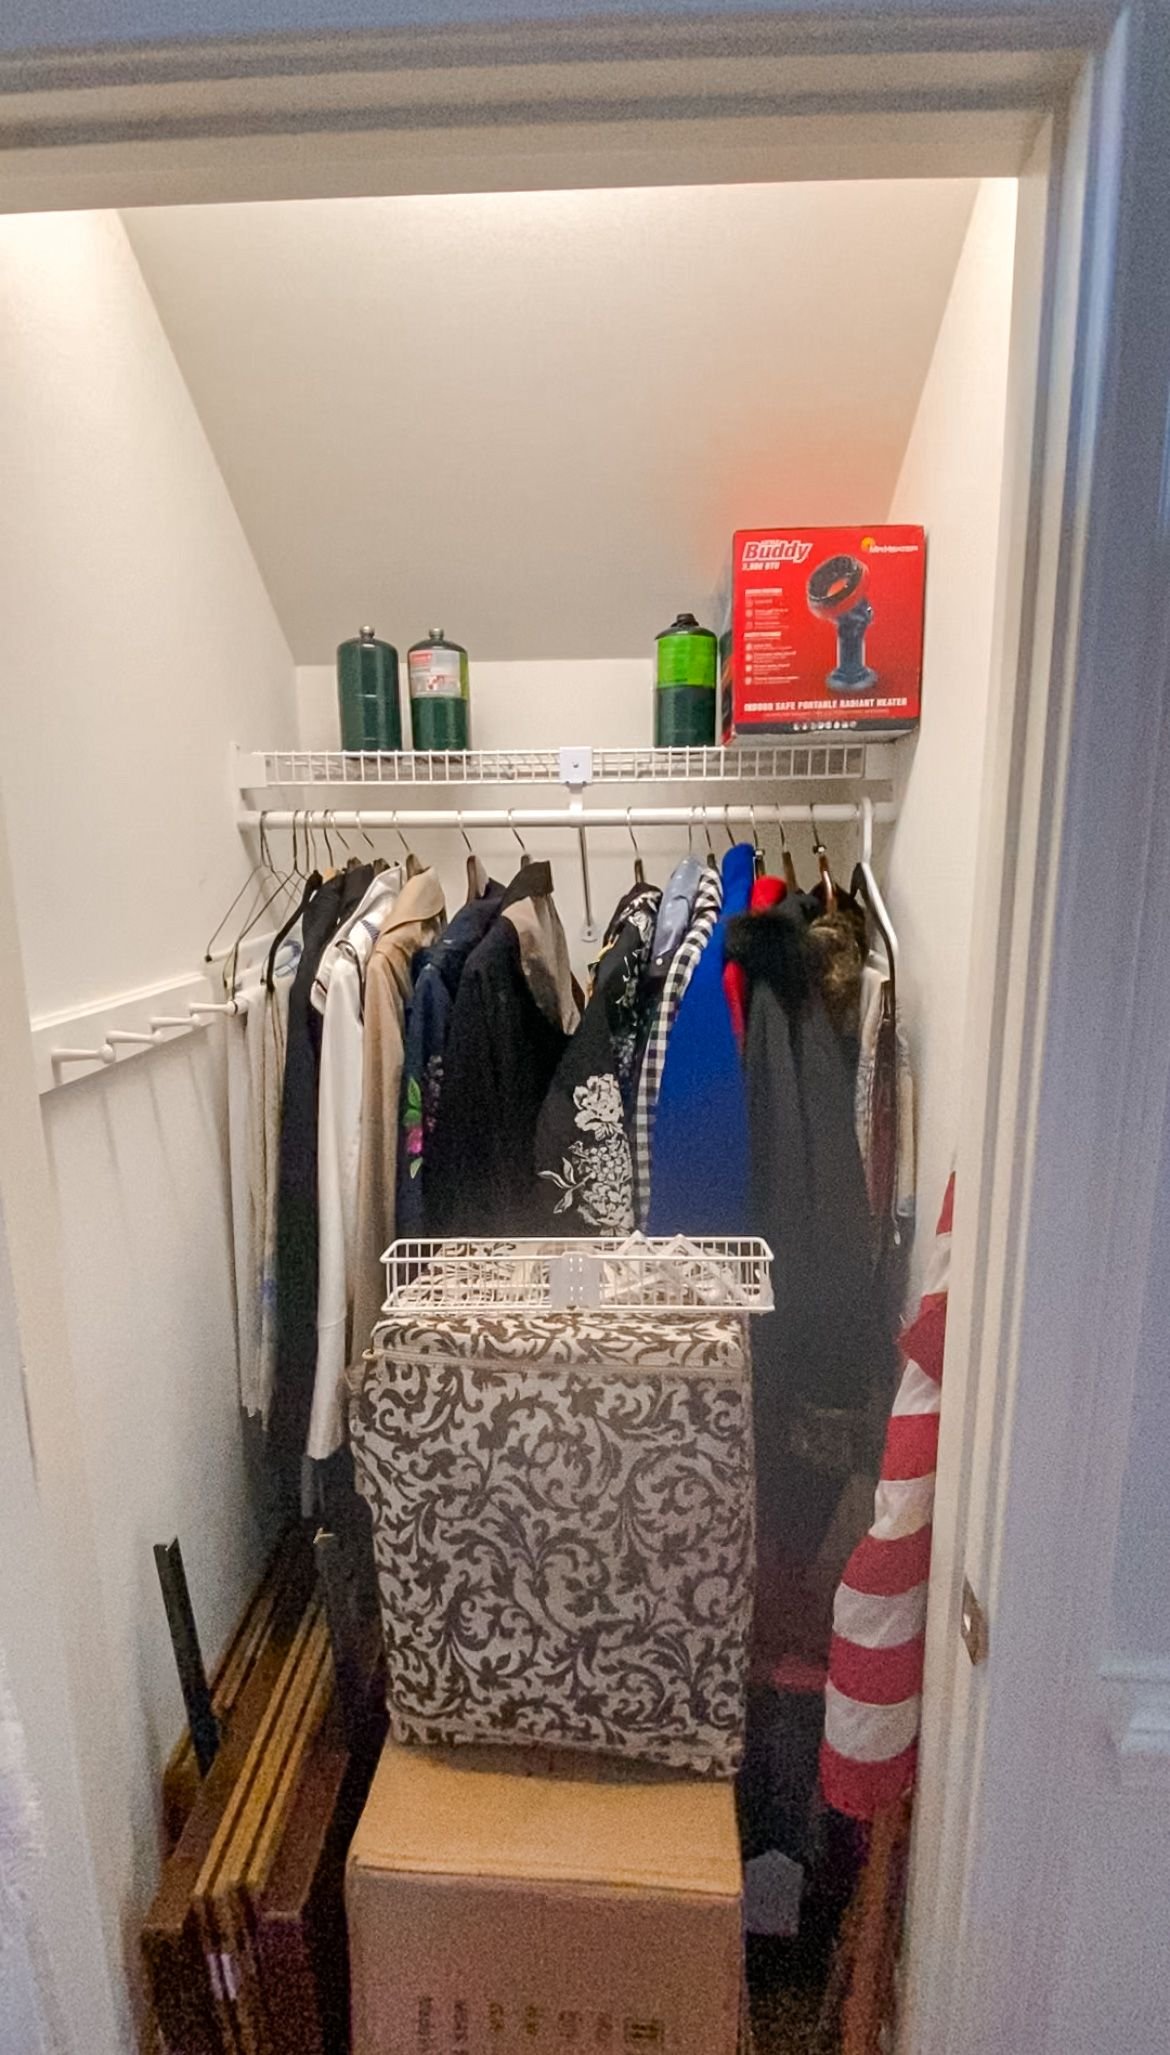
My mom asked me to redo a closet they have in their front hallway. When they moved in, all it had was a wire rack in the back and the hooks on the side. So I took everything out and got to work.

Redoing My Mom’s Coat Closet | A Functional Remodel
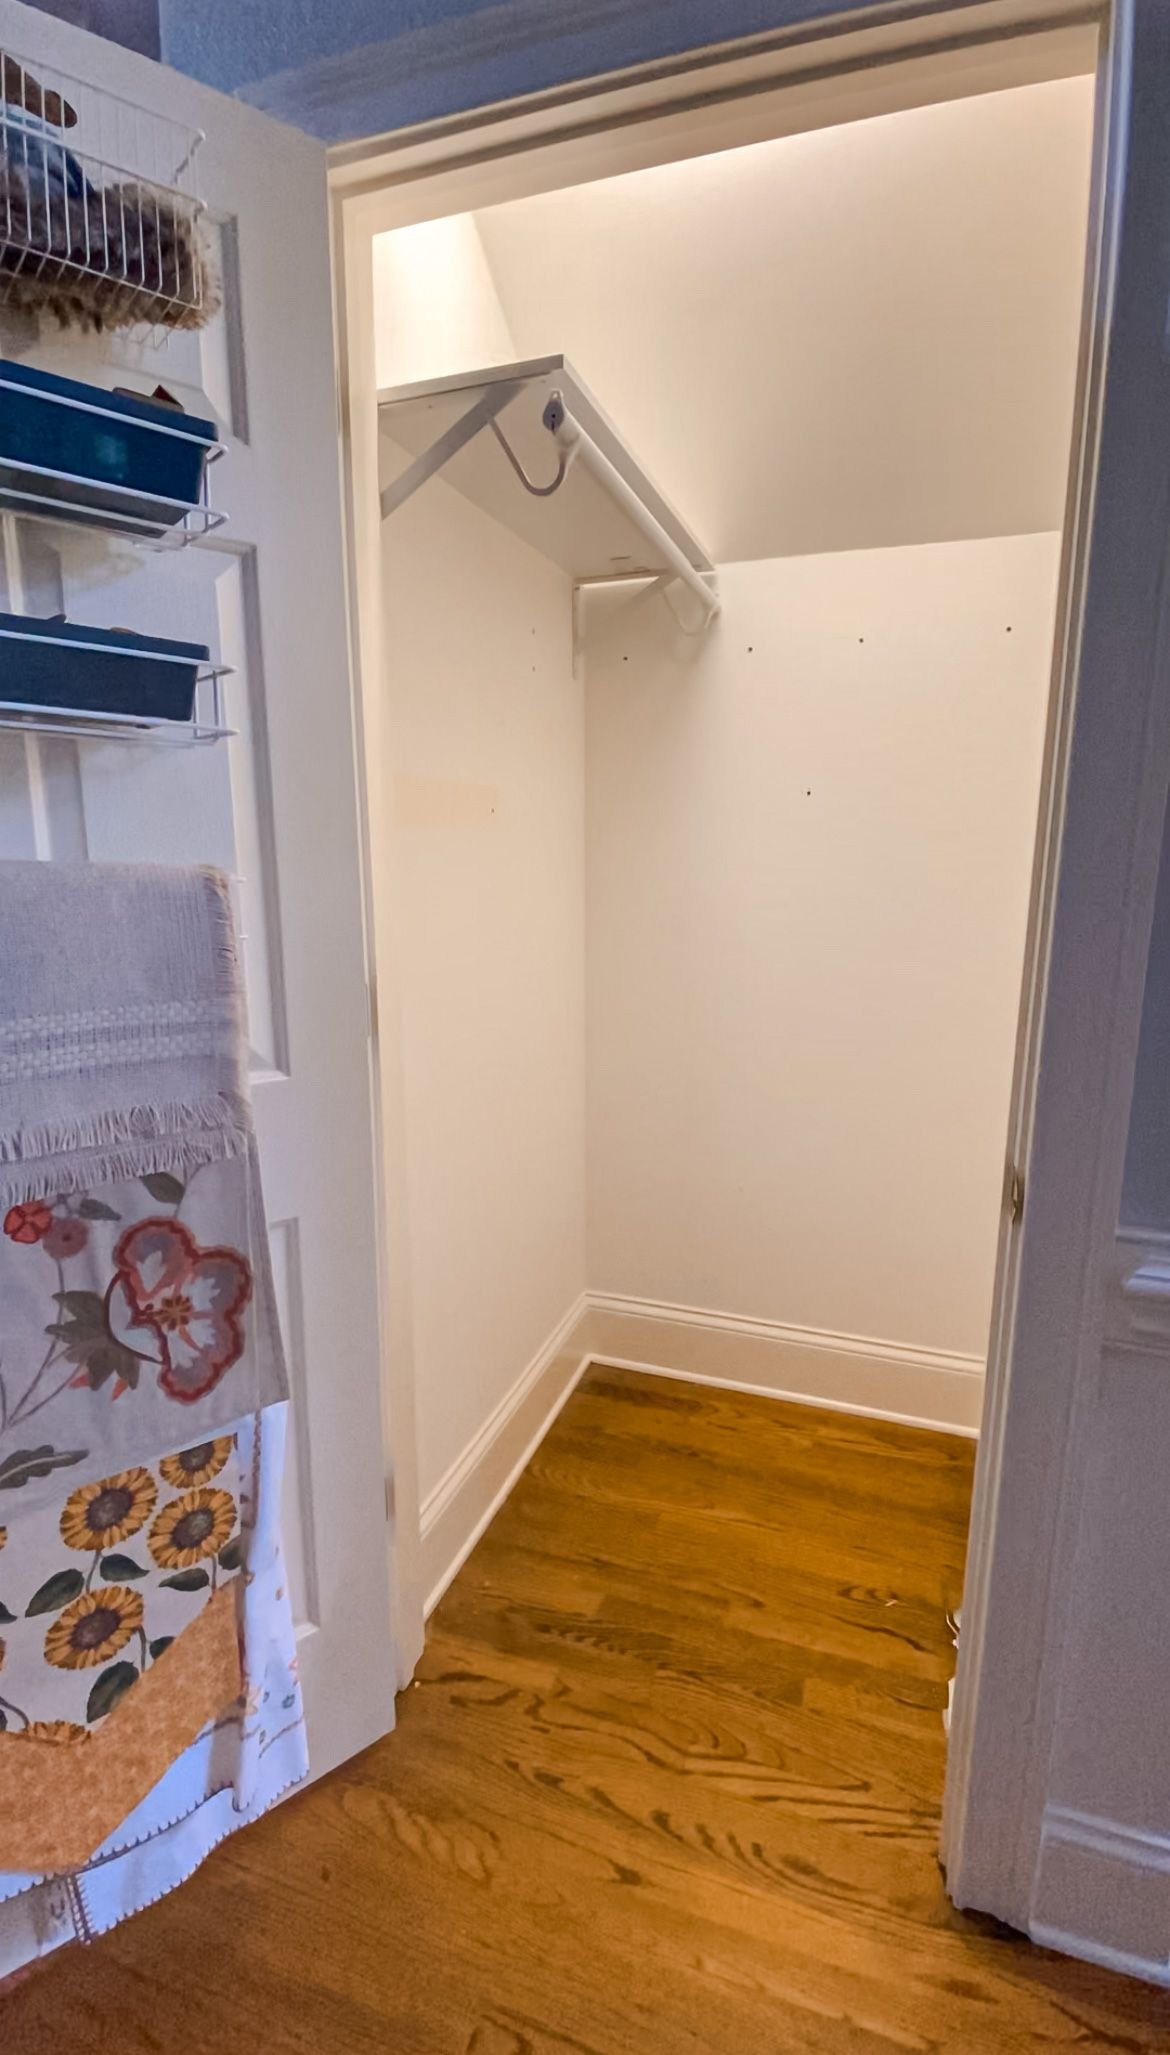
First thing, I took out the wire rack because, as you know, I absolutely despise wire shelves; they are the absolute worst. Then, I installed a hanging rod on the other wall with a shelf on top of it to give them space to hang coats, but also put storage on top of the shelf. These were super easy to install. I just picked the stuff up at Home Depot and followed the instructions.
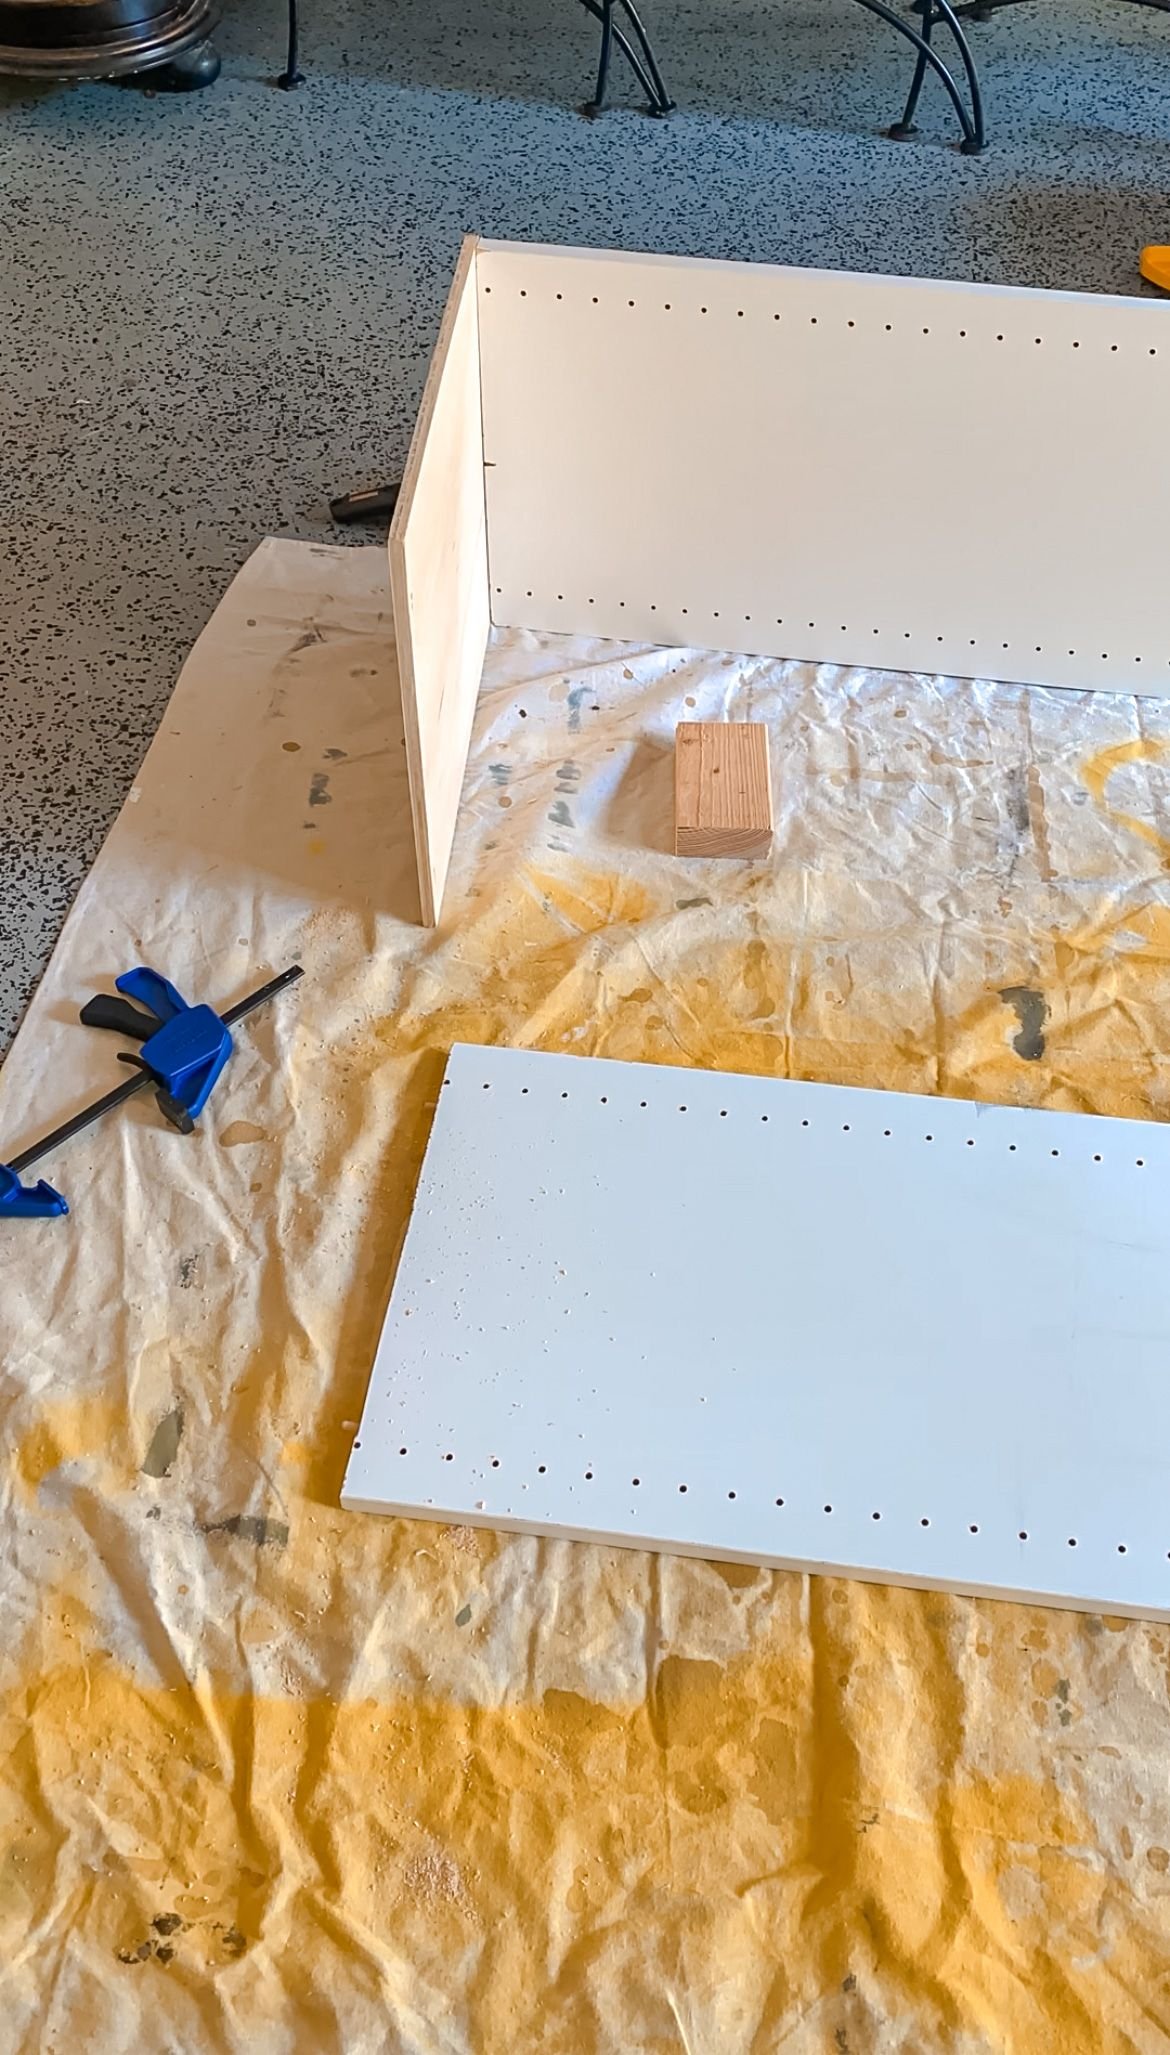
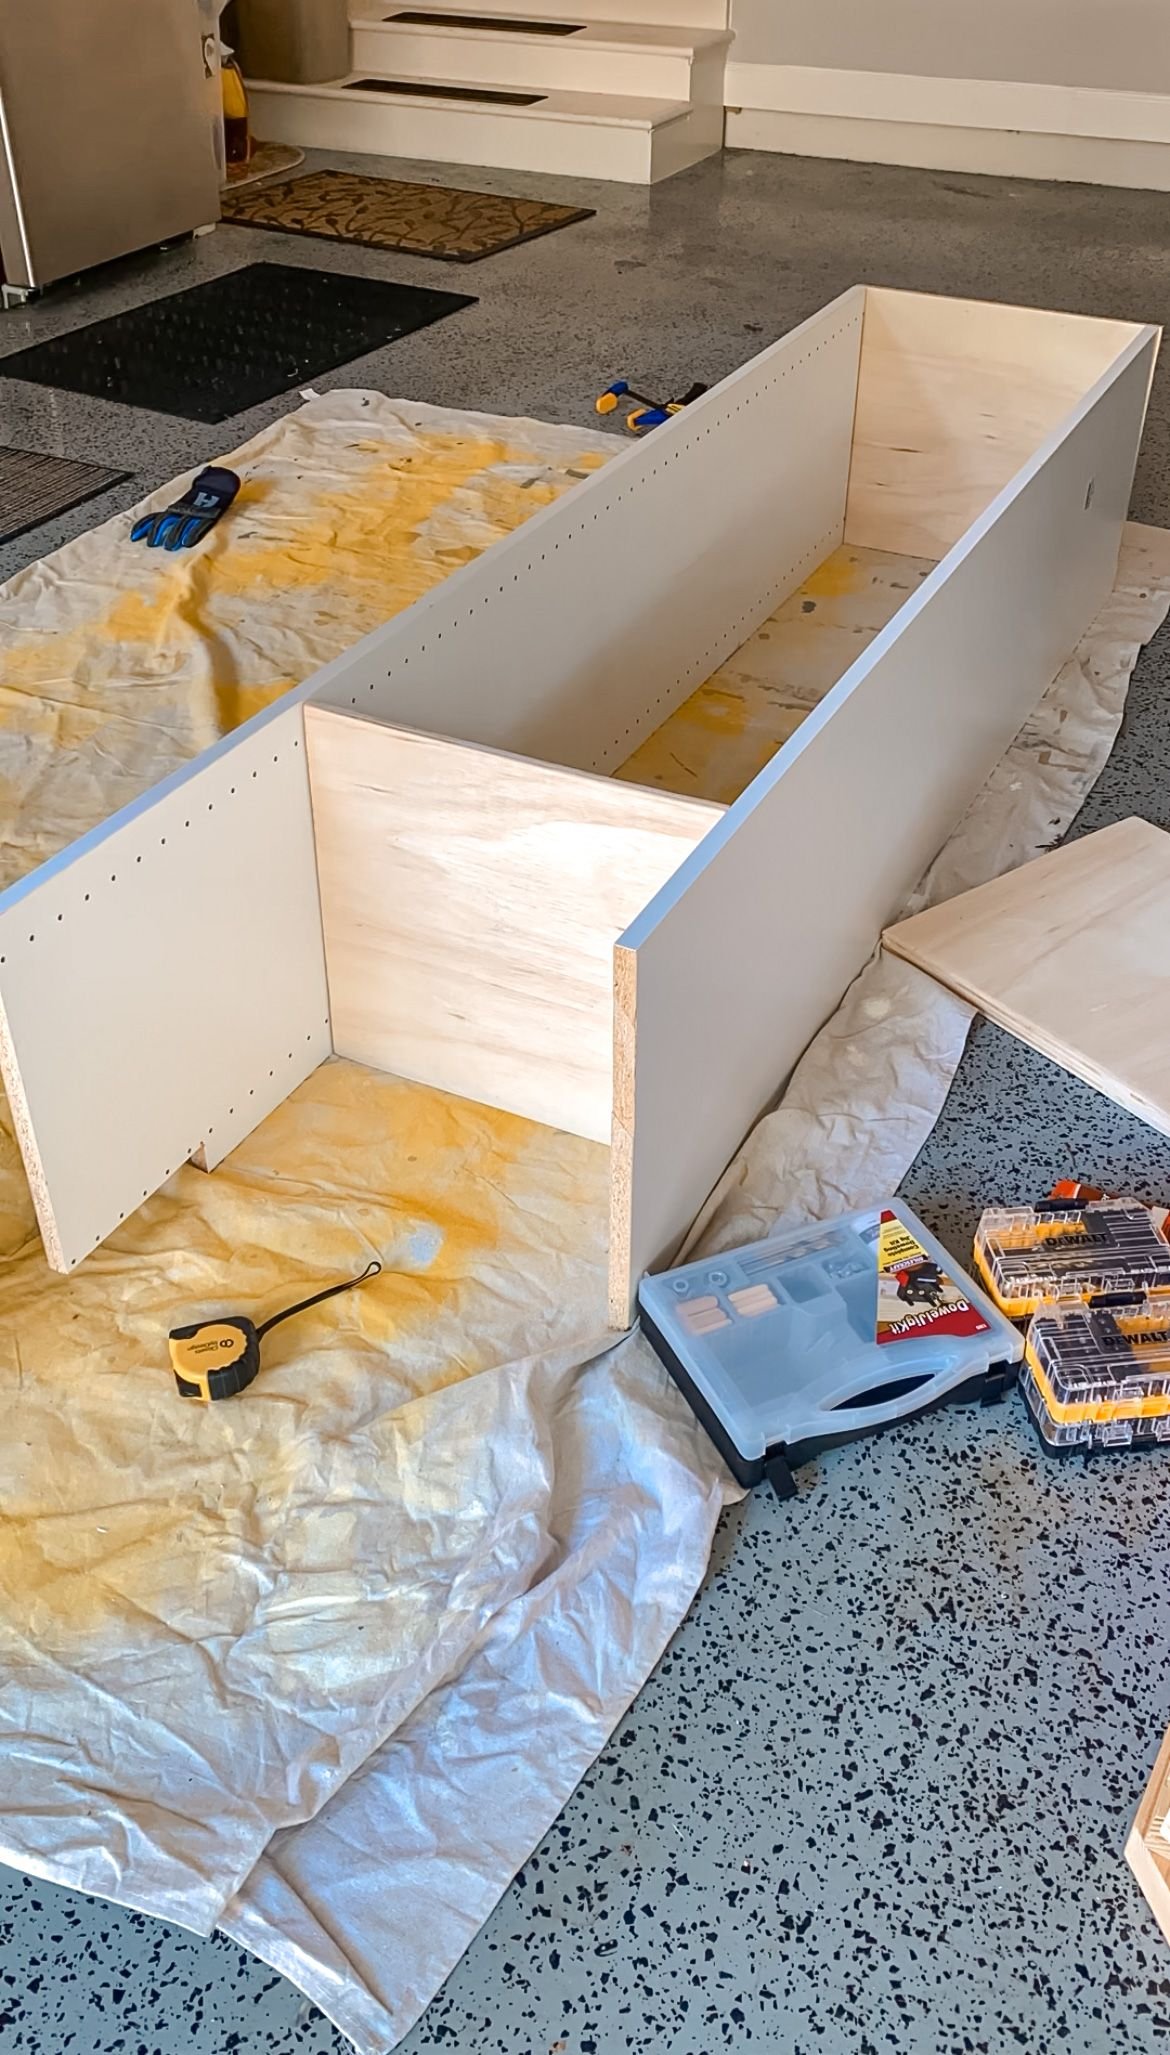
Now the bigger part of this project was actually building a custom melamine shelf to go in the back where the wire hanging rack was. I needed two cuts of melamine. One was shorter than the other one, because the shorter one was going to hang on the wall directly above the trim. The other one would be freestanding and they would be connected by a piece of melamine across the top and then one stationary shelf in the middle as well.

I used my dowel jig to make dowels for these. I then used glue in the dowel holes to keep them together and really secure. There were no pocket holes needed and this adds a lot more stability when you do it this way. I actually really like using dowel holes for joinery and I've done a tutorial on how to use a dowel hole jig. It's a really easy way to up your game when it comes to woodworking.

I attached the top part that connected the two pieces of melamine and then placed the second shelf that was stationary where it would fit best. I added the buckets and baskets that would be going on these shelves to make sure they fit nicely.
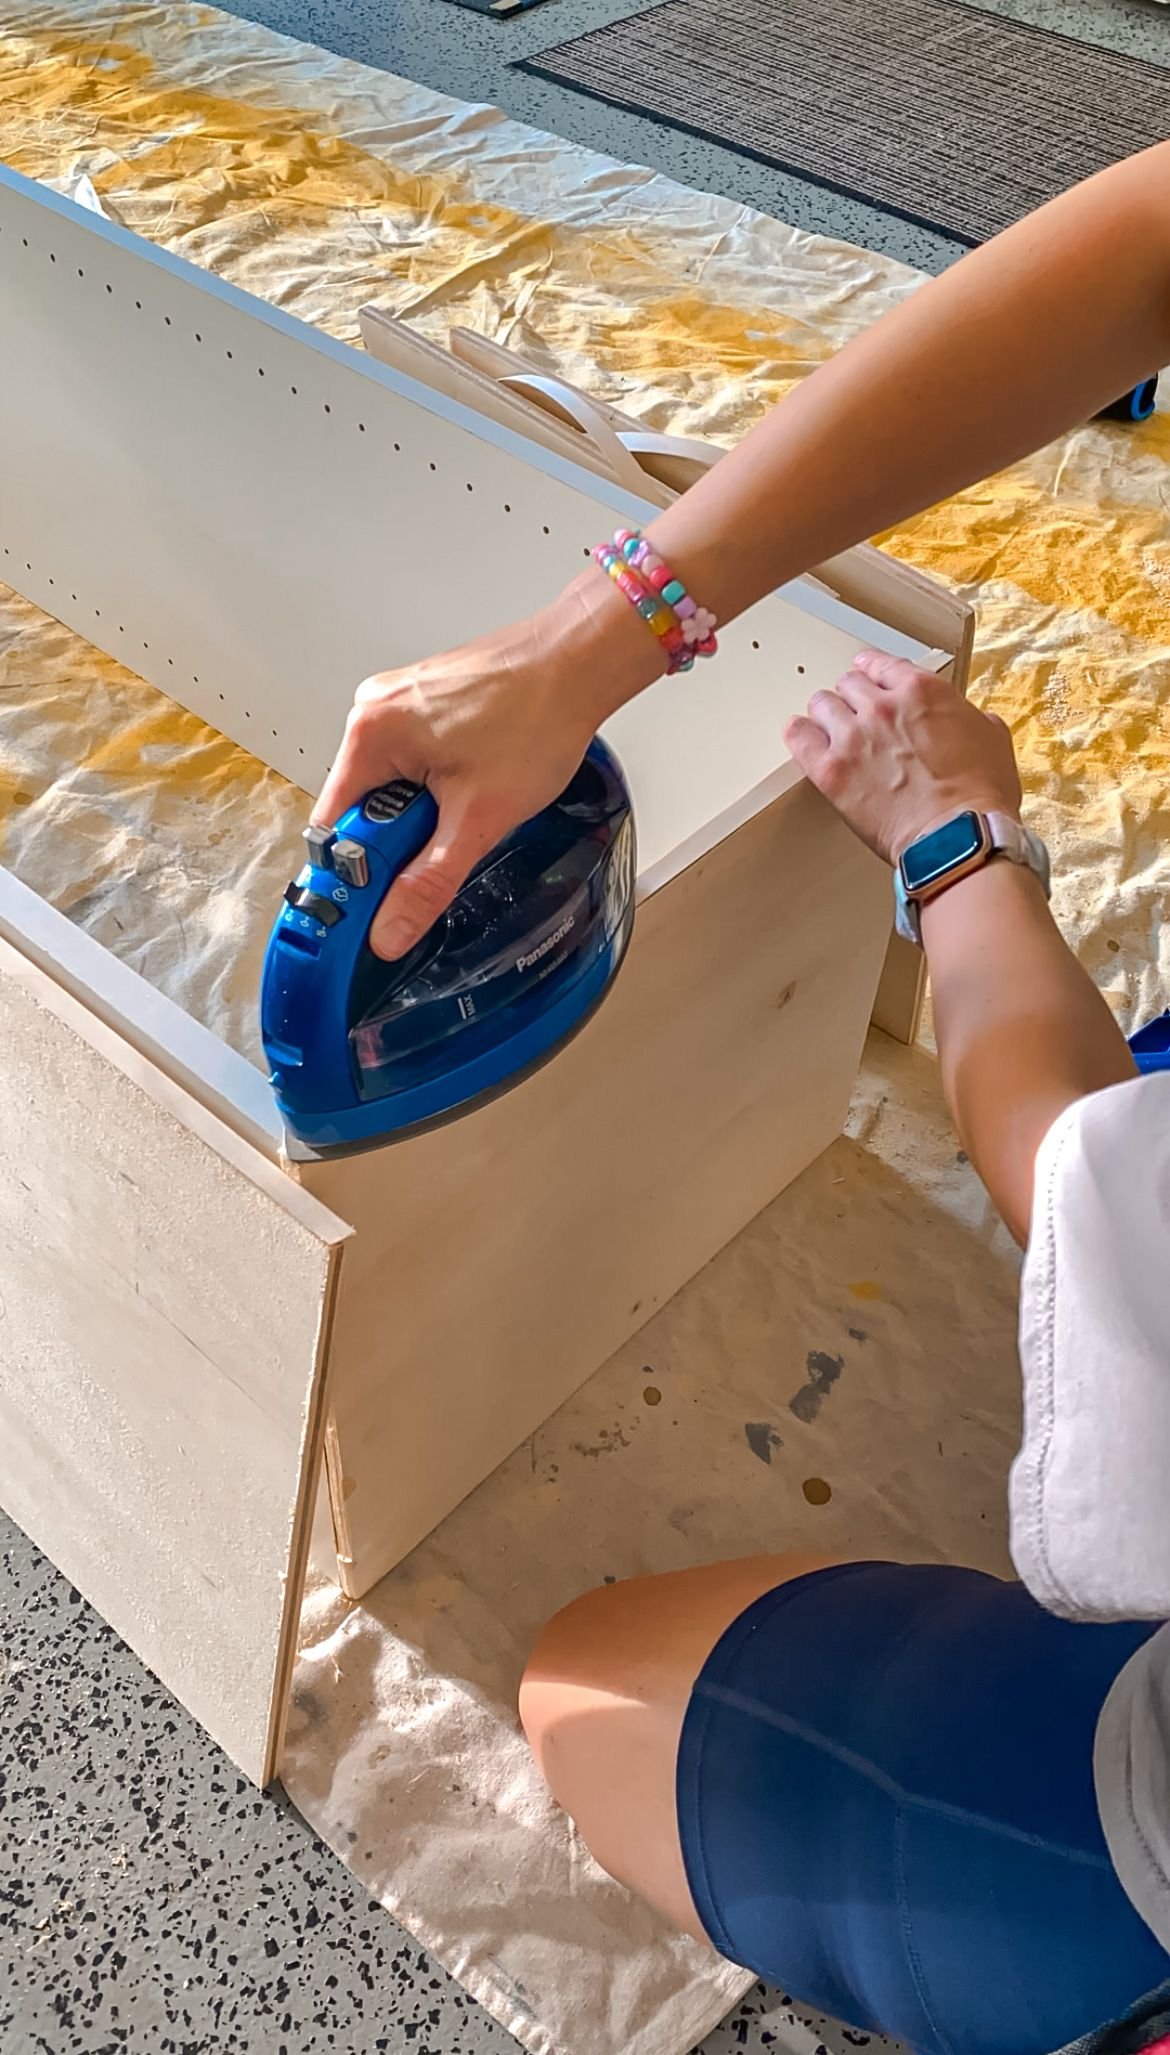
For the rest of the shelving, I used edge banding to cover up the plywood edges. All you have to do is iron it on because the glue is activated by heat. It's a really easy way to get a good finish.
Once that was done, I started installing the shelf unit into the closet. First, I marked the studs and then marked where the studs would be on the first piece of melamine. I decided to install just above the trim because my mom didn't want me to take the trim out so this was the easiest way to do it. I added the bottom stationary shelf, then the side piece and then the top. I made sure to glue everything as I installed so it was really, really secure.
I painted everything then added some adjustable shelves because this was pre drilled melamine and put everything back into the closet. I love how much more functional this closet is and, more importantly, my mom is super happy with it.

Redoing My Mom’s Coat Closet | Shop