
Storage Closet Shelves
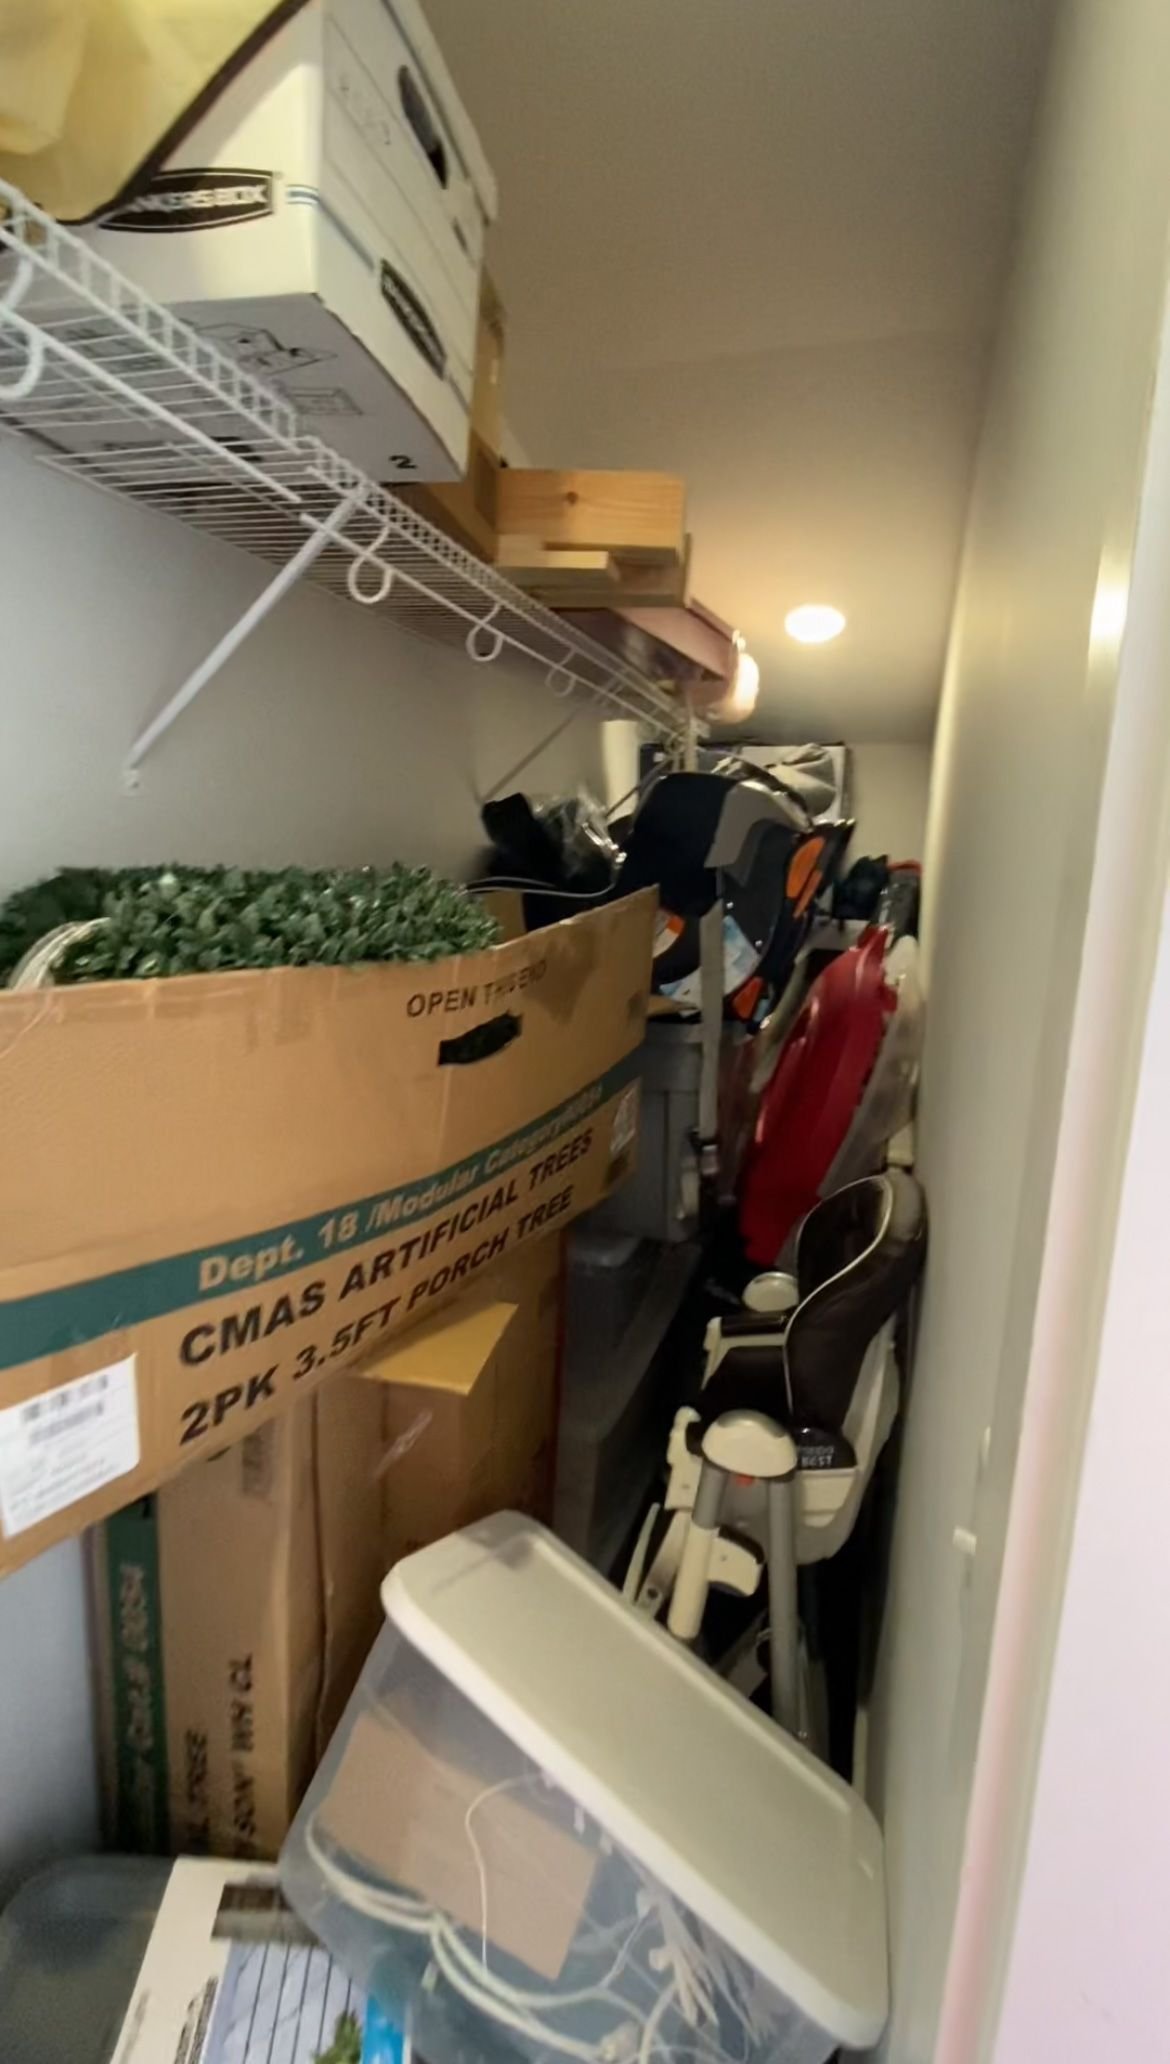
When we first moved into our house there was very little storage, but we did have a really big 15 x 3 ft. closet off of our deck. Because it was so long, it was really difficult to store anything. It only had one long wire shelf stretching to the end so items got piled on top of each other, space was underutilized and it ended up being an unorganized mess. I knew there had to be a better way to utilize the space without having to take everything out every time I needed something. So, I made a plan and got to work.

Storage Closet Shelves | Organization

First, I took everything out not only to build new shelving, but also to reorganize everything in there as well because it had become a mess. There was SO much stuff this closet. Once I pulled everything out, it took up my deck space as well as much of the floor space in the loft. After I took inventory of everything, I gathered new bins for everything that wasn't in a bin already. I knew I wanted everything in that closet to be in a labeled bucket. I used my Cricut and made labels for everything. What I like about using a Cricut for labels is I can make them bigger than a typical label maker. Having large, easily seen labels is super important in my organization process so I don't have to go searching for small labels. I put all of the labels onto the bins and that helped me sort everything into the right bins. Once that was done, it was time to start building the shelves.
Storage Closet Shelves | Building the Shelves
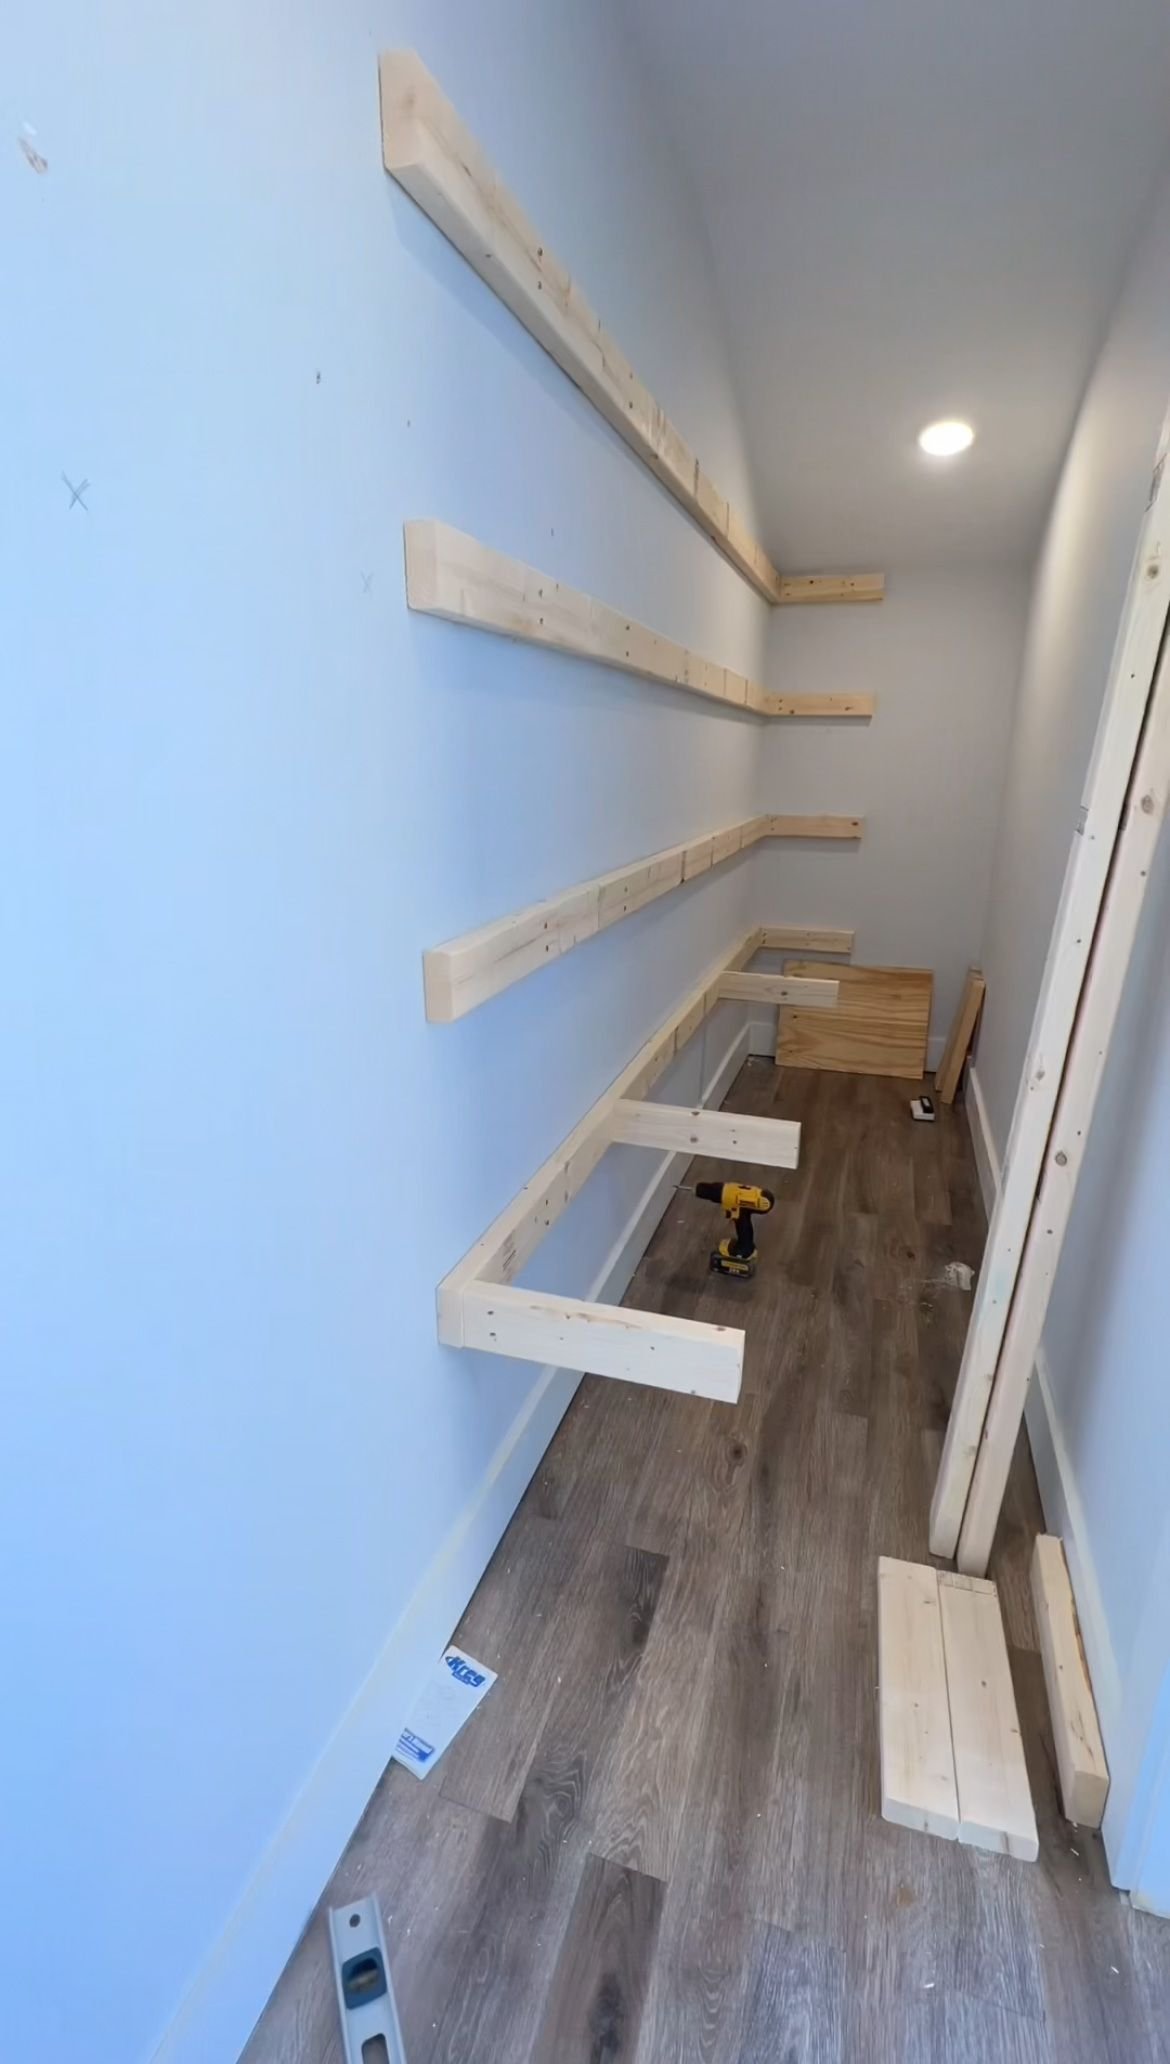
The first thing I did inside of the closet was find and mark where all the studs were along the wall. Then, I attached 2x4s to the wall at those studs. I built the shelves out and put plywood on top so the buckets could rest on them. I didn't add supports yet, but they were going to come I promise. Before adding supports, I had to figure out where the buckets were going to go on each shelf because that was going to impact where the supports went. I was trying to avoid having to pull multiple buckets out to get to one when I needed it.

Once I had everything figured out, I started putting the supports up. I had the shelving going from the floor almost all the way up to the ceiling so the supports would not only help prevent the shelves from sagging, but would also prevent them from coming off of the wall since the contents of the buckets are heavy. If you put enough weight on something, even if it's attached to the stud in the wall, you still run the risk of it coming off of the wall. I used 1x2s as cleats around the three sides and then attached the plywood shelf on top of those cleats. On the left side of the closet I had a little funny extra area, so I decided to utilize it as much as possible and make stacking shelves for buckets there as well. I utilized the buckets, put them into the space and then built the shelves directly on top of them. That way the buckets could slide in and out and I was utilizing all of the space possible. I was able to fit five shelves and seven bins, so I'm pretty happy with how this turned out.
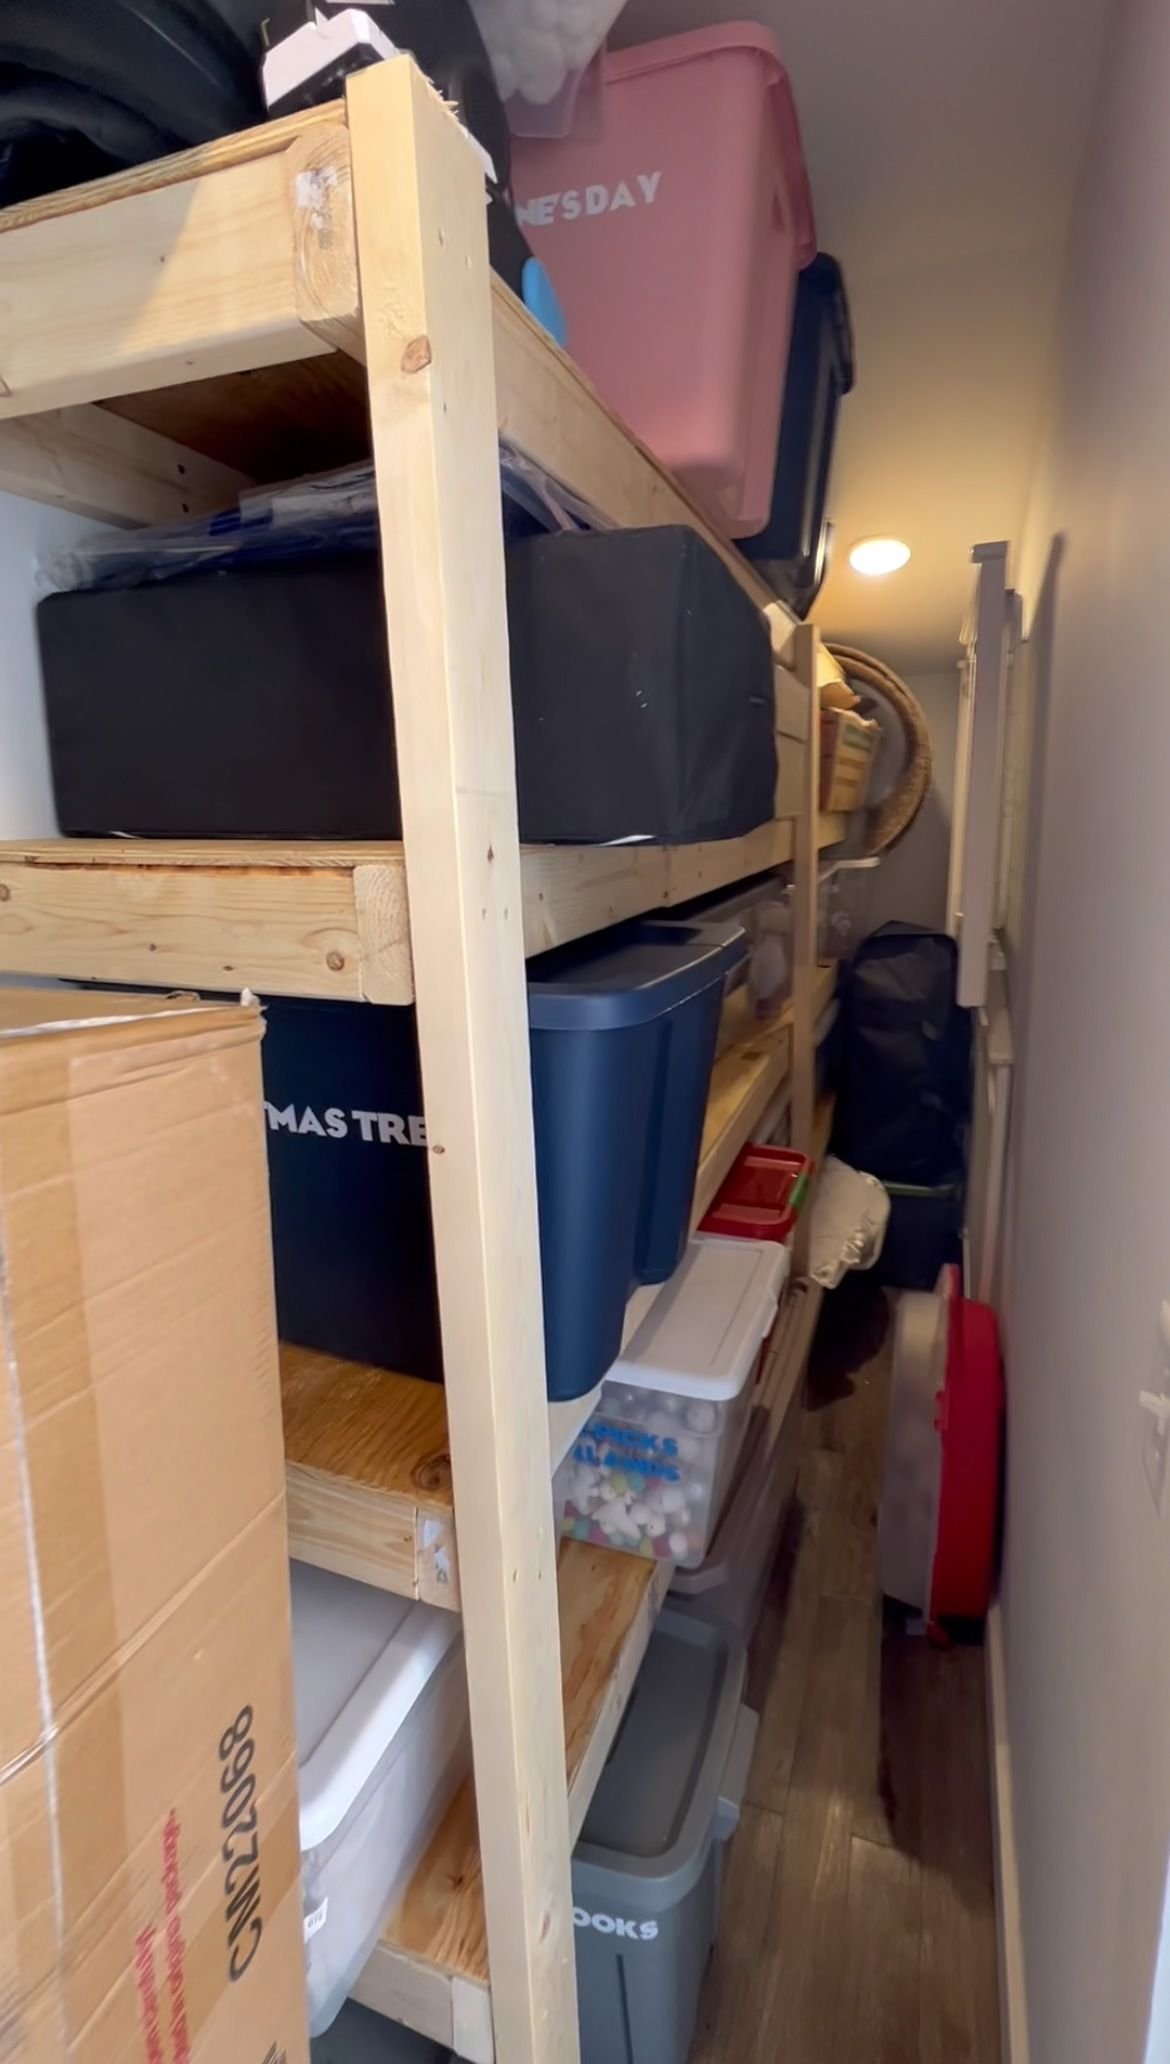
Lastly, I decided to use as much wall space as possible. At the time, I had not had my son yet, so I hung up the high chair as well as a ladder and our old crib that my daughter had used, both of which I have actually gotten rid of as well. I hung some hooks from the ceiling so I could then hang some wreath holders which meant I had even more stuff off the floor. All in all, this took me about two weeks to do, including all of the organization, labeling and building the shelves and putting everything in. I love how it turned out and the organization makes me happy. I've linked everything I used on this project below.
Storage Closet Shelves | Shop