
Seashell Memory Boxes
Let's talk seashells. I know it seems incredibly random, but bear with me. After talking to other people ADHD, especially women, I've found that many of us share a common interest: collecting seashells. My daughter and I have loved picking seashells anytime we go to a beach; however, I'm always stumped about what to do with them once we have collected them. Up until recently, our collected seashells have just been sitting in a glass jar on my daughter's bathroom counter, which, in hindsight, was not a great plan. My daughter accidentally knocked it over and it shattered, so we're not doing glass jars on the counter anymore. I wanted to find a creative way to display them that wasn't just having them sit on the counter.
Seashell Memory Boxes | Getting Creative
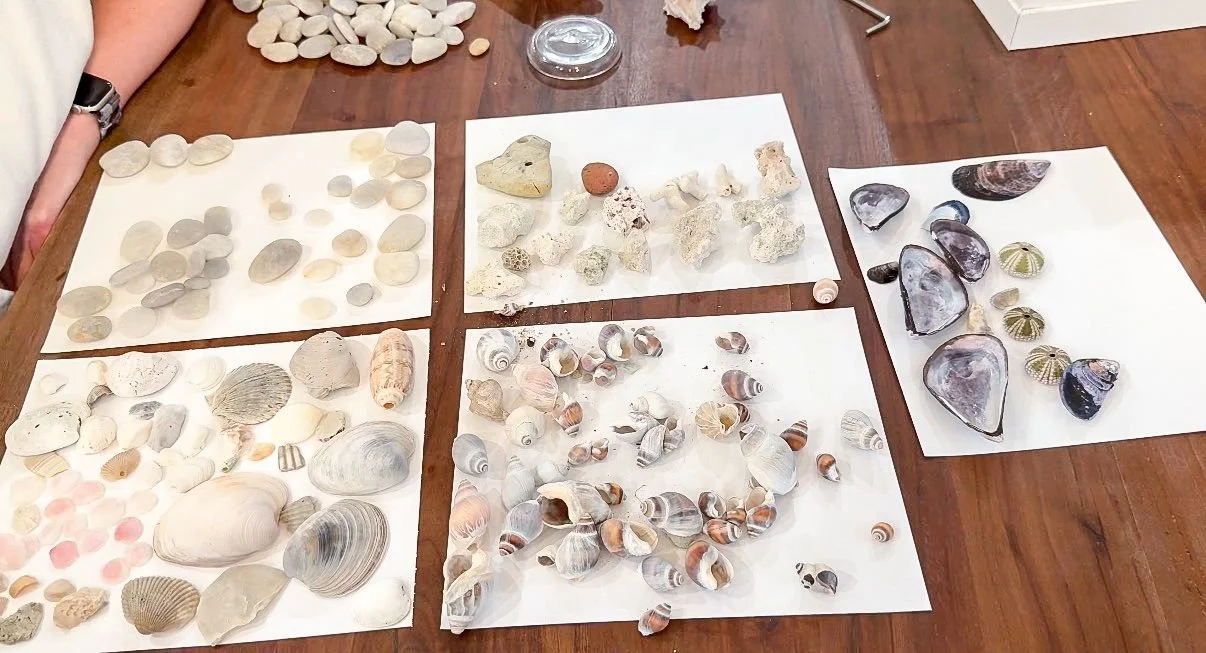
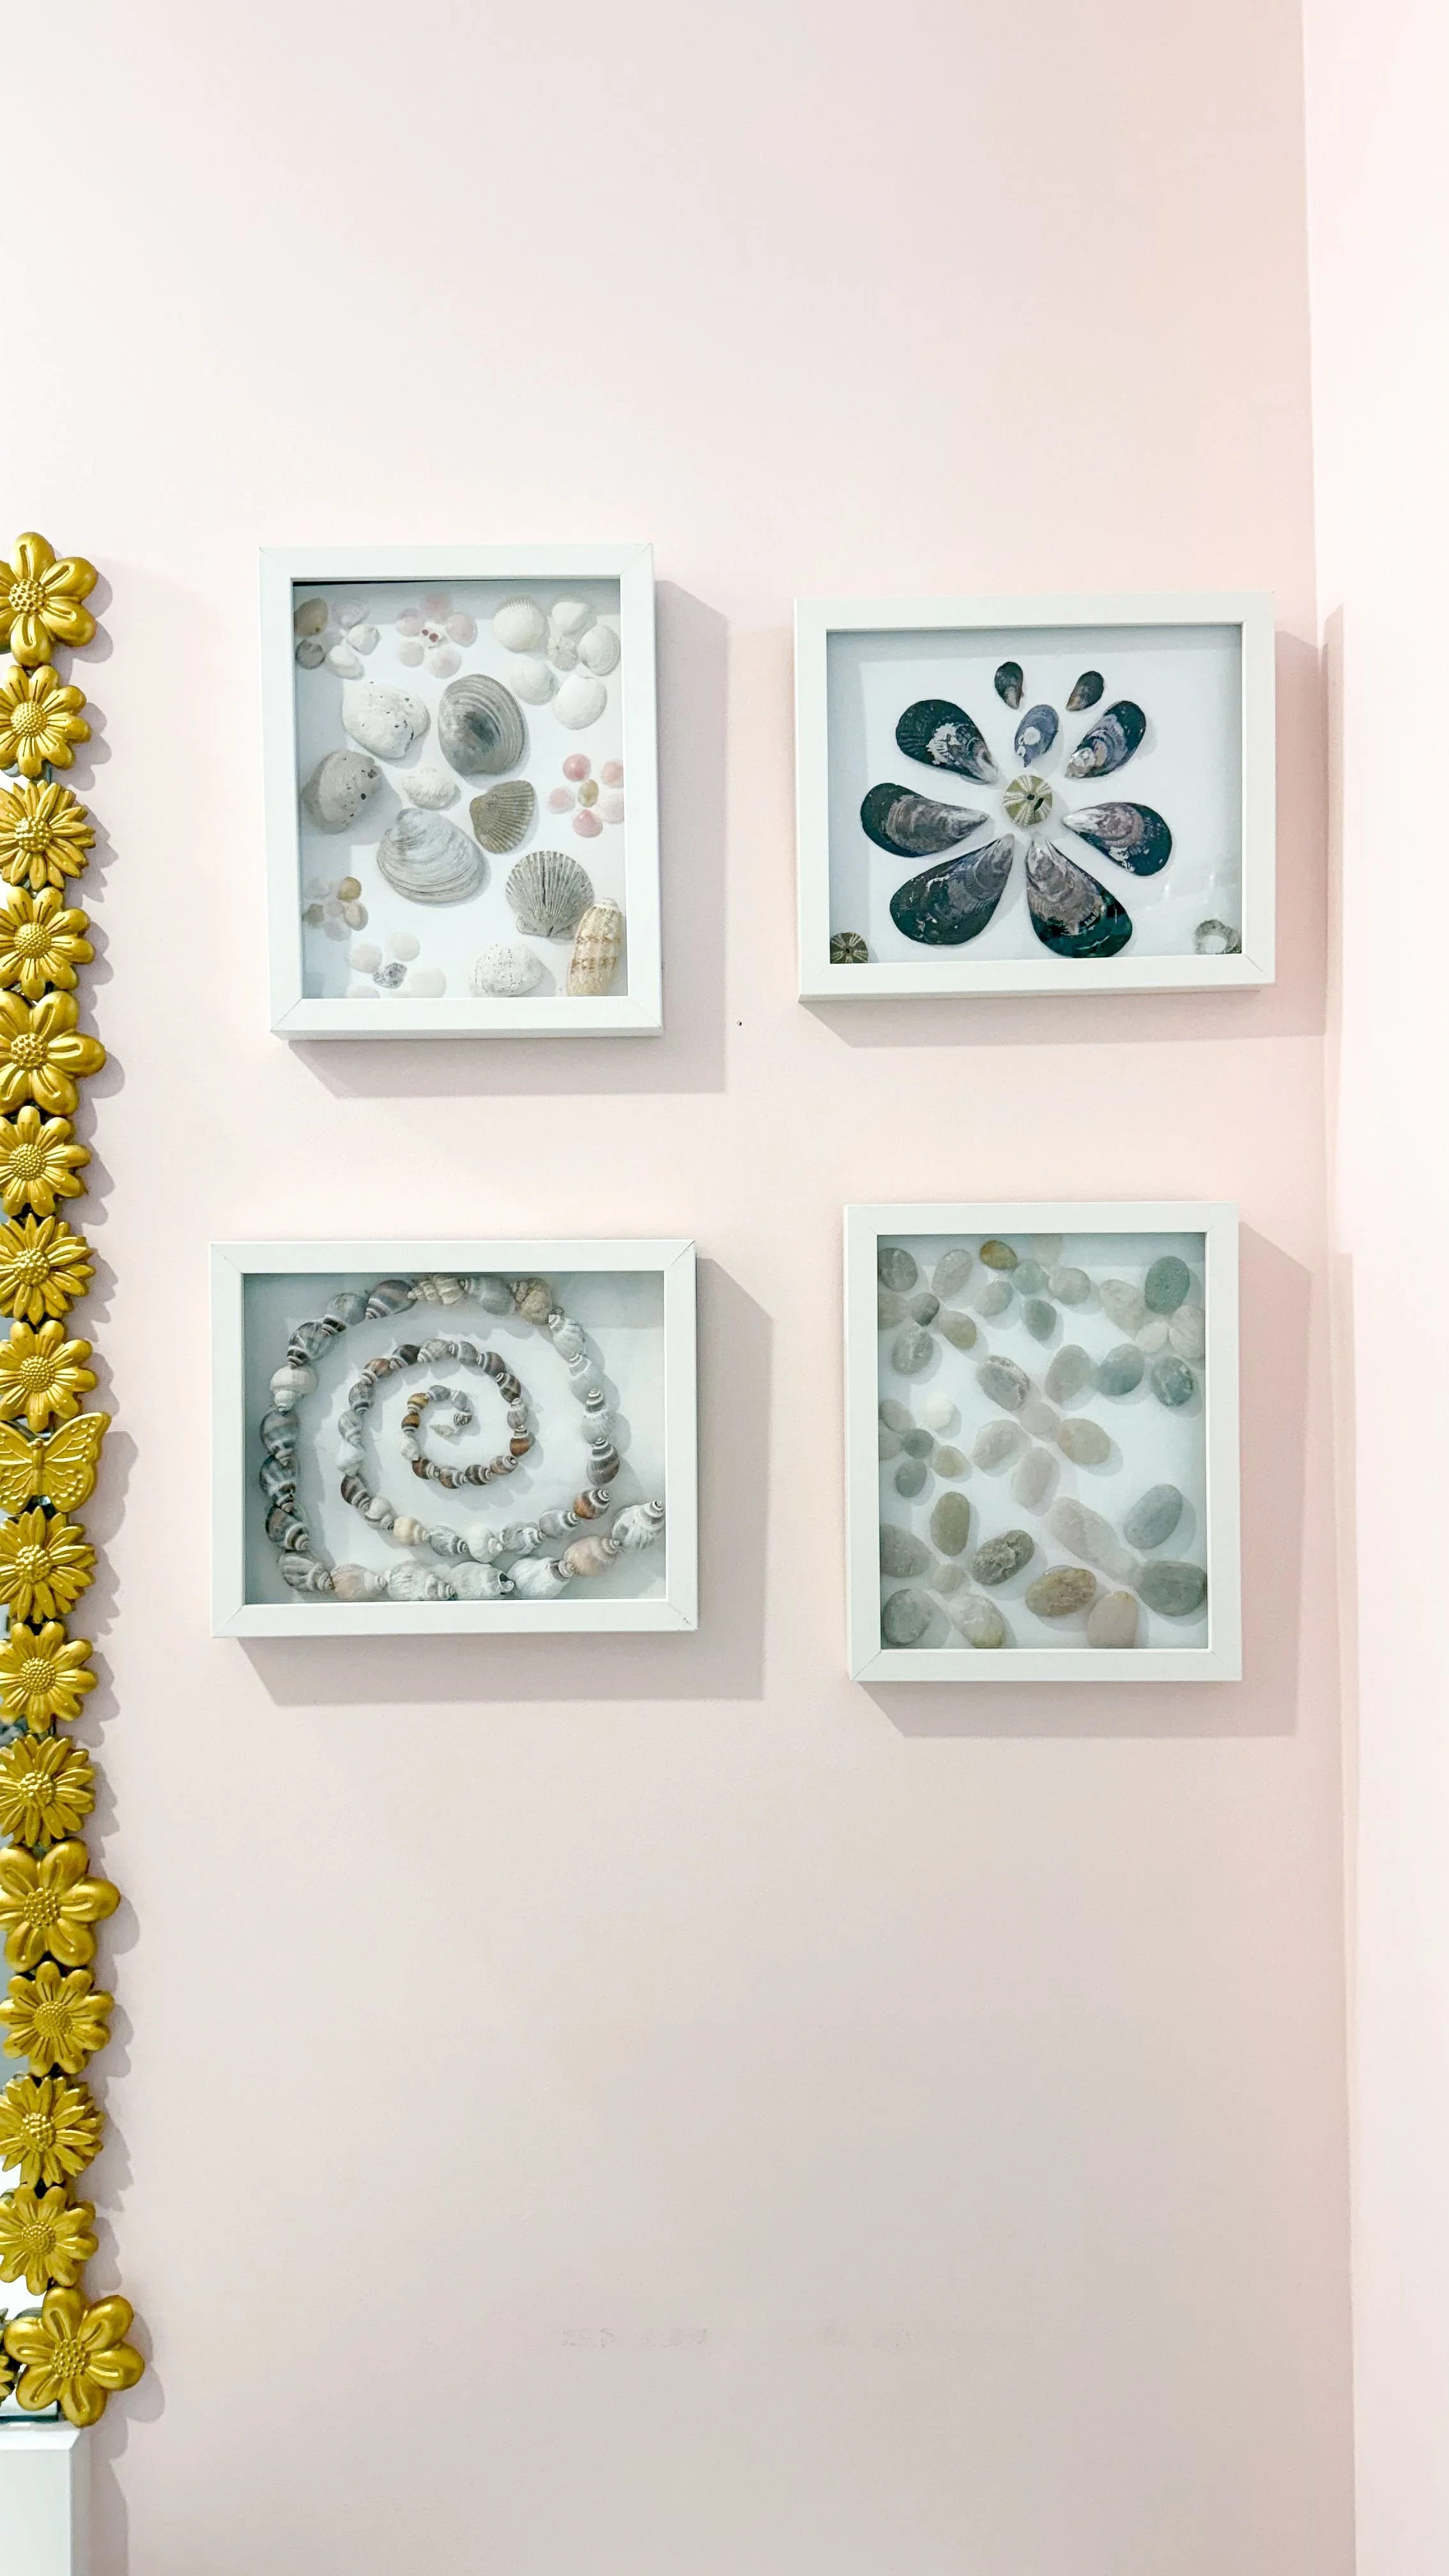
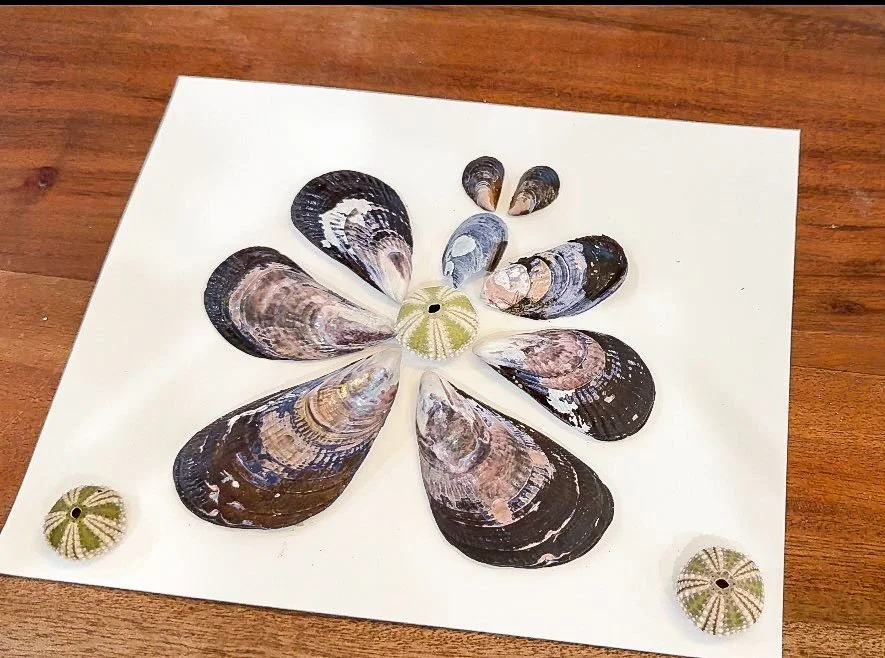
I gathered some supplies including the seashells, some card stock paper, my glue gun and a few shadow boxes. I didn't initially have a plan but started sorting my shells. I had 5 shadow boxes to work with so I had room to be creative with a few different designs. I loved being able to look back on each of the different shells and remember the memories associated with them. The first one I completed using oyster and sea urchin shells. My daughter and I both loved it and it really got the rest of the creative juices flowing.
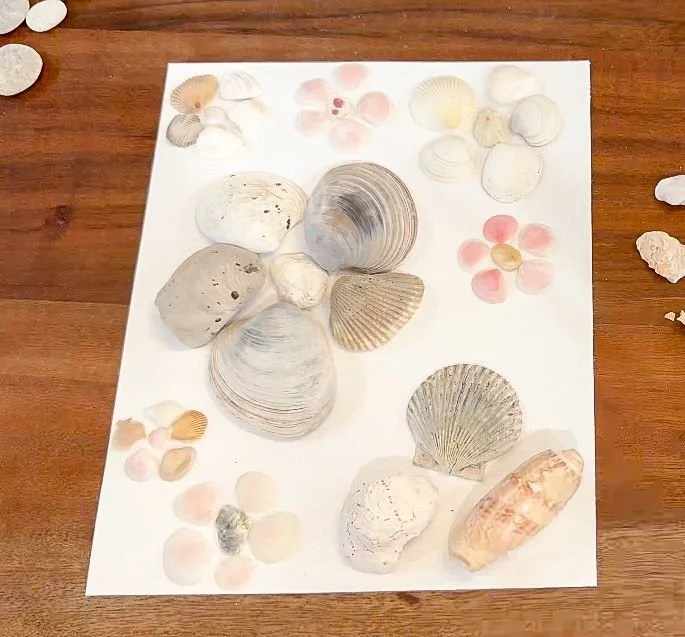
I continued making little flowers and flower themes using different shells and rocks. The little tiny light pink ones are all from Mexico. The other ones are just from other beaches around the US. I think some of them are from Florida, some of them are from North and South Carolina. I love that the overall flower theme goes with the flower theme of my daughter’s bathroom while still having a cute keepsake from our different vacations.
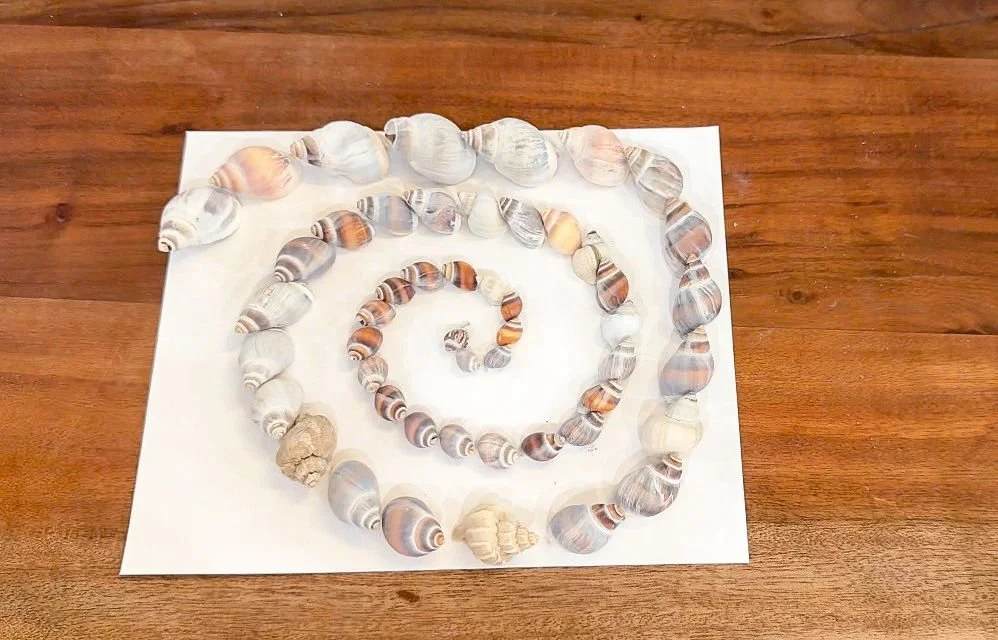
I was stumped when it came to the shells from Argentina. We found these when we were in Puerto Madrin, which is in Patagonia. It took a while, but I finally decided on a spiral design with the largest on the outside and the smallest shells on the inside of the spiral.
The rocks were definitely the hardest thing to come up with an idea for, so I just continued with the flower theme. Luckily, I had a wide variety of sizes, and so I was able to find pieces that worked for the centers and other pieces that worked for the petals.
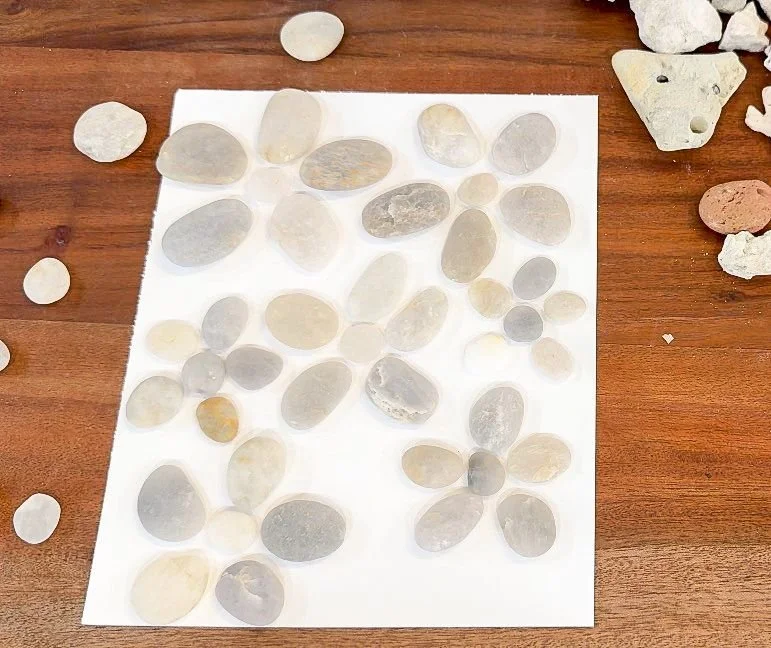
I took the most time laying out all of the shells and deciding exactly where I wanted them to go. When I was absolutely sure about the design, I used my hot glue gun to secure them in place. I tried to keep the petal sizes very similar, did whatever worked best color wise. I ended up having a lot of rocks left over, so I will figure something to do with the rest of them later. I had coral pieces as well, but ended up sadly not using them because they were to bulky for the shadow boxes.
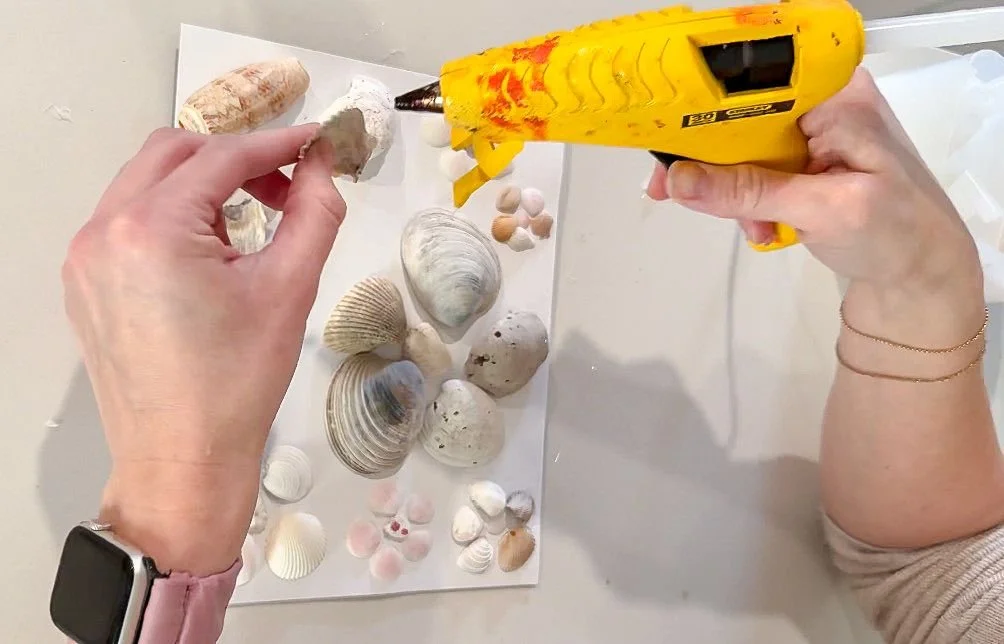
I made sure to glue the shells to the paper and then the paper to the shadow box backing so I didn’t have any last minute shifting when I was hanging them. The spiral seashells were probably the hardest one to glue, just because there wasn't an even surface so I kept second guessing if everything looked cohesive.
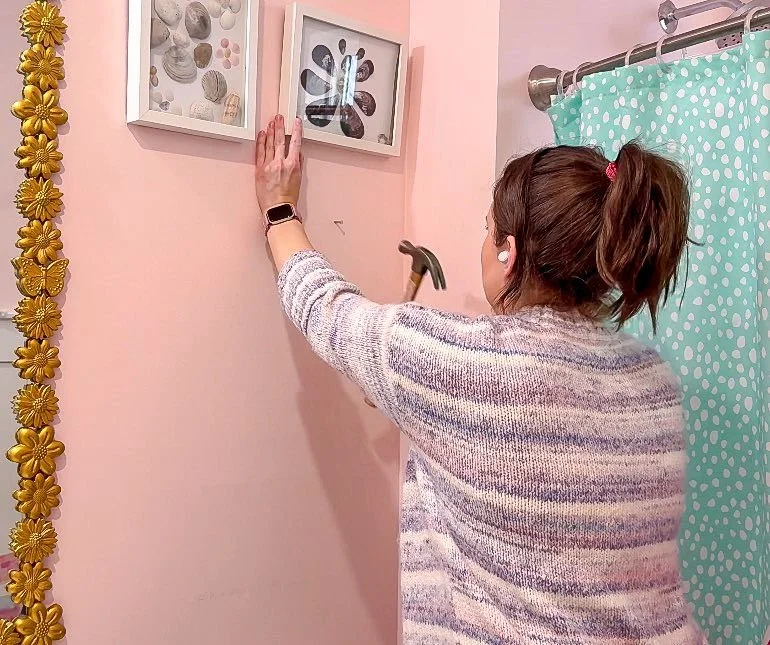
Some of my designs did not fit directly into the frames the way I wanted, so I had to adjust along the way. I found that as long as the back goes in normally with the provided securing clamps, the picture frame is fine. Once I had four frames finished, I hung them in my daughter's bathroom.
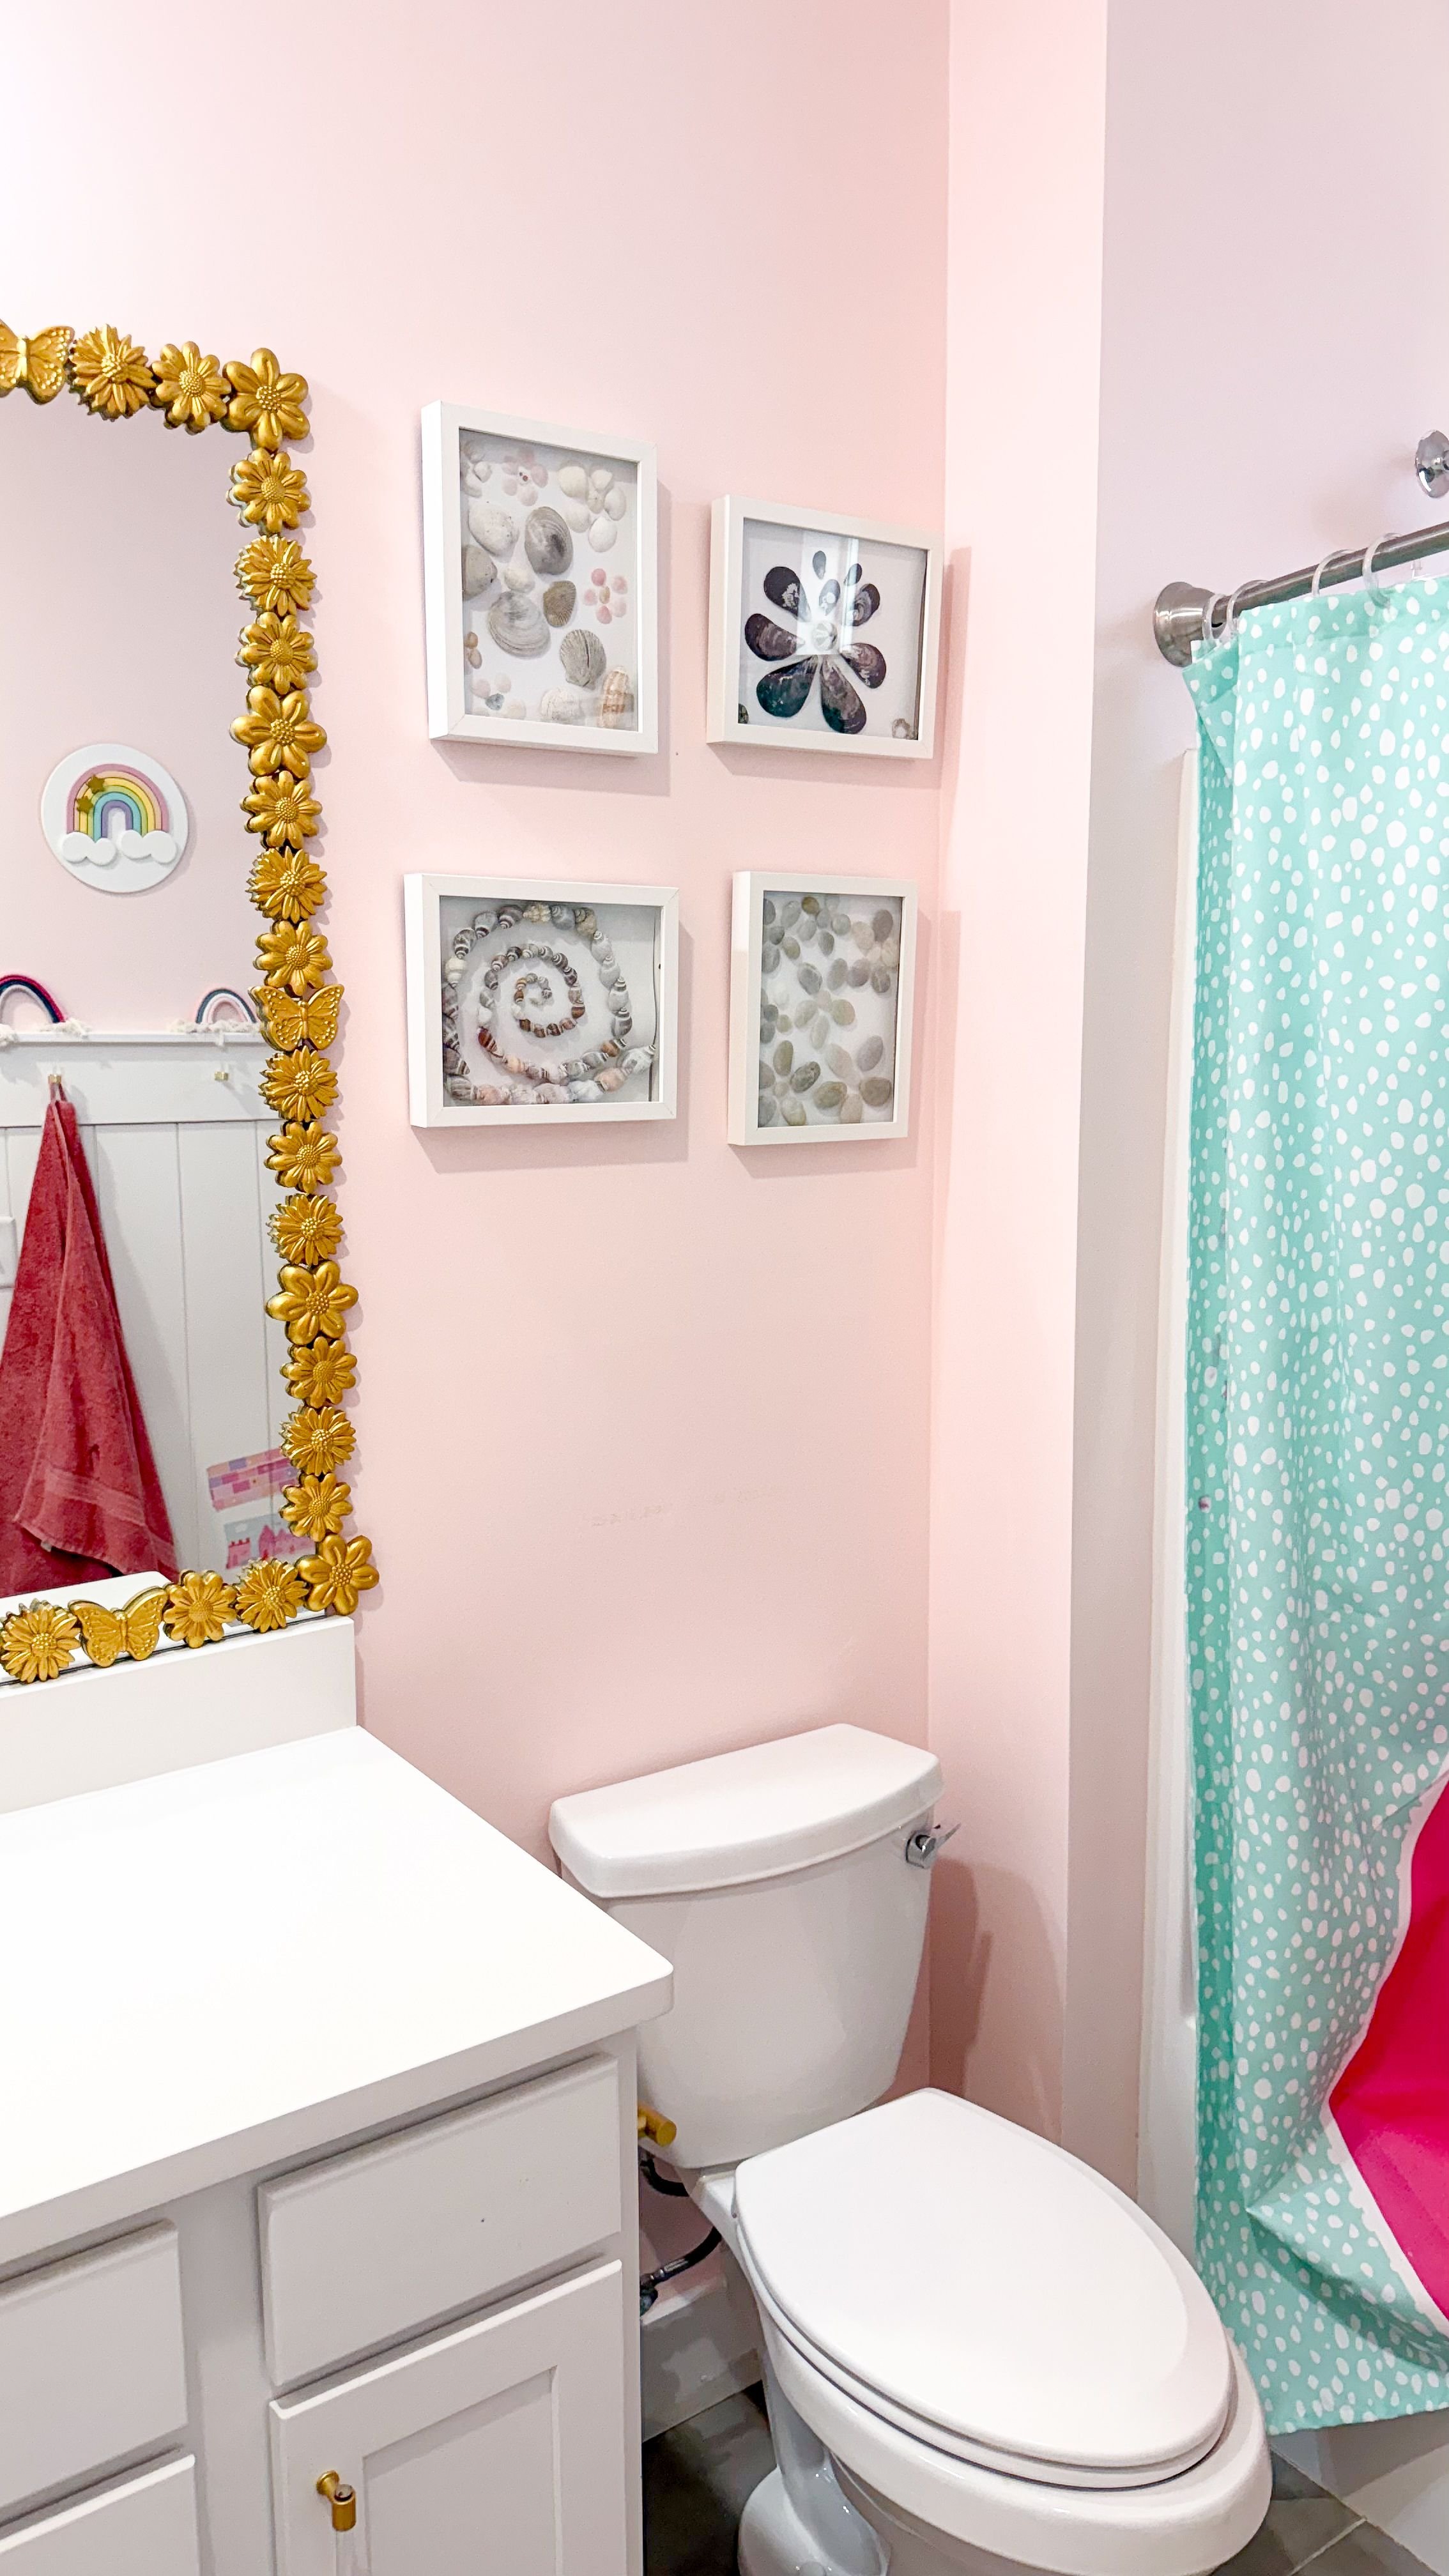
I'm glad that I was able to tie in the flower theme already established in her bathroom and I love the finished product! It was a pretty simple project, but a fun way to be creative and we can look back and remember our beach trips when we see the shells. Let me know if you get creative with some of your collected shells, too.