
My Dad’s Closet Refresh
My parents moved into the house they live in now in 2020. When they did, my dad had this massive closet that he was not getting the most use of. He asked me to redo it and make it a little bit more functional for him. Since he was only using a fraction of it, we decided to dedicate the half he wasn't using to storage. The previous owner of this home had really random cabinets in the space that had locks on them as well as outlets and vents (frankly, very bizarre in my opinion) and there were so many more drawers than my dad ever would need. I got to work using what I could that was leftover from the previous owner to make an adequate storage solution happen while keeping the integrity of the closet.
My Dad’s Closet Refresh | Demo
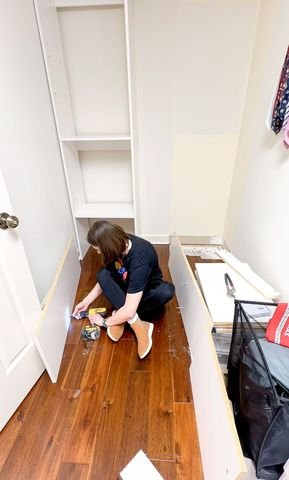
First thing I did was get rid of the cabinet and drawers on the right side. These drawers are actually the ones that I ended up using later in my closet when I built my closet out. This is one of the things that I do when I am working on projects. I try to have an idea of all of the different things I'm working on or potentially could be working on and ways I can reuse materials. These drawers, for example, are really expensive if you just go and buy them from the store. Not to mention if I am able to repurpose something then I'm not putting more stuff in a landfill, which I feel good about.

After taking out the cabinet, shelves and drawers, I discovered that when the previous owner redid this closet, they left the carpet underneath the cabinet. So they made a point of putting wood flooring in everywhere else. Just not here? Under this one cabinet? I don't understand. Of course that was not going to work in the closet and I couldn't just leave carpet there. I pulled it up, put down a scrap piece of wood for the time being while we waited for someone that could handle the flooring and I got back to work on the actual closet.

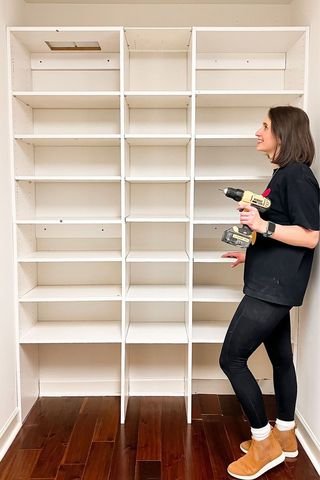
My Dad’s Closet Refresh | Closet Space
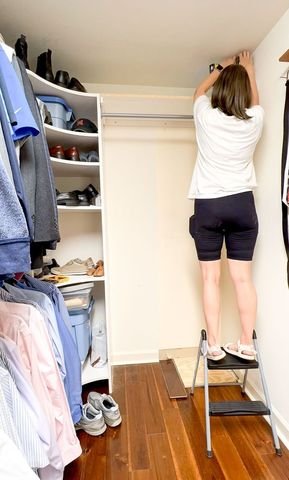
The first thing I did was hang another hanging rod because that's what my dad desperately needed. Most of my dad's clothes are hung and so I wanted to hang the rod first to make sure that it was the right height. In retrospect, it definitely would have been easier to hang the shelf first because I put cleats around the three sides and then nailed the shelf to the cleats, but I did what I did. On the longer shelf on the other side, I did the same thing. I put three cleats up, one on each side, and then I placed the shelf back on and used my brad nailer to nail the shelf to the cleats using melamine shelves to do this. I finished it off with some melamine edge banding on the fronts of the shelves so they looked clean when I was done.
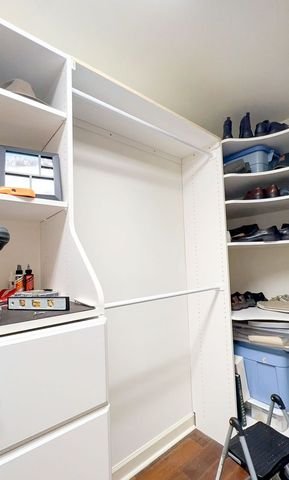
The next thing I did was take out the cabinet on the other side of the closet, because there were three sets of drawers in this closet. And, wouldn't you know, underneath that cabinet was also a patch of carpet like under the other shelf. I took the carpet up there as well and didn't worry about replacing the flooring in this part because it would be covered by a new set of shelving anyways, so it was not that big of a deal. We had a lot of scrap melamine left over from when we demoed my grandparents original closets, so I used all of that scrap wood to make two shelving towers for this side of the closet.

My Dad’s Closet Refresh | Storage Area
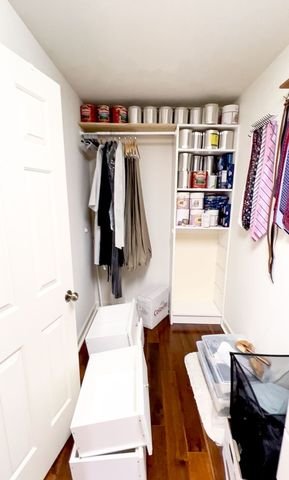
Now to start the storage side of the closet. There is not a lot of storage in my parents house. That's something I've noticed in a lot of houses in Tennessee, at least in my house and in their house. You kind of have to make your own storage because no one thinks you need any storage. Anyway, so I made these two cabinet frames really easy out of the melamine.
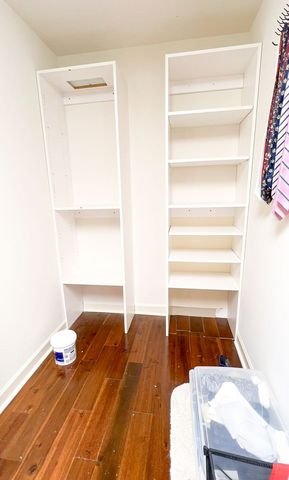
I did a base on the bottom, a permanent shelf a few feet up, a brace in the back and then used the brace in the back to secure it to the wall. Then, I stacked another frame on top, secured that to the studs and repeated that on the other side. That did mean that there was a gap between the two sets of shelves, but trust me, I did have a plan. I cut down more melamine pieces to add additional shelving to these cabinets. My mom wanted lots of shelves in here and wanted them to be adjustable so all but one on each side I made adjustable. Between the two sets of shelves, because it wasn't very big, I added cleats around all three sides and added fixed shelves between the two. Again, utilizing all the space and getting as much storage as possible, I removed stuff from the wall as well as taking the random bulletin board out from behind the shelving cabinet because none of it was being used and it was just taking up random space.

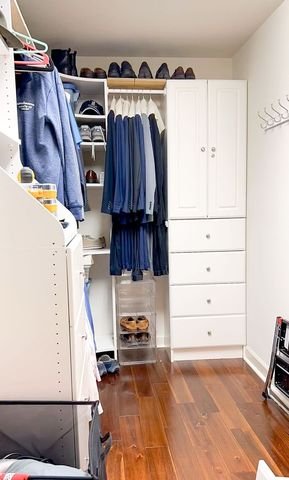
So, this is the finished product. While this isn't the most big or drastic makeover I have done, the point it is to show you that sometimes you can do a couple of little things to utilize your space better while really not spending that much money. Again, everything I took out of here that I didn't reuse in the space, I reused at a different time on a different project. You can shop any of the tools I used and anything I didn't re-use below.

My Dad’s Closet Refresh | Shop
