
Fixing Up My Parents’ Back Yard
My parents have an incredible backyard. It was mostly done when they bought the house five years ago. The house already had the pool, the trees surrounding the yard, the artificial turf and all of the paving. They added a seating area on a side yard and a play structure for my kids. We love the yard and it is absolutely beautiful. However, there were a few little things my mom wanted done before hosting an event at her house. A good family friend asked if they could host a post-wedding party/open house for one of their kids there after they get married in another state. Even though it wasn't a full blown wedding, it still was a formal event she wanted the yard looking nice for. After giving this event as a deadline for a few contractors she had doing various projects, she asked me to finish up the rest.
Fixing Up My Parents’ Back Yard | Privacy Screen and Swing
First on the fix-up list is a privacy screen on the far side of the deck. I think when the previous owners put the deck in, they put a privacy screen there because the trees they planted weren't mature enough to provide privacy from the neighbors. Fast forward a few years and my parents have built a huge retaining wall and the trees have matured so the privacy screen really isn't needed. My mom decided she wanted to put in a porch swing instead. I started taking down the privacy screen and i was having a hard time because at the top I realized there was nothing really securing it. The board at the the top of the privacy screen was actually just secured to the beam on the deck and not to the physical privacy screen. The bottom of the privacy screen is secured to the deck at the bottom onto the Trex. After I removed the top board and the pieces were loose, I started working on the screws. At the bottom of the three screens the screws seemed to go in really far. Some of the screws were stripped, old and rusted and were wood-filled and painted over. Getting to them out was almost impossible. I tried every single thing I could think of. I scrubbed, drilled, and even used a kit that I can drill into a stripped screw and then pull it out. After 30 minutes, absolutely nothing was working. I switched to the easy, messy way: sledgehammer. I started going to town on the side pieces, because those were keeping everything secured together. I took those out and then I started to pull down one of the privacy screens and had a feeling that since those screws were clearly rusting, things would come off pretty easily and it worked. After the warped screws popped out of the wood, and I now had access to all of the exposed screws, I was able to use a pair of clamps and just pull them out.
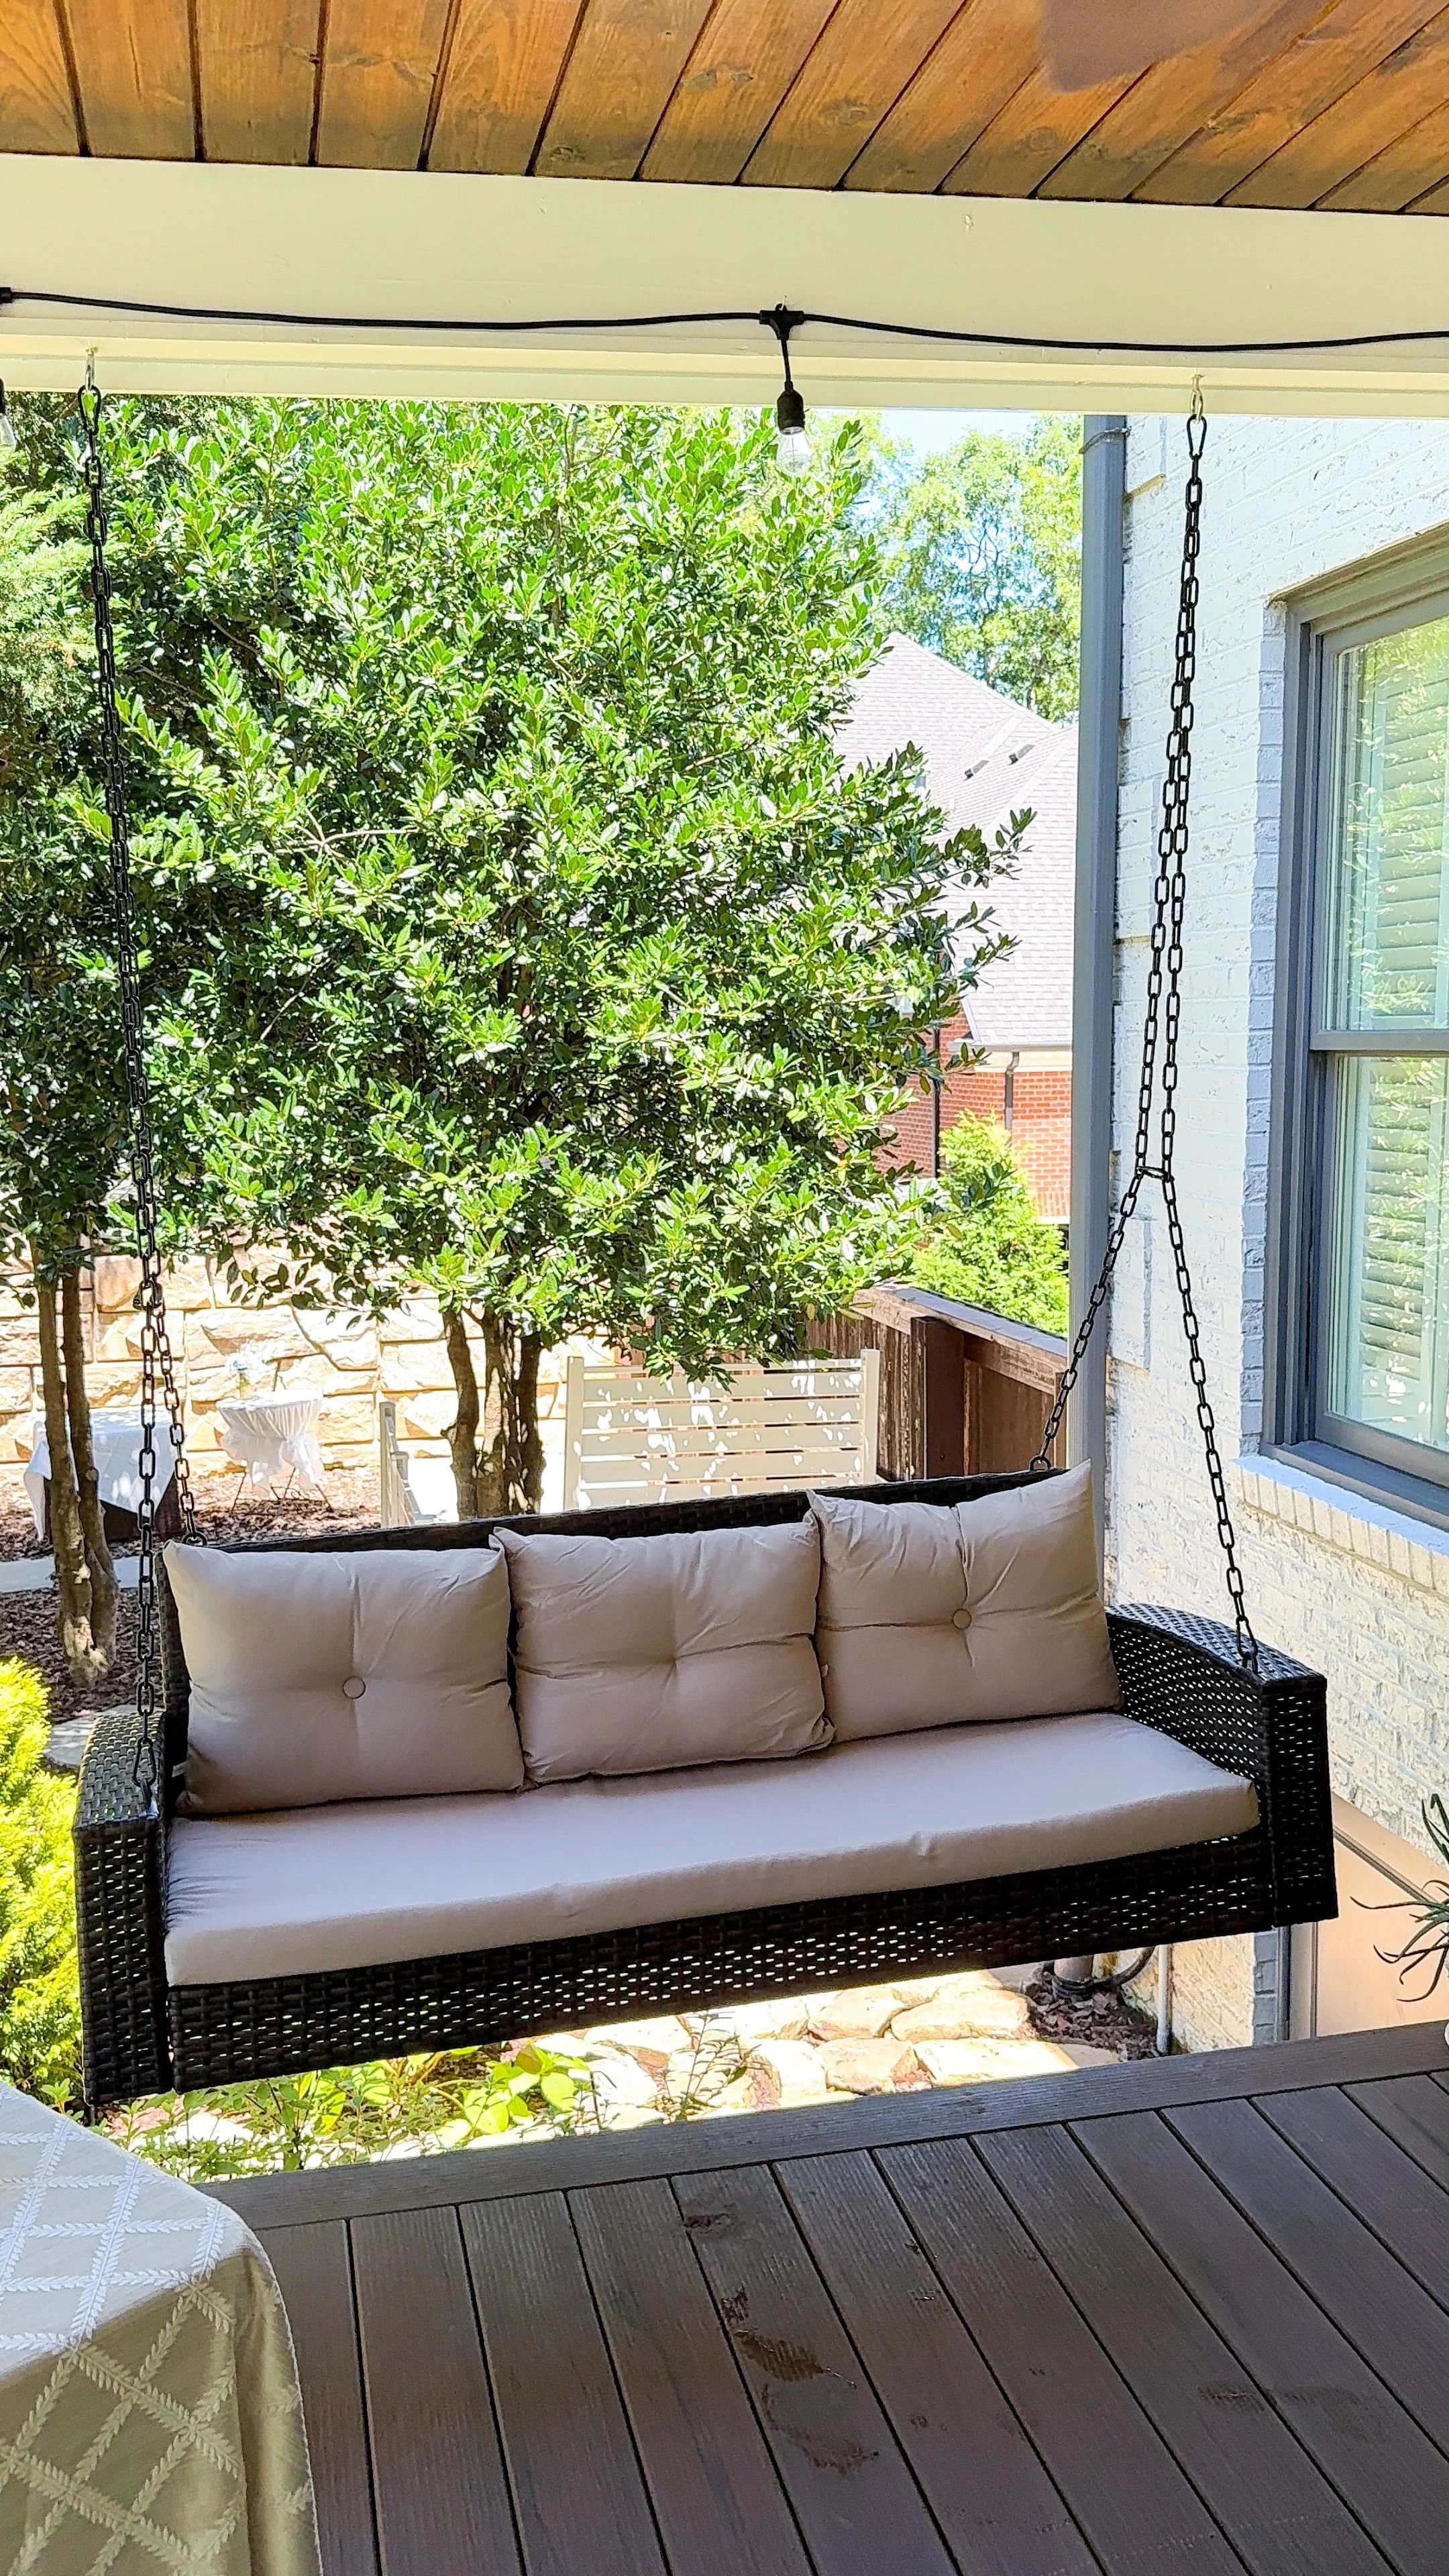
Once everything was cleaned up, I removed the face of the beam the screens were attached to because it was rotted through as well. One of the contractors did some paint paint touch ups and fixed holes in the Trex. He taught me that when there are holes in Trex, you can actually use a heat gun to get the plastic really hot and then maneuver it a little bit to fix the hole. After everything was fixed up, I started assembling the swing. My mom chose a swing really similar to the other deck furniture she has. It's dark brown wicker and really easy to put together. The thing I really like about this swing is all of the cushions have toggles on them. So that means that you can put the toggles through the wicker and secure them to the swing and they won't come off or shift while your swinging which is super nice.
Fixing Up My Parents’ Back Yard | Hiding the Trash and Generator
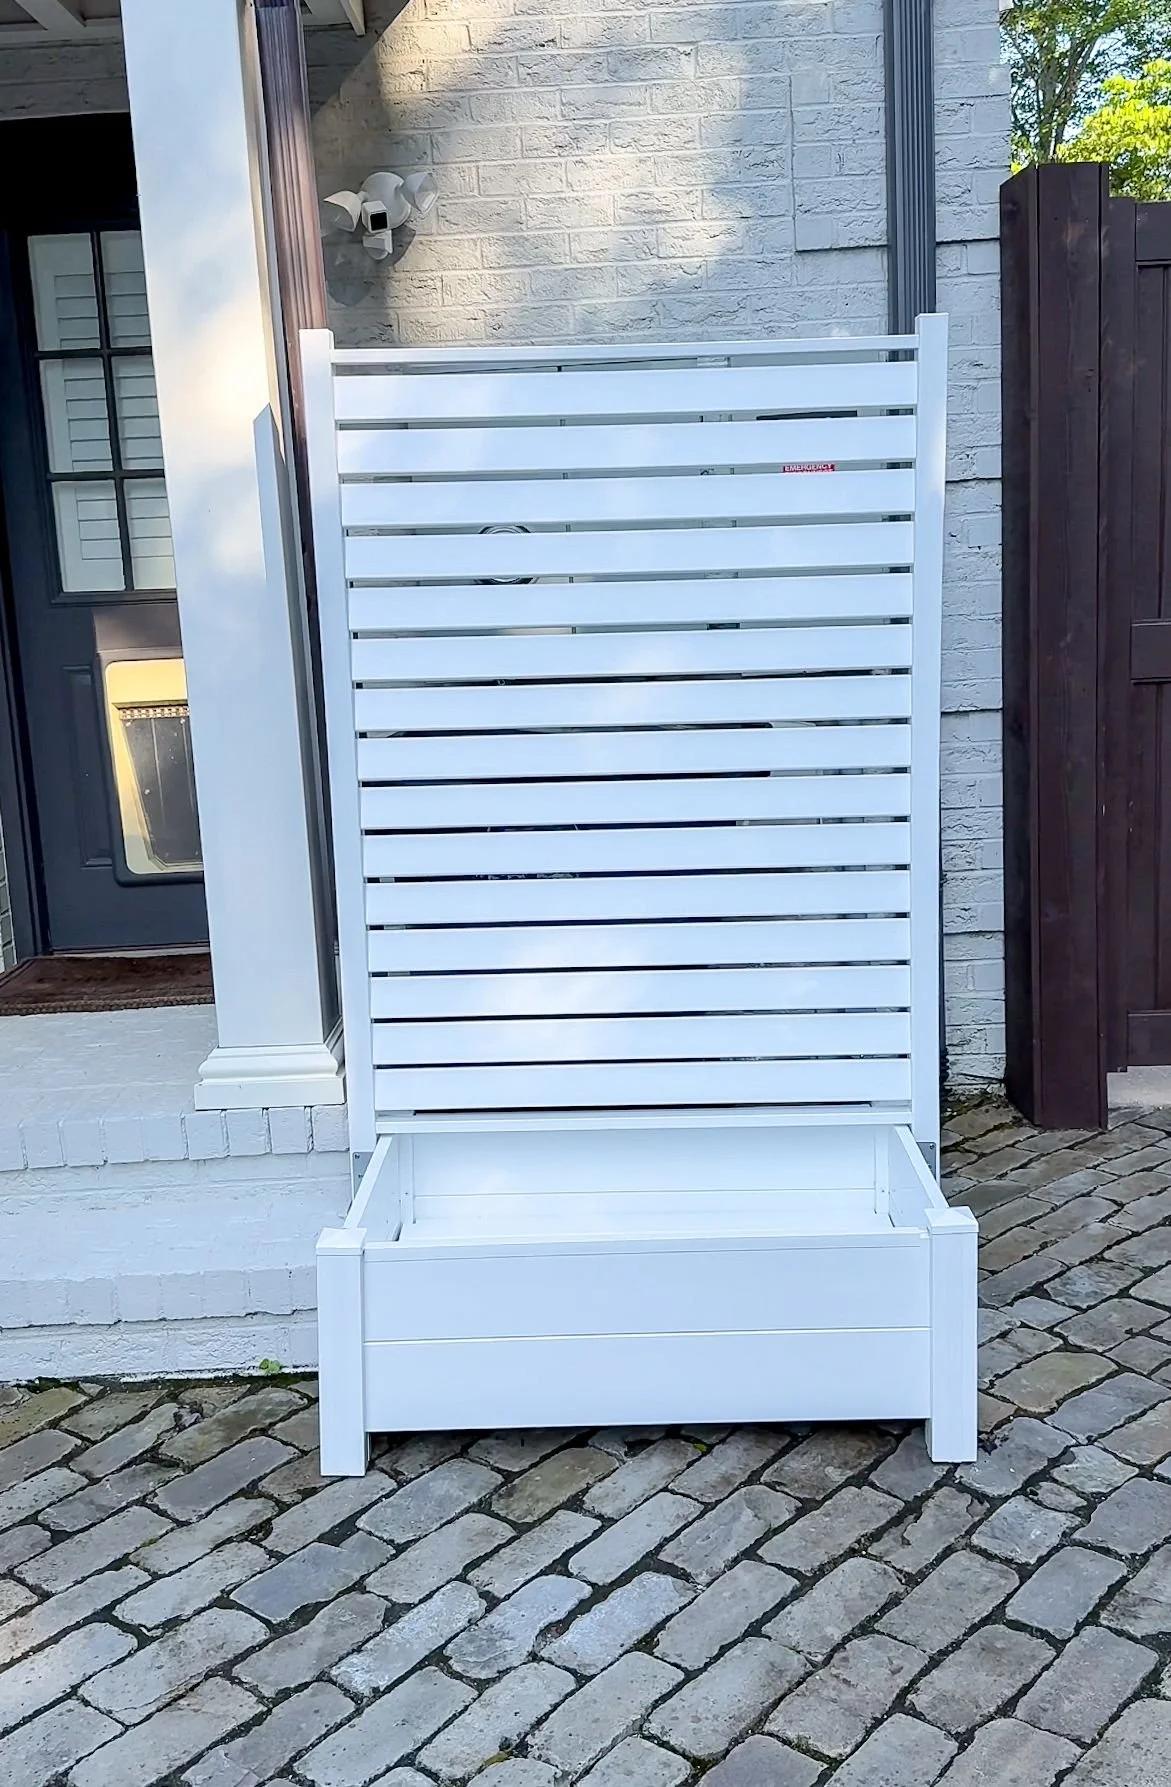
The next task was hiding the trash cans and generator. For the trash can area my mom got a privacy screen attached to a planter box and was actually really easy to put together. The only difficult part was trying to connect everything to the other side. I had to put all the slots in the holes and then carefully secure all the slots on the other side, but they pop out really easily as you do that, which was really frustrating. Once I got the privacy screen done, I started on the planter box. This wasn't the highest quality, but it worked and would hold up in the crazy Tennessee weather. There were three plastic support pieces on bottom of the box that were cheap and not quite long enough. I decided to make sturdier pieces with pressure treated wood. I measured the two by fours to be just a little bit longer than the plastic pieces. Then used my multi-tool and cut the holes to place the supports so they were big enough to hold them, and I placed those in instead. This helped the plants we put in the boxes to actually stay put. Once I got the planter box and the privacy screen done, I used the brackets that came with it to attach the two together. After finishing, it was tall enough to cover the trash cans and my mom added some gorgeous plants to it.
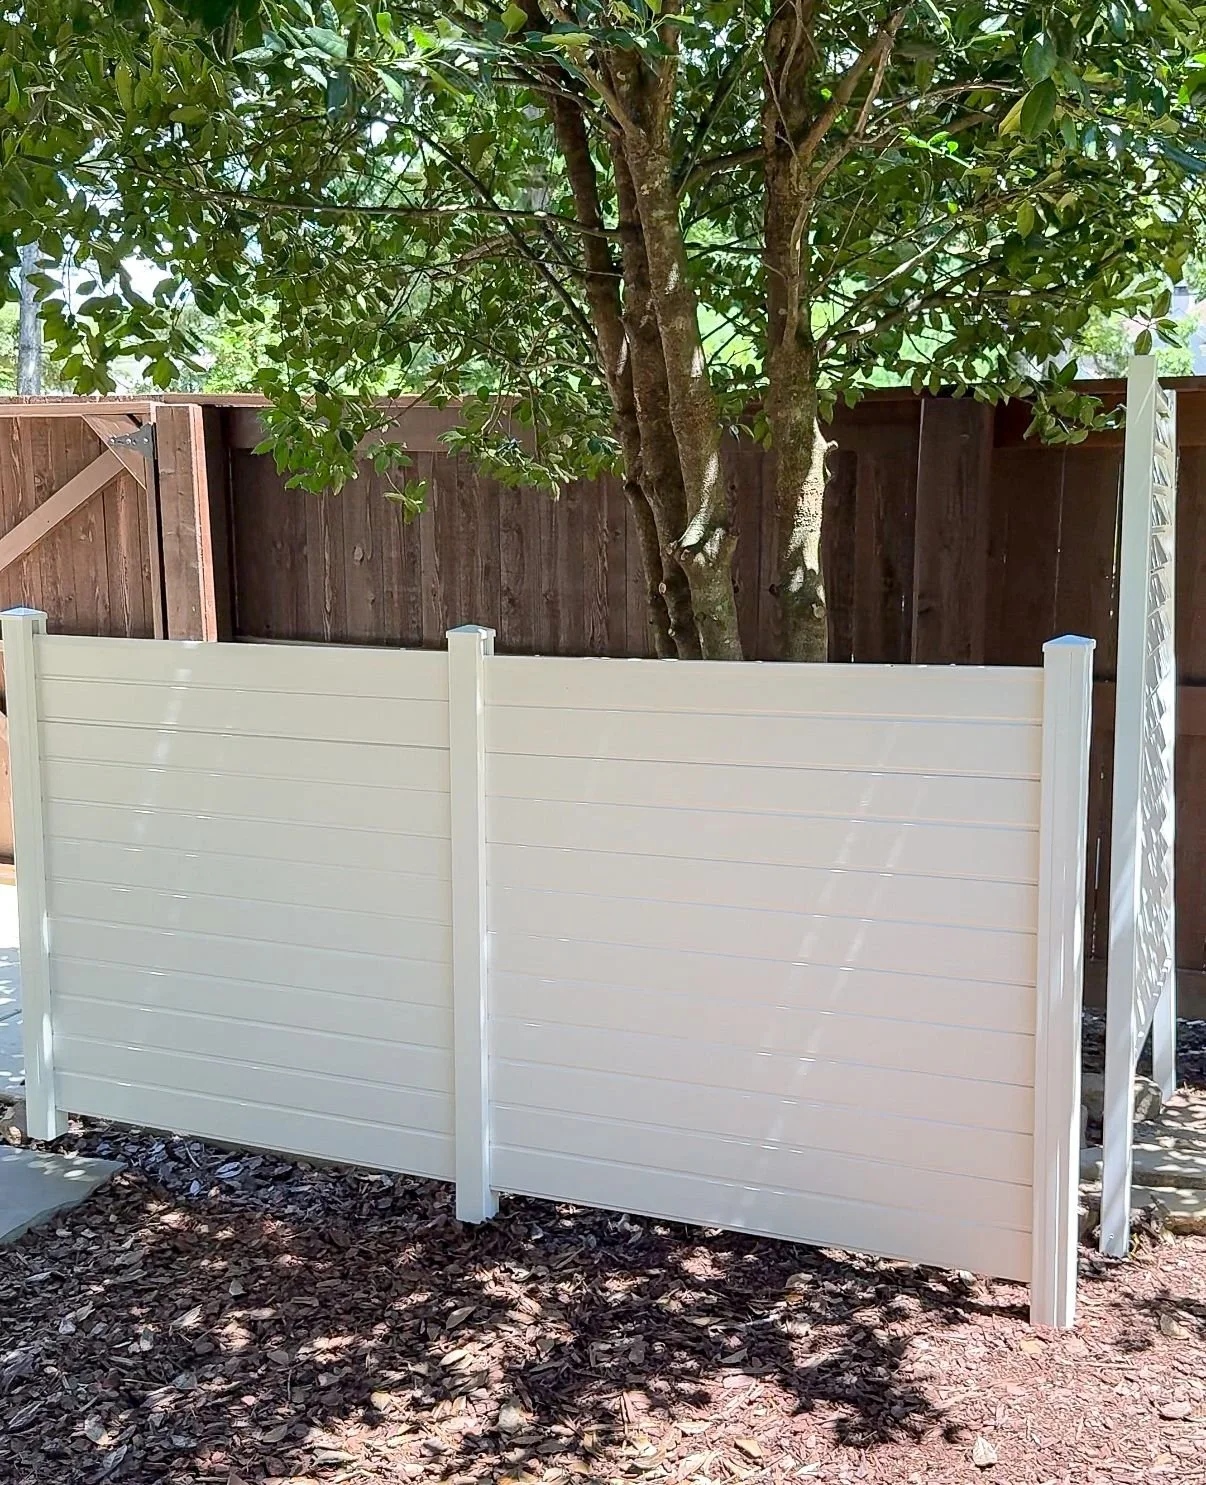
We then moved onto the privacy screen covering the generator. We decided to set it up and so it would block the view of the generator from the deck when you're looking down onto it. This screen is the exact same assembly as the previous one but added two of the three panels from the U-shaped piece for the HVAC privacy screen. It seems complicated but its only three pieces total. One is from the second set of the privacy screen and planter box, and the two of the three panels from the U-shaped privacy screen.
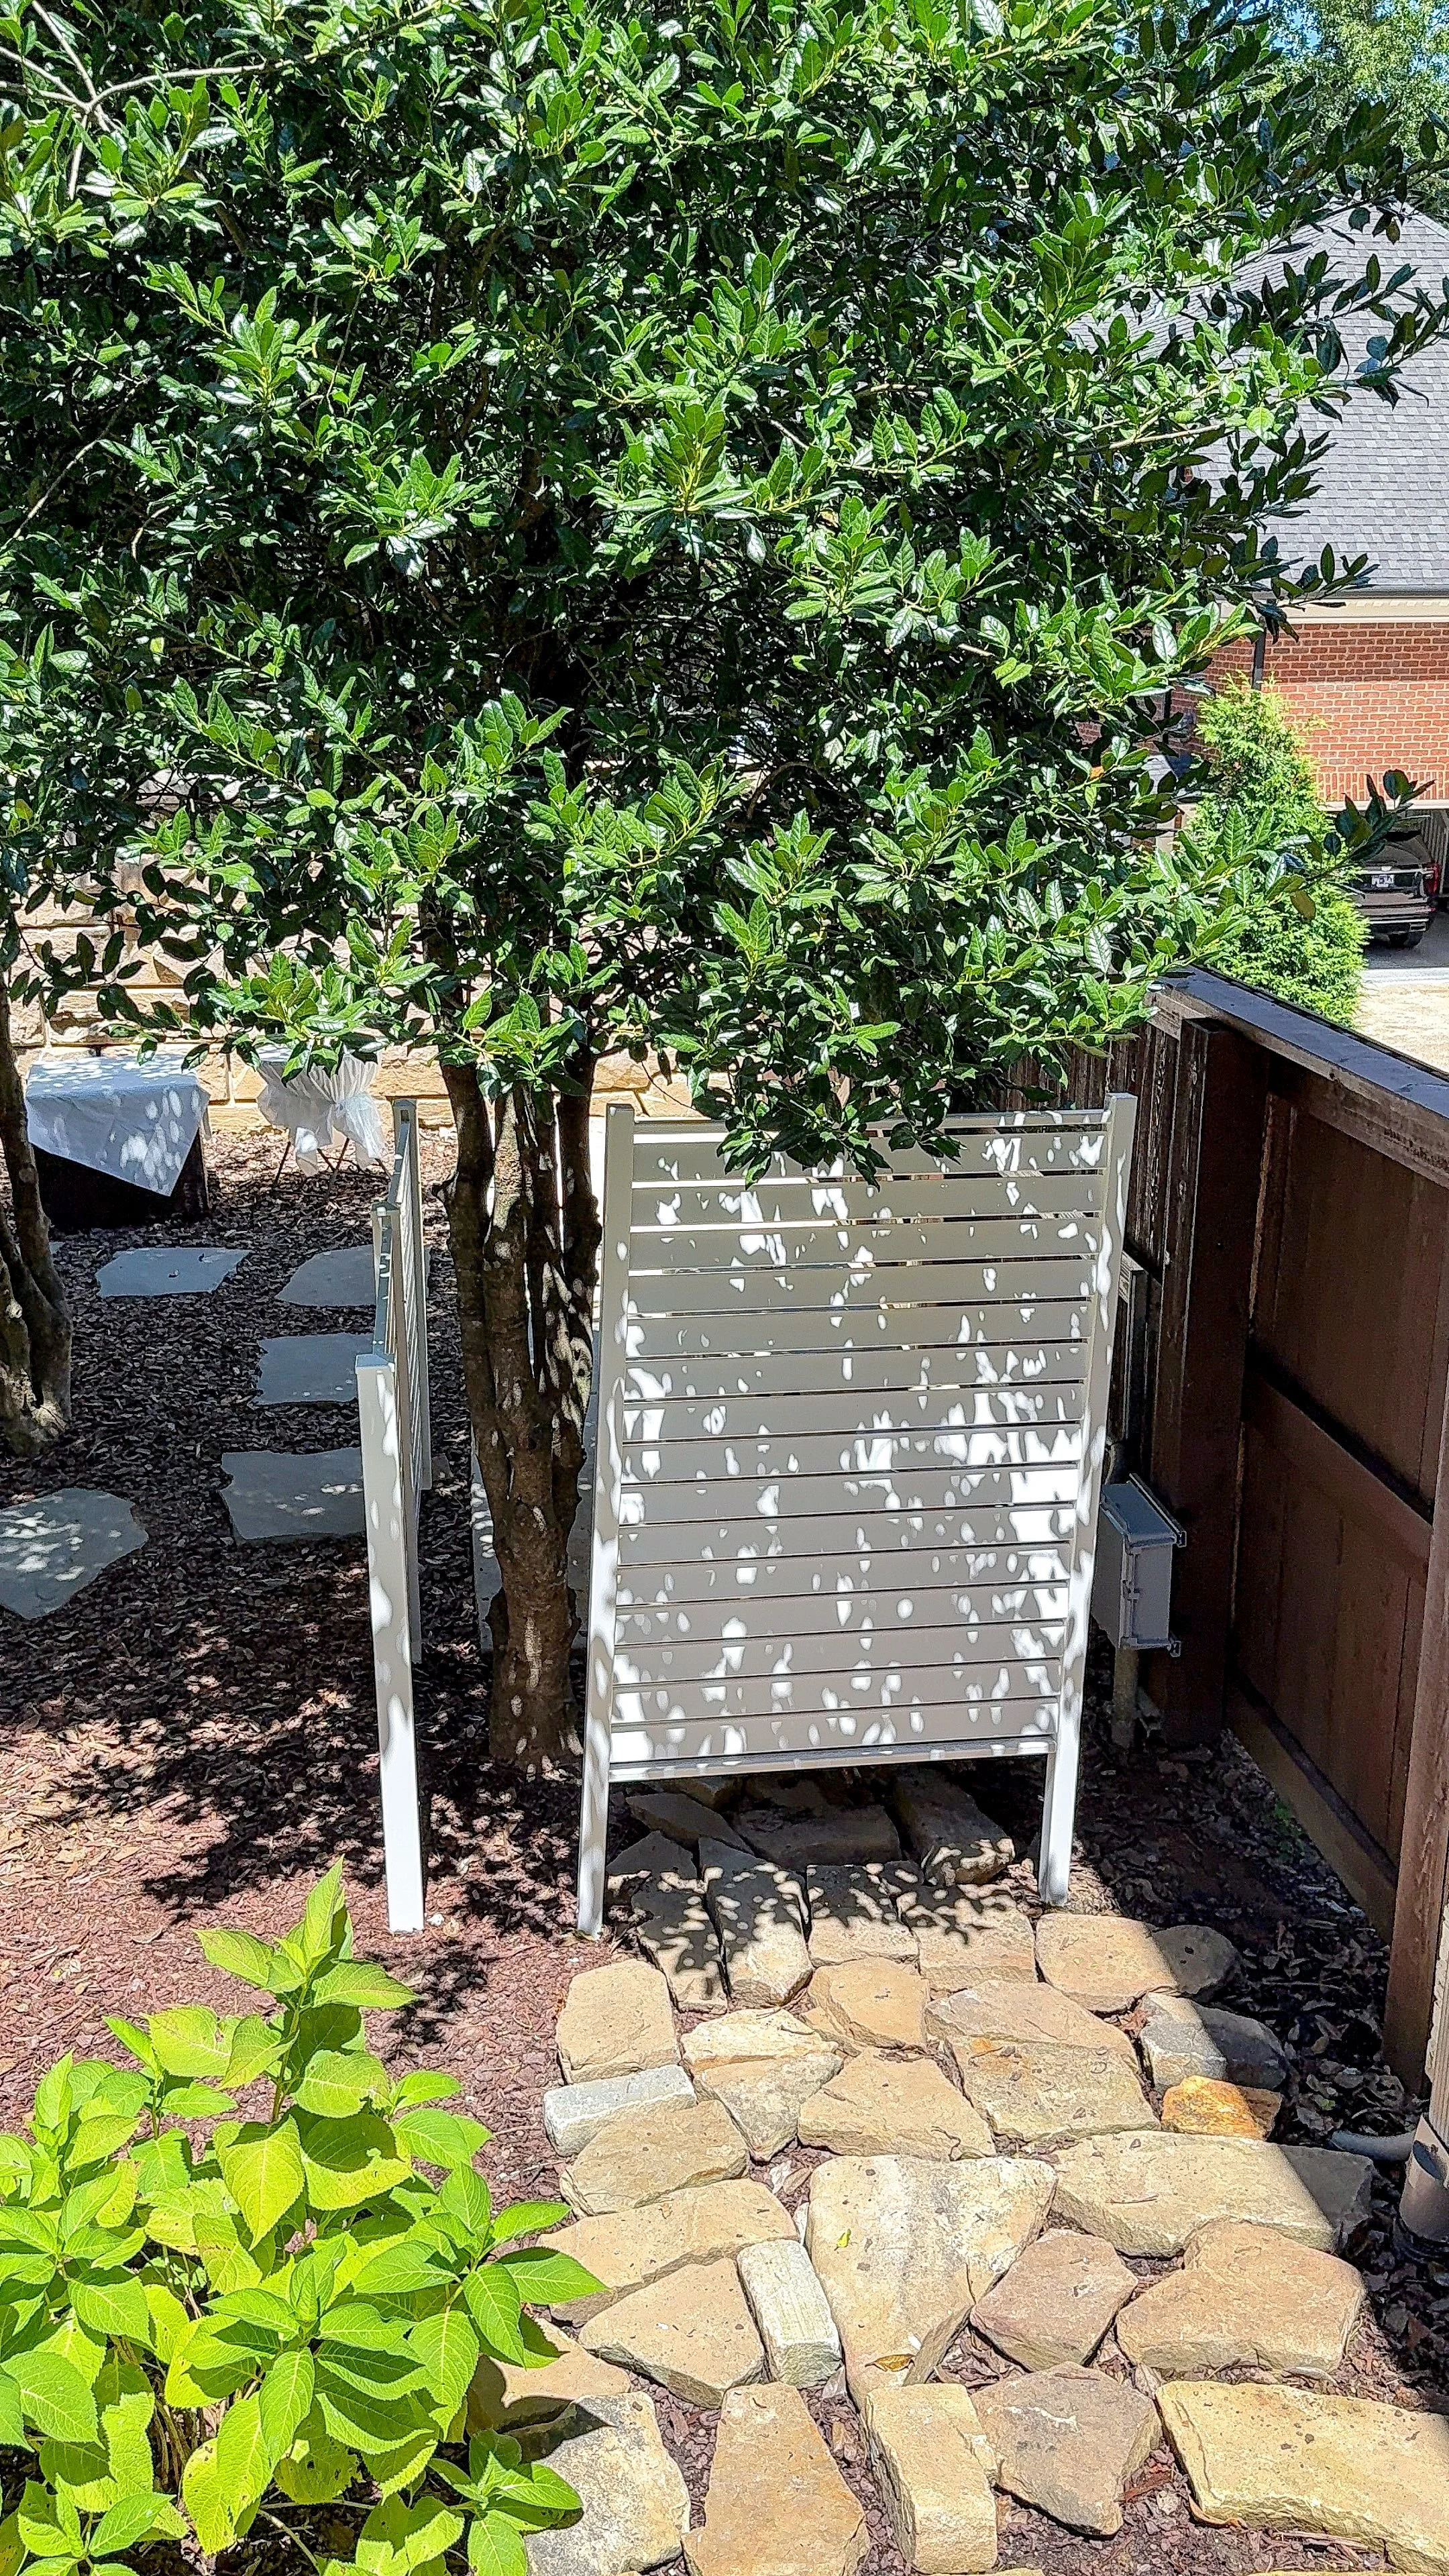
Before this, we had just put some pavers in the backyard, but I needed them moved so I could actually stake in the privacy screen. The complication came when we realized part of the yard slopes down for drainage. I had to make sure I was making everything as level as possible. I used the template that came with the privacy screen to mark where each post should go. Then I put the actual plastic PVC posts in and assembled the slats into each one. Halfway through, I realized things actually weren't level so I added a second spacer piece. Unfortunately, that made the slats on one side too high. I ended up needing to lift the plastic up a little bit and put some mulch underneath it to make it level with the other post. I did the same thing on the other side and then added the cap pieces to make everything look smooth and finished.
Fixing Up My Parents’ Back Yard | Florals
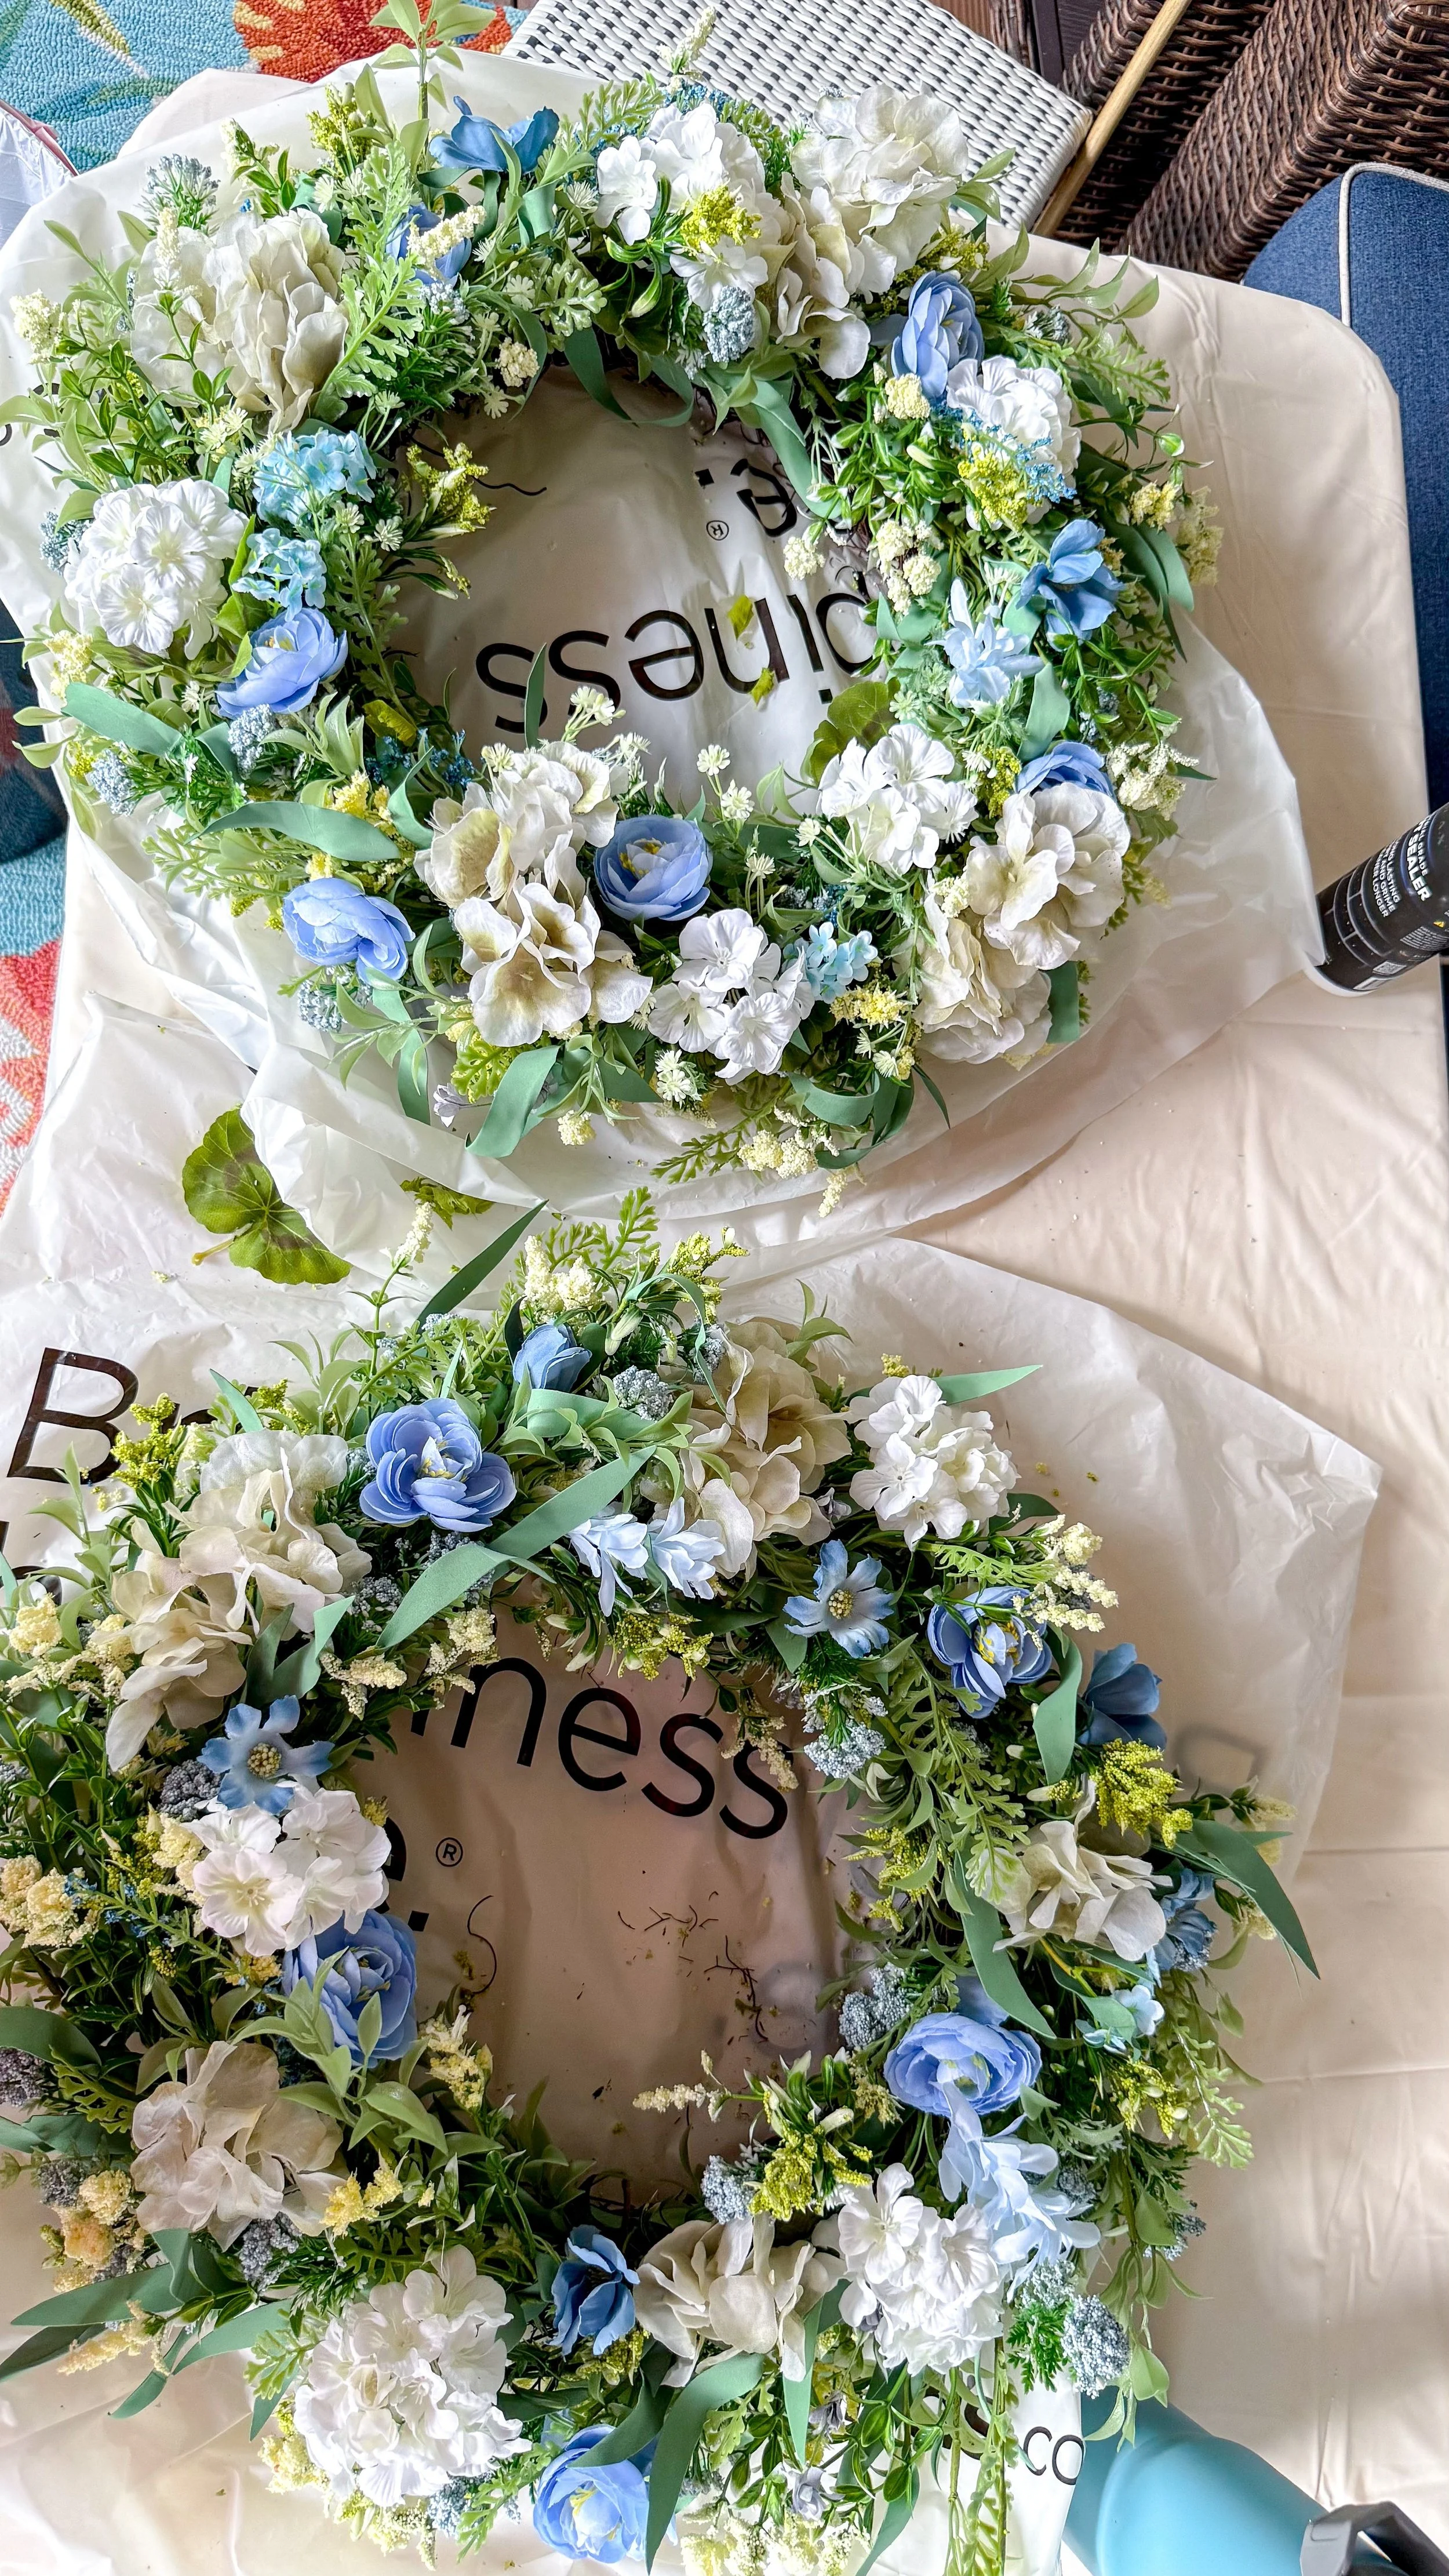
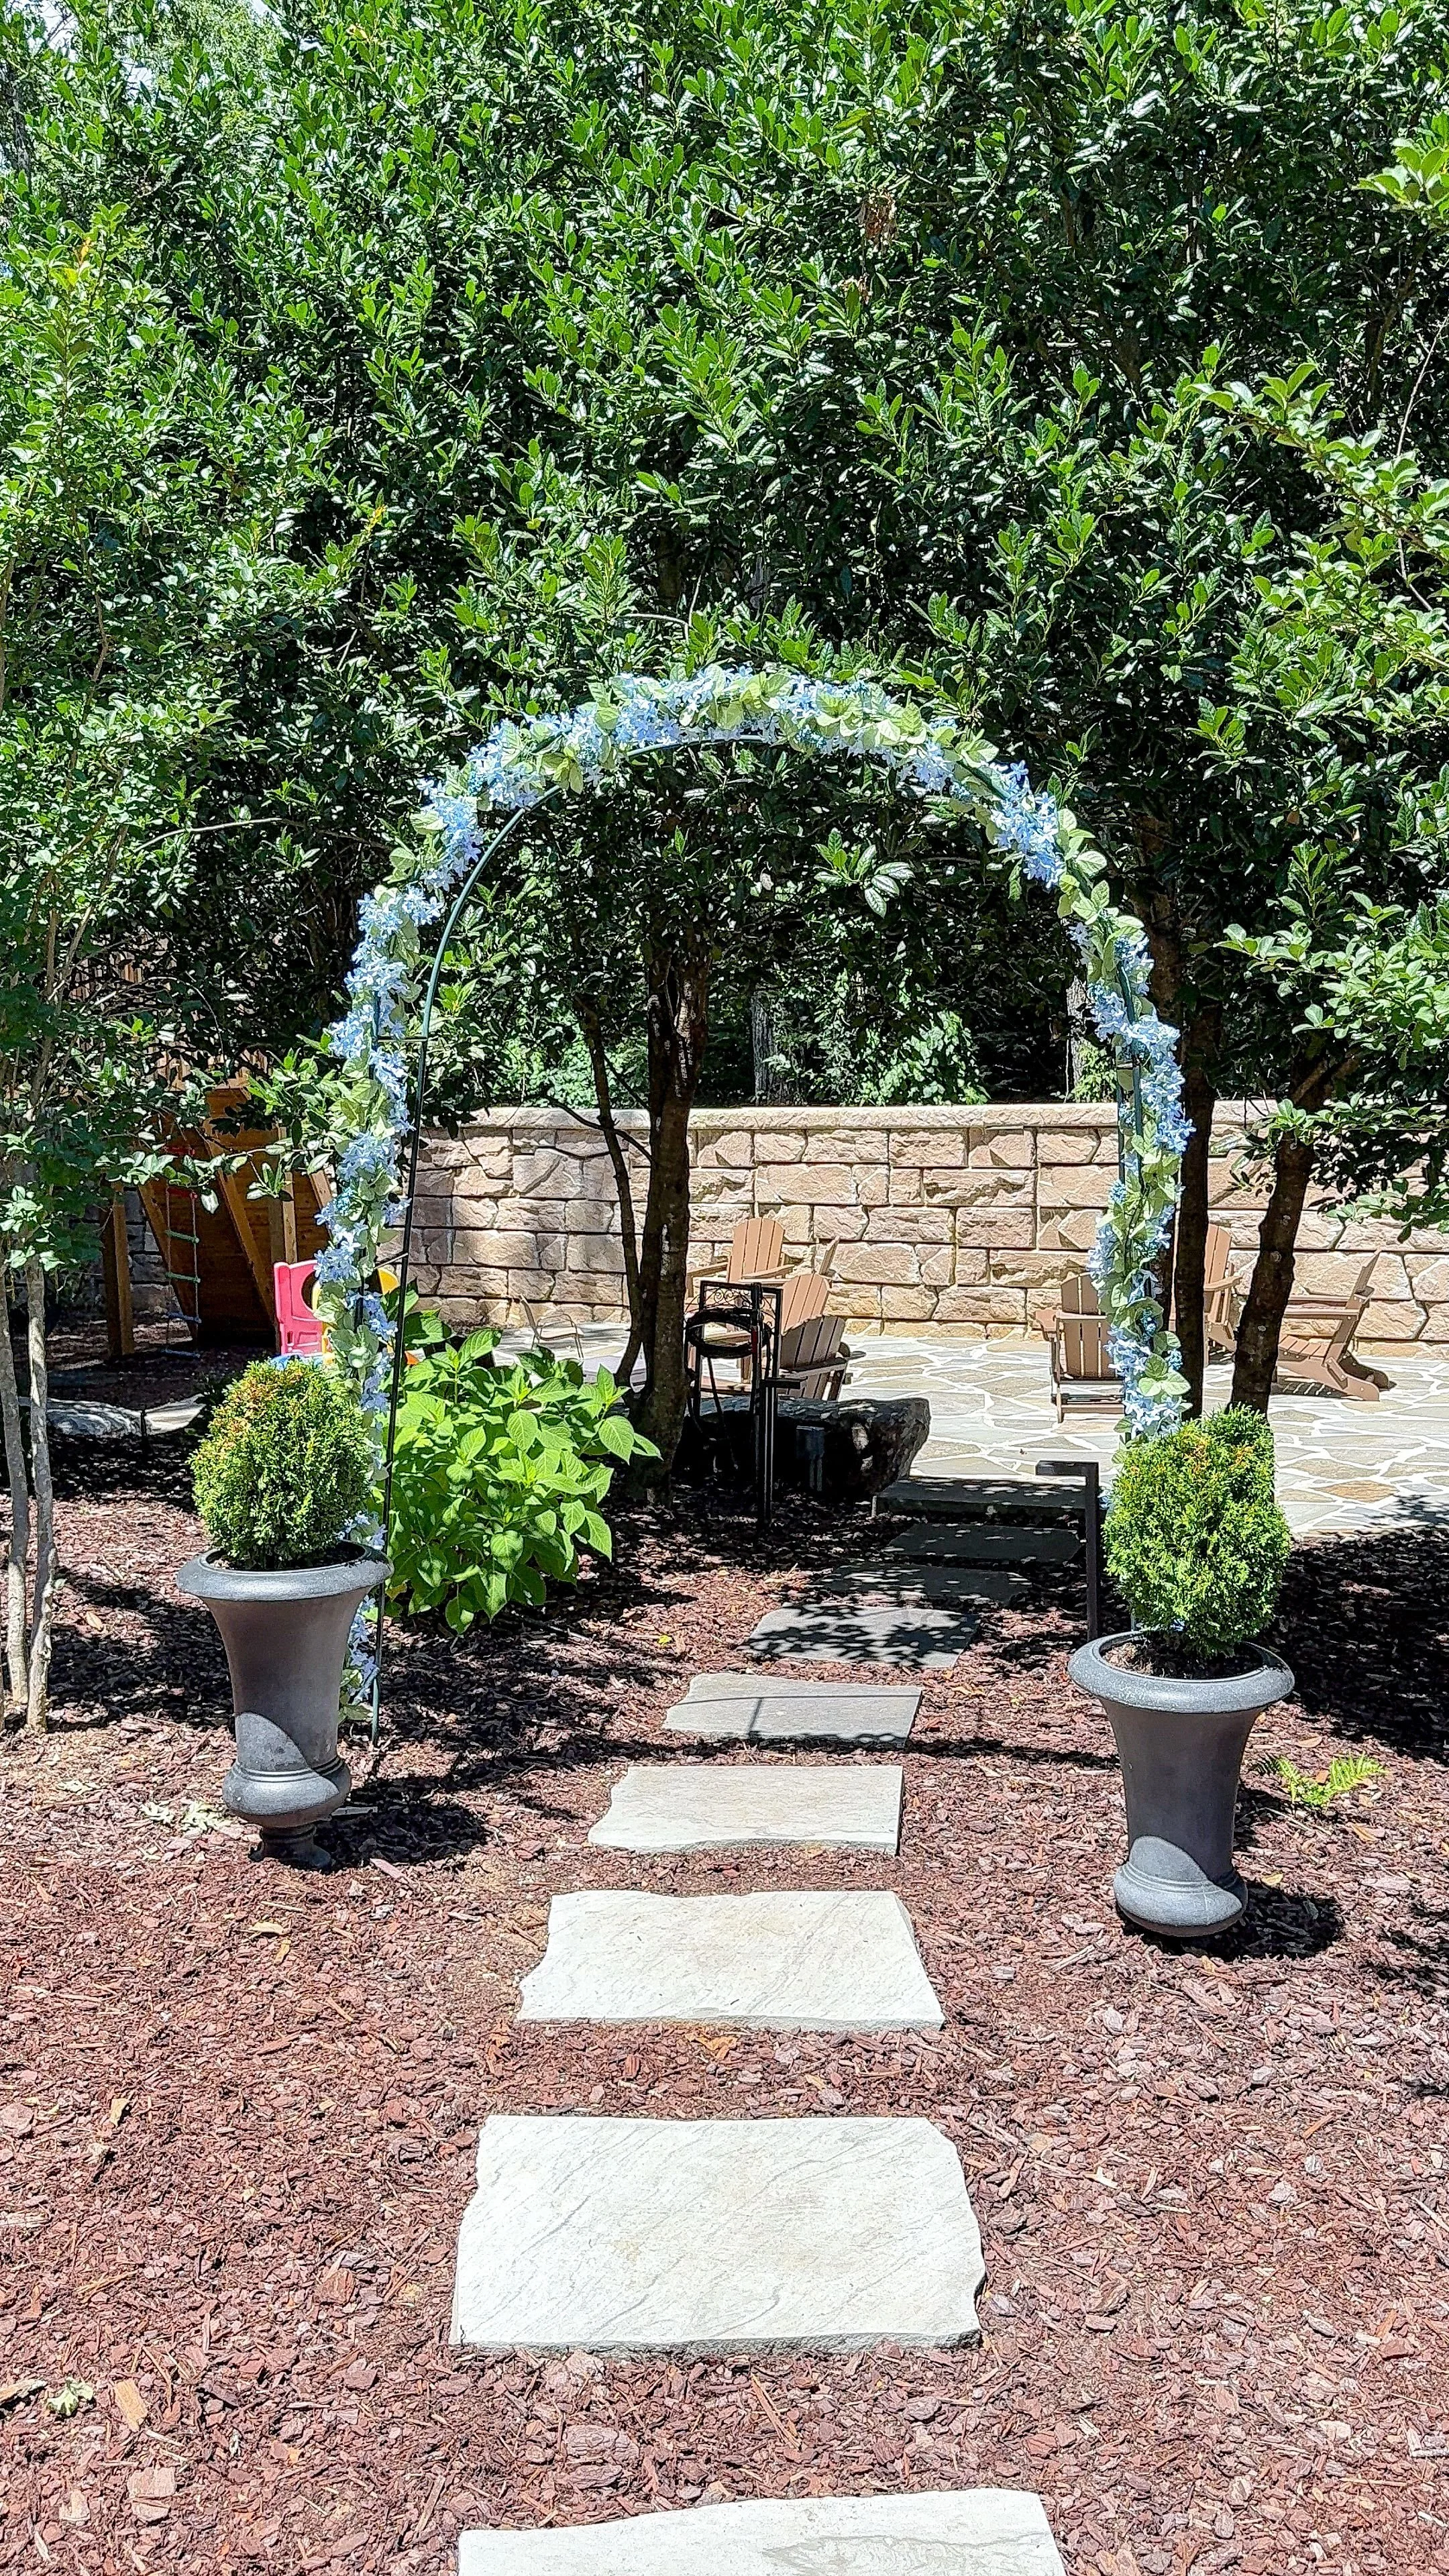
The last thing we needed to do was add some beautiful floral arrangements. This event didn't have a big budget so adding florals wasn't necessarily a priority for the couple. They were just happy with the yard as-is but my mom loves doing floral arrangements and wanted to make it extra beautiful. My mom is a pro at fake flower arrangements and we got some killer deals on some amazing florals. We focused on earthly tones mixed with blues and greens. My mom has gorgeous hydrangea bushes in the yard that are in the blue family so we kind of centered everything around those. We put together vases of florals that were all a little bit different. My mom looked through her flower stock and found cream and white hydrangeas that we added to some of the flowers we bought. We used mason jars with rocks at the bottom and filled them with water so they looked more realistic. I'm actually really proud of myself because usually she's the one that does the floral arrangements, but I really wanted to add some as well and they turned out so pretty. We spread them throughout the yard and onto the three tables we had set up for the event. We also added blue garlands to a wire arch in the yard which rounded things out beautifully.
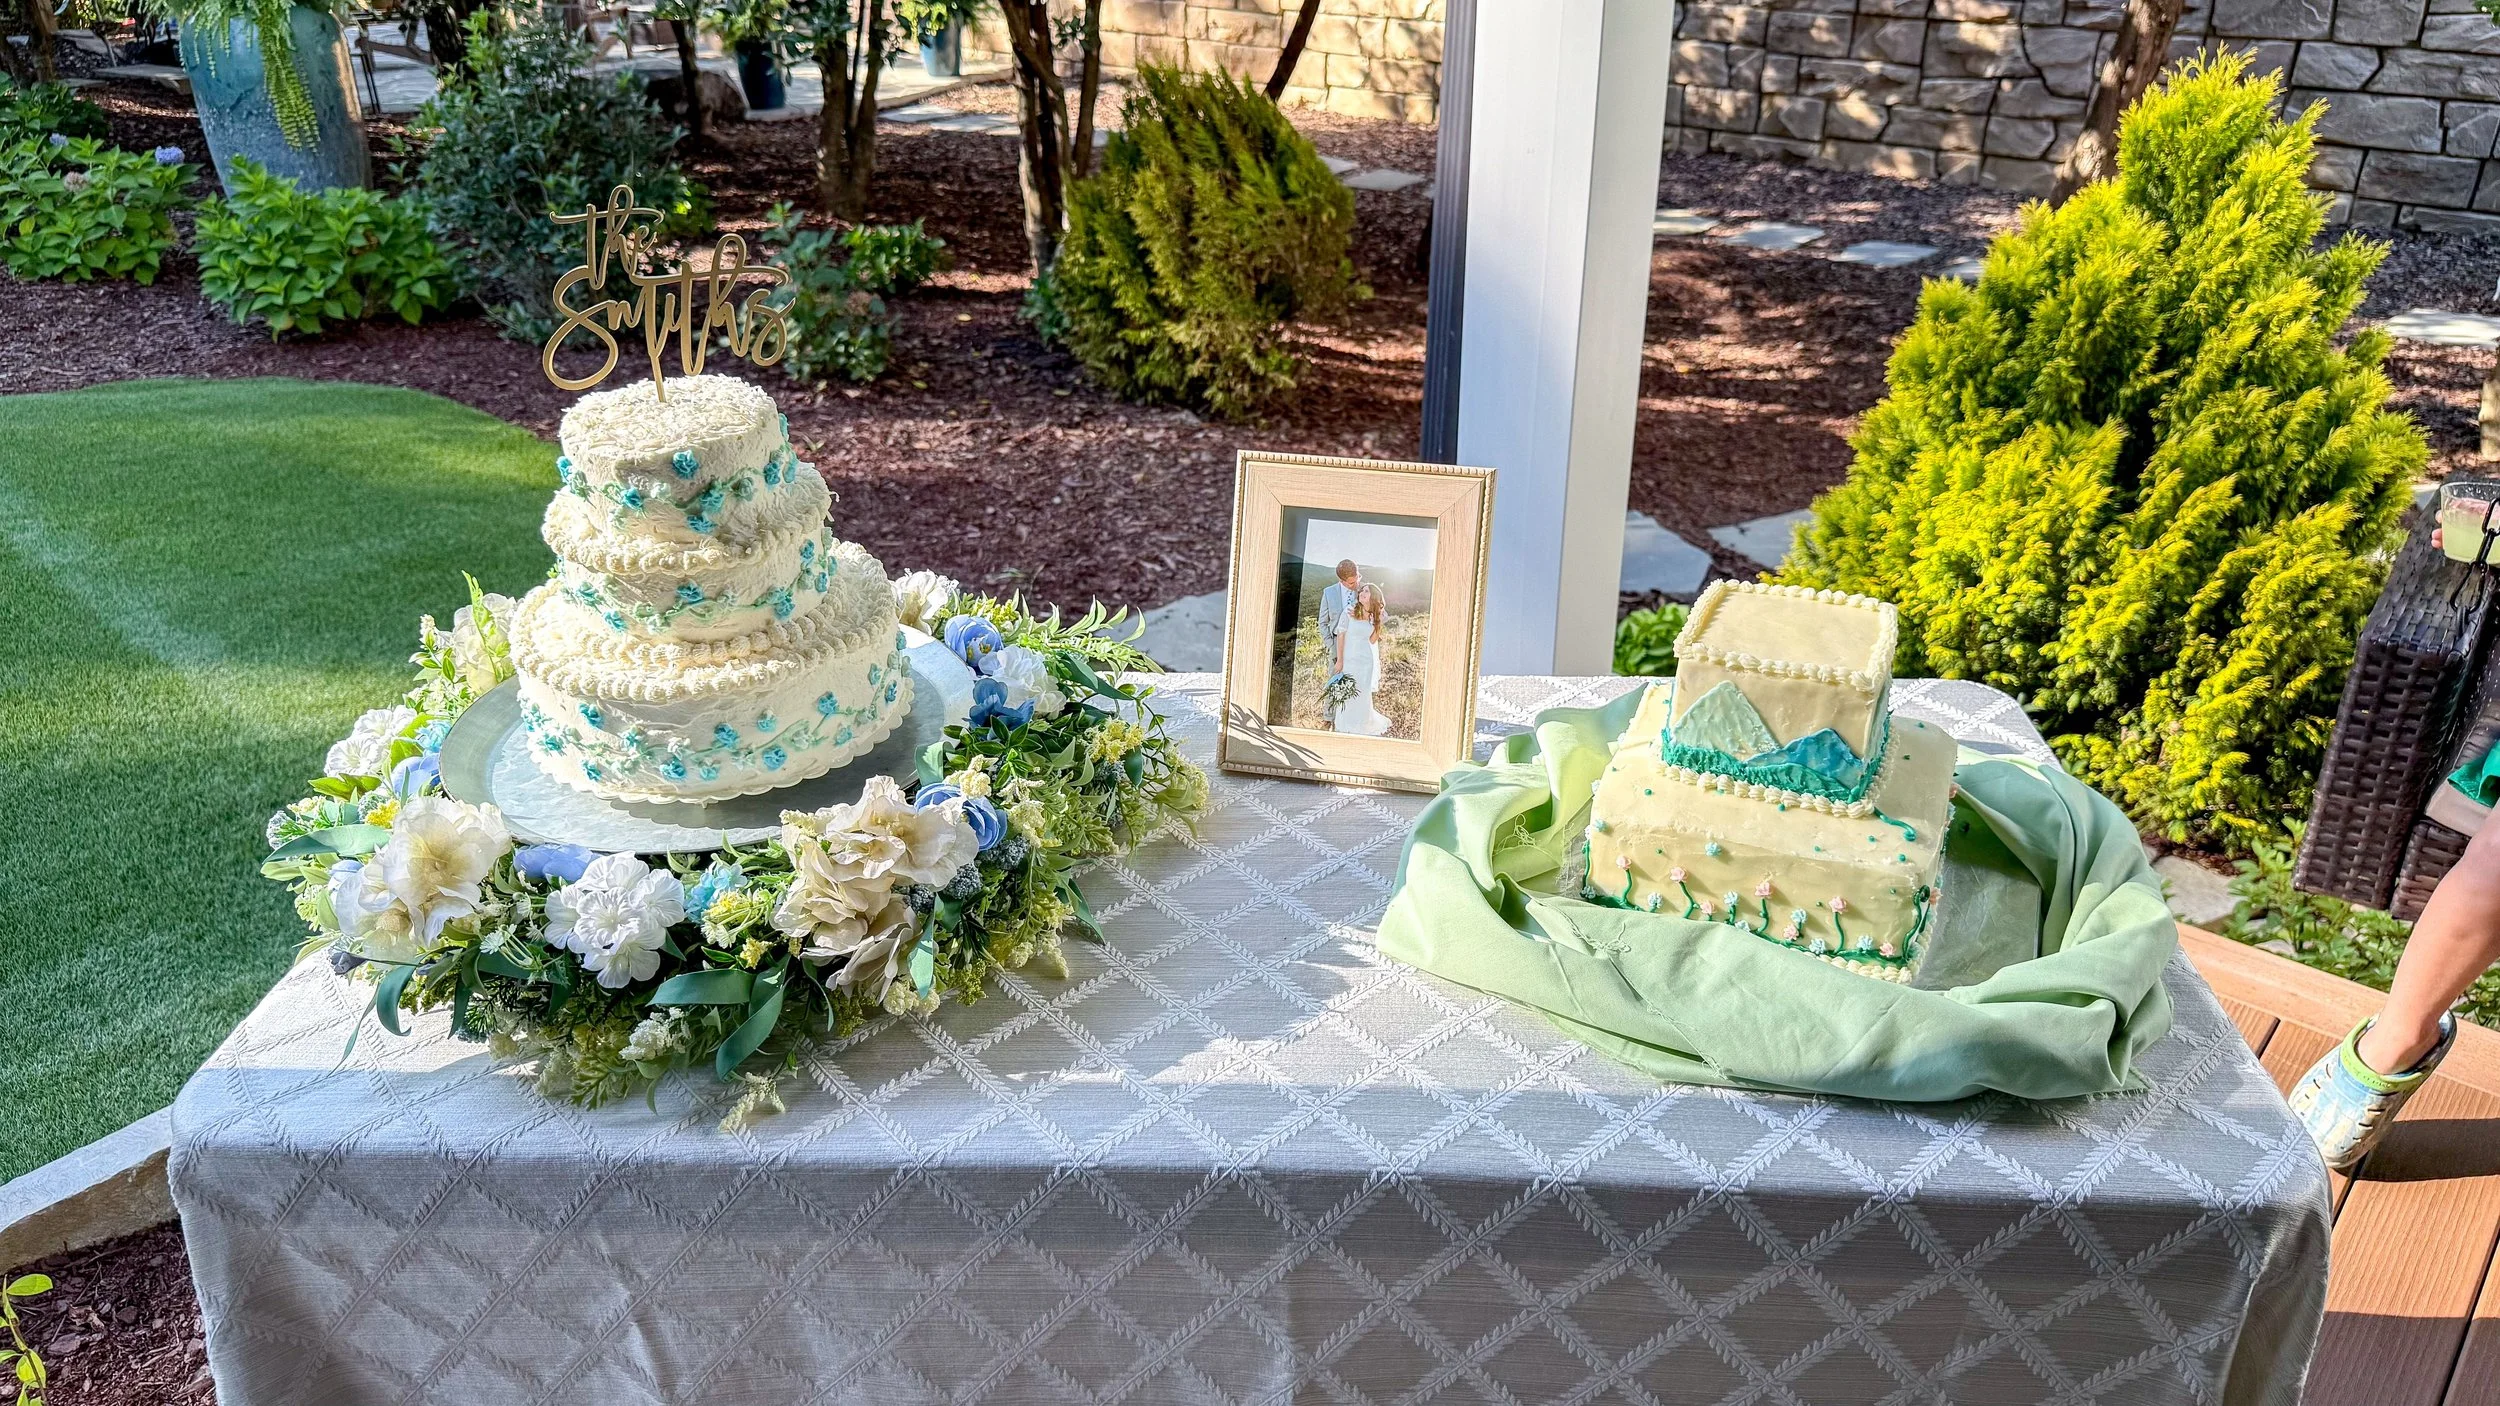
We also got some wreaths on clearance and we added flowers to them. They were a perfect addition to go with the theme. Pro tip when arranging flowers is to fluff the wreath before you start. Otherwise it will not look complete when you finish and you will have to start over. We used one as a centerpiece for one of the tables, and used the other one as a surround for one of the cakes which was really pretty.
When everything was done the yard looked so beautiful and the event turned out amazing. Stay tuned for more behind the scenes to getting a venue ready in the future!