
DIY Flower Mirror
Today I'm sharing a fairly simple DIY project I've been wanting to do for a really long time. When we moved into our house, I immediately started personalizing and updating our spaces. One of the places was my daughter's bathroom. I added vertical shiplap next to her bathtub so I could hang hooks because anyone that has kids knows that hooks are far superior to towel rods. After that, I painted and changed out the hardware on her vanity and sink. It's pink and girly and very her. The one thing I didn't address at the time, though, was her mirror.

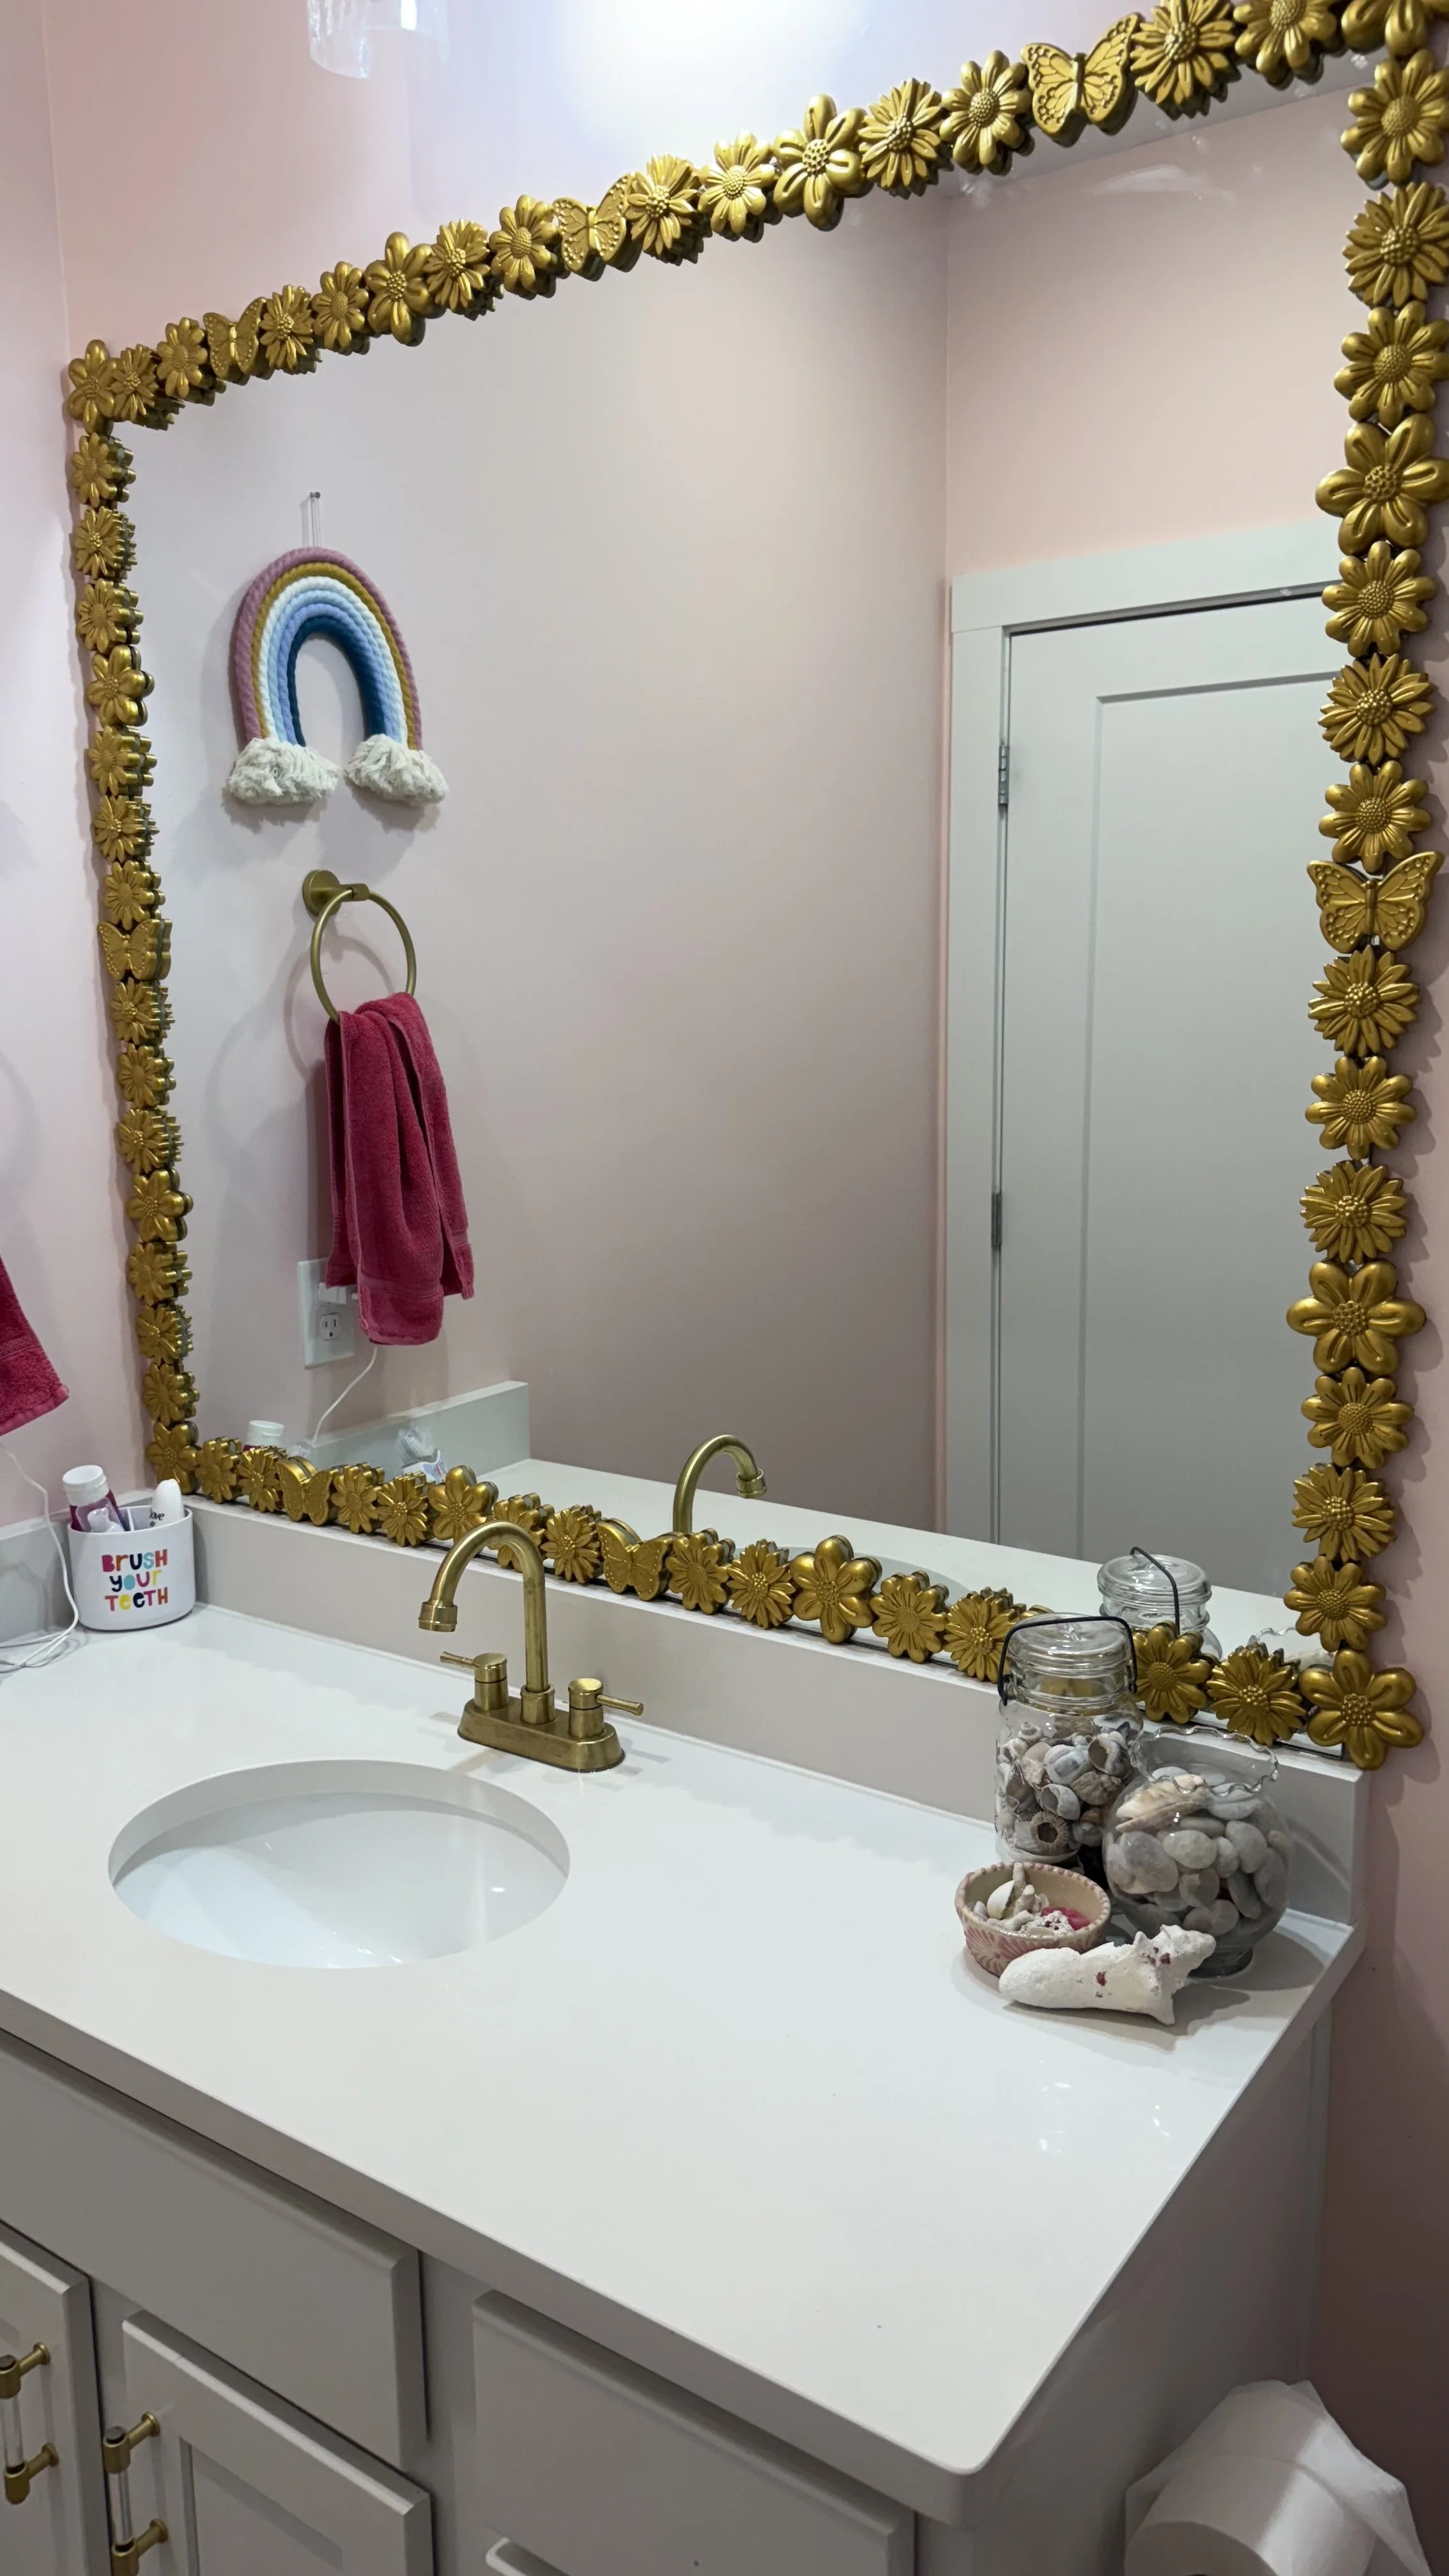
The mirror is a very large edge-less mirror, very builder-grade. I added a frame to another bathroom mirror a while ago, but I've kind of been holding off in my daughter's bathroom until I could find something that was perfect. I've been looking at a few options but after I saw resin flower frames from places like Pottery Barn and Anthropology, I knew I could DIY one that would look just as good. I consulted with my daughter on what flowers she wanted, since it is in her bathroom. She initially wanted ALL of the flowers but I decided to keep it a little bit more cohesive, so it wasn't quite as overwhelming and then I threw in some butterflies as well.

I got six silicone flower molds and four boxes of the resin. I initially only would've needed three, but once I decided to experiment and do all of the flowers, I ended up needing a fourth box. This resin is super easy to use. It is a one-to-one ratio from each bottle. You mix it together for a minute, and then you pour it into each mold. You know it's working because the liquid starts to heat up. It is warm as you pour it, and once it's cooled you can remove it from the mold. It is very important when working with resin to wear gloves and eye protection as well as be in a well-ventilated area. I did it in my kitchen and it was totally fine.

Once I was done with making all of the flowers and the butterflies, I started painting. I did a test first to decide if hand painting or spray painting was going to be the best. I decided hand painting was going to be the better option because there were a lot of nooks and crannies in each flower. Because there were so many flowers and butterflies to do, I did them in sections. First, I did an all over rough coat of paint to give the rest of the paint something to adhere and I let that dry overnight. Then I added second and third coats of paint. I found painting the edges first and then painting the top was the best way to ensure everything was smooth and even. This was the most time consuming part of this project just because it took so long to paint and I had to wait in between coats for the paint to dry

Next, I laid everything out to see how I wanted things arranged around the mirror. I taped out the measurements of the mirror on my floor giving me a really nice space to work with. Getting those measurements right is critical when doing something like this, because if it's just a little bit off, it's gonna end up being funky. I utilized the large daisies, the smaller detailed daisies, and then the smaller replica of the larger daisy, along with butterflies. I used a large daisy, a small detailed daisy, small daisy and butterfly, and repeated that pattern all the way across, and it just so happened that a butterfly landed in the middle of both the top and the bottom frame which gave me some symmetry to work with. It took a bit to alter the spacing to my liking, but once I had everything the way I wanted, it was time to start gluing stuff onto the mirror.

I used a clear construction adhesive on the back of each flower, and pressed them onto the mirror. Initially, I was worried they were going to fall, but the adhesive held really well and started to dry very quickly. I followed the pattern I had laid out and everything came out really nicely. Initially I was gluing each flower individually and then placing them on, but I realized it was so much faster and so much easier to glue all of the flowers for whatever side I was working on and then place them. The bottom didn't turn out exactly how I envisioned because I didn't have a lot of space to work with, but I didn't want to remove and reinstall the mirror so I did what I could.

I think the final product turned out so good, especially the top and the sides. In retrospect, the only thing I would've done differently was take the time to paint the backs of the pieces because you can still see a little bit of white if you look closely. Overall, though, I love how it turned out, so much so that I may do this to another mirror in our house in the future so stay tuned for that!