
How to Swap a Pedestal Sink for a Vanity

We have three full baths and one half bath in our home. When we moved into the house 5 years ago, we only had a pedestal sink in the half bath. The house in general is VERY low on storage so I have spent 5 years adding storage wherever I can but have put this bathroom on the back burner. My husband works from home in our bedroom, so I usually get ready for the day downstairs so I can keep an eye on my son at the same time. However, having all of my hair/makeup stuff downstairs makes the kitchen area really cluttered so I decided to finally bite the bullet and create storage in the bathroom.
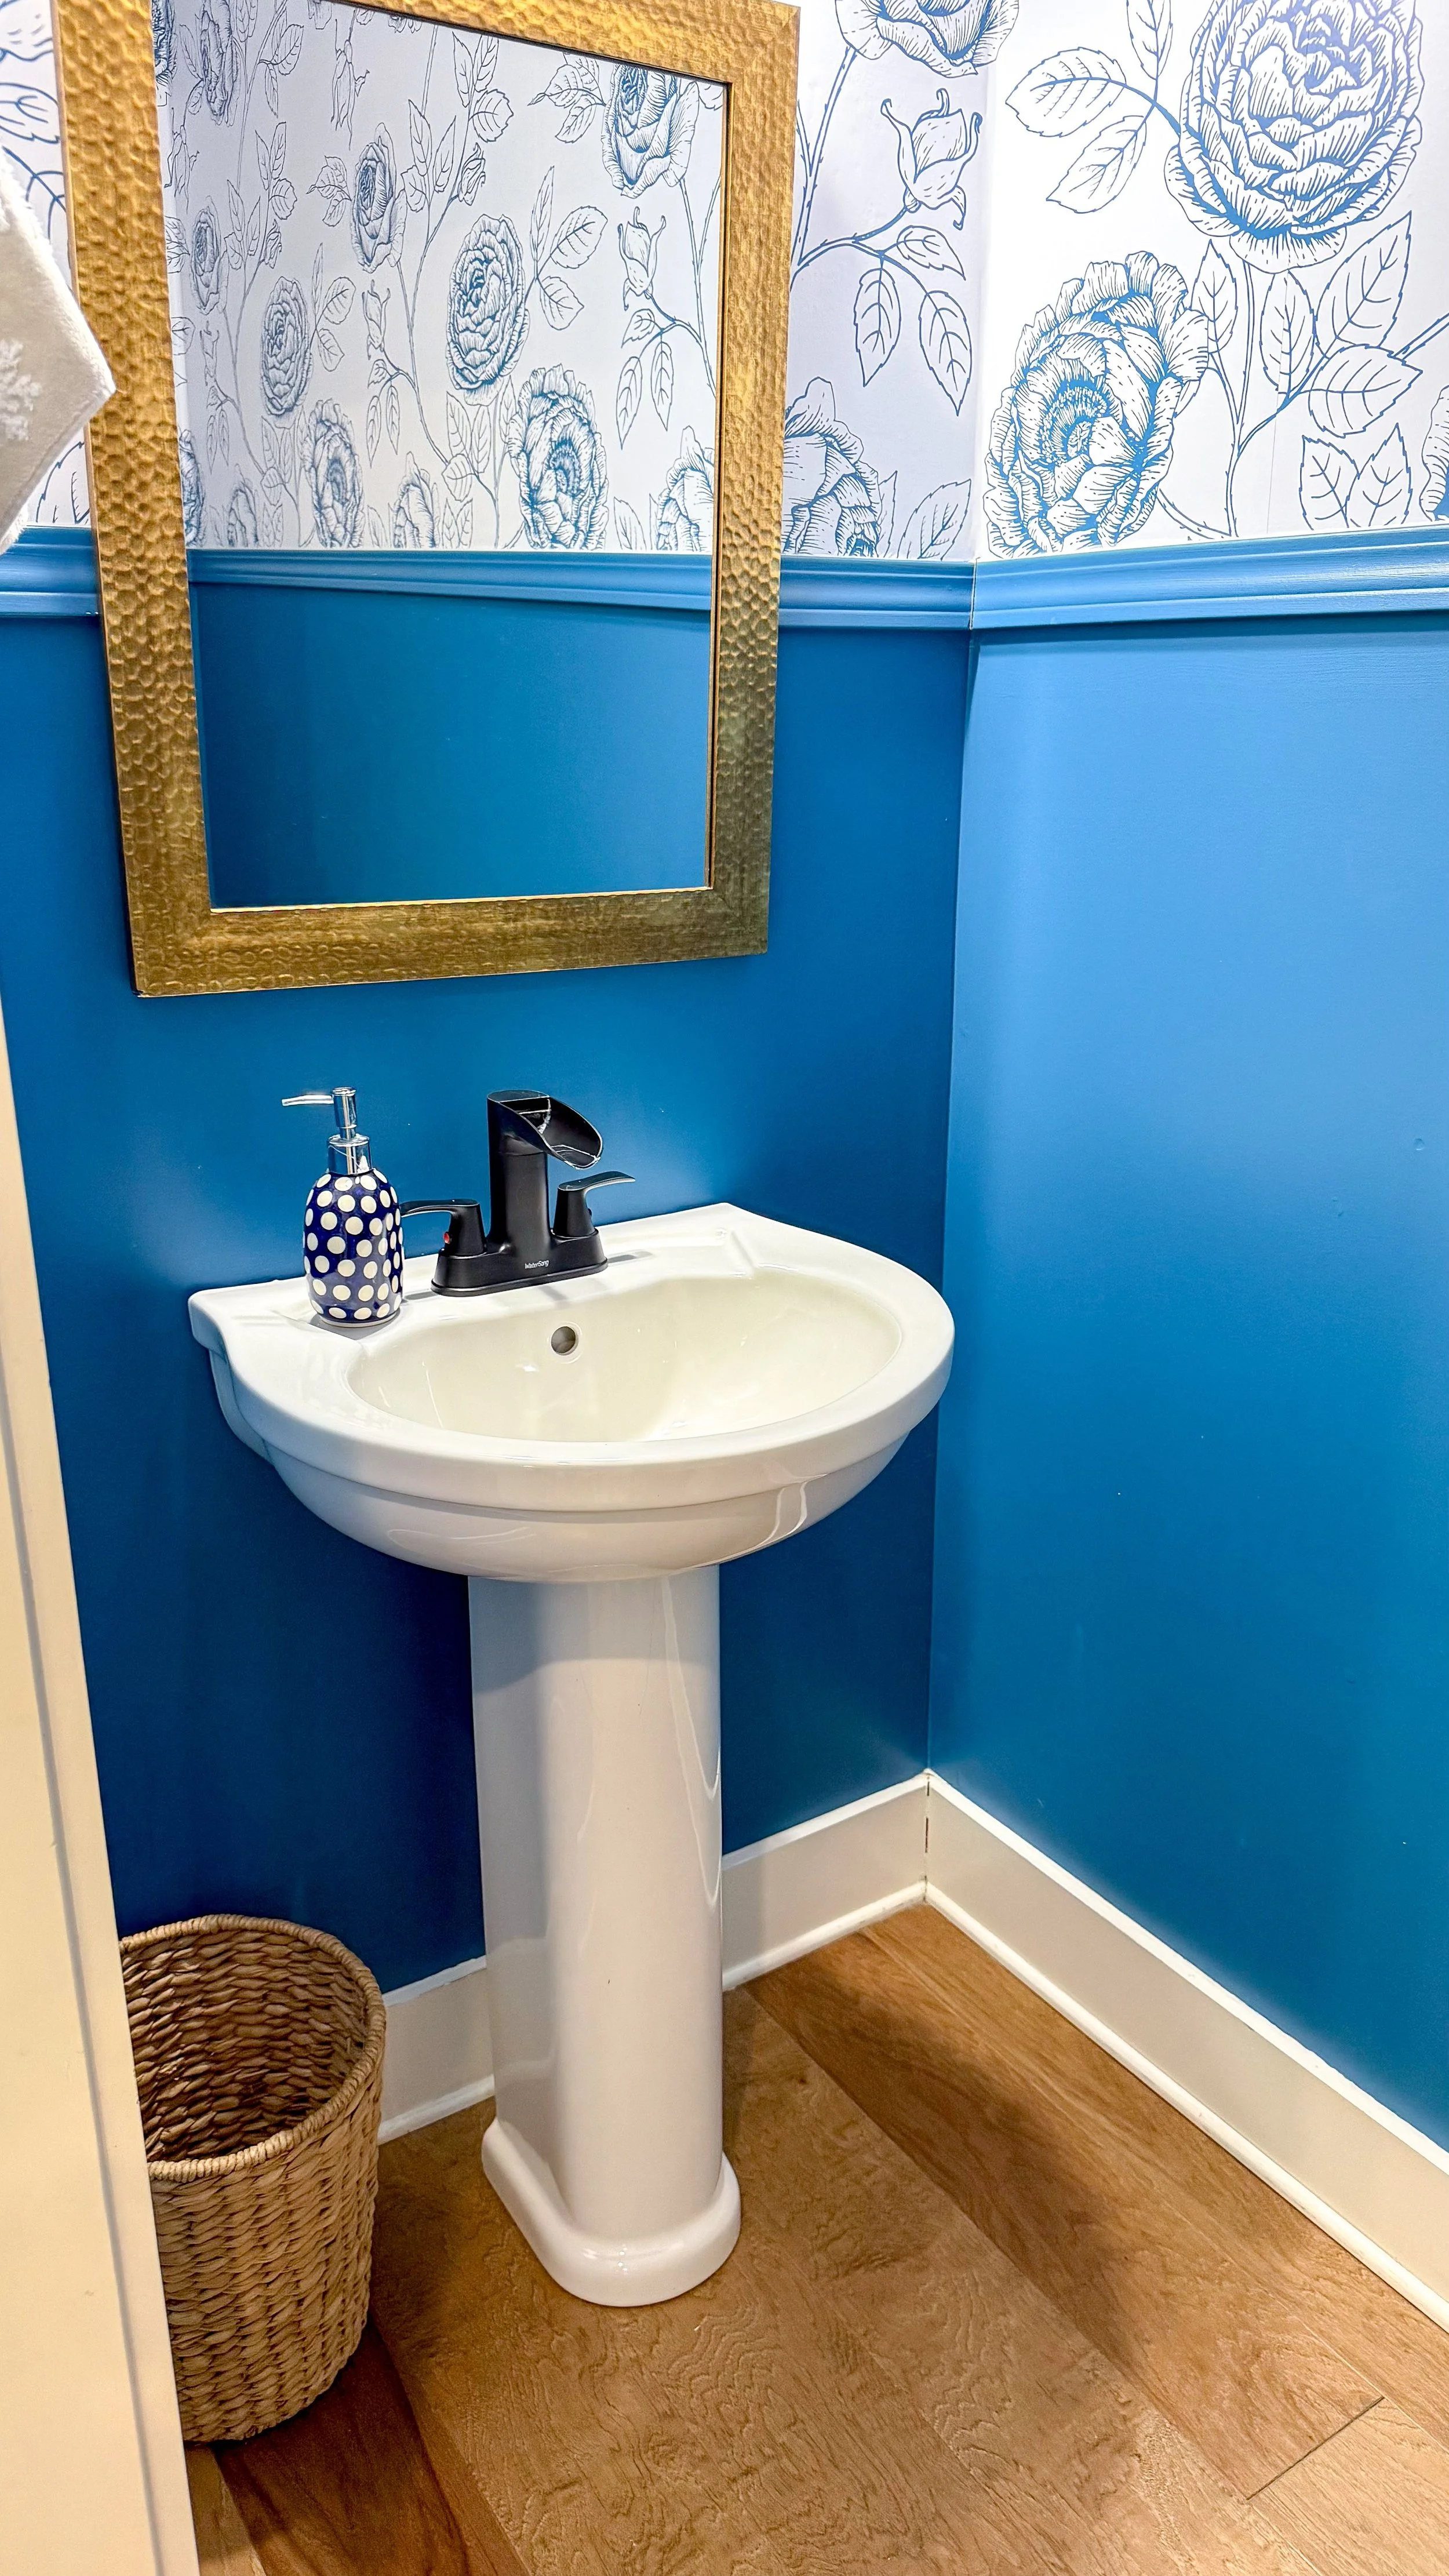
How To Swap A Pedestal Sink For A Vanity | Pedestal Removal
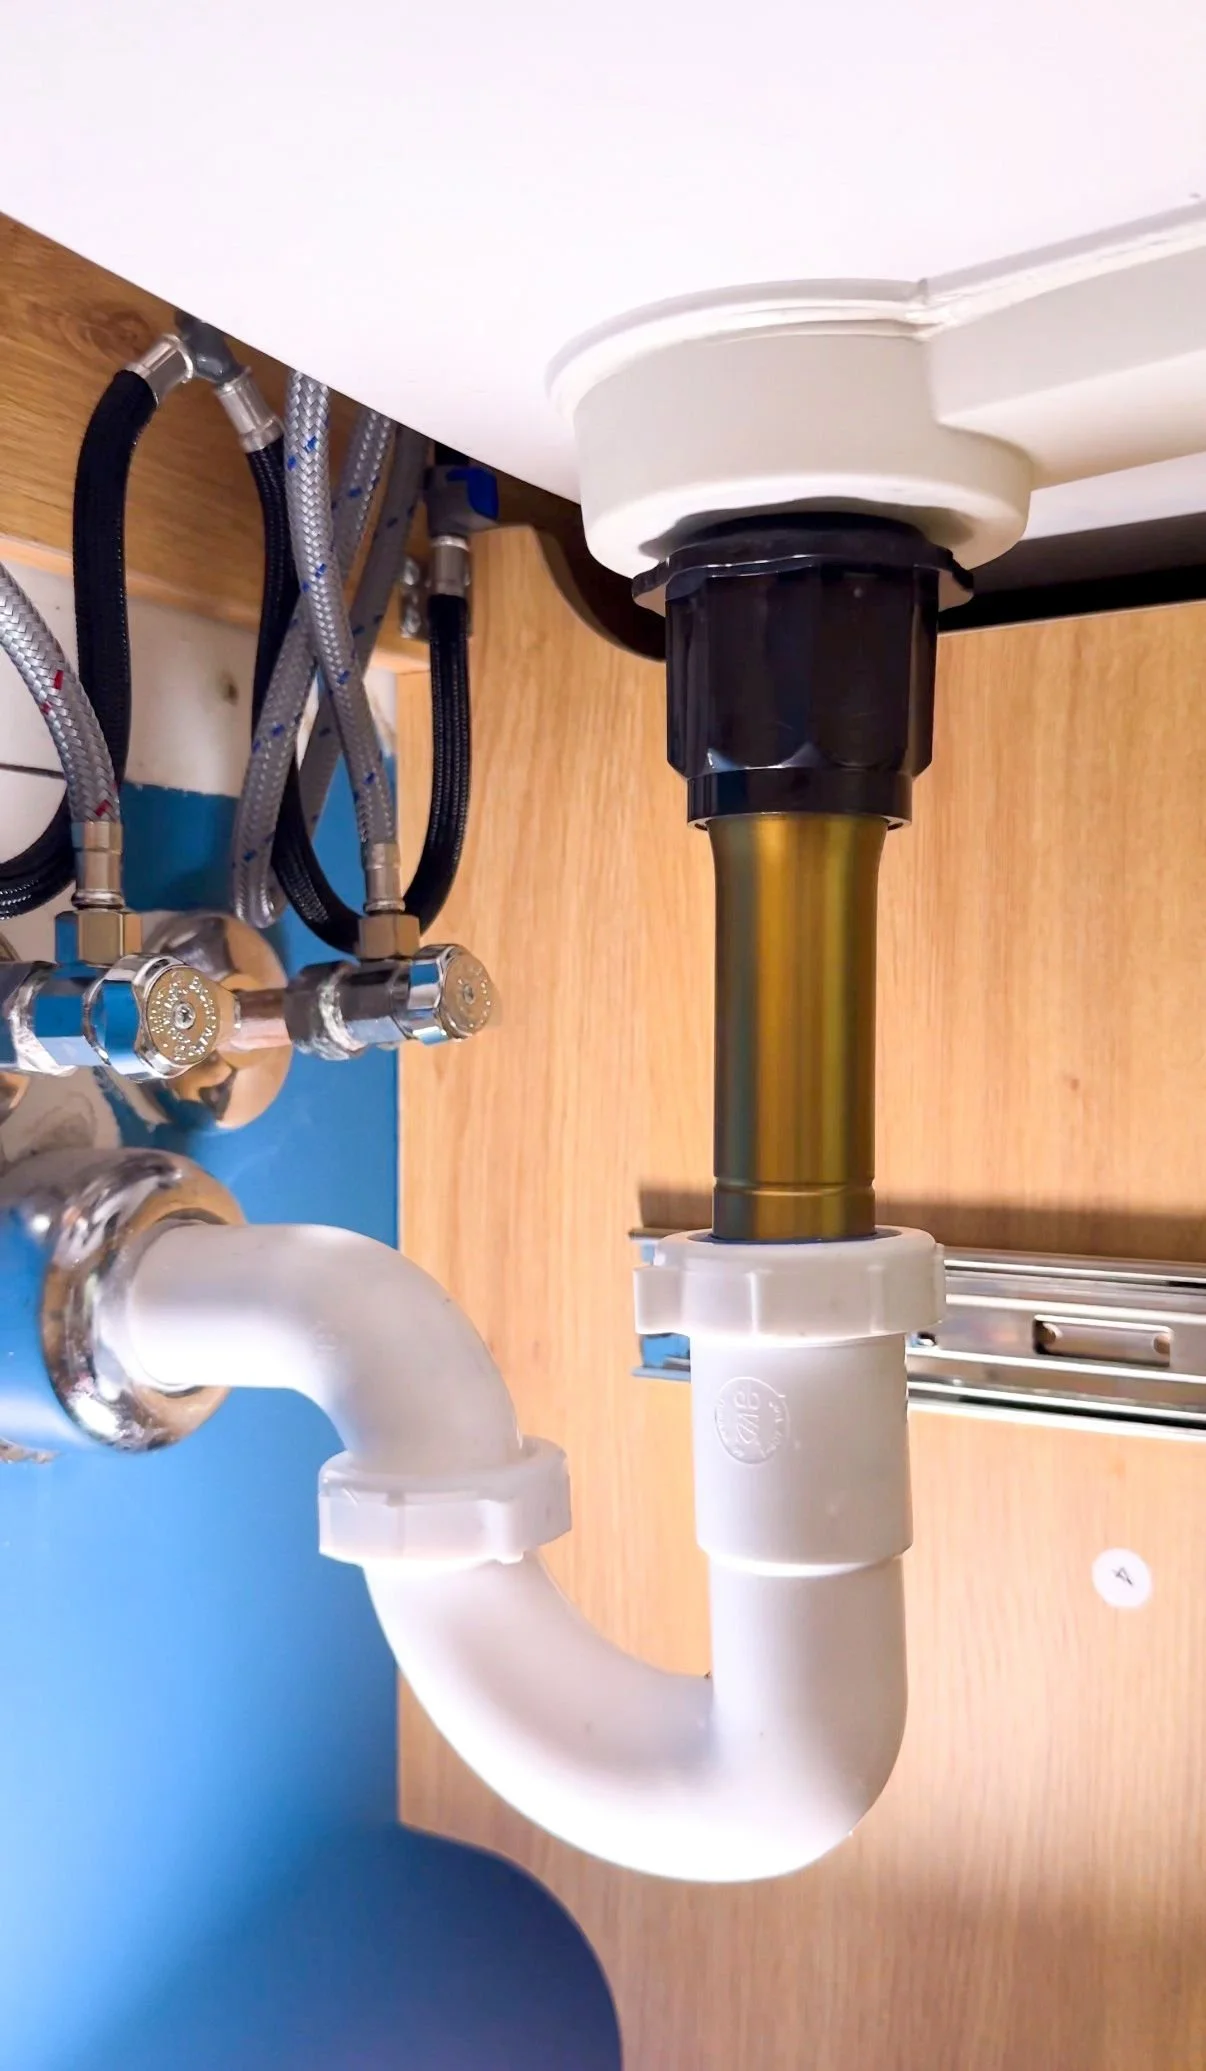
Before I could remove the sink, I had to turn off the water under the sink. I turned both the hot and the cold water valve to the right so no water came out when I turned the sink on. There's a pipe that comes out of the wall and connects to what's called the P-trap. This pipe runs in a U shape underneath the sink and then goes up into the drain. These are connected by a threaded washer you can loosen with a pair of pliers and then unscrew by hand.
The next thing I had to do was disconnect the water. There are lines that go from the water in the wall to the handles on the sink, that also can be loosened with a pair of pliers and then unscrewed by hand. Once everything was disconnected from the sink, I was able to easily remove it. With this pedestal sink, there was a silver piece attached the wall the pedestal was sitting up against to keep it upright. To remove the sink, all I had to do was pick it up and move it away from the wall in order to disconnect everything and take it out of the bathroom. I removed the metal piece and had a clear space to install the vanity.
How To Swap A Pedestal Sink For A Vanity | Install
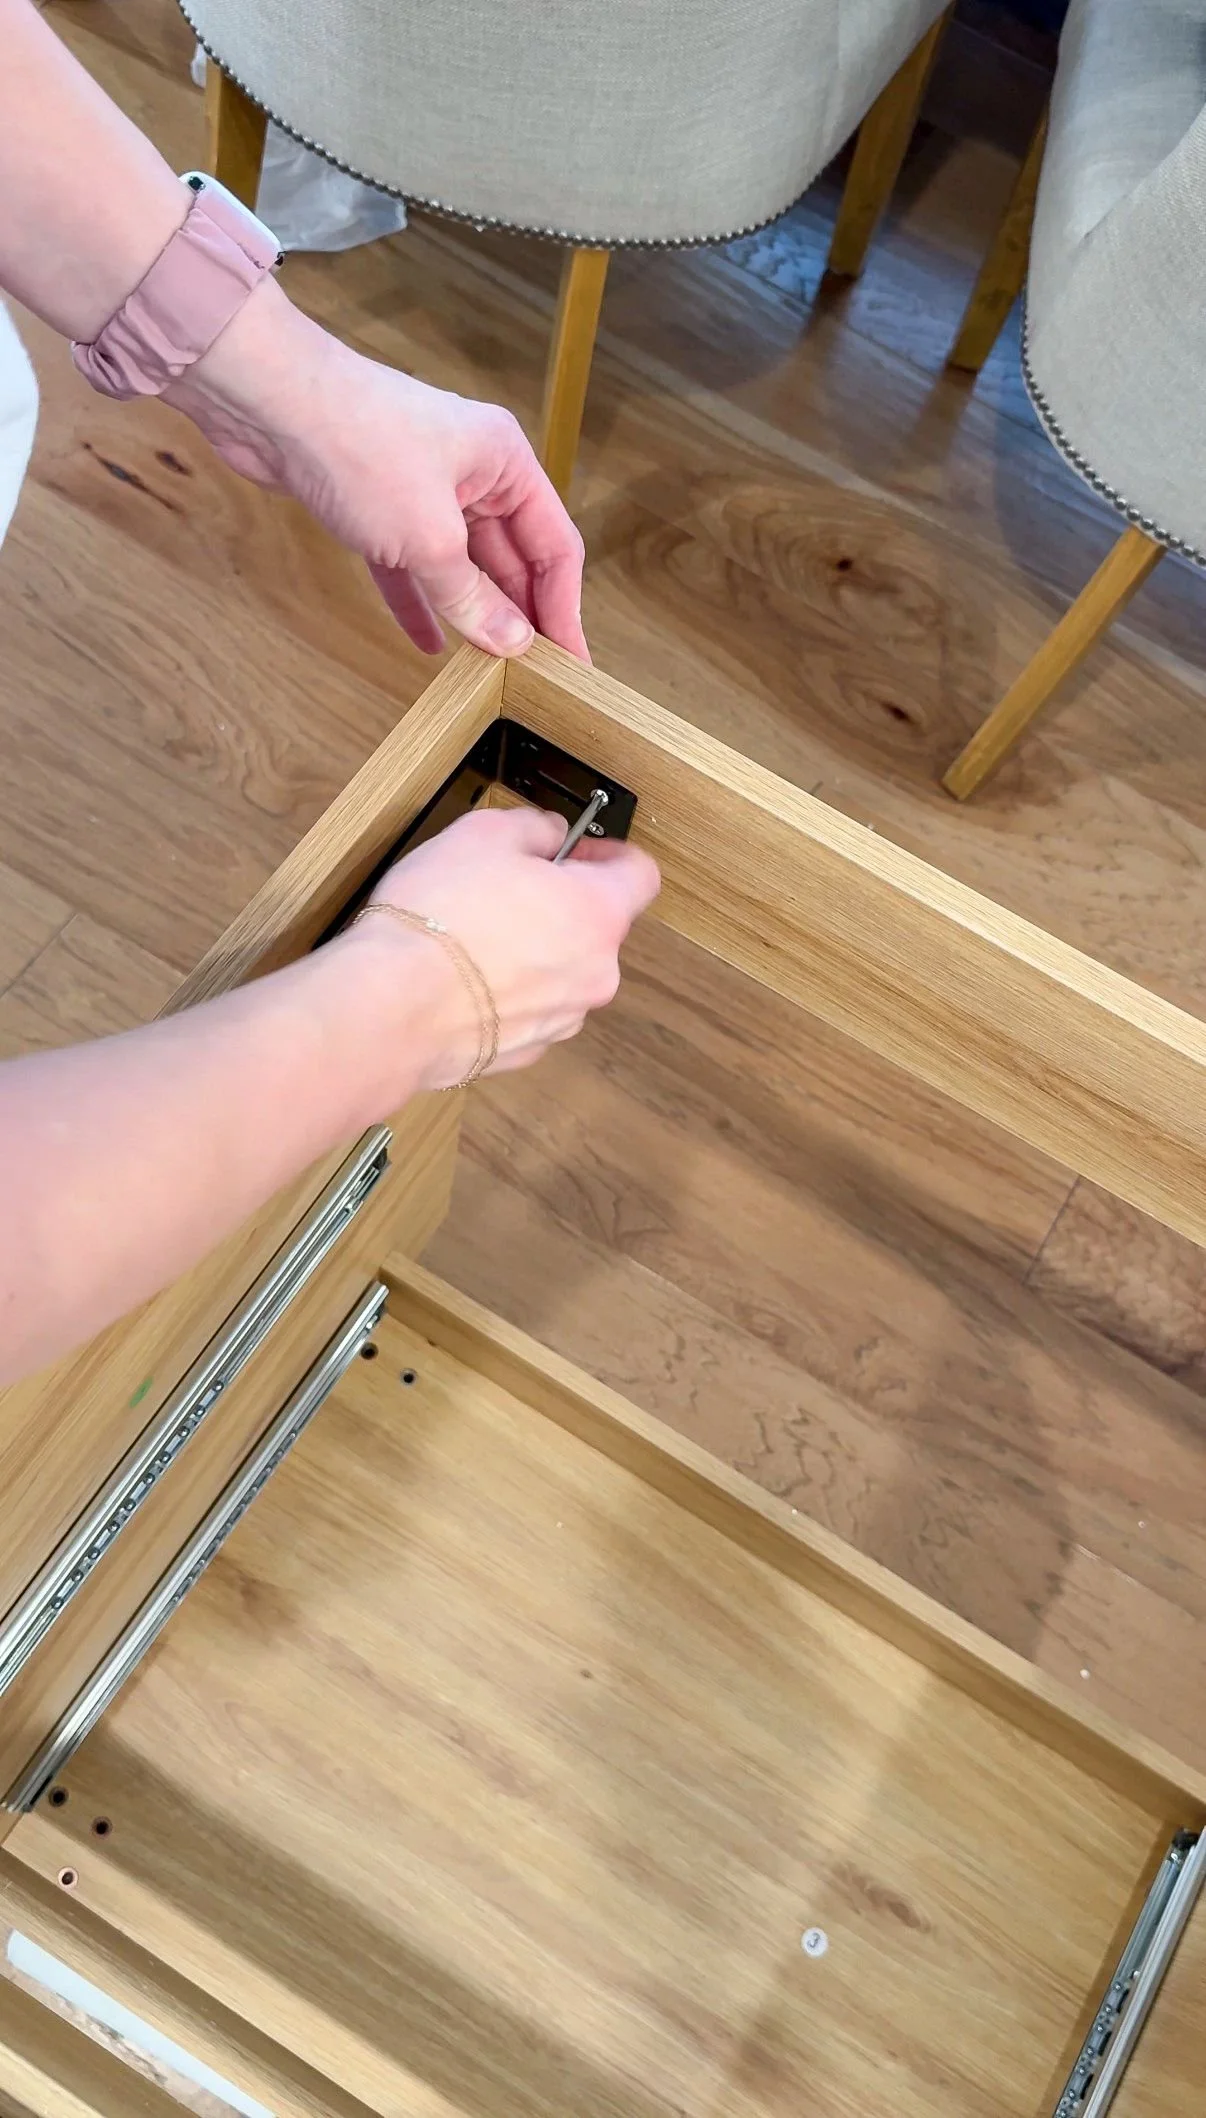
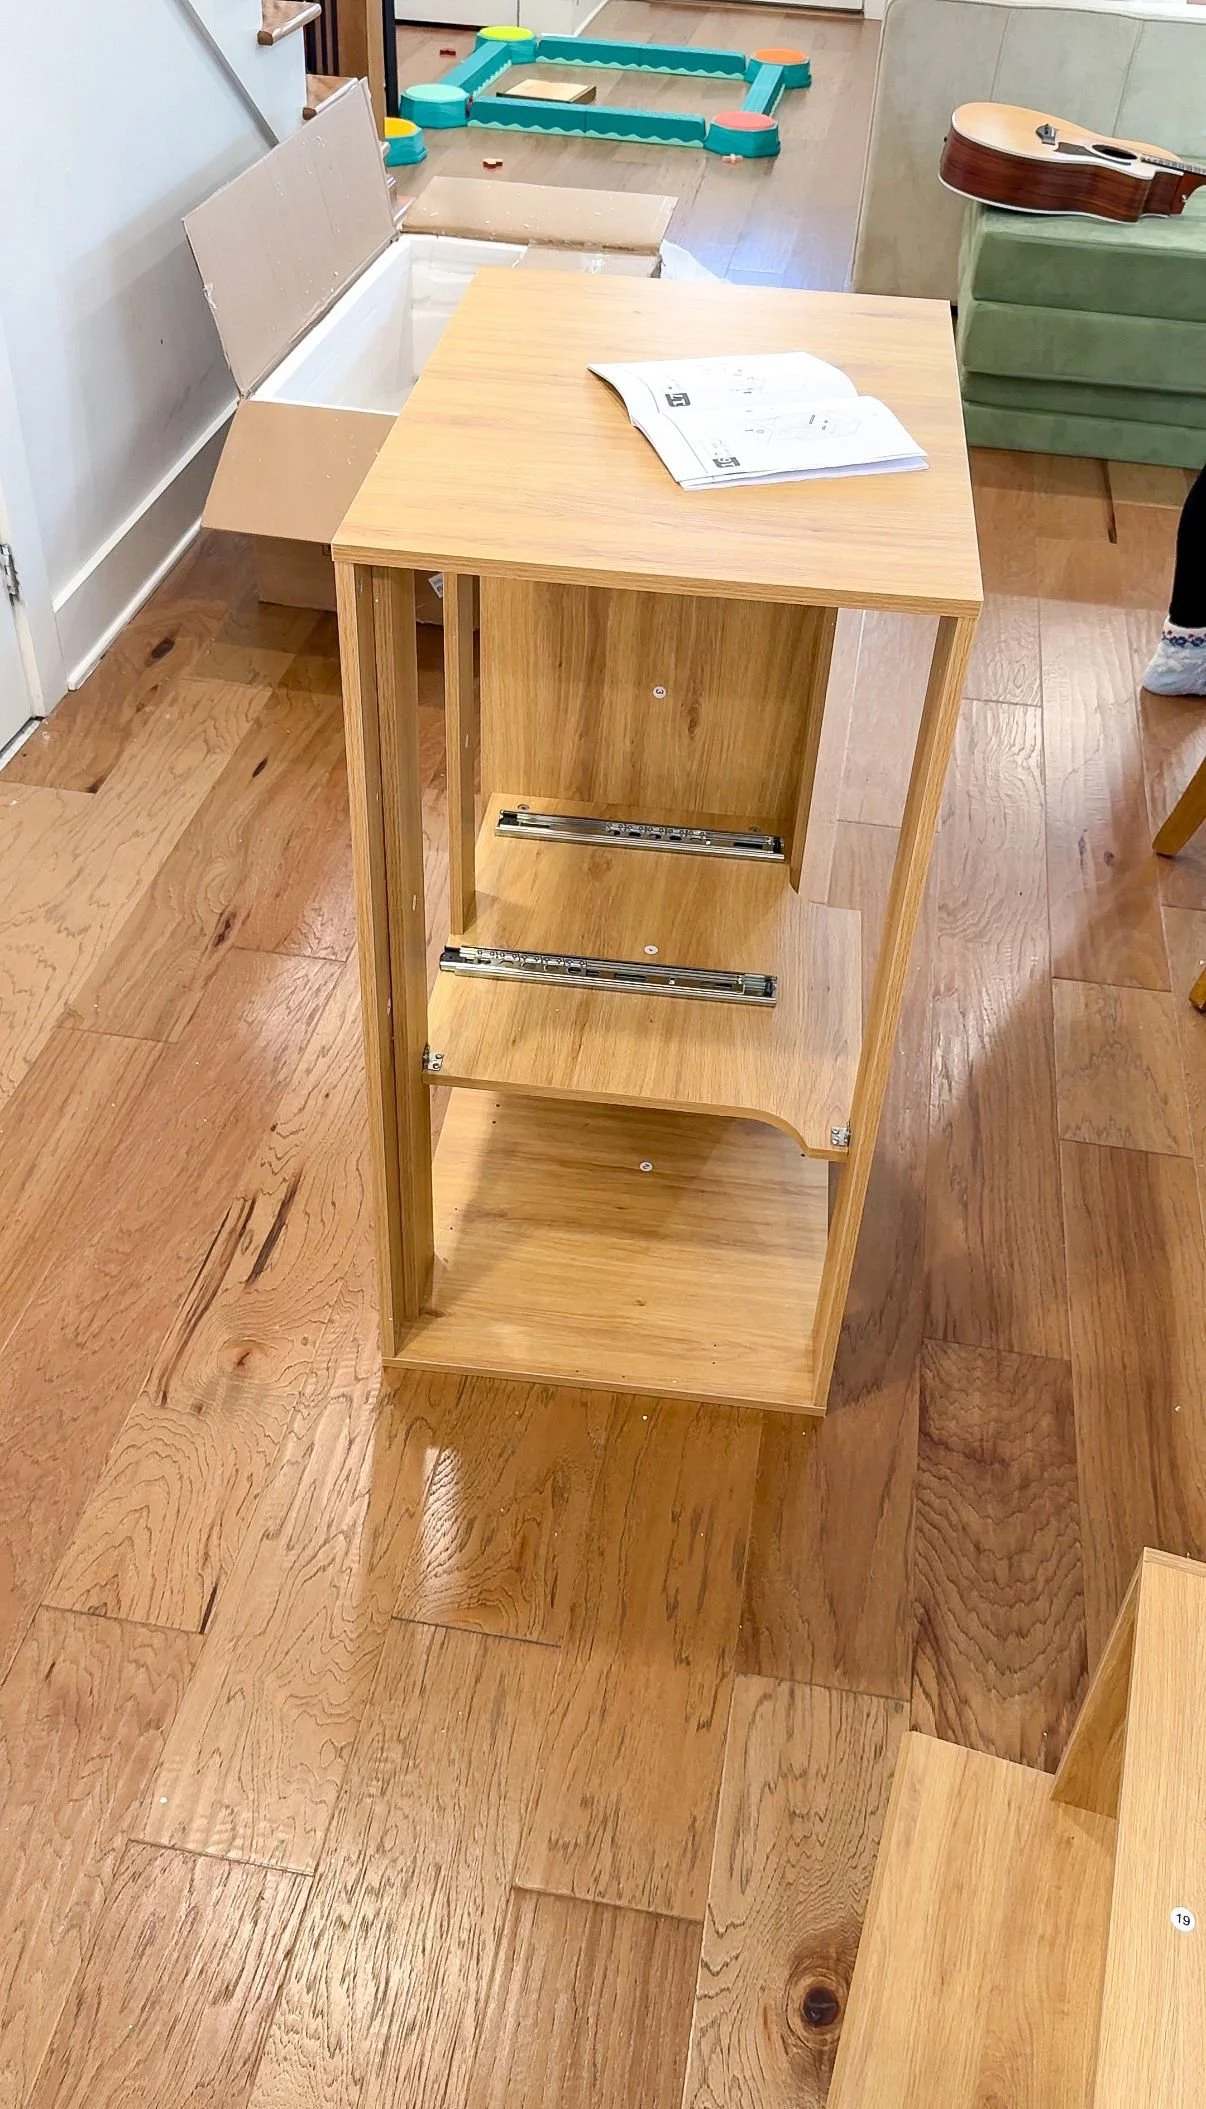
I looked high and low for a vanity that met my criteria of being a decent price, had a good amount of storage space, specifically drawers and had a top included. I was surprised in my search that many vanities don't actually come with the top/sink, so I had to really narrow down my search. After finding the right one, I started to assemble it. I actually really enjoyed doing this, it was a relatively simple build with clear instructions. The hardest part was keeping the pieces away from my toddler! One of the things I like about this specific vanity is that only one of the drawers has a cutout in it for the plumbing. Most other vanities that I saw had cutouts in both drawers that takes up precious storage space. All in, assembly took me probably two hours.
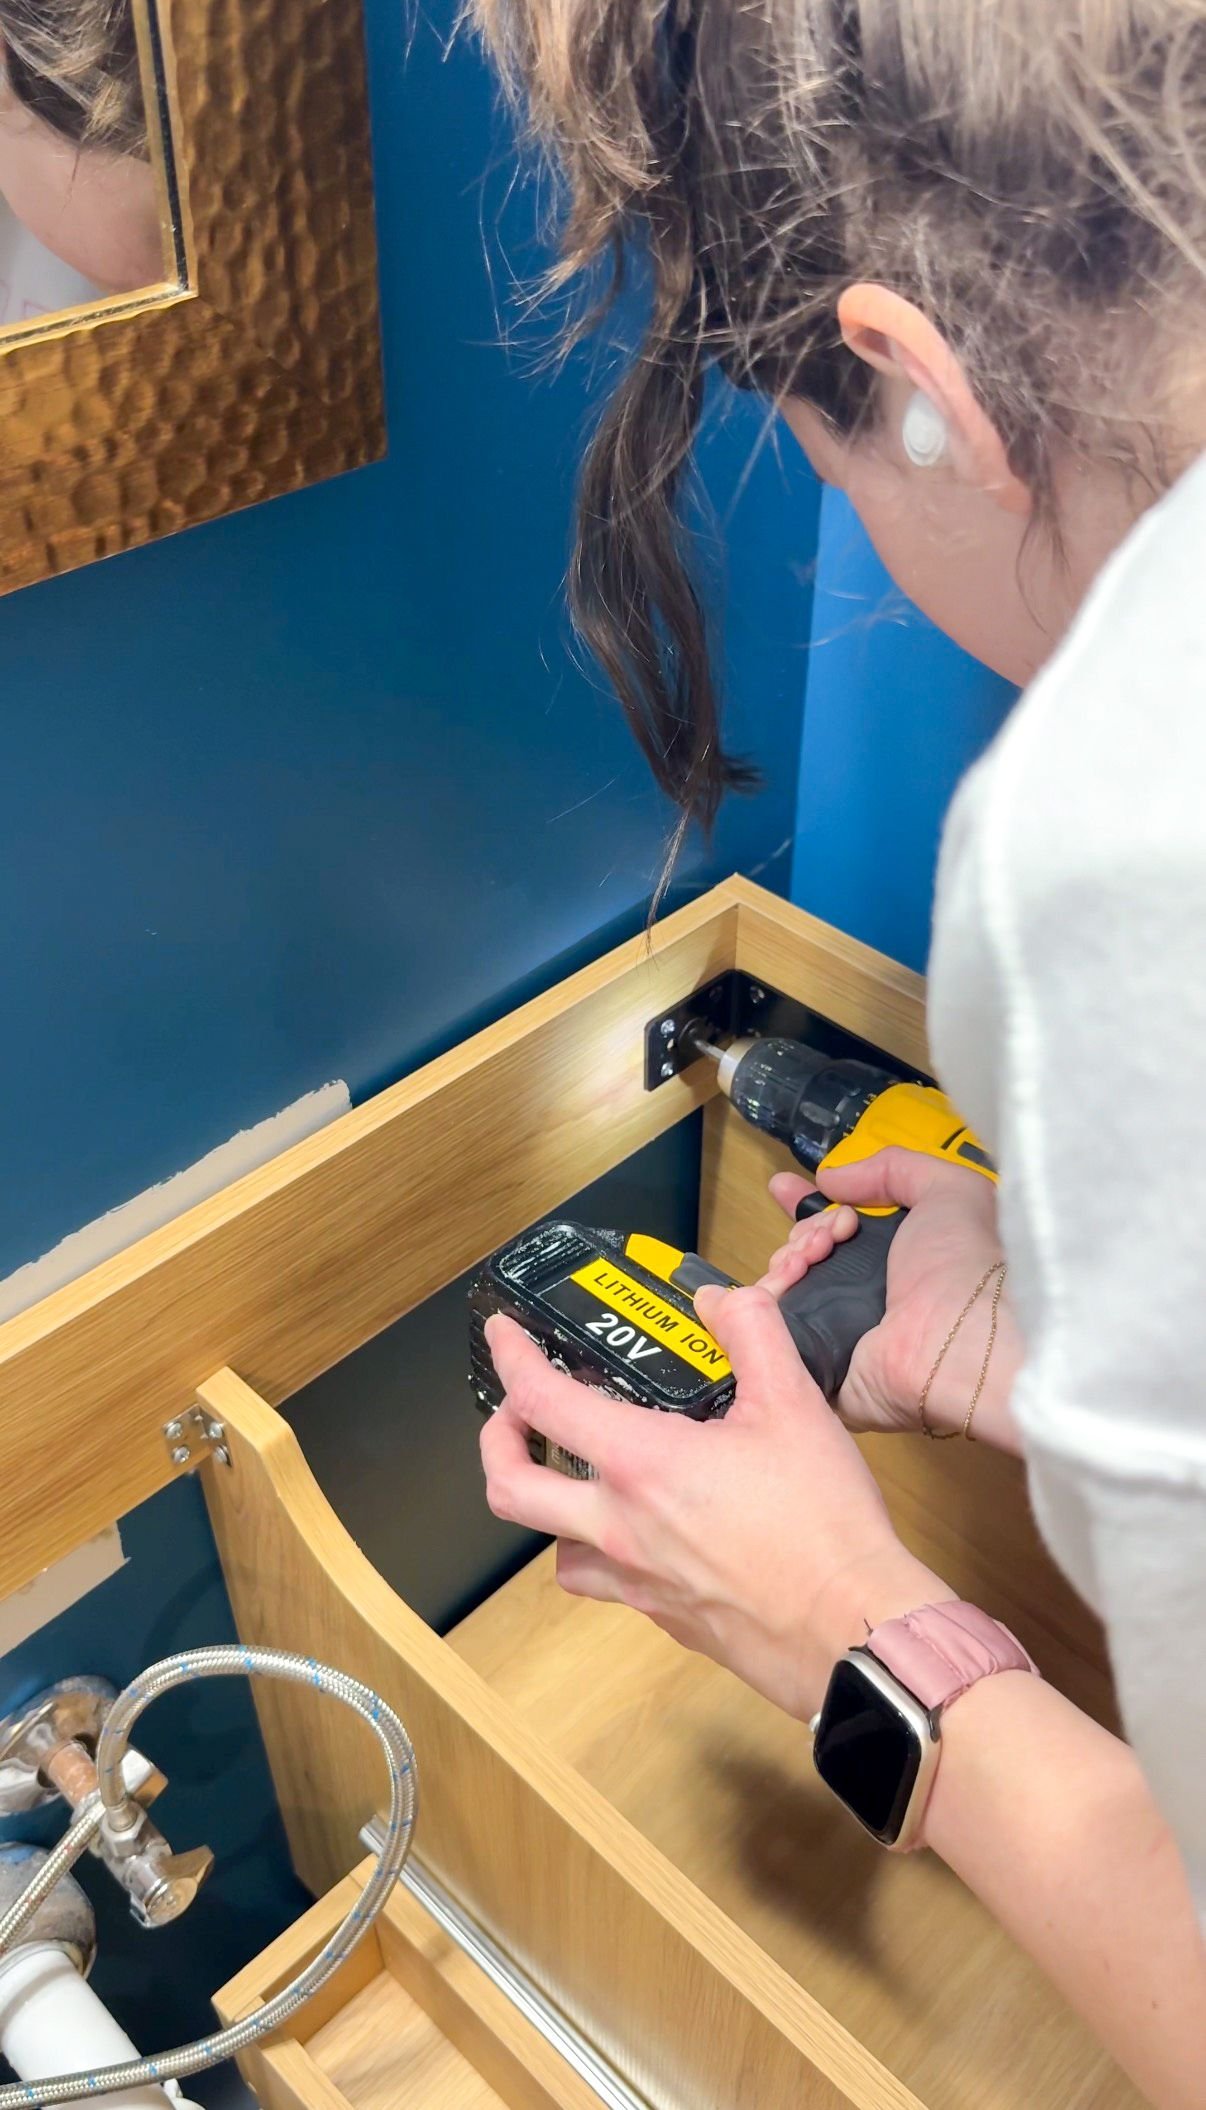
Once the vanity was assembled, I was able to move it into the bathroom. Vanities don't have backs on them so the plumbing can come through the back. This also made it easy to secure it to the wall. I made sure to screw it into the studs so I knew it was secure. Having a climbing toddler around makes me extra cautious when installing heavy things. To secure the countertop to the vanity, I put glue all along the edges, placed it and let it sit for a while. Next step: plumbing.

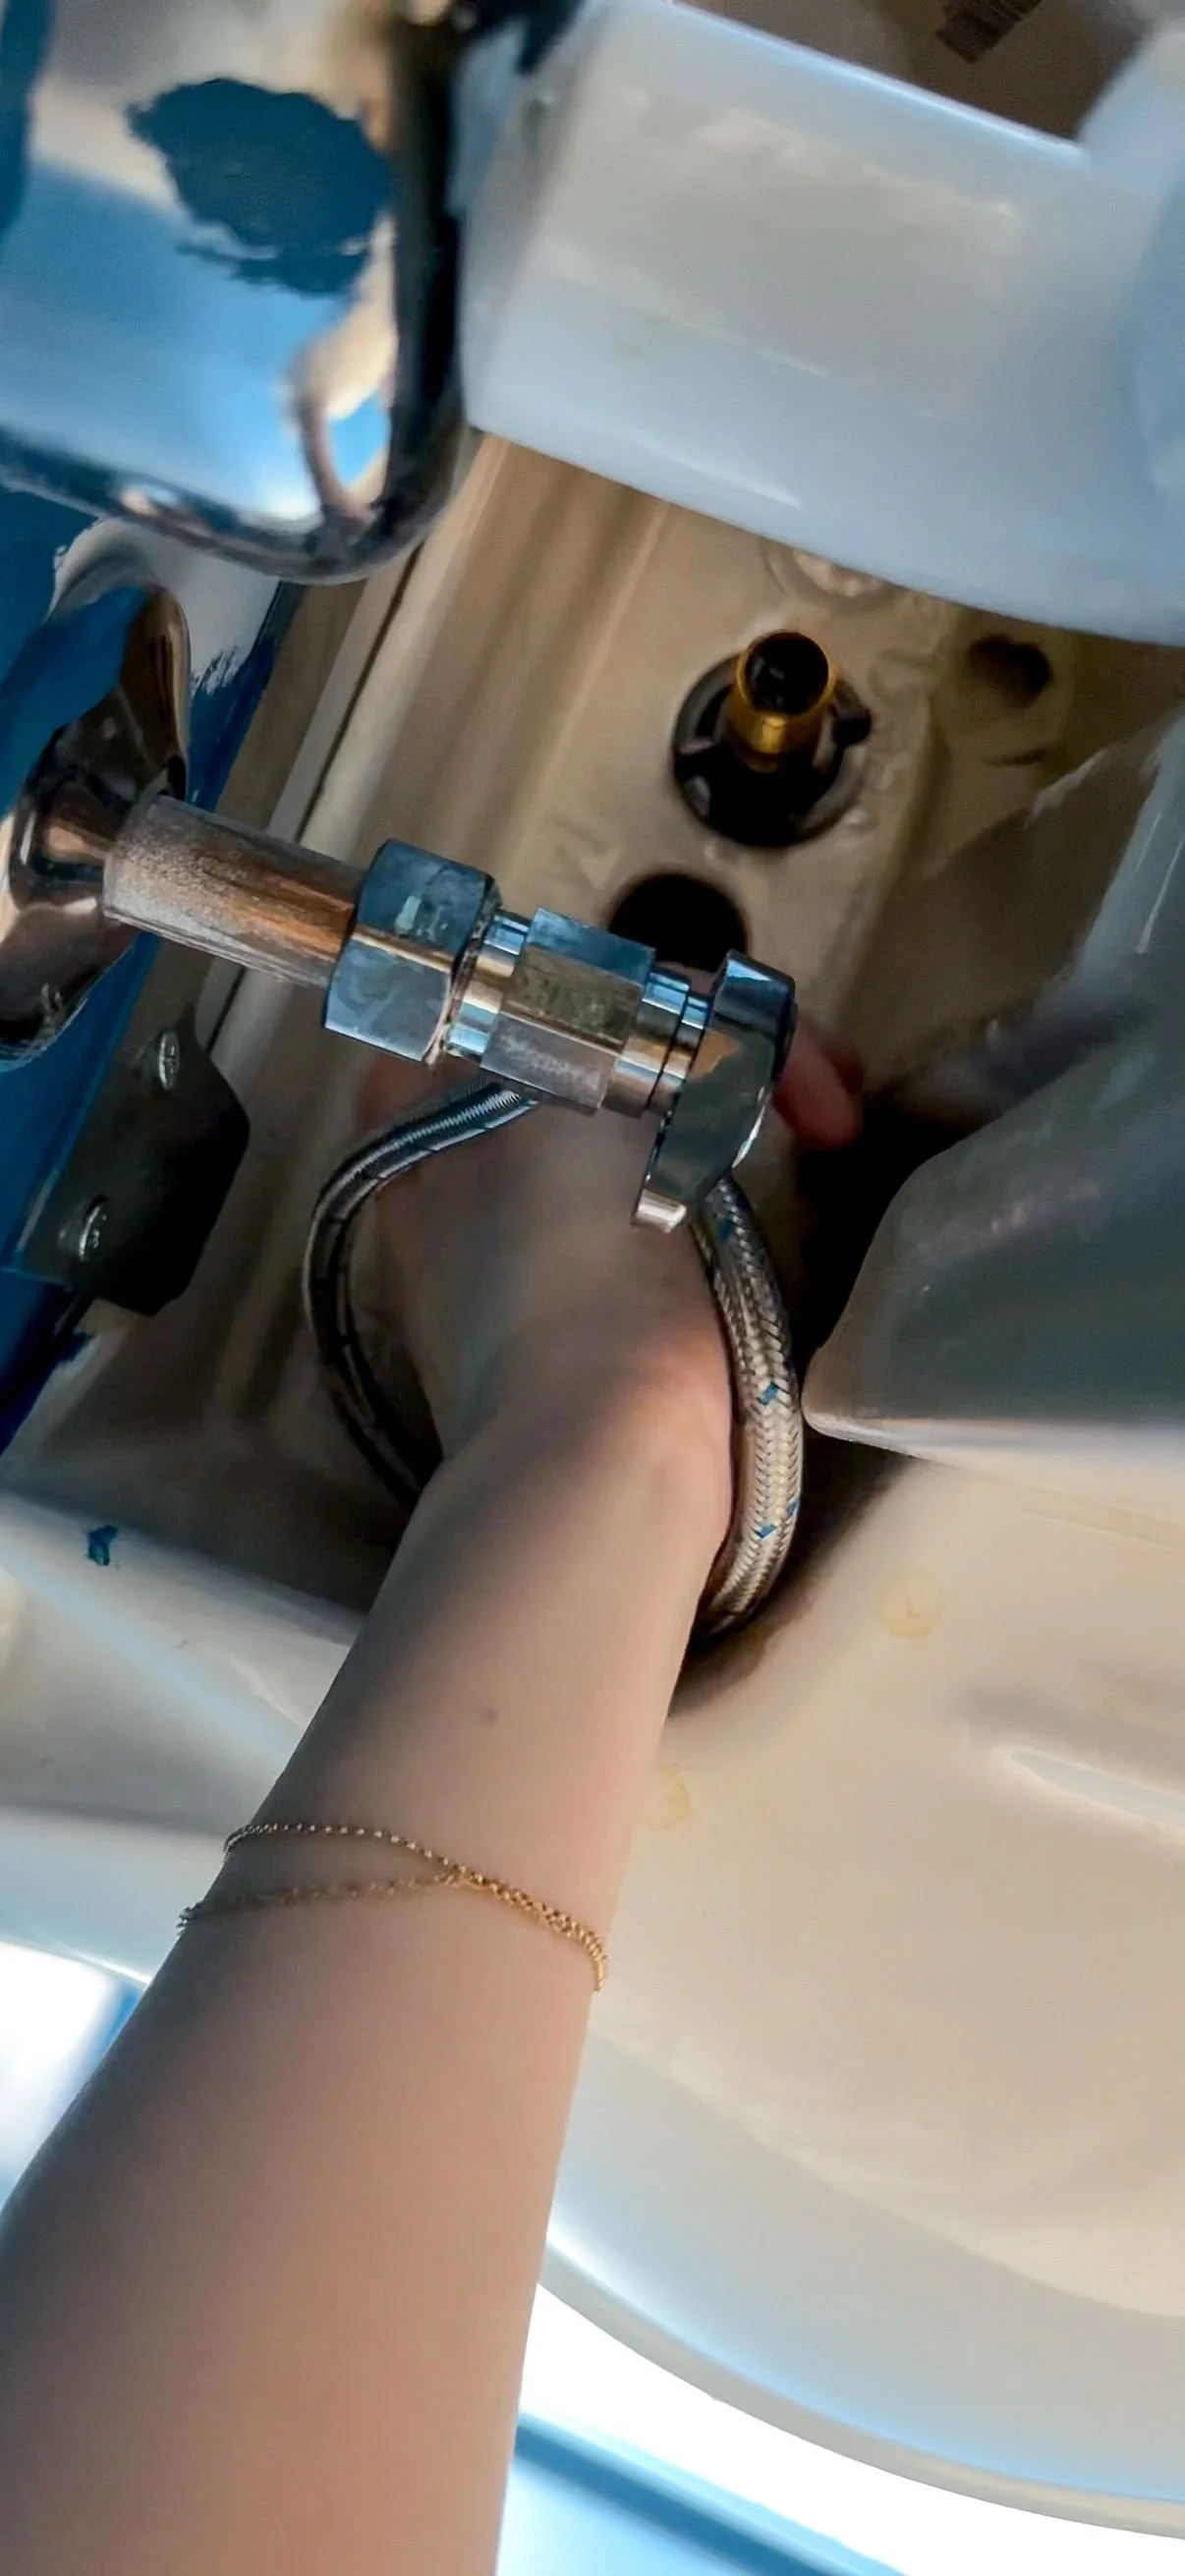
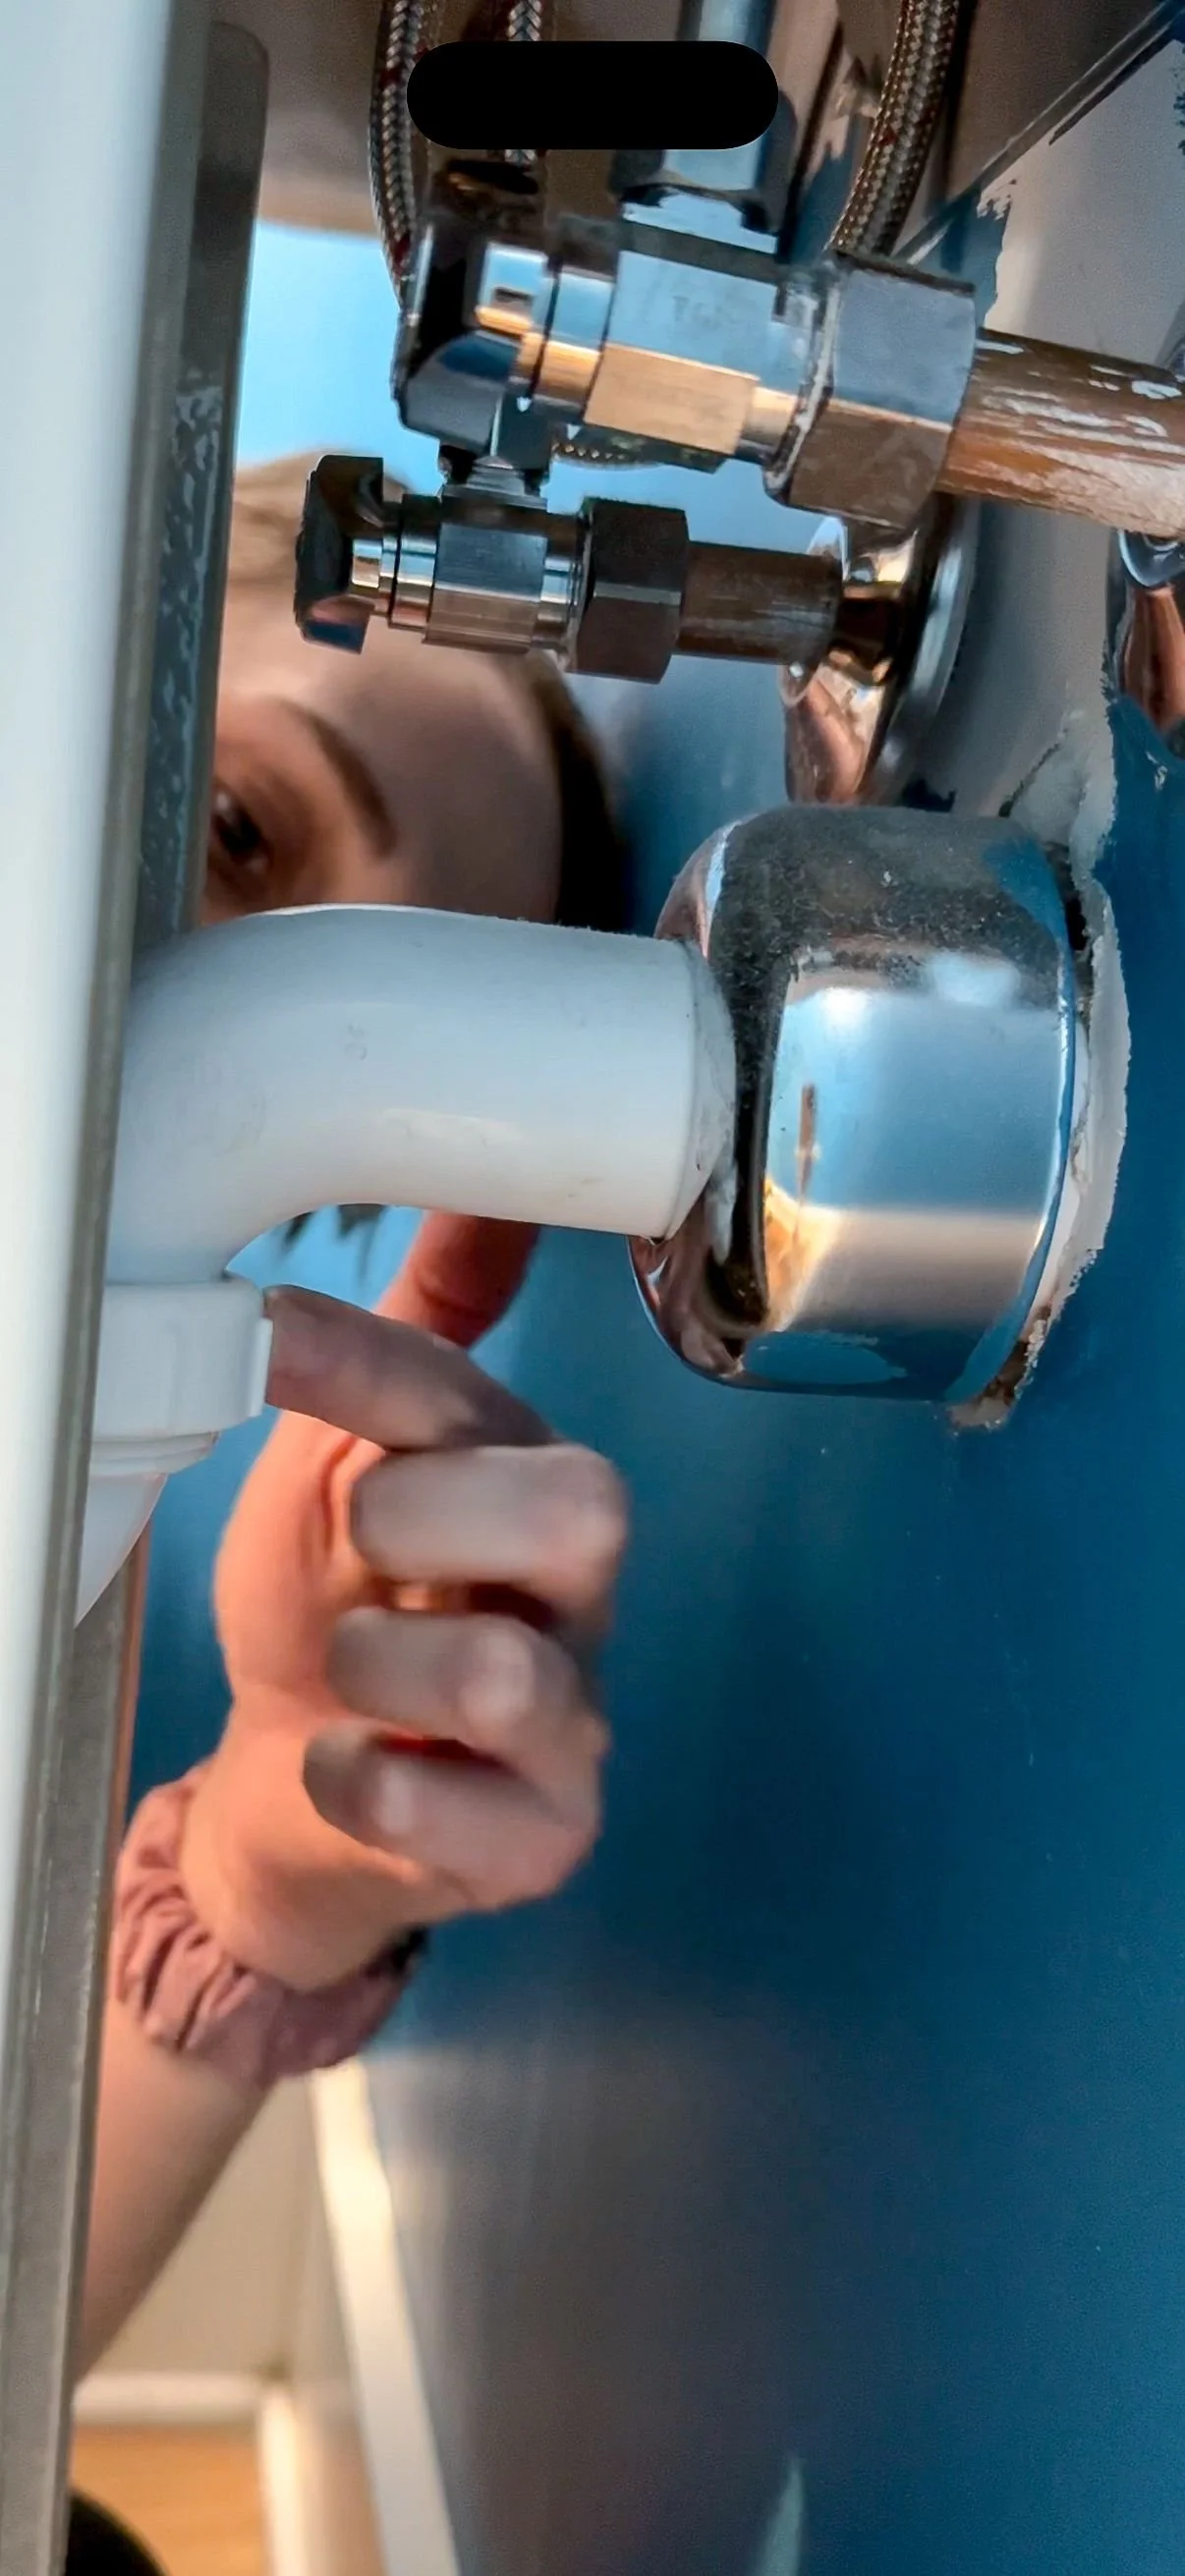
Since the old faucet wouldn't work with the new sink, I was able to find a new faucet that matches with all the rest of the hardware in the bathroom. I started installing the handles, connected them to the hot and cold water and screwed them in using the washer that came with the kit. It is super important not to over tighten things so you don't get any cracks. Best practice is to screw things in by hand first, and then use a wrench to tighten it in a 1/4 rotation. Once the water lines were all installed and connected, it was then time to put in the drain and connect the drain to the outside pipe.
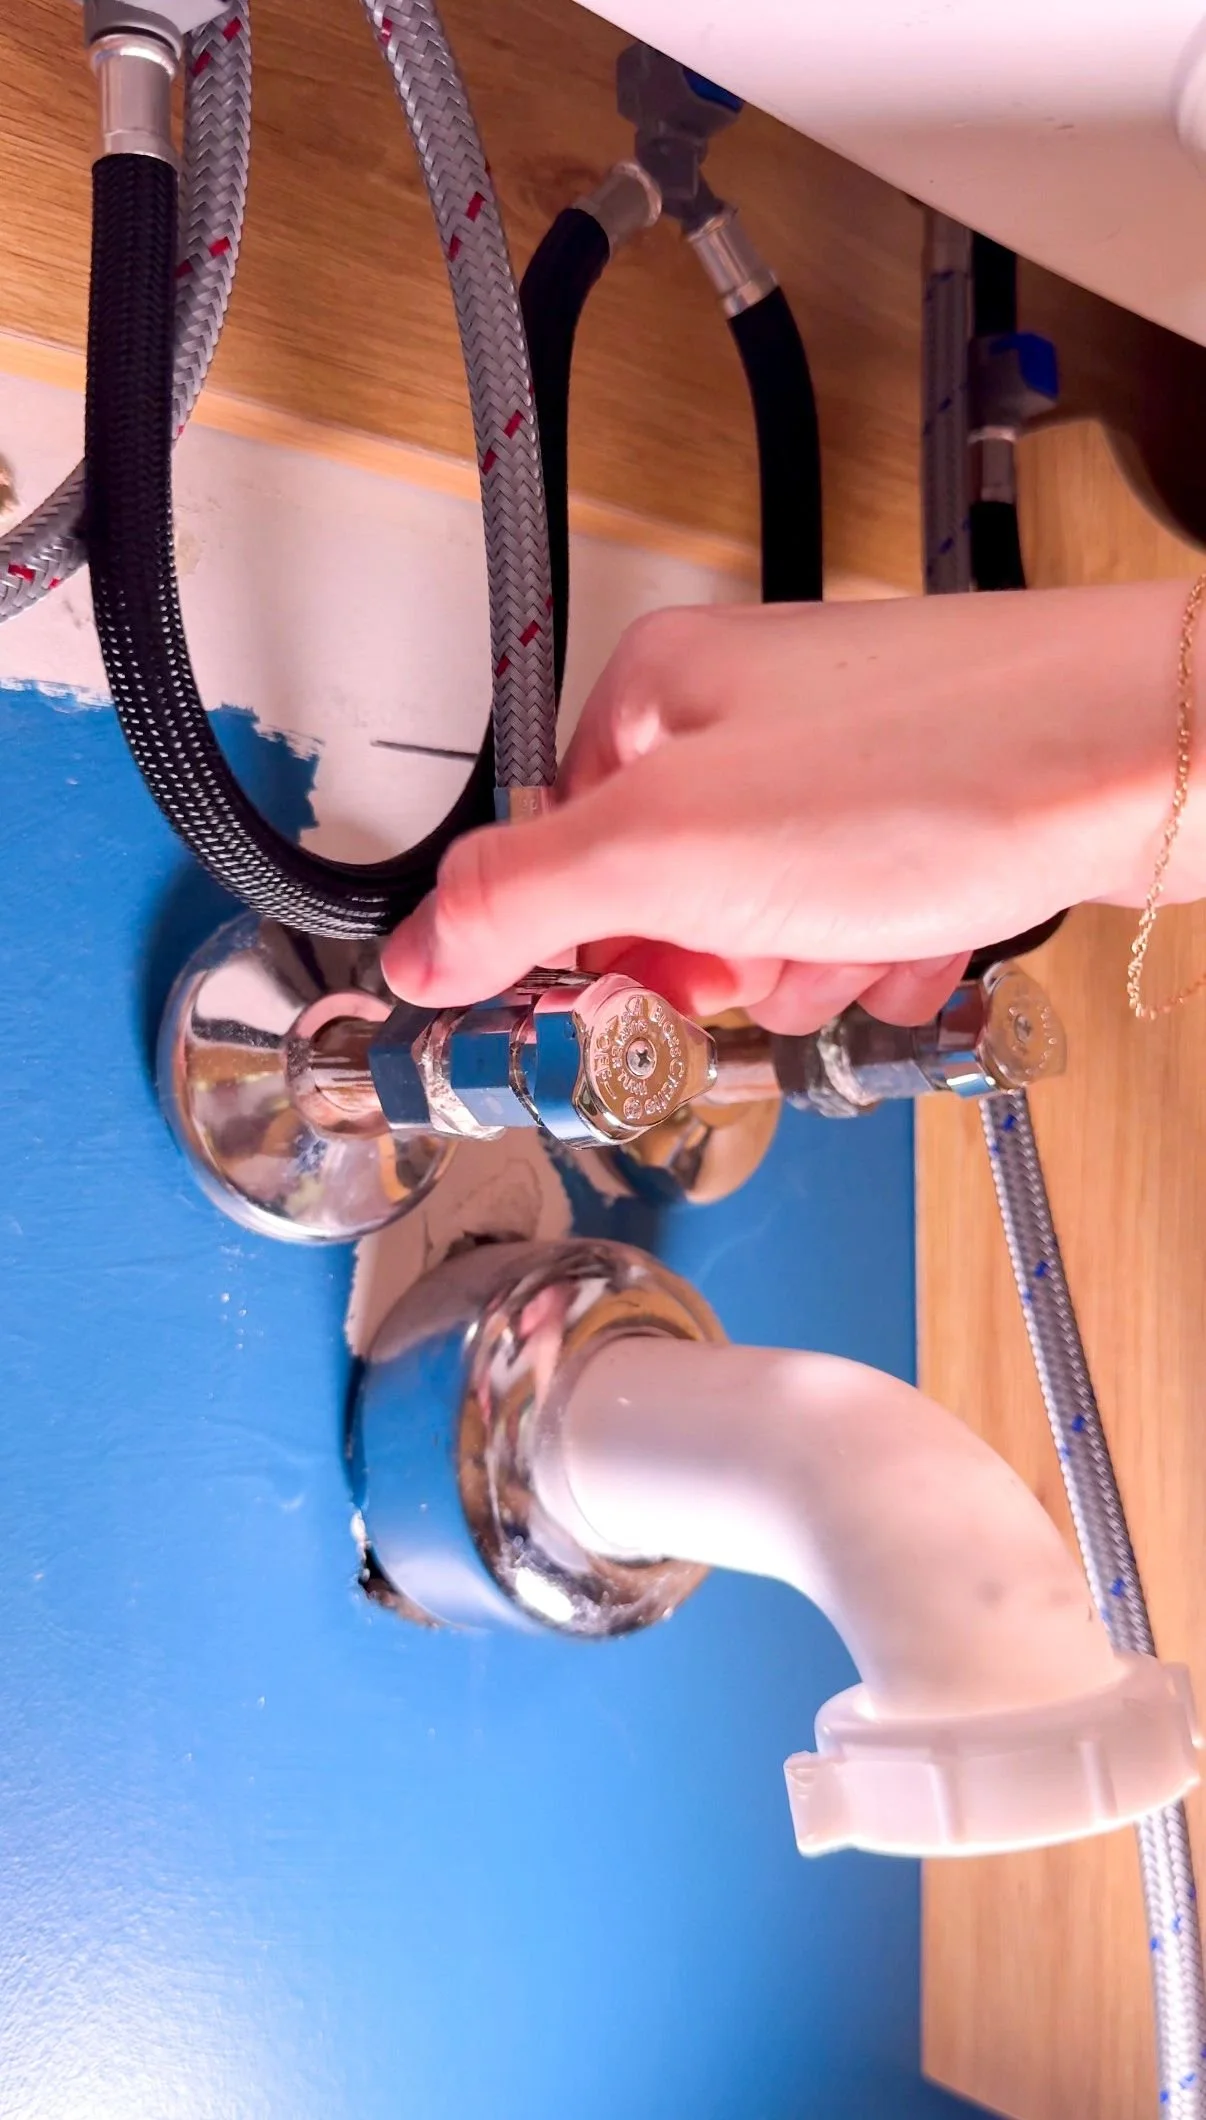
When installing a drain, there will usually be two rubber gaskets, one that goes at the top of the drain/sink and another that goes underneath and the sink gets sandwiched in between them. This helps prevent water leaking from the sides of the drain. The goal is for the water to go through the drain, not around the drain. There is also usually a plastic gasket you screw in to secure the drain into place. From there, the P-trap is installed. The P-trap is really important because it collects any debris that might go down and clog your pipes. It also keeps the gases in the sewer from coming up your drain by trapping them in that curve. These are secured together with threaded washers that connect with the waterlines. Once again, It's imperative you don't over tighten these.
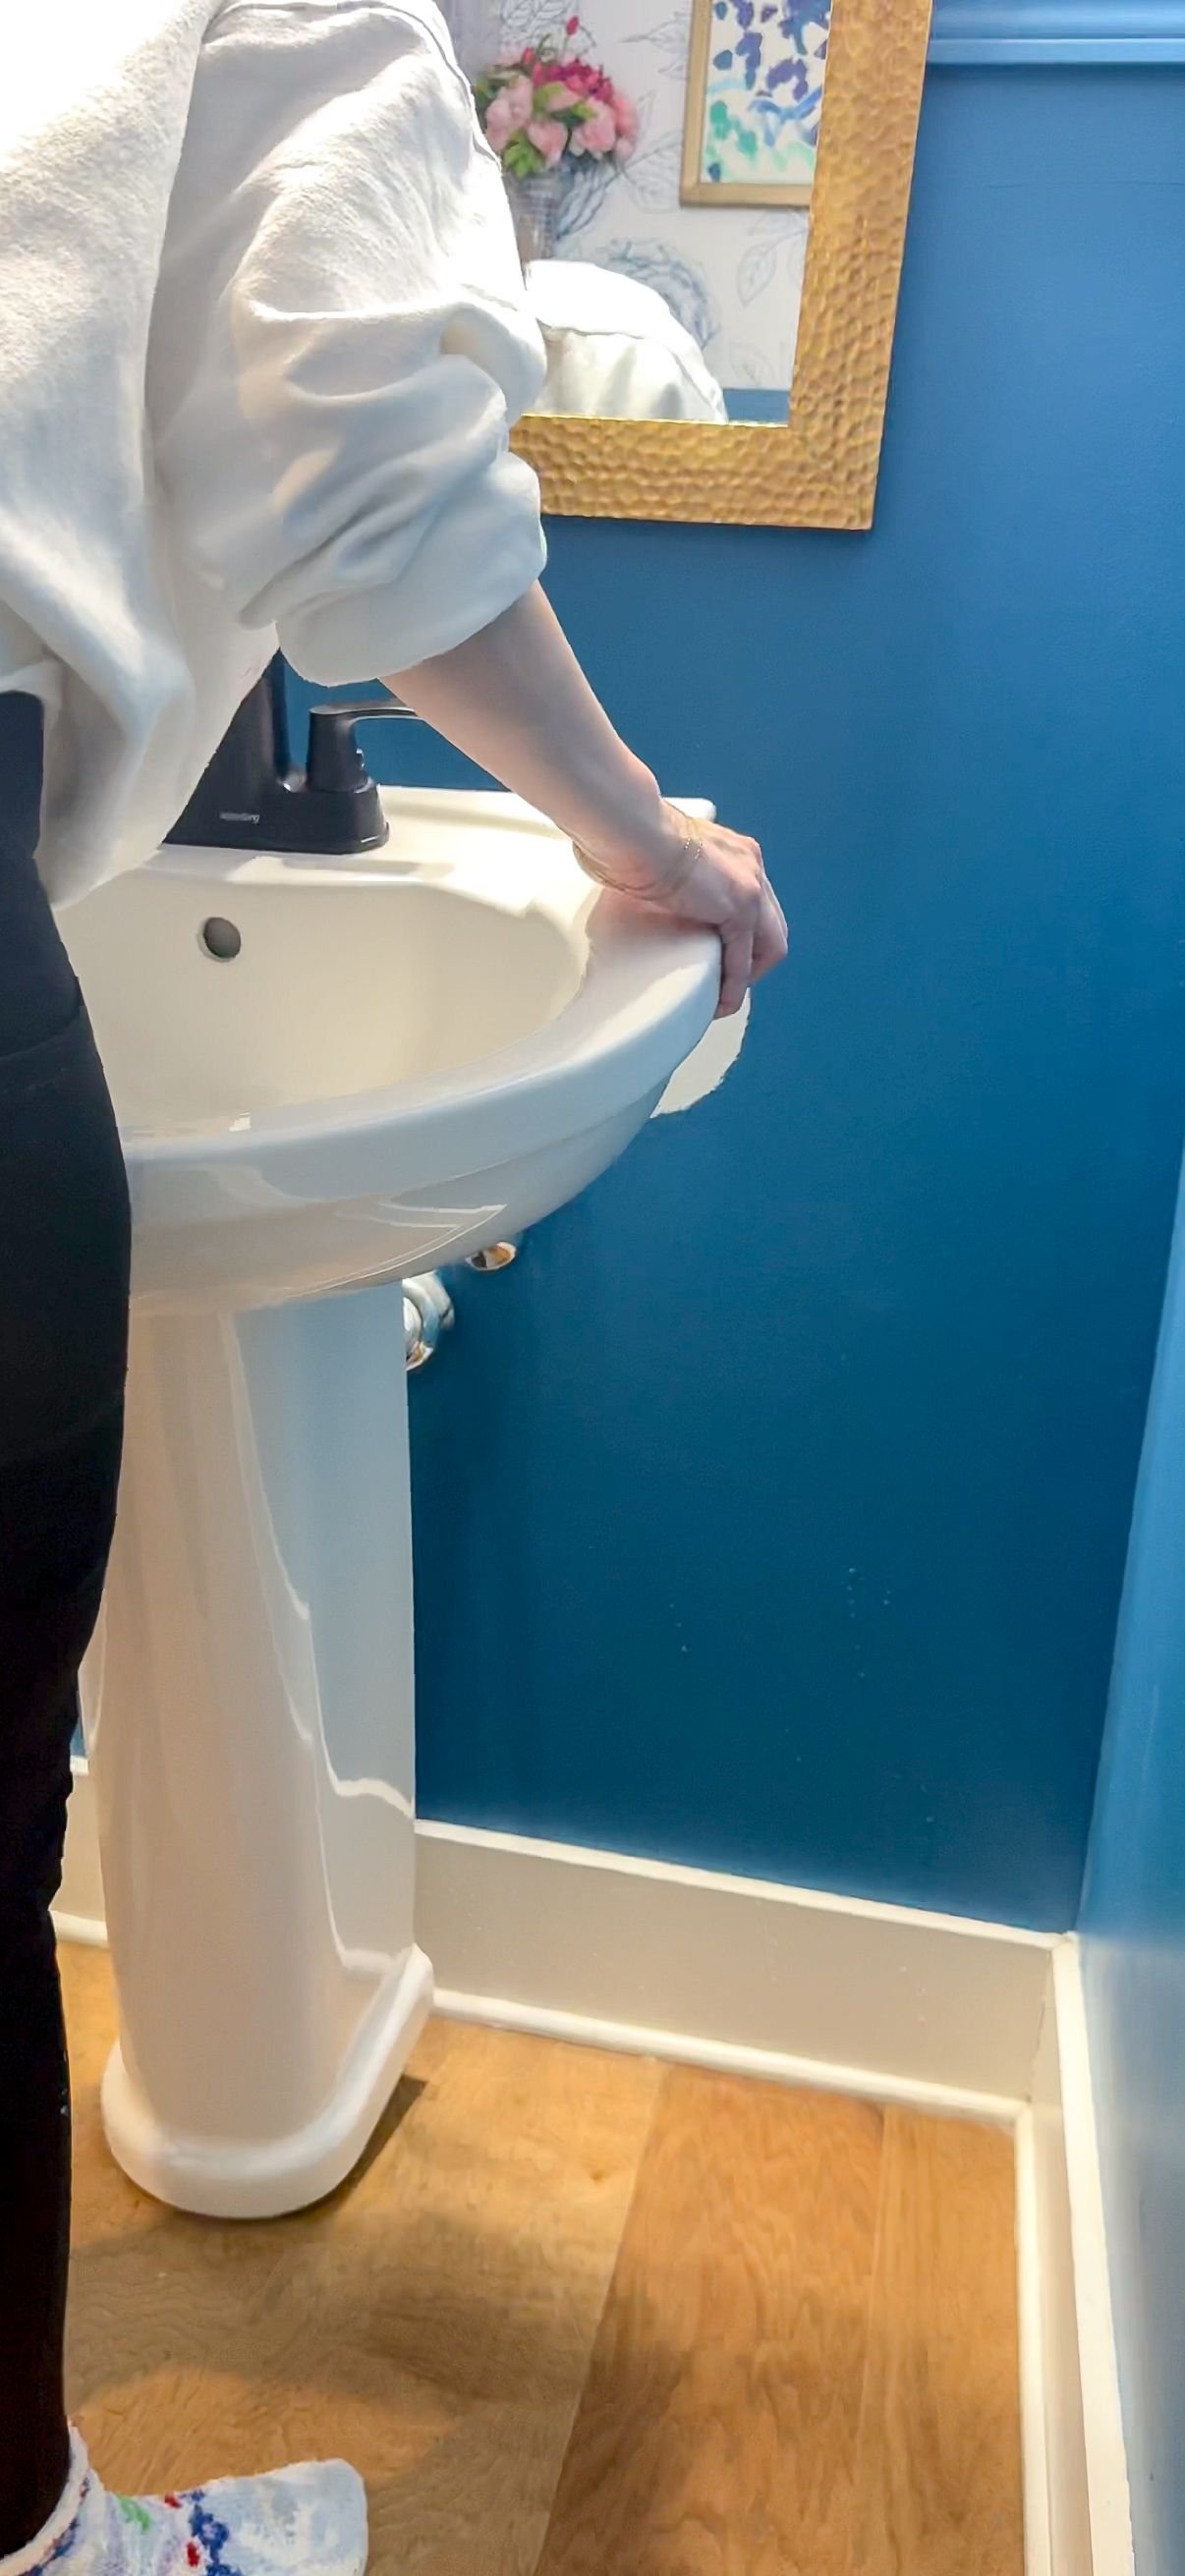
Once that's all done, it's time to turn the water back on. Both water lines should be turned to the left in order to turn them back on. I normally let the water run for a while to make sure water isn't leaking anywhere or getting stuck in the P-trap. I keep an eye on it to make sure nothing's dripping. I also keep a bowl underneath the sink while I'm doing all this to make sure if any water drips, it gets caught without creating any water damage.
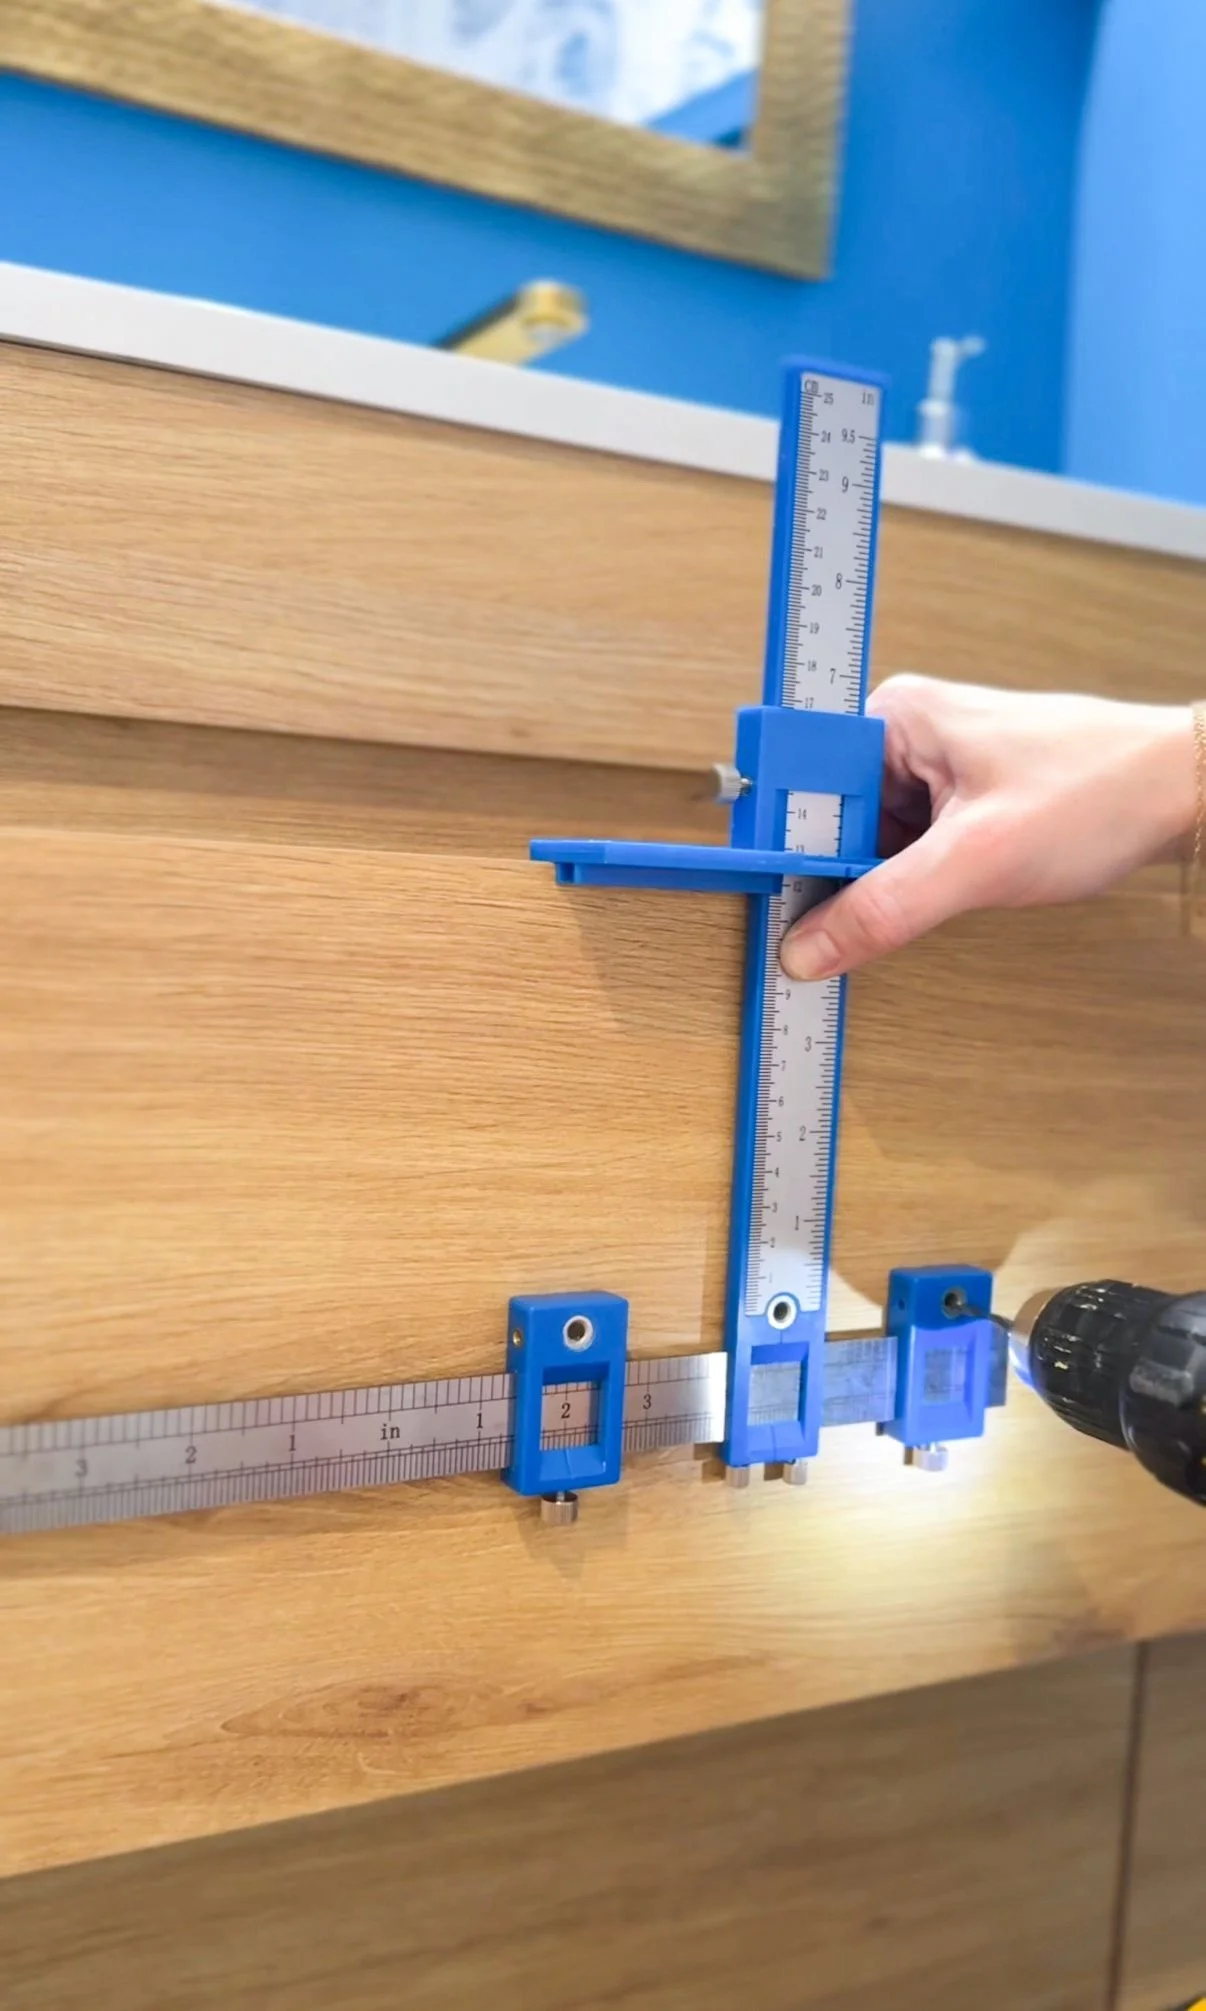
This cabinet didn't come with any hardware because, with how its designed, it doesn't necessarily need them. However I decided to add some to match the aesthetic of the rest of the bathroom. I went to the stash in my workbench and landed on a more modern style I have a lot of. I used my hardware jig to install them. To use it, I placed it at the top of the cabinet and lined it up with the side. Then I measured the distance of the holes for the hardware and was able to use it again as a template for the next drawer. I drilled the holes, screwed in the hardware and was good to go!
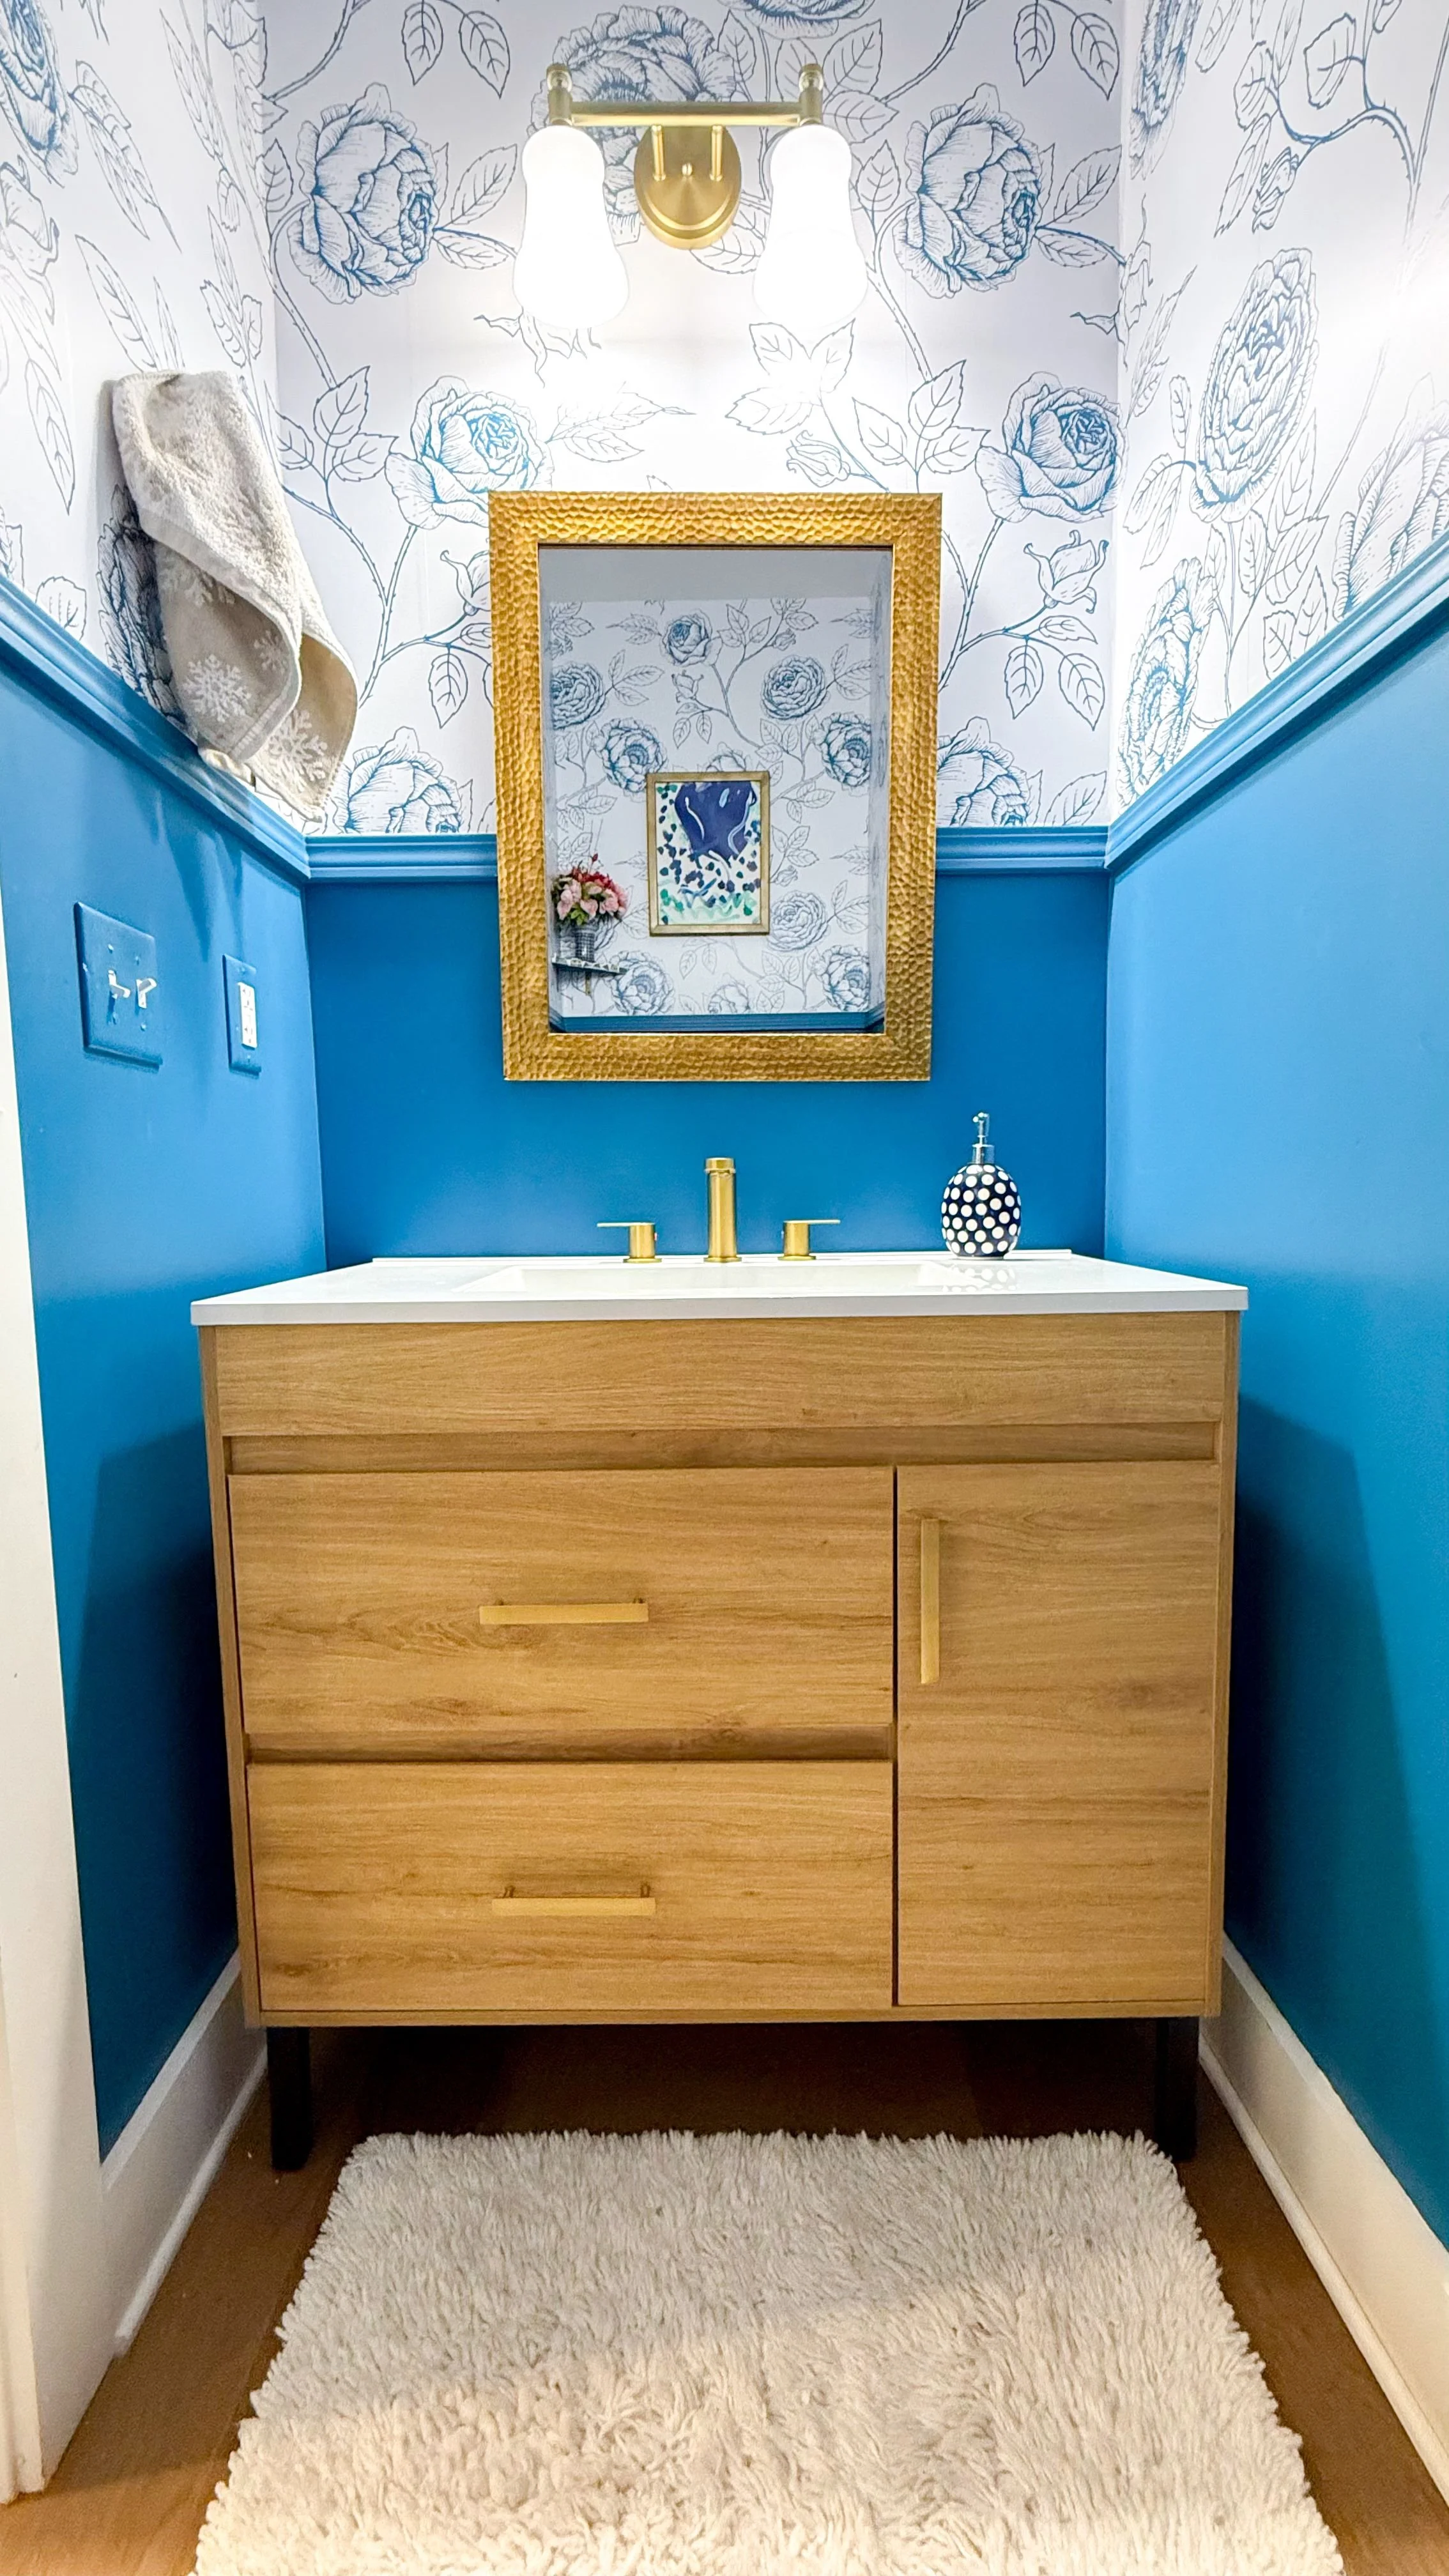
The bathroom is pretty small, but this seems to fit really well without overwhelming the space. I love how it turned out! It looks so good and I absolutely love having all of the stuff I need tucked away while also having room for other things too!