
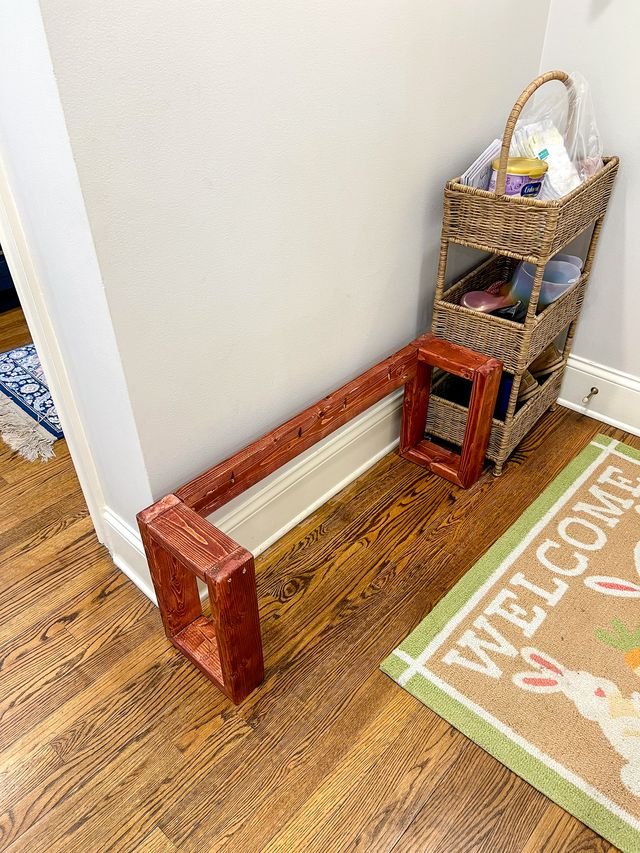
DIY Entry Bench

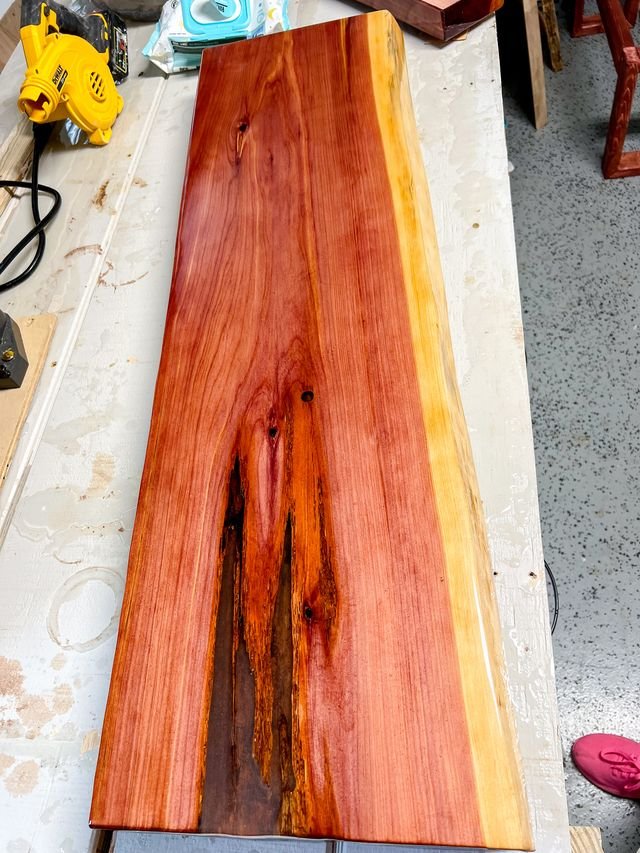
I found this beautiful piece of cedar at a local lumberyard. I didn't need to use the whole thing, so I cut it down and decided I was going to make an entryway bench for my mom to put in the small area she has when you come in from her garage. Since this space is so tight, I' needed to keep this bench pretty narrow. This bench will serve dual purpose and be used as a bench for her table when we have big family gatherings.
DIY Entry Bench | Epoxy and Stain on Top
I started the project off by pouring some epoxy and filling the big cracks. Since the cracks are so big I'm doing a bunch of really thin pours to make sure everything cures and gets filled in. This was the best option for me because I've never used deep pour epoxy and don't want to try out a new technique until we are back from Argentina.
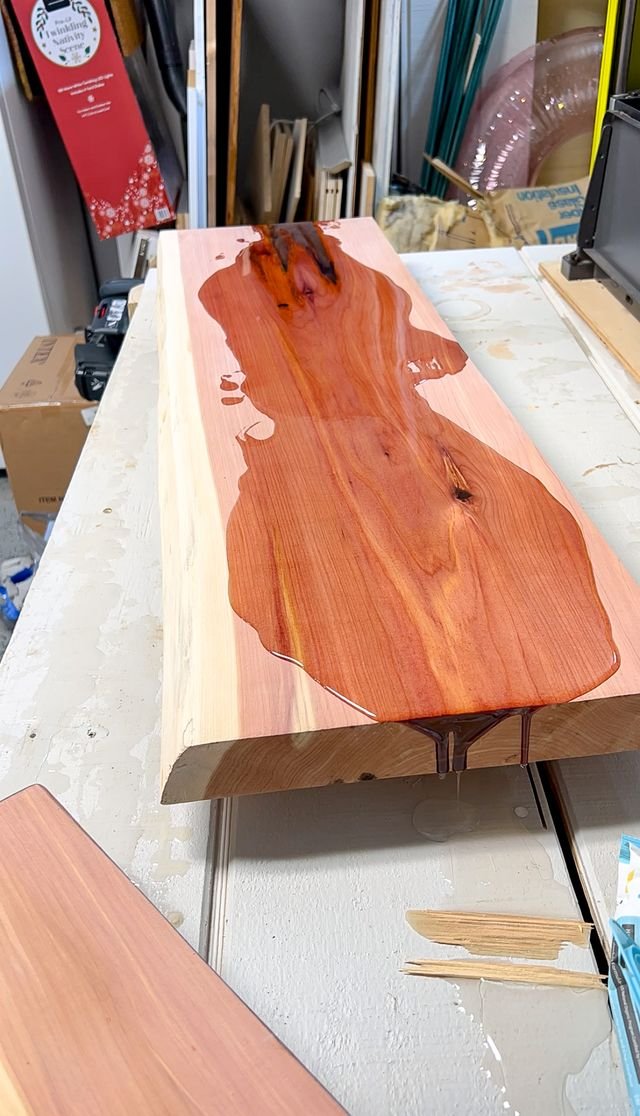
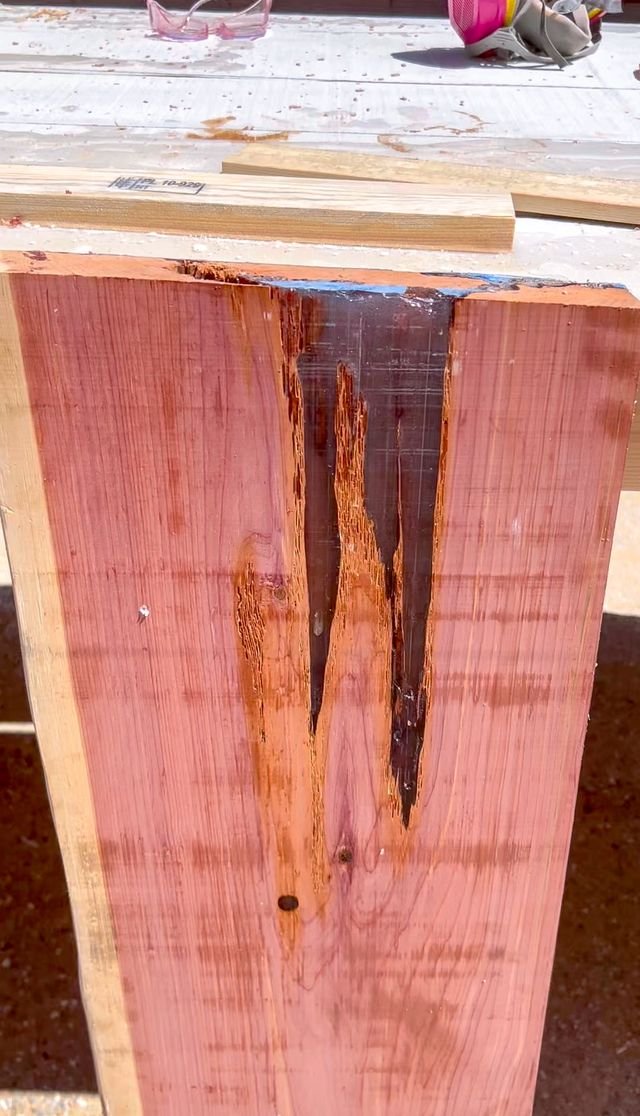
I noticed one of the large cracks actually went through the board and it's cracked on the other side as well so I needed to flip it over and fill that in as well. I didn't necessarily need to, but for aesthetic appeal I wanted to. I also for the experience of doing it, because sometimes it's not just about functionality, it's about the learning process.
After doing all of the pours and curing, I went and pulled some wood stains I had on hand. I wanted to match something that could be put onto the base for the bench. I'm not using cedar for the base because I feel like that would be a waste of cedar. I can use cedar on the top for something else. The first set I tried did not work. I hated it. The second set, where I mixed stains together, was a much closer match.
DIY Entry Bench | Building the Base and Fixing Problems
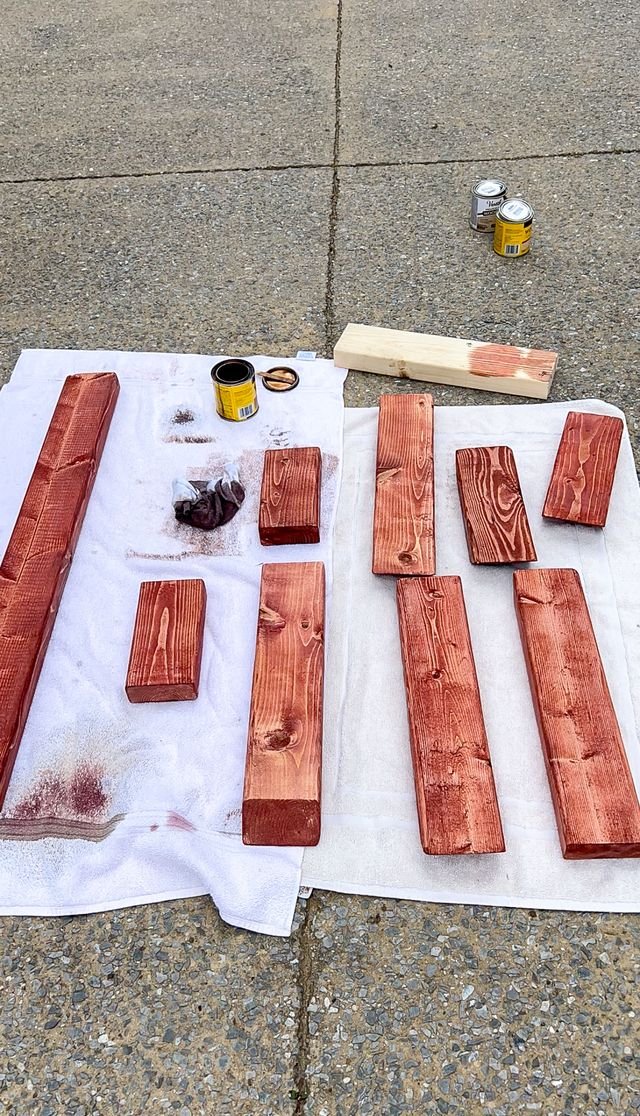
Then I started building the base. I decided to replicate the base from the bench someone else built for my mom's kitchen table. I cut all the pieces of wood, drilled some pocket holes in places I needed them, then I pre-conditioned and sanded the pieces. I stained the wood for the base, and then once that was all dry, it was time to assemble it. There are just two small legs connected by a support piece. The top will then be placed on top of that, the support piece will be screwed into it, and the legs will be as well. While doing this, I had to made sure to continuously check if it's level as I went.
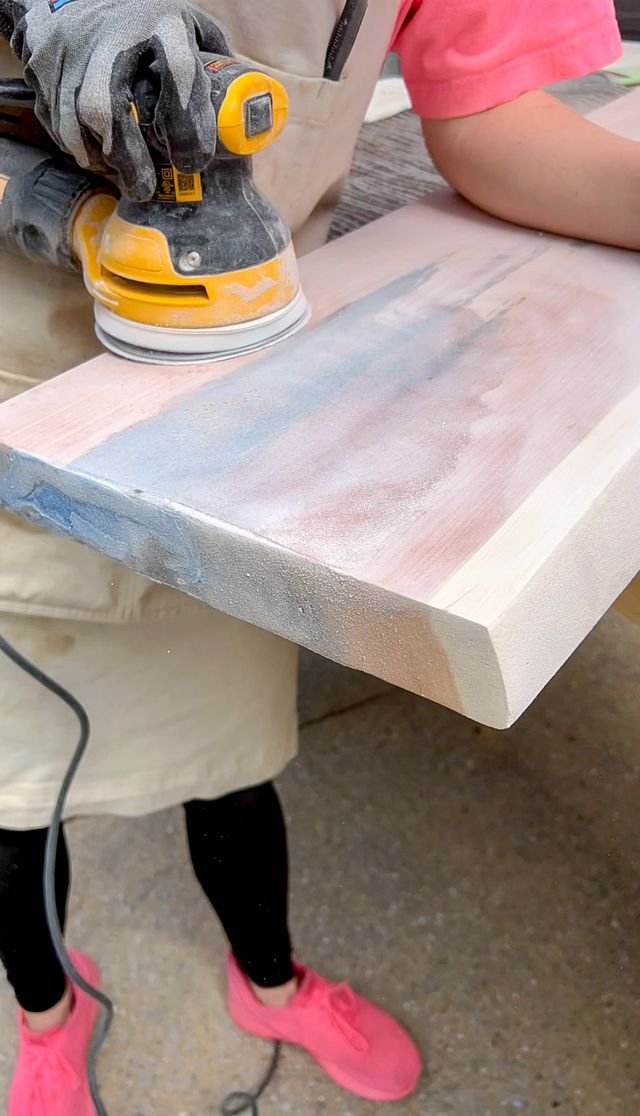
Because the piece of cedar is so narrow, I could actually put it through my planer and take off all of the excess epoxy instead of having to sand it. When I did that, I found a bunch of extra holes I needed to fill. I also discovered that one of the the layers of epoxy did not cure all the way. I ended up making a giant mess, which was not super convenient as I got epoxy all over the blade of my planer. I also discovered a hole in the side that did not get filled. I taped over it thinking that it was connected to one of the other cracks and it was not. So I needed to re-pour epoxy in a bunch of places and fill in that hole on the side. Once that was done, I decided to sand instead of using the planer because I did not want to add more cracks to it. It was a little bit more intense than I would have liked it to be, sanding-wise, but it came out absolutely beautiful.

The next step was a wipe down after all of the sanding. I like to use a baby wipe to wipe down the wood after I have sanded down epoxy because it just is so dusty and even a microfiber wipe does not get everything off. So baby wipes to the rescue!
DIY Entry Bench | Finishing Touches
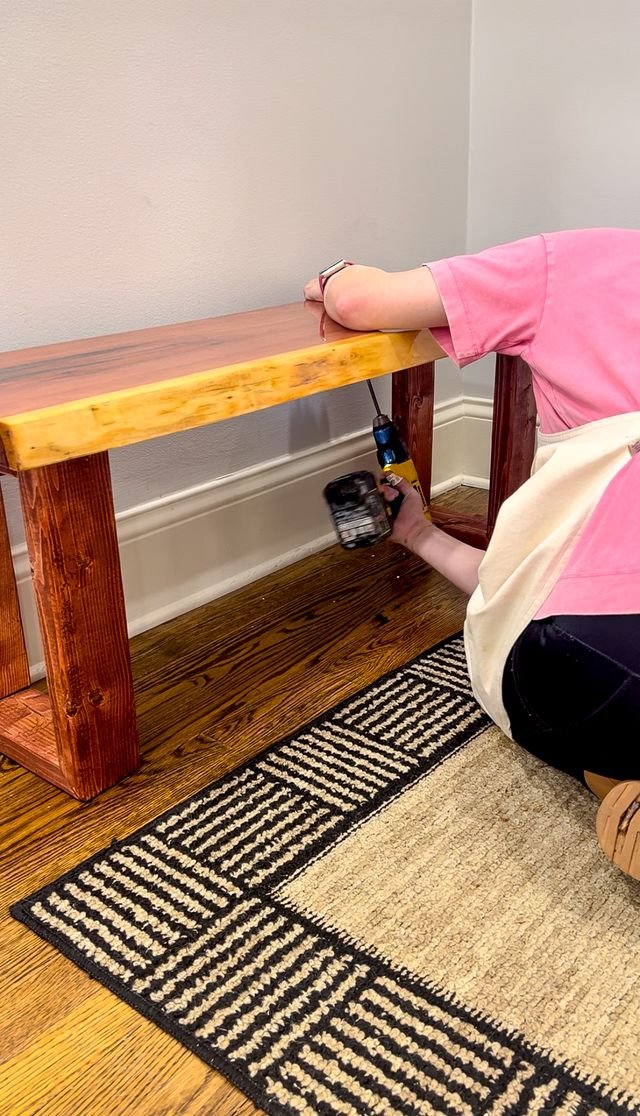
Then it was time for the top coats of epoxy to really bring out that color. It is so gorgeous and I love it! I always do two coats of epoxy when I'm doing the top coats because it gets a nice, even finish that way. I let that fully cure over a weekend and then the next week I attached the top of the bench to the base. I used some pocket hole screws to secure it into the support piece along the base and then just regular screws for the legs on the bottom.
I seriously love how the whole thing turned out. I still have some cedar left and I plan to use it to make a back for this bench. I won’t be able to do it this year since we leave for Argentina in a few weeks, but hopefully I will be able to in 2025. Stay tuned!
DIY Entry Bench | Shop
